DIY farmhouse shelves
Learn how to build thse DIY farmhouse shelves! So easy to make your own from unfinished wood. Just add paint and stain! Lots of pretty farmhouse decor ideas!
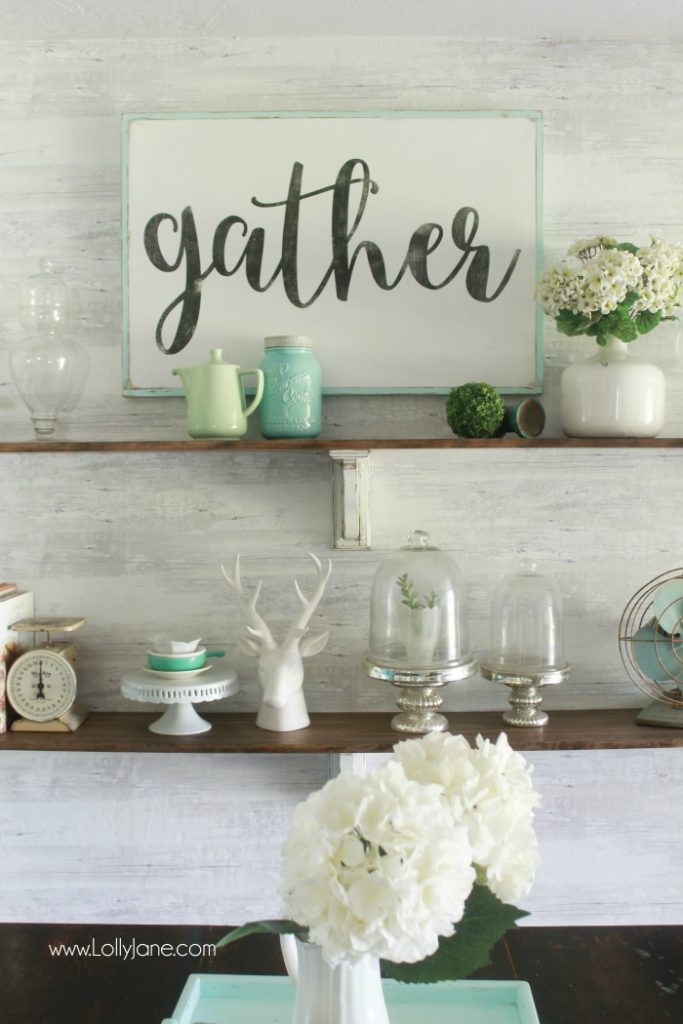
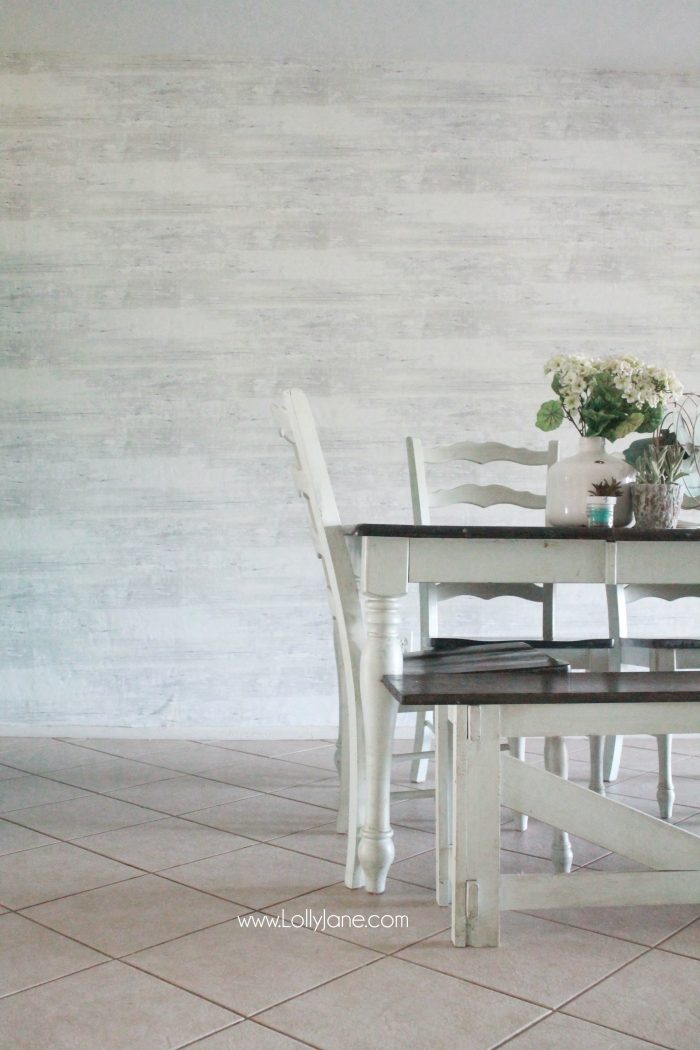
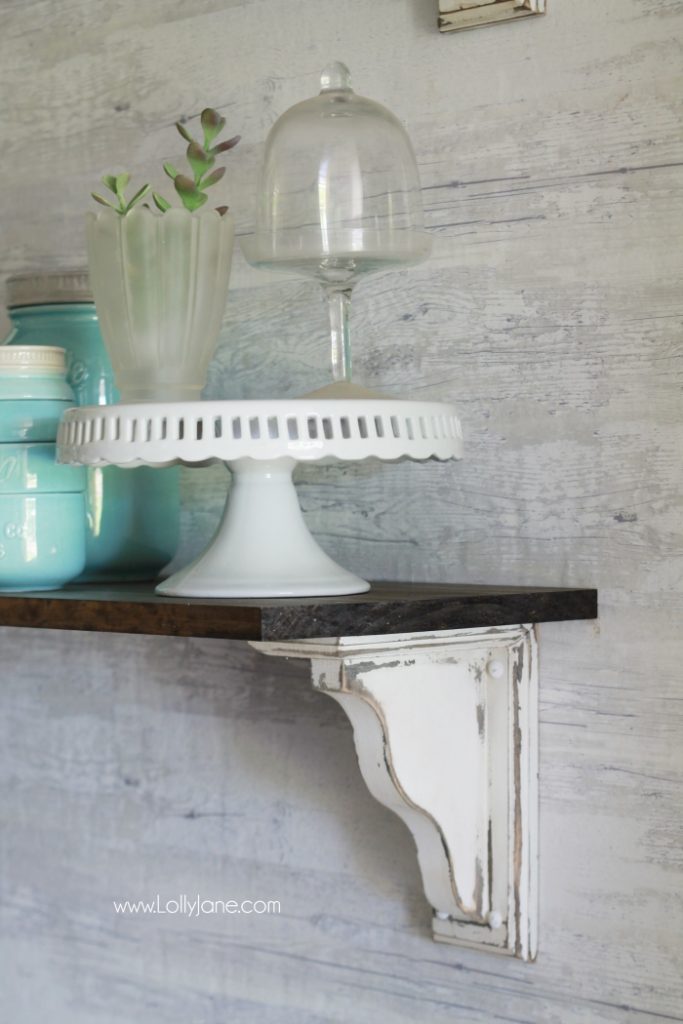
Hi there, are you following us on Instagram and Pinterest? We update daily and you’ll have seen that I’ve been on the hunt for old, chippy corbels for a couple of years but haven’t had any luck finding more than 2 at a time. When I started my dining room makeover, I became anxious to finish it (poor hubby was sick of our house being in disarray, lol). With a few bucks and a little more time, we were able to mimic the look I was going for and love how it turned out. Sure love our DIY farmhouse shelves in here on our newly wallpapered wall!
Supplies to make DIY Farmhouse Shelves:
These supplies contain affiliate links for your convenience. When you make a purchase after clicking an affiliate link, I will earn a small commission at no additional cost to you. I am disclosing this in accordance with the Federal Trade Commission. I only recommend products that I personally use and genuinely recommend. Thank you for your support!
- unfinished corbels
- Minwax Stain: Dark Walnut color
- foam brush
- petroleum jelly/Vaseline
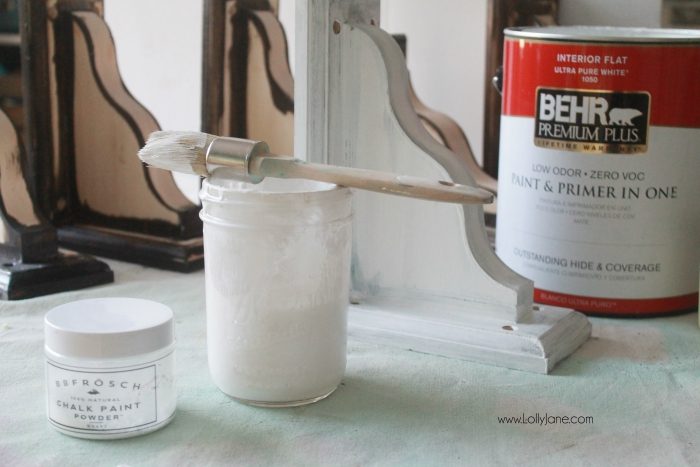
- chalk paint powder and paint (you can use latex paint; chalk paint powder just has better coverage when added to paint)
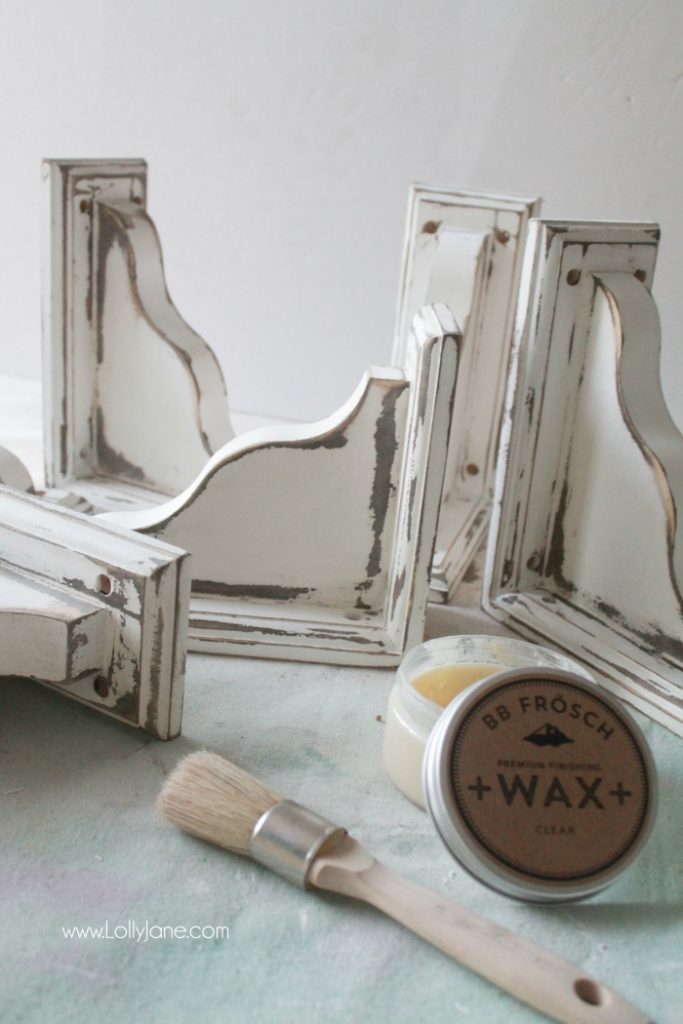
- wax to seal
- paint and wax brushes
- sander
How to build farmhouse shelves:

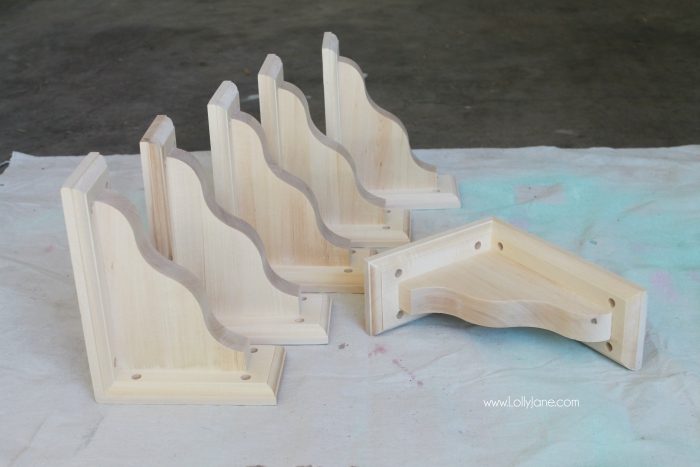
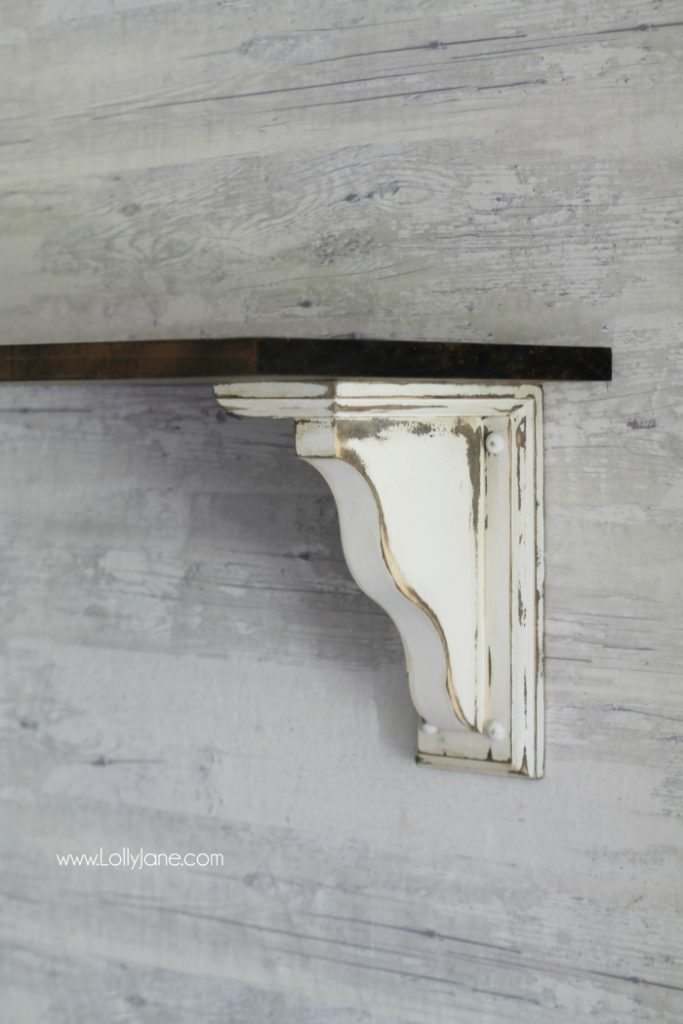
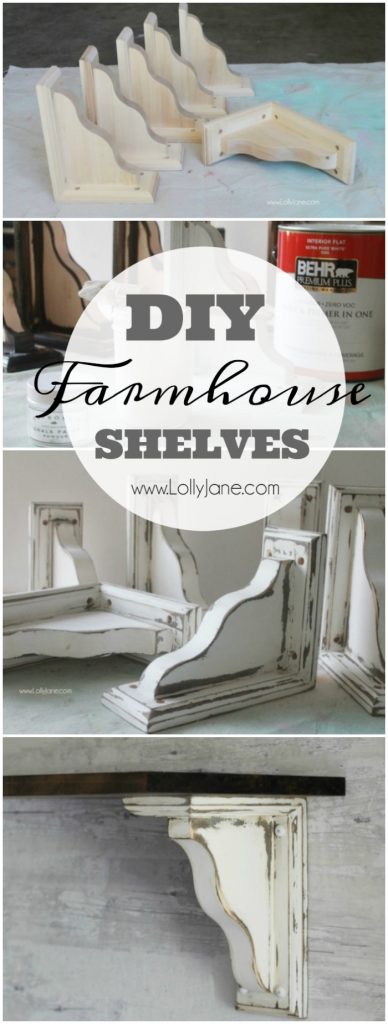
We took a trip to Home Depot together and browsed their unfinished corbels. We decided on these $13 plain corbels, I didn’t want them to compete with the decor that would sit atop the completed shelves.
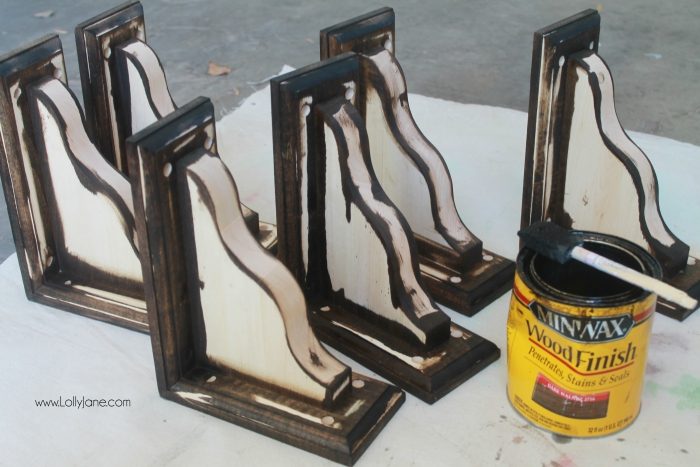
I stained the edges and corners with my fav stain, Minwax’s Dark Walnut. I applied it with a small foam brush.
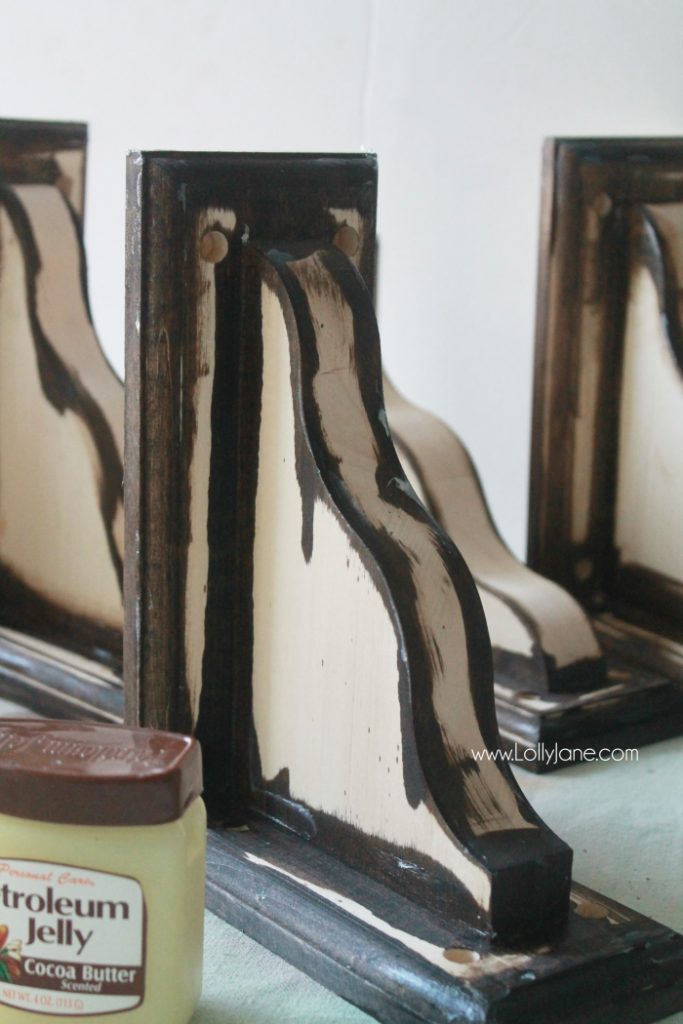
Using my finger (after the stain dried), I rubbed some petroleum jelly on the spots I didn’t want the paint to stick to for easy distressing. I didn’t want to chance the raw wood color showing through and the jelly acts as a barrier to preserve the deep color. (See another project we used with this Vaseline trick a few years ago!)
We mixed our favorite chalk paint powder into flat paint (we prefer not using the paint + primer in one but it’s hard to find them separate nowadays) then brushed it on over the whole corbel.
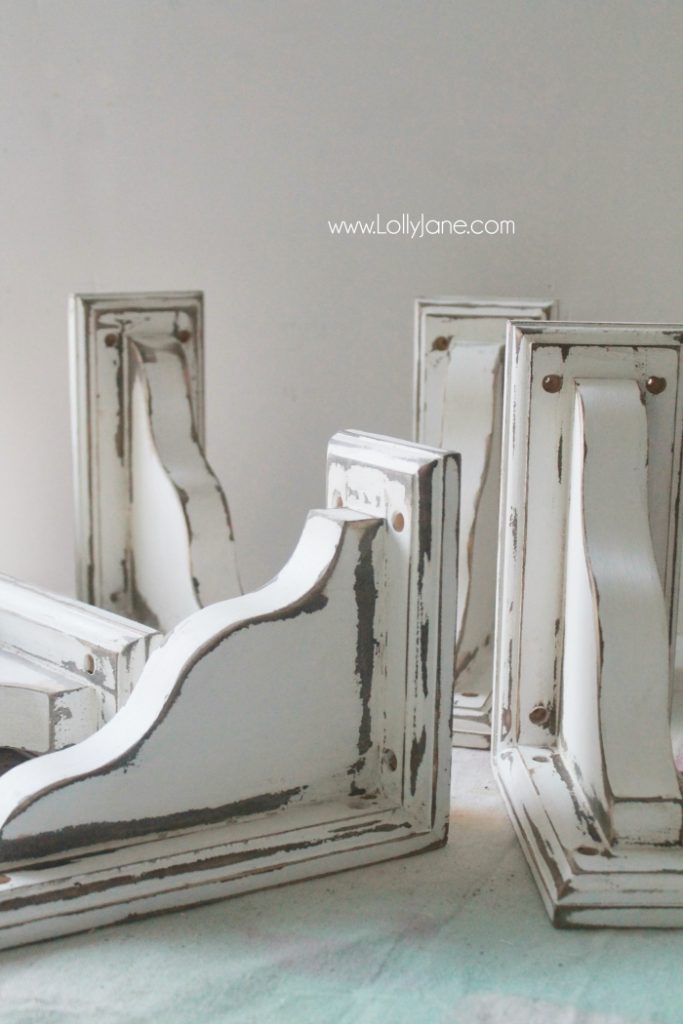
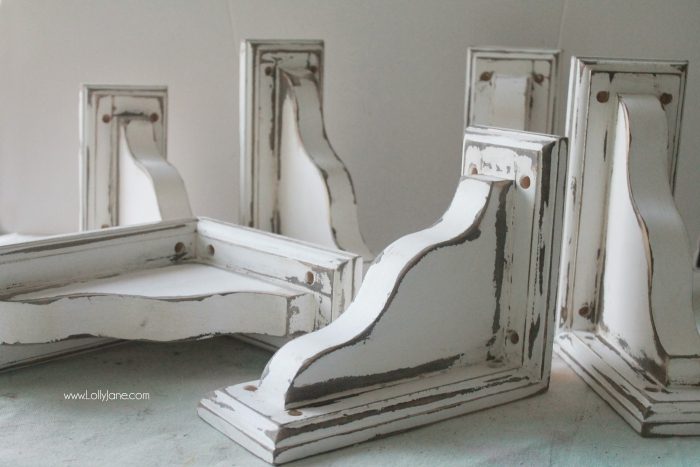
I didn’t include the picture but I power sanded the edges until I liked the amount of dark showing through. The paint came right off thanks to the petroleum jelly barrier, whoop!
We then waxed it to seal them since they’ll be near food in the dining room. If any particles manage to land on them, I’m now able to wipe them down since the wax is the protective barrier to preserve my hard work.
Do you like them? I adore how they turned out, super chippy!!
Earlier this week we posted the wallpaper process, check it out! Here’s the blank wall PRE-shelves:
For the wood shelf, I’d have loved to score a giant piece of authentic barn wood but we’re in Arizona, a newer state and there aren’t a lot of options around. So we grabbed a higher quality pine wood from Home Depot with no knots or imperfections and brushed on some more stain. I sealed it with the wax as well.
How to hang farmhouse shelves:
- Anchor your screws into the wall (using drywall screws or directly into a stud) and set corbels onto screws, (my corbels were pre-drilled.)
- Once corbels are secure, lay 8′ piece of wood (or the length for your space) over the corbels.
- Drill 2 screws directly into each corbel through the wood.
- Decorate!
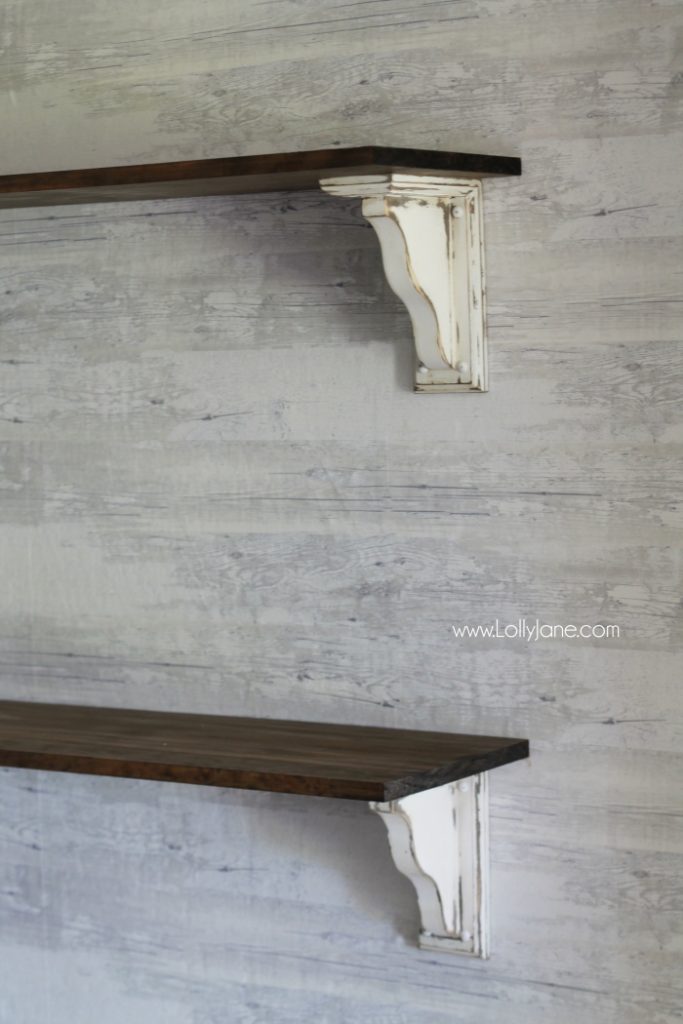
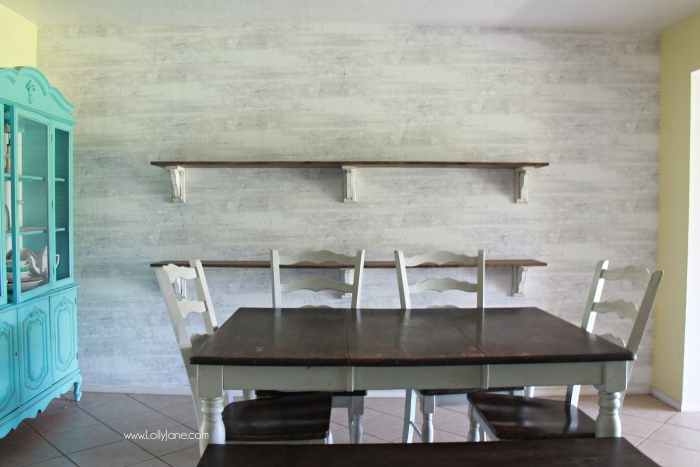
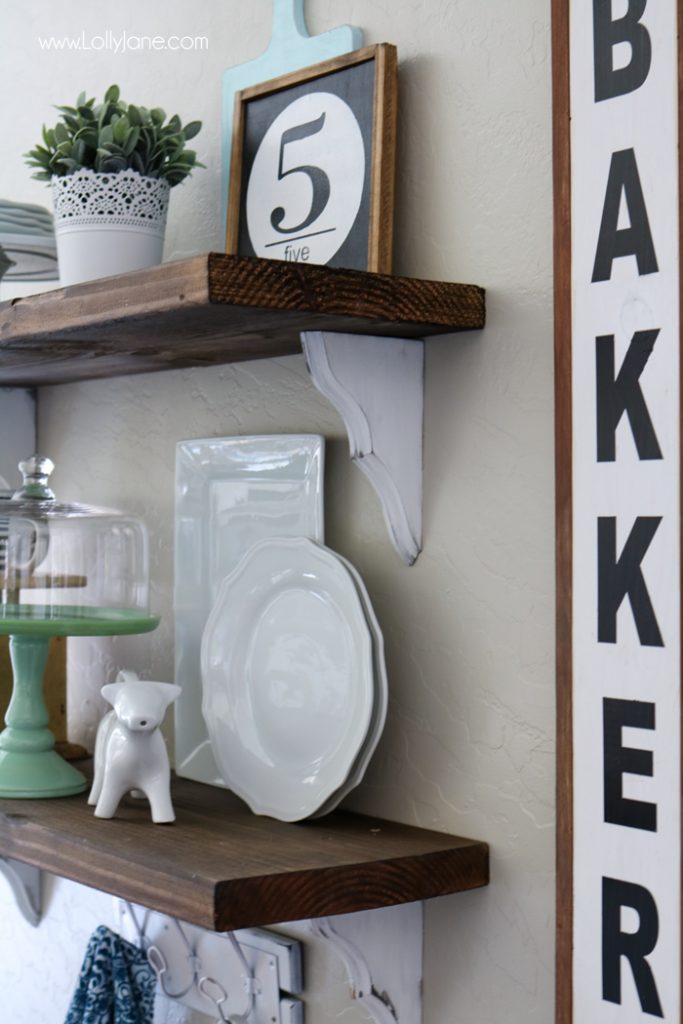
Time to start filling them up! We’re sharing a final reveal after our lights arrive but here’s a peek at what they’re looking like, I love them!
 That’s all we’re sharing for now. We have some adorable pendants coming to finish the space off. Just wanted to share the how-to for these fun faux vintage shelf brackets since we shared a peek on Instagram and had lots of questions about the details (: See how easy they are to make?? Please pin so your friends can make their own!
Update: Check out how our Farmhouse Dining Room is coming along!
.jpg)
Visit more farmhouse shelf tutorials:
Kristi did her own version for her farmhouse chic dining room shelves:
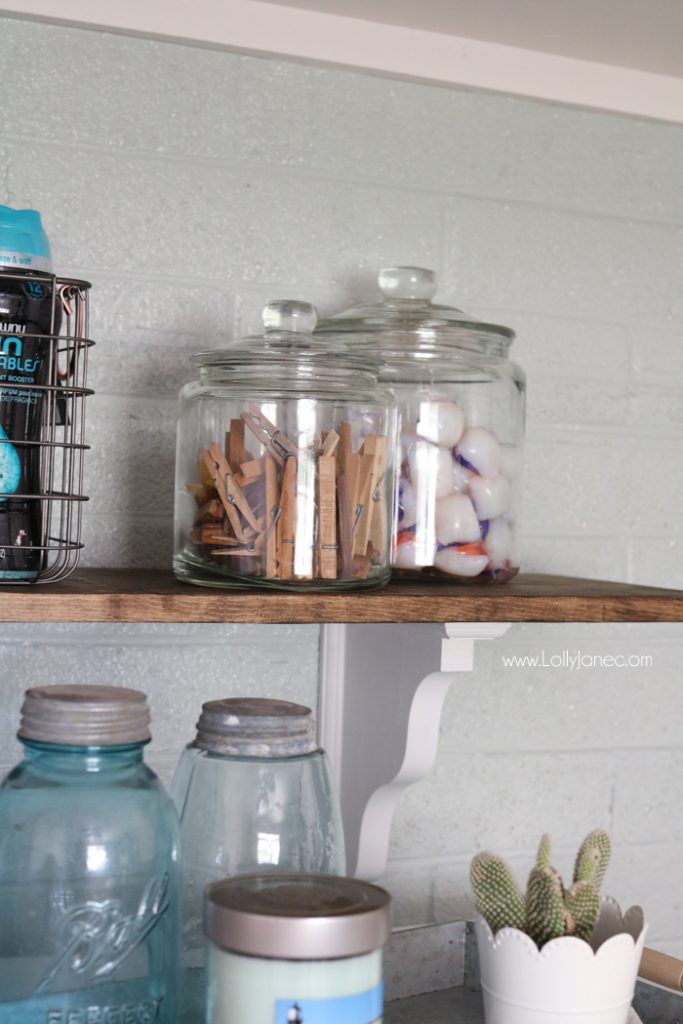
Here’s the same concept in our laundry room:
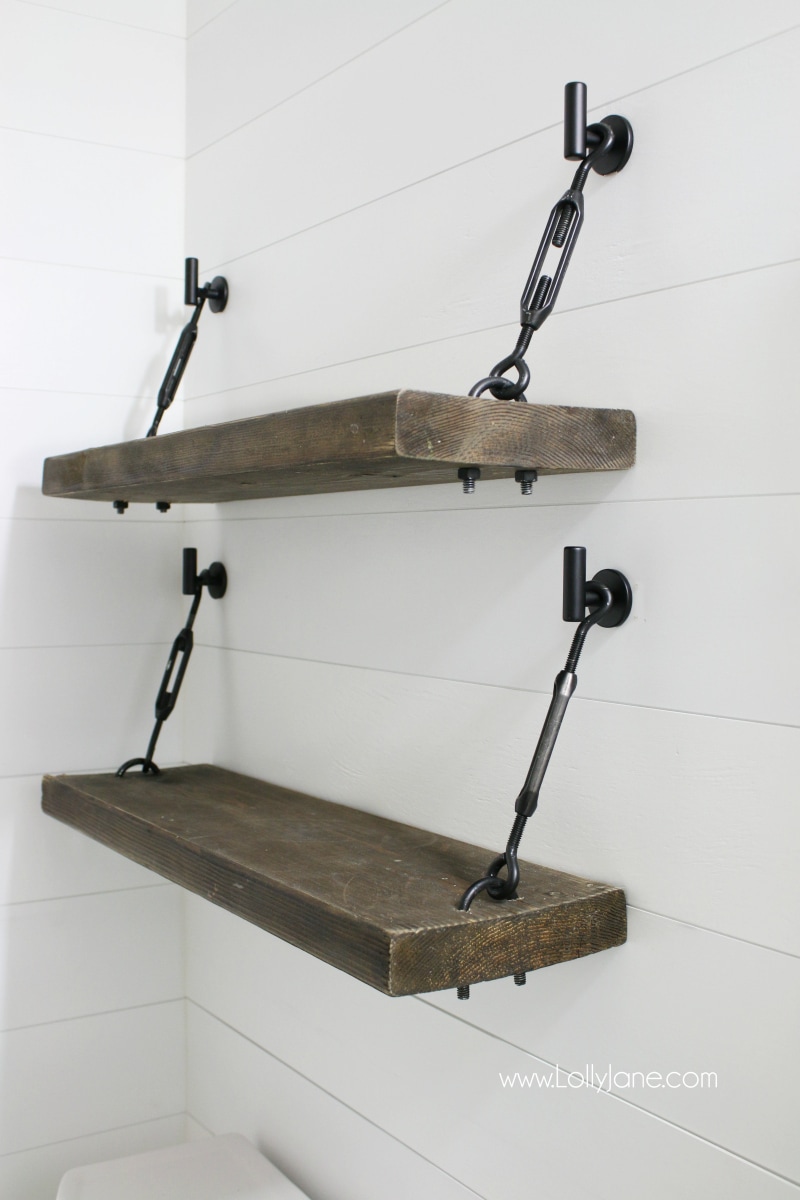
And our recent creation: DIY Turnbuckle Shelves! LOVE how they turned out in our newly renovated bathroom!


Good post guys!
Thanks so much, Velma!
Hey Jane your shelves are beautiful. You are keeping it simple that’s what I’m looking for. Great job !!!! Jean
Well hello, neighbor 🙂
Very nice I live in az also
Thank you, Melissa! It’s 1″ thick 🙂
Beautiful shelf!! I am planning a similar project for my dining room. What is the thickness of your boards?
Hi Tanya! Yes, we used Dark Walnut stain and sealed with wax 🙂
Beautiful! Did u use the walnut stain for the shelf itself? And what did u use to protect the shelf? The same wax?
Yay! Happy to hear that, Rebecca! Happy building! Shoot us an email or tag us @lollyjaneblog so we can share you version 🙂 XO
Enjoyed this post.. corbels are soo expensive and this is a perfect alternative for me. Now off to Home Depot. Thanks again. I can do this. Rebecca
I am having a difficult time finding your brackets? What were the style of corbels you bought at home-depot?
They’ll be perfect in that space! Here are some we put in my laundry room but didn’t distress as heavily 🙂
https://lollyjane.com/laundry-room-on-a-budget
Happy building! xo, Kelli and Kristi
You ladies are the bomb(s)! We are just getting ready to put shelves up on our laundry room wall using corbels and barn wood. I so love the treatment you did on your corbels. I’ve never seen it done quite like that and I love it. Talented girls! Thank you!
It’s 8 feet 🙂
I’m confused. In the article you said the shelf was 5 foot. but the comments say 8 foot. Am I reading it wrong?
I’m confused. In the article you said the shelf was 5 foot. but the comments say 8 foot. Am I reading it wrong?
Hi Sheena! The corbels come with little wooden plugs so we put those in after we screwed the shelf to the wall. The longer side is running along the wall, the shorter side is touching the wood shelf 🙂
Hi what did you cover the nail with? It looks white? Did you just paint over the nail that is in the wall? I was just looking at this in Home Depot before finding this post. Do you have them so the longer side of the corbels are connected the the wood and the shorter part is on the wall? I was trying to determine which way I would want them..
Oh wow, Adsila, that’s amazing! I’m sure yours will be beautiful! Hello from Arizona, USA <3
Love the Corbels. Being in Australia, we don’t hear the term Farmhouse style, or word. Yet I absolutely adore it. I’m going to try and make my own Corbels from pallet wood. Products are limited here, so I tend to build and create Farmhouse Furniture and decor from scratch. TFS.
Thanks! Here’s the directions!
To hang the shelving:
Anchor your screws into the wall (using drywall screws or directly into a stud) and set corbels onto screws, (my corbels were pre-drilled.)
Once corbels are secure, lay 5′ piece of wood over the corbels.
Drill 2 screws directly into each corbel through the wood.
How did you attach the corbels to the wood and the wall? I love these so much
We sell it! 😀 https://www.etsy.com/shop/LollyJane/items
Love how those corbels look. think due to price will have hubs make our own corbels or some kind of shelf bracket, good old pallet wood . I would so love to take upper cabinets down in our kitchen but with the wind, dirt/gravel driveway and traffic on it everything would be so dirty would make me crazy. Wish I could take them down cause then wouldn’t have to paint them all.
Love your nice long shelves, they look great, lovely styling job, have fun with that. Love this post and all others.
Enjoy rest of weekend
Email us! 😀
I was wondering if you sell these. Even though your directions seem easy-I am not talented at all and would rather buy some. If you would be willing to sell some, how much would you charge? I am interested in 4 of them.
Very cute!
I would love for you to share this with my Facebook Group for recipes, crafts, tips, and tricks: https://www.facebook.com/groups/pluckyrecipescraftstips/
Thanks for joining Cooking and Crafting with J & J!
You nailed the aged look!
Hi Karen!
Yes, the shelves are 8′ wide and 11″ deep (we purchased the 12″ wood from Home Depot but it’s actually measures 11″)
They make a huge statement in our house and you will love them!
🙂
How wide is the shelving–8″?
It IS wallpaper, good eye! You can see the whole process (and where to buy) here: http://lollyjane.com/faux-wood-wallpaper-walls-republic-review/
They’re 8′ long 🙂
Also what is the gray on the the walls? wallpaper? Where can i get that look?
How long are the shelves?
Awww, thanks so much, Lydia!!
It’s “Ultra Pure White” from Behr Paint. (:
Could you tell me the color of white you used? I didnt see it posted above?
This is great. I love it. I showed it to my husband.
Thanks Sheila! Since you just use a fine amount, it doesn’t mix in; it kind of acts like oil and water as the paint WON’T stick to it at all. Hope that makes sense. 😉 You can try it on a small scrap piece of wood before painting an entire piece to see how it works. Good luck!
Love the look of these shelves. I have been seeing several tutorials about using petroleum jelly for distressing things. My question is, when you are painting, does the jelly not mix in with the paint an alter the way it stays on other areas of the project? Really wanting to try this, just want to know what to expect.
PLEASE tell me how you made or where you got your GATHER sign. I LOVE everything about it. The color of the frame, the font of the letters. THANK YOU!!!!
Hi Allyson! YES! https://www.etsy.com/shop/LollyJane/items
Are you selling that gather sign?
Hope you do, they’re so easy!! (:
Fabulous! Can’t wait to make my own!
Wow! The corbels turned out stunning. They look perfectly aged! Bummer about not having barn wood available easily. I actually have seen some really neat tutorials about aging new wood to look like barnwood. But I’m also lucky to live in Ohio where there are no shortage of old barns. haha!
Love this! I’ve been looking for farmhouse or DIY shelves to display my Grandmother’s china in our dining room and this looks gorgeous. I do have a question I haven’t been able to find the answer to, how much room is between your dining chairs and the shelves behind them? Our dining table and chairs are huge and I only have about 43″ between the table and wall. Is that enough room for full size shelves? Thank you!
Wow great looking website I run a small family air conditioning company in in Australia and have found the diy market has helped grow our business. I was just just browsing the web at present as I am just about to do a diy upgrade on my web site also.
Very, very lovely!! I read that you were thinking of offering this ‘gather’ sign in your etsy shop…any update on that?
LOOOOOVE what you have going on here! Perfect chippiness on the corbels, they look legit. Can’t wait to see it all come together!
okay brilliant—totally dig this look! really creative.
Seriously cute, ladies!! I LOVE this and am so happy to know how you achieved that perfectly aged look!!!