DIY Cedar Name Plaque
Hello Lolly Jane readers, I’m Jaime from That’s My Letter, a fellow DIY blogger who builds, paints and sews everything. Today I’m sharing this super fast and easy DIY Cedar Name Plaque that is super cute for wall art or door hanger and FAST to make and personalize… and it’s made from scrap wood!
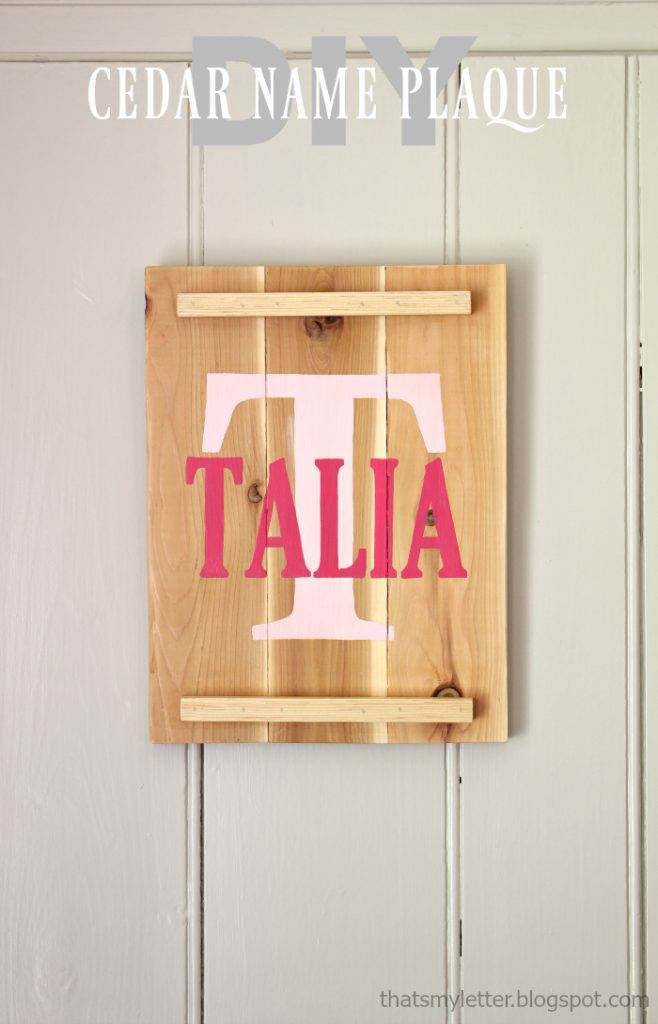
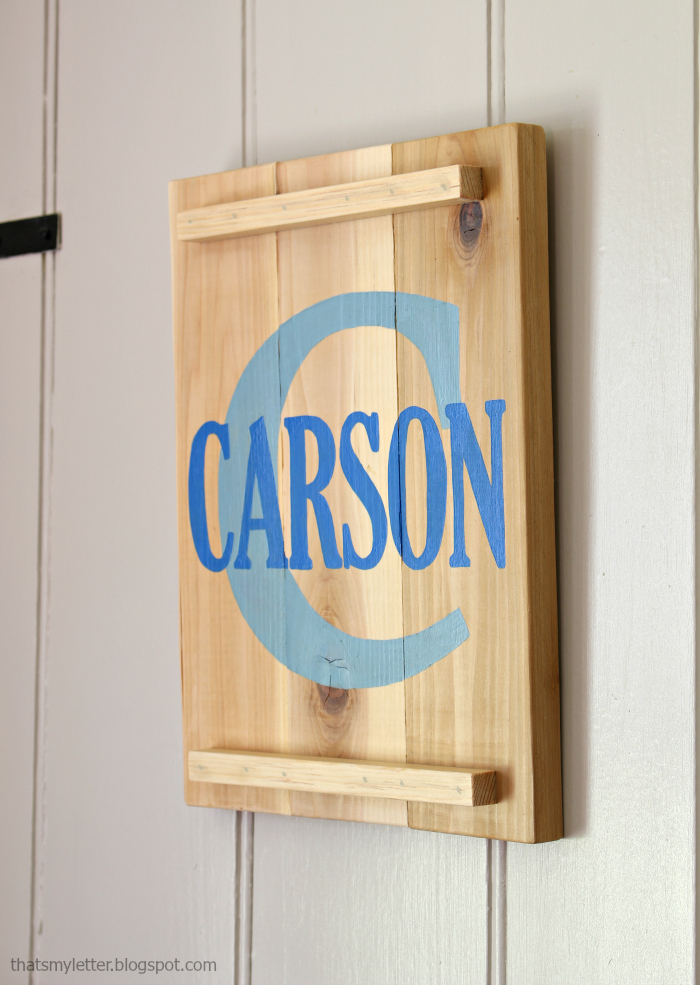
I used 1×4 cedar boards here but you could use any 1×4 boards to make this plaque. Assembly is easy and then you can personalize however you like. I prefer a large letter in the background with the full name in front:

These plaques are for my niece Talia and new baby nephew Carson. Handmade gifts are nice and even better when they are easy to make 😉
Below are the steps to make your own cedar name plaque. Always be sure to follow all safety precautions when operating power tools.
Supplies:
- 1×4 cedar board (3 @ 13″)
- 3/4″ square moulding (2 @ 8 1/2″)
- wood glue
- nailer & 1 1/4″ finish nails
- sander
- computer & printer
- ballpoint pen
- acrylic craft paints
- small paintbrush
- clear polyurethane
- sawtooth hanger
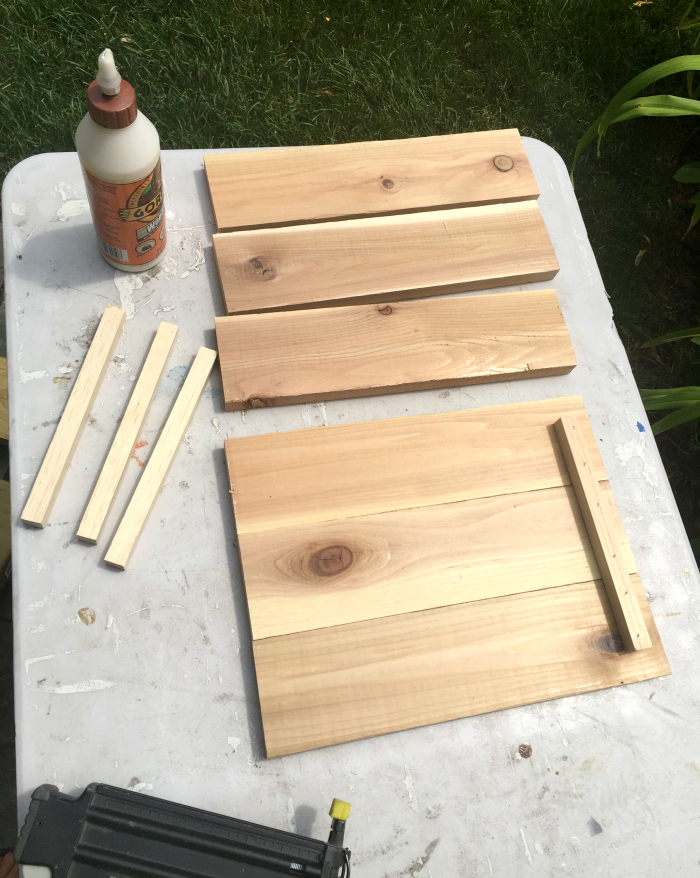
Step 1: Cut 3 – 1×4 cedar boards to 13″ long. Cut 2 – 3/4″ square mouding to 8 1/2″ long. Line up the 1×4 boards together, apply wood glue to square moulding and secure to boards using 1 1/4″ finish nails. Sand well.
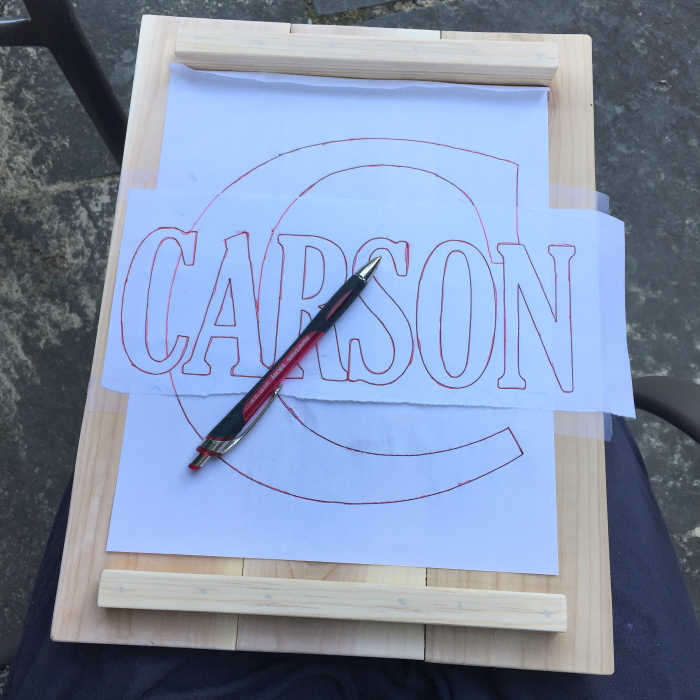
Step 2: Print out desired name and letter. For the giant background letter I used Calisto MT font at 800 point. For the name I used Gloucester font at 300 point. Position lettering on board and trace outline using a ballpoint pen. (Alternatively you could use vinyl lettering.)
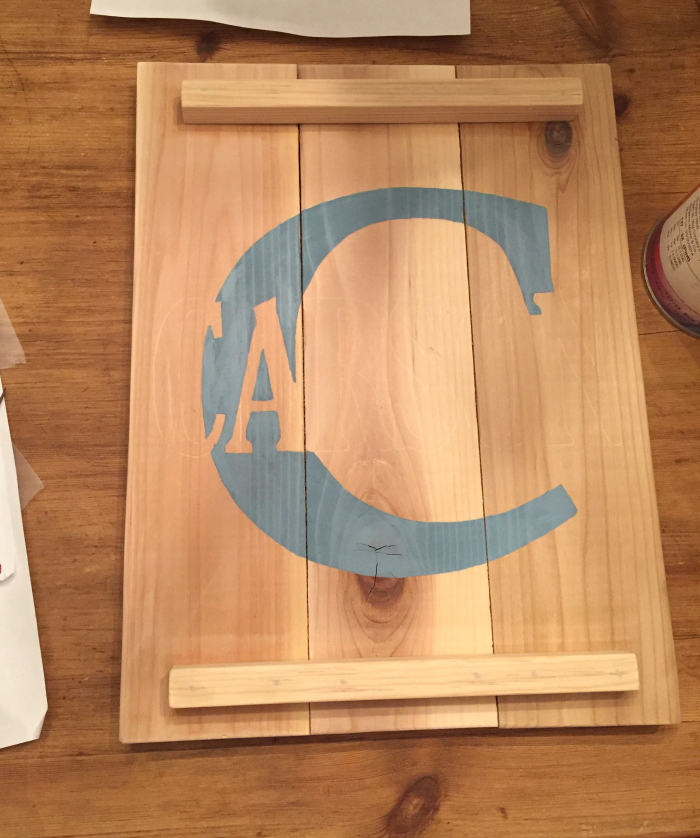
Step 3: Paint the background letter using acrylic craft paint. The pen will leave an indent in the wood and you follow the indent with your paintbrush. Paint the name then seal with clear poly.
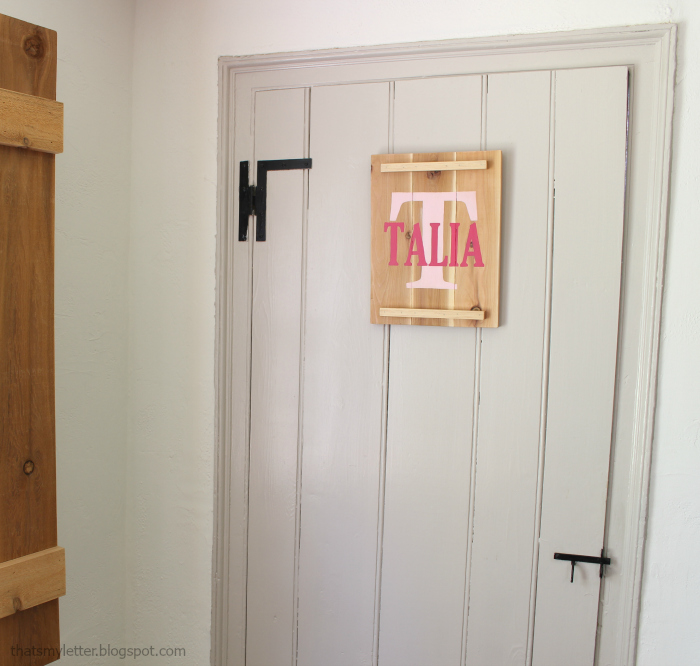
Attach a sawtooth hanger to the back and hang as desired or wrap up to give as a gift. I hope you enjoyed this simple cedar name plaque, be sure to follow me on social media for more project ideas and sneak peeks:
If you’re looking for more small projects with wood be sure to scroll down.
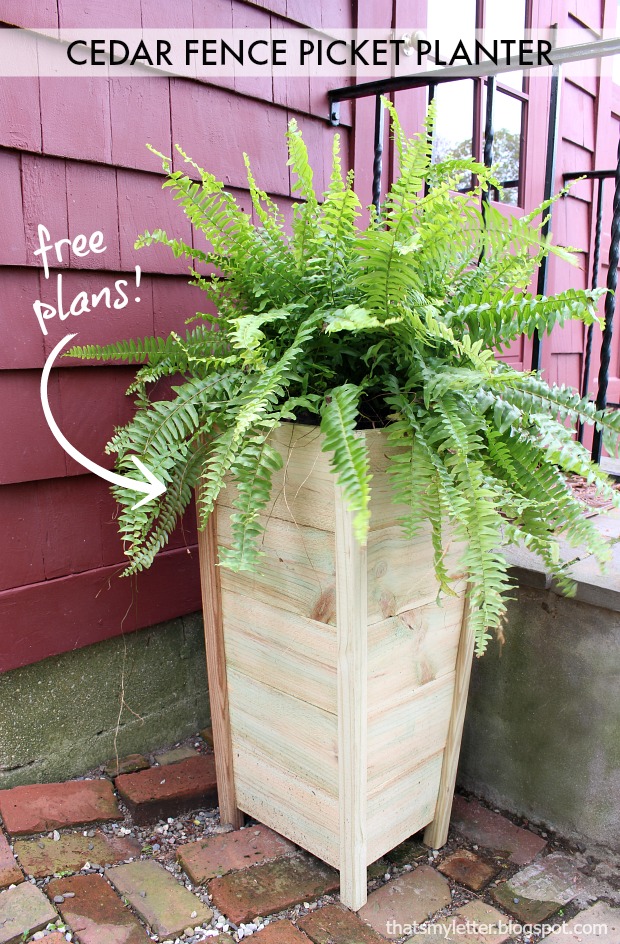
This cedar fence picket planter is super cheap and adds tons of height, get the free plans here.
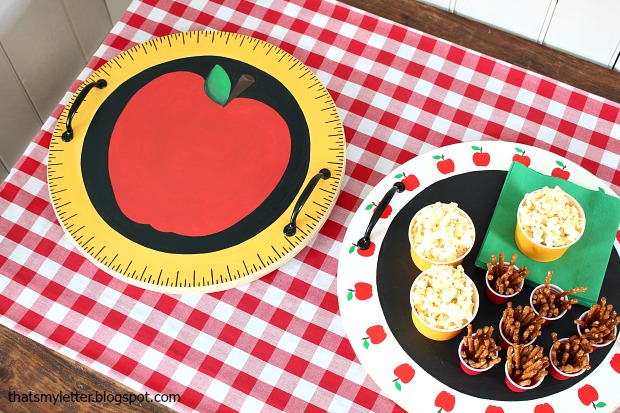
These precut 18″ wood rounds are only $5 each and make great serving trays. I painted these for back to school gifts, see how here.
 Or how about the easiest little
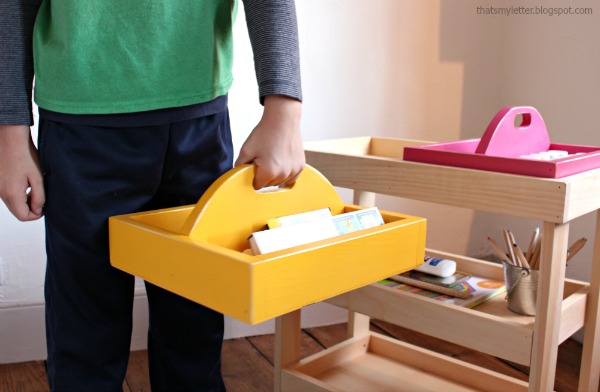


This looks great. You guys have the best projects! Thanks for linking up for Friday Favorites. I’m featuring you this week.
Cute project! I love personalizing things and this will now be added to my project list. I featured you on A Little Bird Told Me this week.
Great looking and so wonderful to “meet” you! I can see you have lots of great ideas up your sleeves and I hope you’ll continue to contribute to craft schooling Sunday!
The “T” name plaque caught my attention right away at the Idea Box Link Party! My 8 year old daughter’s name is Talia and I rarely, if ever, see it…other than our own home 😉 Thanks for the tutorial this DIY project is just beautiful!
Love this modern take on a name plaque, and the fact that you’ve used natural materials gives it real texture.
I love all your wood projects. Thanks for sharing your post with us at Creatively Crafty #CCBG http://tryit-likeit.com/link-party-it
Love the cedar name planks! Very clever and very attractive! Blessings, Janet
Very cute ideas. I really like the name board. So much cheaper to diy.