Furniture makeover: kitchen barstools
So if you caught Kelli and I on our big (cheesy) news debut recently, you will have read that we’re “cheapskates!” Kelli MEANT to say frugal but when you’re on live TV, you (and by you, I mean WE) tend to kind of fuddle with your words so yep, we labeled ourselves as cheapskates. Which is true… kind of. There is a big difference between frugal and cheap. Frugal is being thrifty, cheap is being, well, cheap. We lean more towards frugal but for the sake of standing behind what we blurted out on Arizona television, we’ll go with being cheap! So that’s how we’ll roll here today on Lolly Jane…
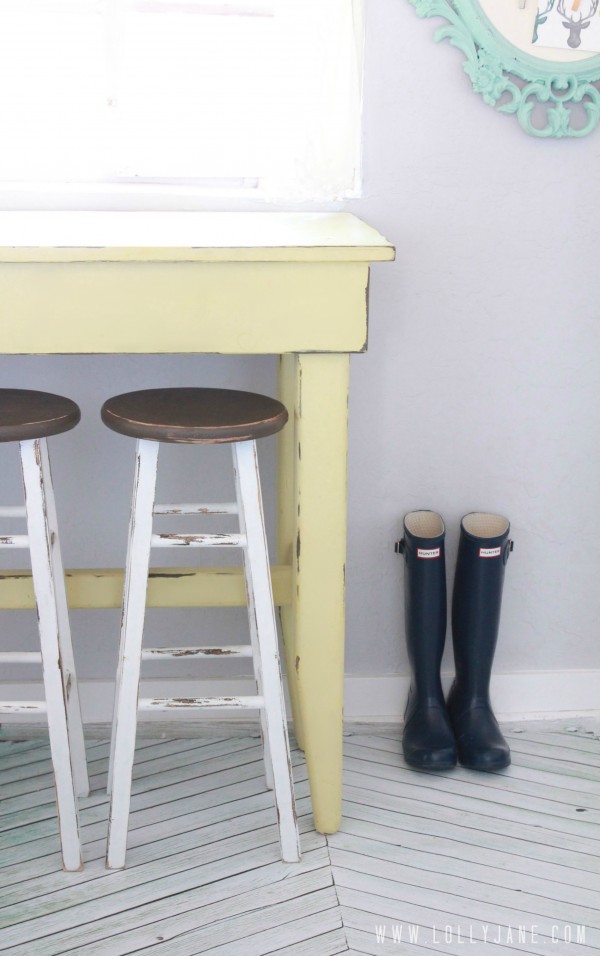
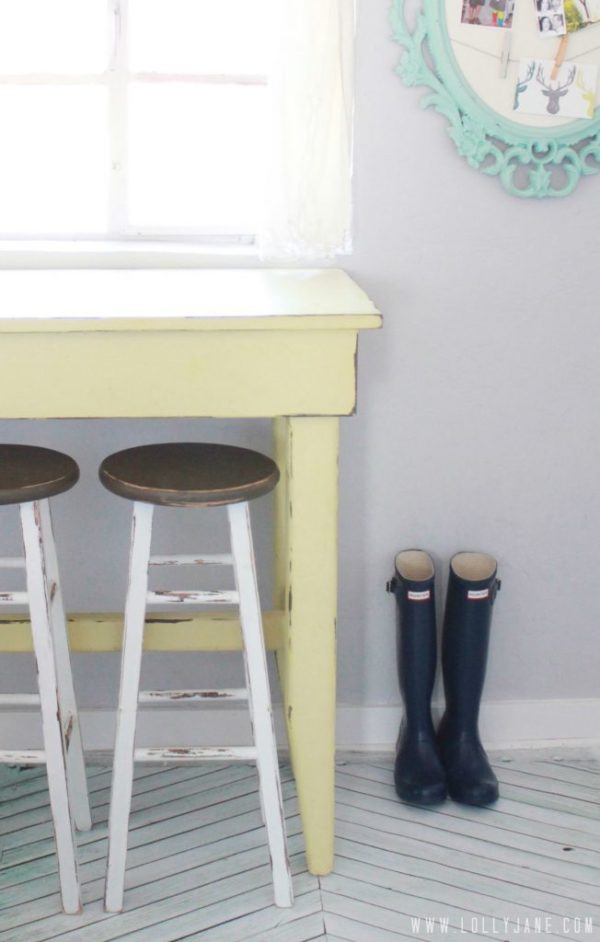
Rewind to a convo my ah-mazing FIL and I were having a few months back when his son and I moved into my SIL’s guest house about a table solution for the kitchen as the space is pretty narrow. (My hubby is going all cray cray on remodeling our new (old) house so I knew he wouldn’t have the time to build me anything.) To my surprise, my FIL showed up within a few days of that convo with a freshly built dinette table that fit perfectly in the space. Sneaky sneaky Hank. I sure love that guy and his super furniture building skills (remember the custom Land of Nod knock-off crib he built for us last year? He has some serious talent!) Anyway so now I had a kitchen table (painted a shabby yellow) with no place to sit. I scoured Craigslist for barstools with no luck and was not about to load my little kids in the car for the hour drive to Flagstaff to hunt for stools at retail prices. My BIL came to my rescue with 3 barstools he no longer needed…. for free! Score! Fast forward to the picture below… the most expensive item in this space are my Hunter rain boots I got from an IG deal site. Now we know the proper definition between being cheap and frugal (; Haha!
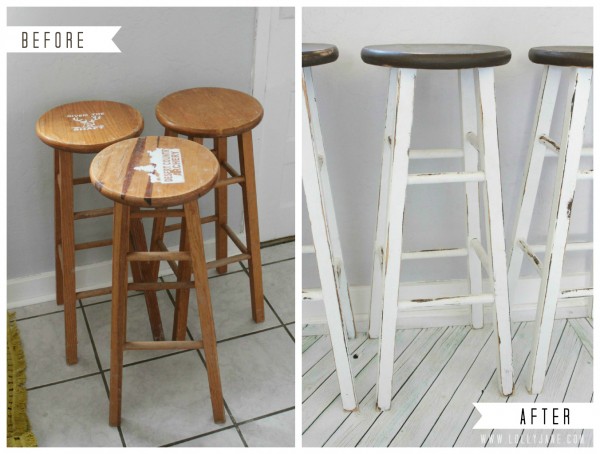
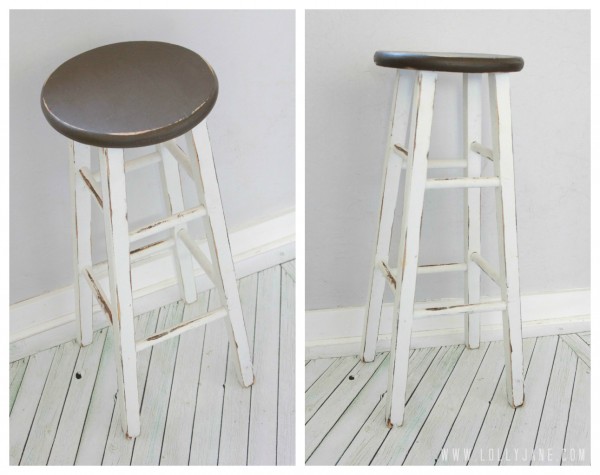
Holy moly, that was the longest intro to a project EVER! So let’s get to it the makeover. I should mention he had these 3 barstools came from my BIL’s bow shop and although they are in great shape, they weren’t all gussied up. Well, they did come with his cool antler logo and antlers are SO in right now, right? Well let’s take a looksie at the transition…
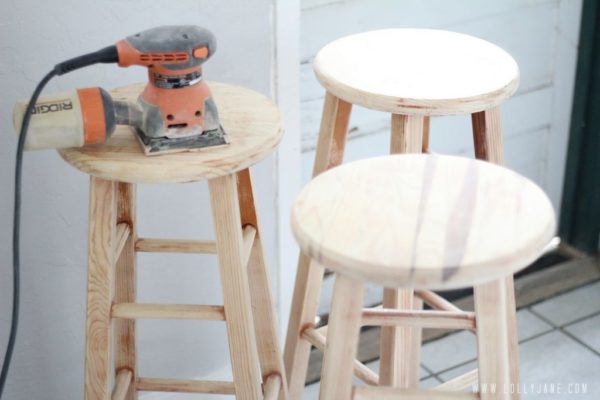
…loving the after! And no, those floors weren’t part of the redo- that’s just a cool backdrop I scored from Very Jane (; Anyway it was a super easy process, albeit a bit time consuming because there were a few steps involved x3 barstools. To get started I peeled off the vinyl logos, wiped the barstools clean and sanded the heck out of them to get the all of that shiny poly finish off. Don’t skimp of sanding! Paint adheres best to unfinished wood. See how clean and fresh they look now?
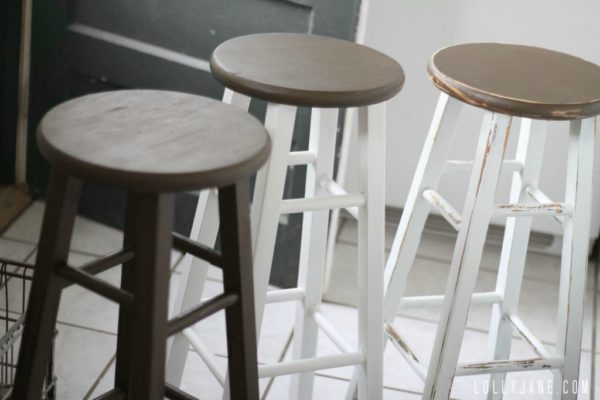
I skipped the pictures of painting and distressing as I used my fav DIY sister duo’s tutorial here, using Vaseline. There are a load of ways to distress (you can see another distress method we used with spray paint here) but I had wanted to try the Vaseline trick and gotta say that I lovely love loved it! I did snag a pic of the “during” process though… at this point I was like, “We just need ONE barstool, right?!” Haha! PS: The brown paint is the same color used for the crib in the link among my earlier ramblings (;
So grateful to have such generous family members to help a sista out! I love our little kitchen set and as you can see, so does our little toddler. He fits so perfectly at the table and uses it often for his art station… nevermind that I revamped a chalkboard table for him last year! LOL
Don’t be afraid to take a hold of furniture and make it yours! Painting is the easiest and cheapest way to really personalize a space.
What a difference between the before and after with minimum effort. Love that.
PS: Don’t forget to enter our current giveaway for a gorgeous piece of your choice from The Rusted Chain! (:
Happy crafting!


Love the way it turned out. You did an awesome job. Now i find inspiration to deal with my old furniture. Thanks for sharing this furniture makeover DIY.
I looove these and am so glad you gave a tutorial on them! This type of furniture is all the rage in furniture stores right now, and they want hundreds of dollars for it. I think I’m going to give this project a try myself. We’ve been looking for barstools for almost 3 years now, and these would look great in our kitchen. Thanks ladies, y’all are so crafty!
Great job! Love the colors. I need those to go with my table – same color. Our bar stools are getting wobbly. New ones are a lot of money and they don’t look as good as yours.
LOVE, LOVE, LOVE! You’ll be linking this up today, right?????
Melanie Reasons To Skip The Housework
Haha, you are so cute! Love the long intro. And, I was sorta dying over those new floors. Fooled me! 🙂
The barstools are great!! And, I’m loving the pop of yellow on your table. Gorg! I’ve pinned this!
What an amazing transformation, Kristi! You can barely tell the before and after stools are related….
Good for you!
hugs x
Crystelle
ha ha, oh that is so funny! My biggest fear is to be on live tv… I have no idea what could come out of my mouth… so scary!
Your stools are super cute!!! great job. Little Bit from http://www.DecorateWithaLittleBit.com
Love it!
Wow! Kuddos to you making these beautiful! I’m super impressed with your thorough sanding job, I always want to quit early when it comes to sanding. They turned out great and look especially perfect next to that beautiful yellow table! And btw, you should take pride in being thrifty! That’s a talent I wish I came more naturally to me. But I keep trying. 😉
Hi! I just found your blog – thank you Pinterest – and I love it! I noticed the wood strip flooring in this post and would love to know more… have you done a post on it?
Hi Andrea, it’s a photo drop I purchased from Very Jane 😉 The link is in the post. Thanks for asking! xo
So cute!! I love that little photo prop! Your FIL is awesome to build the table!!
Bar stools turned out great!! I love the distressed look!
That is so perfect! You have some great in-laws, seriously! Lucky score for such a cheapskate 😉
Looks so cute Kelli! I can’t believe he made that table, it’s seriously awesome. Love the stools too.
Uhm, duh…I mean to say “looks so cute KRISTI!” ha ha, I’m a dork.