Birthday Board

We’ve been making these bad boys for years but are simply BURNED OUT! Consider this your warning: this isn’t a simple hour long project. It requires lots of baby steps and just as much patience (:
We’ve made over 100 birthday boards, here are a few that we loved most:

The great thing is these can be customized to your home decor style. Here’s an up close shot of that popular M&M theme’d board made for our brother-in-law’s mom:

How to make your own Lolly Jane Birthday Board:

SUPPLIES
- 24″x8″ wood
- Acrylic or Spray Paint
- Vinyl lettering or Stencil
- Drill Bit (We INSIST on using the smallest bit Home Depot offers: 1/16″)
- Eye hooks (We ONLY use the #216 1/2″ from Home Depot, 8 for $0.99)
- Hanging Pieces (Wood stars, circles, etc. We ONLY use 1″ diameter x 3/16″ thick pieces)
- Note, here is what we prefer: Circles + Stars
Instructions
1. Paint your board & hanging pieces.
2. Apply vinyl lettering on board & hanging pieces (alternative: chalkboard paint/write names on with chalk pen for hanging pieces).
3. Center eye hooks under each month and screw into wood
[Starting 1″ in from left to right, screw 2″ apart, 12 hooks total]
4. Screw eye hook into center of each star, top & bottom*
*We’ve found it’s easiest to a pack of eye hooks and open one side with pliers.
*You MUST pre-drill: We used the smallest drill bit from Home Depot, 1/16″. It will help prevent cracking!!!
5. Hang the specific hanging piece under each month.
6. Smile knowing you’re never going to forget another birthday again! 😉
A sports lover in your house?

Updated thanks to all the inquires from Pinterest:
These 2 boards were recently made in bulk. Instead of the teeny-tiny vinyl lettering names on the hanging pieces, the names were simply printed on cute scrapbook paper then decoupaged in place.

Quick solution and no more headache for all those itty-bitty vinyl lettering names. I promise it’s not worth the time cutting + weeding all those names in vinyl, not when scrapbook paper is so cute these days (:
My newest sports themed birthday board used chalkboard stars! No more printing or cutting!
Most asked question:
Do you sell your birthday boards?
NO, we no longer sell the kits but instead shared our tutorial with you. We’ve seen tons of copy-cats out there along with girls even selling them. More power to them, they’re so time-consuming! 😉 However…
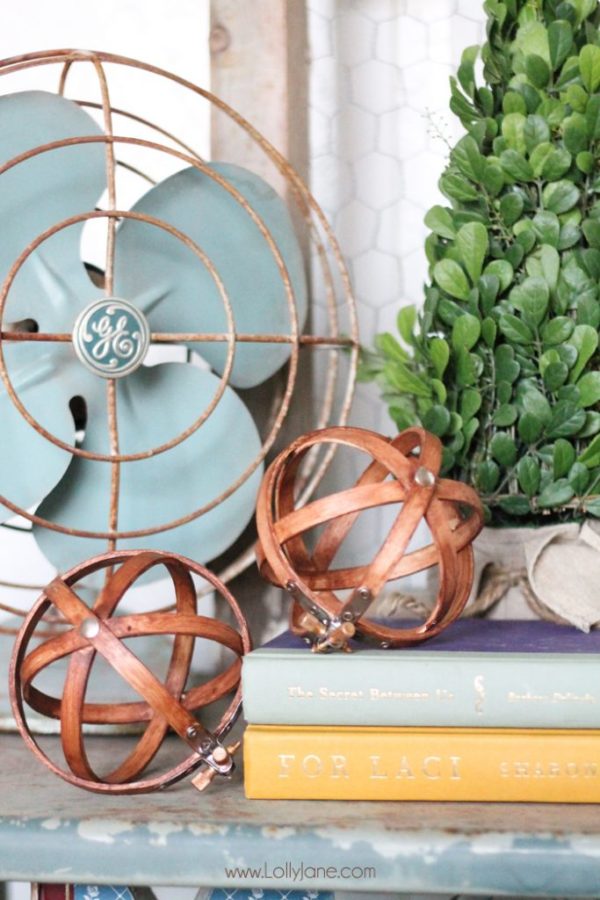
We have a great friend who has taken over: Marni who is an AZ local. FAST turnaround and inexpensive pricing! [email protected] Also check out tons more tutorials like our embroidery hoop spheres,
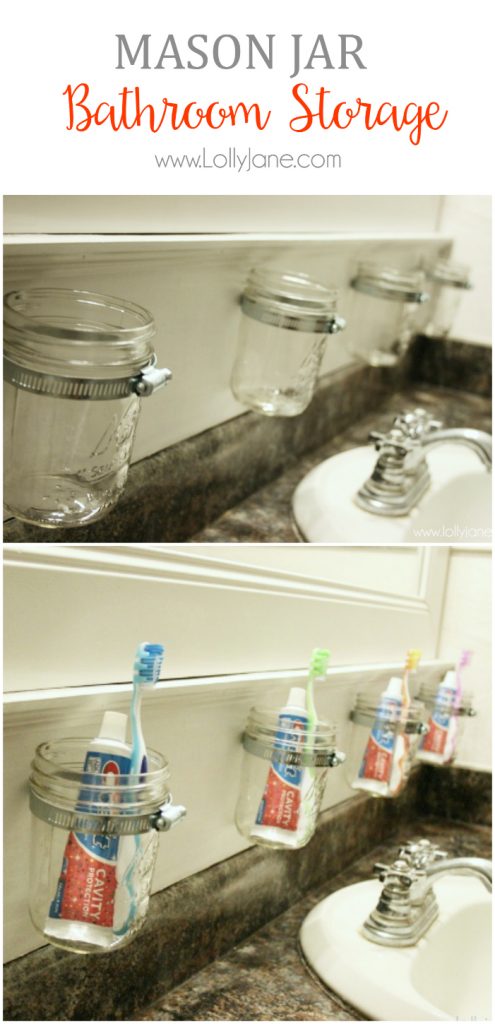
mason jar bathroom storage ideas,
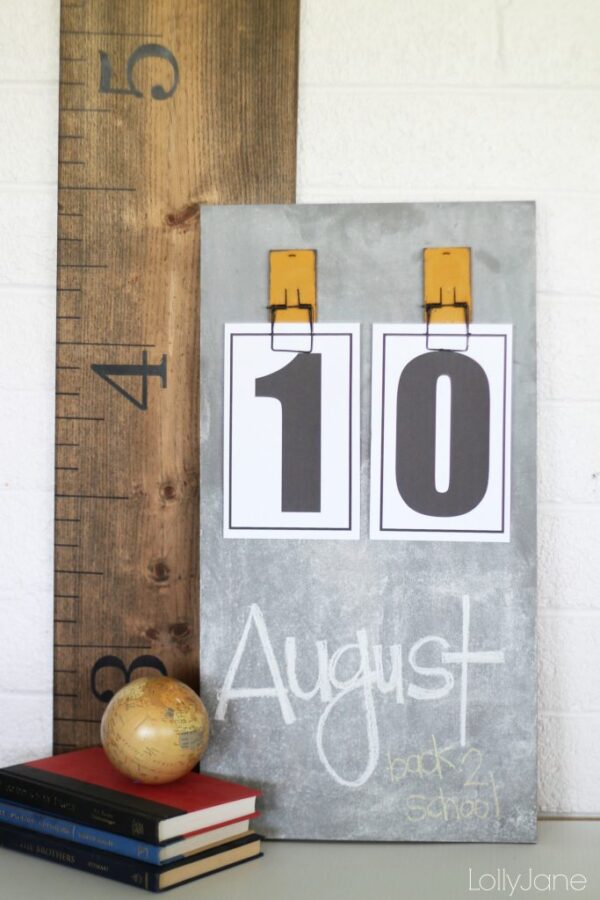
plus our mouse trap chalkboard calendar.
And we’re always on Facebook, Pinterest and Insta! XO
Mallory, the the circles, stars, squares(diamonds are the square ones turned to make a diamond). I used them for all the Annivs. You can get them so many in a bag at any craft store. Look in their wood section. I used large jump rings to connect the circles and diamonds together for each of months and I used small eye-hooks to connect them to board. You will need to drill small holes in the tops and bottoms of wood pieces so they can be connected to each other. The board can be bought at the craft store or go to your hard wear(Lowes or Home Depot here) or lumber yard and sometimes where they cut the wood, they may have the scraps they cut off for other customers or have them cut you a piece for you, I think they still might do the cutting for free , I used a 22&1/2 piece long. I laid out my months to get my measurement. I just take the whole board and cut it my self and I will either use the board for another project, let my Hubby have it for one of his projects or shoot a pic to our son for one of his projects he has his own woodworking shop now. Or you can use a piece of from outside. Smaller than a log but bigger than a limb, your preference. I used a piece of base molding and added a piece of rope molding, painted and used the vinyl lettering from the tee shirt or paper aisle. I used the abbreviation for the months. And even thou they stick the the wood pretty good, when you have them exactly where you want them, make sure you glue or put a coat of poly over the months. Believe me when I say, they will come up if you don’t. Or you can just write everything. Add what you want to the back so you can hang it on the wall. Good Luck Hun!
I made a Family Birthday board too. But I took it a notch. I married into a German family and married #3 out of 7. And that was almost 42 years ago. So by now there are many. I used round wooden circles for birthdays and squares turned on the diamond and use them for Anniversaries . This family has grown so much over the years and just so I can keep up with all of them on the birthdays under their name I also put theis DOB. and with the Anniversaries I put both names and date married. There is a birthday for every month. I just looked at it and I believe I need to add a new birth and a marriage. And this is just my Hubby’s brothers and sisters. We just celebrated the family’s Matriarchs 91st birthday on the 5th of this month.
Of course, thanks for popping by! 🙂 The font is called Lima Bean, it’s a cute one!
http://fontgarden.com/fonts/9620/lima_bean.html
What font did you use for the M & M birthday board…
Thanks for sharing this project…i love it
Thanks
Denise
Sure thing! Email us at [email protected]!
Just love all that I see here….love love love it!!!! My sister loves M&M’s and I simply love the font on the M&M birthday Board. Can you please give me some idea how to go about it!? Please do help, am new to the US and want to do this lovely board to pass my time………. 🙂
Decoupage or ModPodge 😉
How do you adhere the scrapbook paper onto the wood circles?
So glad you like them! They’re 1″ diameter and 3/16″ thick!
Love these!!! What size are the wooden discs?
Well thank you, Cindy! So sweet! 🙂 XO
I’m the Editorial Assistant for Fun Family Crafts and I wanted to let you know that we have featured your tutorial! You can see it here:
http://funfamilycrafts.com/birthday-board/
Thanks for sharing your fabulous idea!
I am trying to figure out how you do the vinyl lettering? Is there a template you use or something?
craftparts.com is cheaper in bulk (:
I am going to try and build one of these for myself (wish me luck) where do you find the stars and circles? I have also seen ones with hearts to represent anniversaries which I would like to do. I am assuming Michaels or Joann’s? Thank you
I was going to try and make a board for a gift and was wondering where you found the lettering and the sizes you used. Thanks.
1 1/2″ (:
Check your email, Donna. 🙂
Just curios did you use the 1 inch or 1 1/2 inch stars from craftparts.com?
I really want to make birthday boards for Christmas. I can’t seem to find the vinyl lettering. Can you give me some idea of where I might look?
Love this site!!!
Oh and the small letters for the months?
Where do you get the fancy lettering in vinyl? Or sport themes? Thanks!
Thanks, love this idea, and love the tutorial…I am trying to figure out how to put the names on…not handwriting…I don’t know how to do vinyl-can you share? Do you have to have a machine or is there somewhere to order the names in vinyl online? Thanks!
Hey Samantha, that would be SOOOO cute! No we haven’t tried it but that’s a great idea. The vinyl would ahere to it just fine so we should definitely try that too but I LOOOOOVE that idea!!!! We may have to make a new one JUST to see what it looks like! (; Thanks for the suggestion! xoxo
Have you tried using metal for the name plates? And letter punches to do the names?
The vinyl seems really tricky and my writing sucks (hahaha!!), so was just wondering if you had tried it and if it looked any good, or actually worked at all?
Thanks, Sam
Thank you! I’ll go check then out right now.
Visit craftparts.com! Shipping is reasonable too!! (:
I was wondering where you bought the stars for the names? Also you mentioned how thick to get them but not how wide they are. I’m guessing 1inch? We only have a hobby lobby here and they didn’t have any :(. Thanks so much for sharing how you do these! I just love them.
I’m planning on using your tutorial to make a birthday board of my own as part of a new years resolution to give everyone a car BEFORE their birthday rather than a week or so late. I love all the different ones you’ve made. Thanks for teaching us how. I’m showing my work on my own blog, but I’ve linked back to you guys as my inspiration. You are great!
I made it! (: Glad you like it. We’ve since stopped offering vinyl so hit up Marni, she’s amazing: [email protected]
My mom would LOVE the Utes board! Where did you get it?? I saw it on Pinterest btw..and I can’t find it ANYWHERE!! HELP ME!!??
[email protected]
How do you make a birthday board like this? Are there plans or directions somewhere I can look up?
Hey Kristen! I hate when that happens. If you pre-drill it won't crack. But the smallest drill bit you can from Home Depot (it's a little gold one) and that will take care of cracking. Good luck (: Kelli
I am having trouble finding small enough screw eyes for my little hearts. I bought 3x12mm at Hobby Lobby but they are splitting the wood… HELP please?
The plaque is simple pine wood from Home Depot, it's 8" wood. We cut it to 24" long. Easy enough! (:
I was wondering where you got your wooden plaque from? I am having a hard time finding one that is that size.
@Tiffany: We get our eye hooks at Home Depot. They're in a red package, 8 for $0.99. We manually open half of them so we can hang them from each other. (:
I was wondering, where did you find your eye hooks? I can't find them anywhere?
My MIL would LOVE this (even though we are BYU fans I can get her something she actually wants) Where can I get the vinyl? Saw this on Pinterest btw. Please email me shjorgoataimdotcom
Really wonderful idea. You even made the Utes look good…lol
That is so cool! What a great idea!
Thanks for stopping by my blog. I am now following you back. 🙂
You have the cutest ideas! Love this! Thanks for sharing in the DIY Project Parade!
Roeshel
kim, it had to be done. it wasn't read-able! i gave the bday girl a choice, she liked white. i did too. 🙂
but thanks for your input!!
That is the cutest, most original thing I've ever seen! Wow! Loving your blog! Am your newest follower!
smiles!
http://www.blackberryvine.blogspot.com
That is awesome!
I cant believe you changed them all!! They looked cute red.. but do look great in white!! Good job!
I love it, so cute!!
How cute! Love this. A friend (Kalee Whipple) played basketball for the Utes. Her family would have loved something like this!
I love this idea! My husband would hate it though. I'm a Utes fan, he's for BYU. Maybe I can make one just to get him mad 🙂
GO UTES!!!
I have to admit that I am a BYU fan instead, but now with the changes, maybe we don't have to be rivals. I had to stop and comment when I saw this though as Utah gives us some connection!!! This is really an adorable idea. Go Utes!