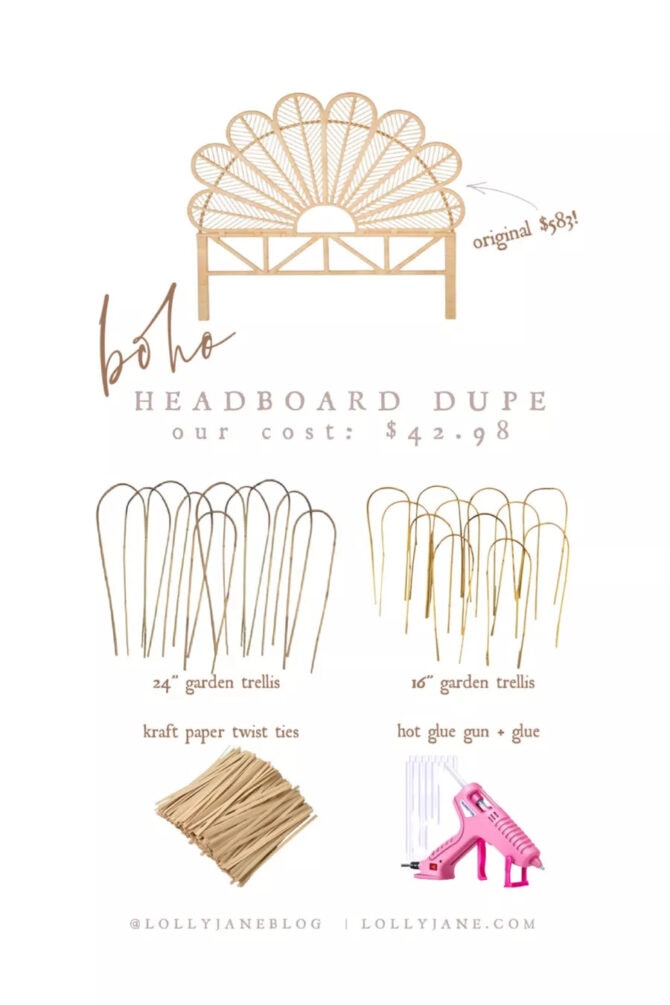
DIY Boho Headboard
Check out our easy DIY on how to make a bamboo trellis boho headboard. This quick tutorial takes less than 30 minutes and costs under $40!
We are loving the trend of minimal decor and natural elements which is why we’ve been drawn to boho decor. My tween has caught the bug so when her and her newly graduated sister switched rooms, she requested a boho bedroom with this cute but expensive boho headboard. Together, we made a cheap and easy DIY boho headboard and love how it turned out, so cute!
We designed this space back in Sept of 2022 and just realized we never posted it, oops! This is a beginner level tutorial on how to make a bamboo trellis headboard. This easy project took less than 30 minutes and cost under $40.
Supplies to Make a Bamboo Trellis Boho Headboard
- Bamboo Trellis: 16″ Trellis + 24″ Trellis
- Kraft Paper Twist Ties
- Hot Glue Gun + Hot Glue
- Brown Rubber Bands
- Finishing Nails to hang
How to Make a Trellis Bamboo Boho Headboard
We were so excited to find this cheap and easy DIY boho headboard tutorial on YouTube. We immediately ordered 2 sizes of trellis to give it more dimension than the original idea.
This is the easiest tutorial, it requires zero skill.
Just hot glue and sneaky little cute Kraft paper bread ties to cover up the glue.
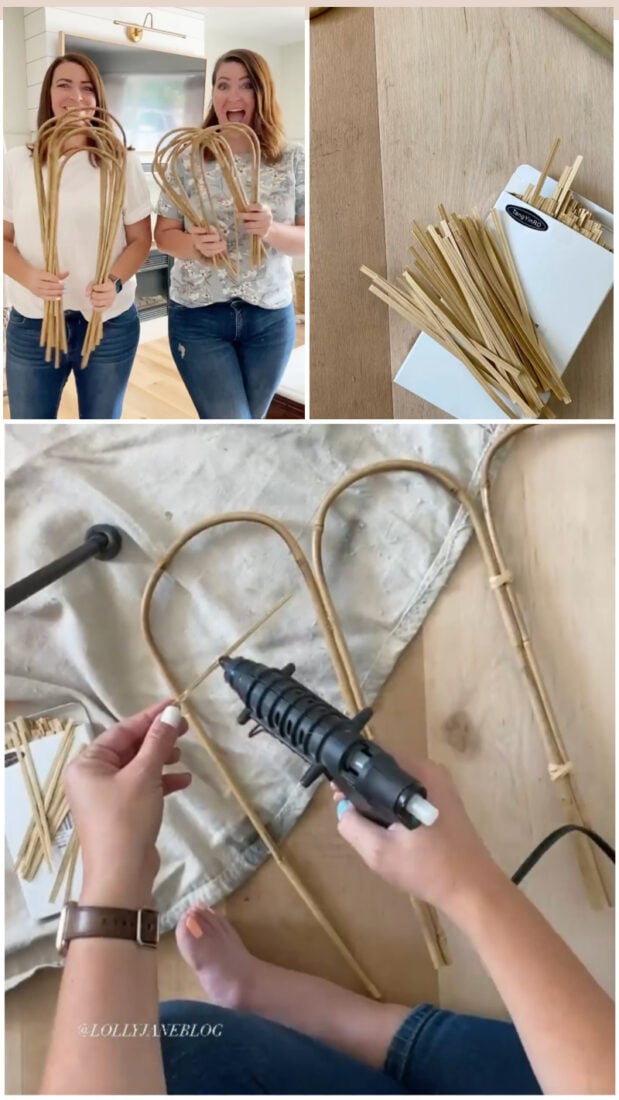
- Start by laying the trellis pieces side by side.
- Hot glue three dots on the trellis pieces: one on top, in the middle and on the bottom.
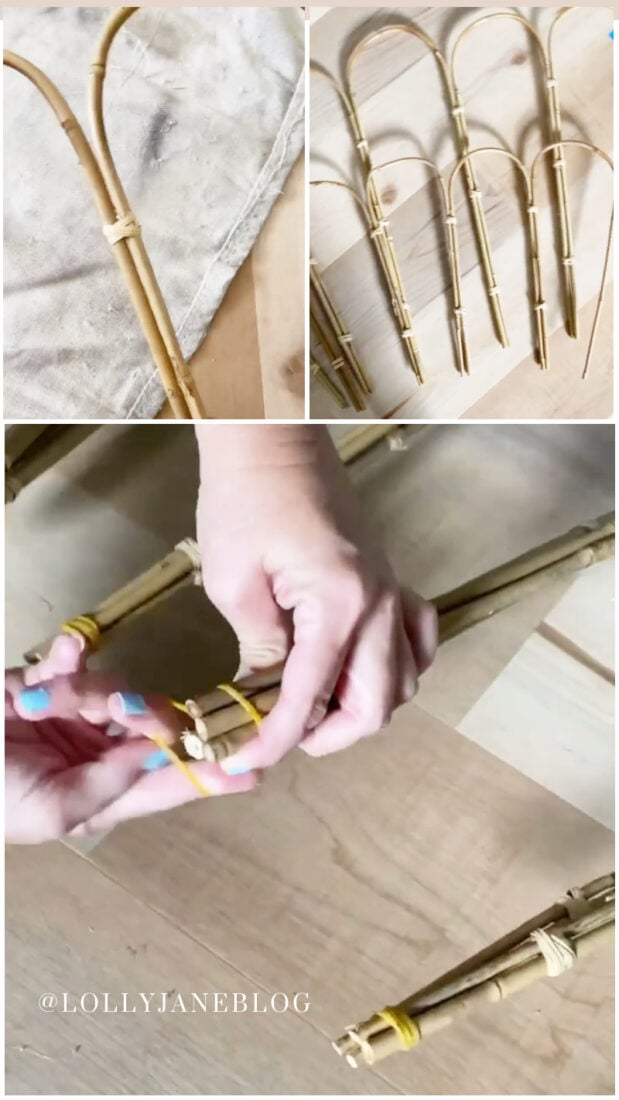
- When the pieces are dry, run a bead of hot glue along a Kraft tie and wrap it at a diagonal to make an “X” shape. When the bottom “X” is dry, run a bead of hot glue along a second Kraft tie and wrap it across at a diagonal to complete the “X” shape.
- After you’re done gluing the two new trellis “frames” together, attach the two frames together with rubber bands on the bottom pieces. Just wrap them around at the feet/base of the frames.
How to Attach a Trellis Headboard to the Wall
To attach them to the wall, use finishing nails to nail between the rubber bands and in between the “X” shapes. This way, you won’t see the nails the bed frame is hanging.
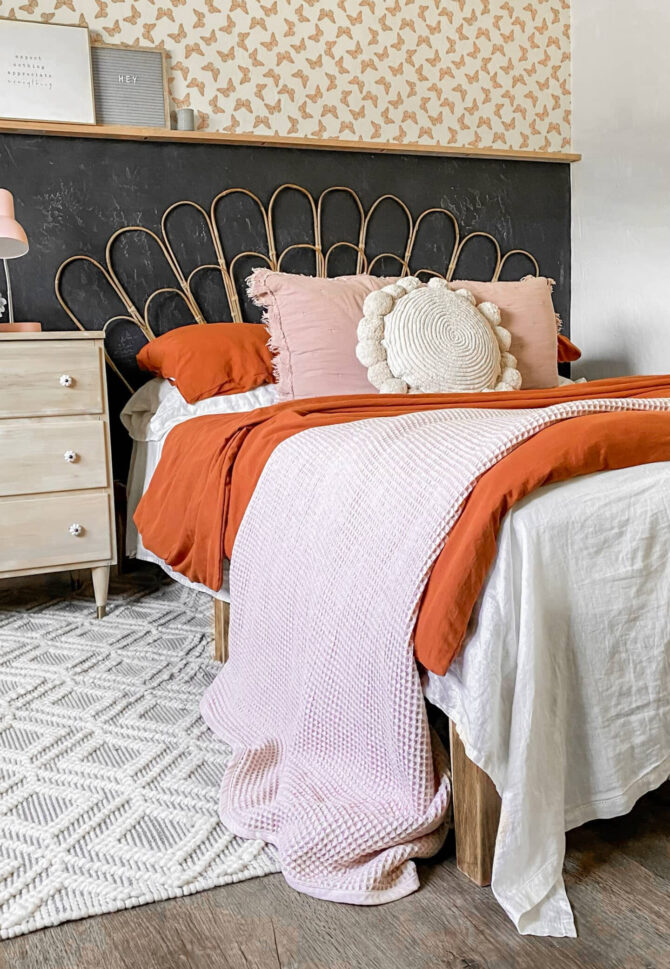
If you end up just putting the nails under the main piece of the frame, they’ll still small so they won’t be obvious. In the picture below, I had the nails under the top rails of the headboard.
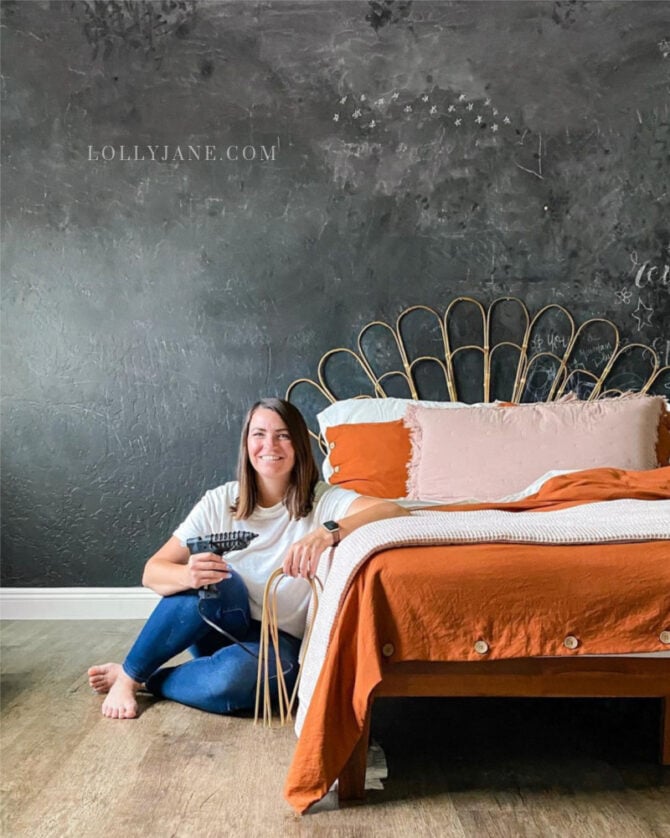
In this picture below, you can’t see them because I nailed them between the rubber bands to hide them.
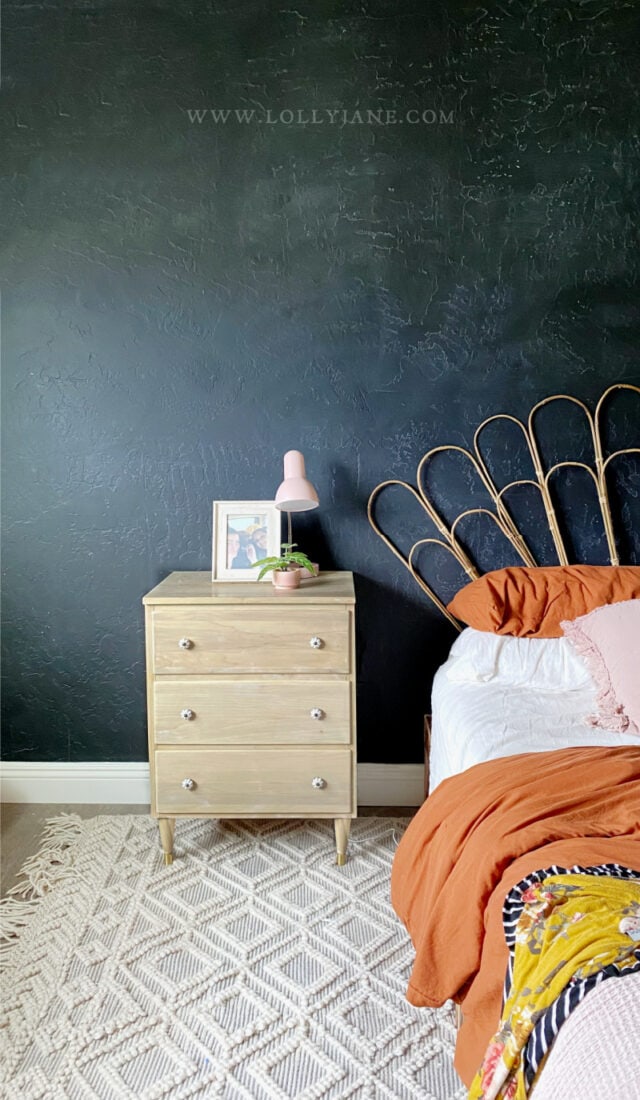
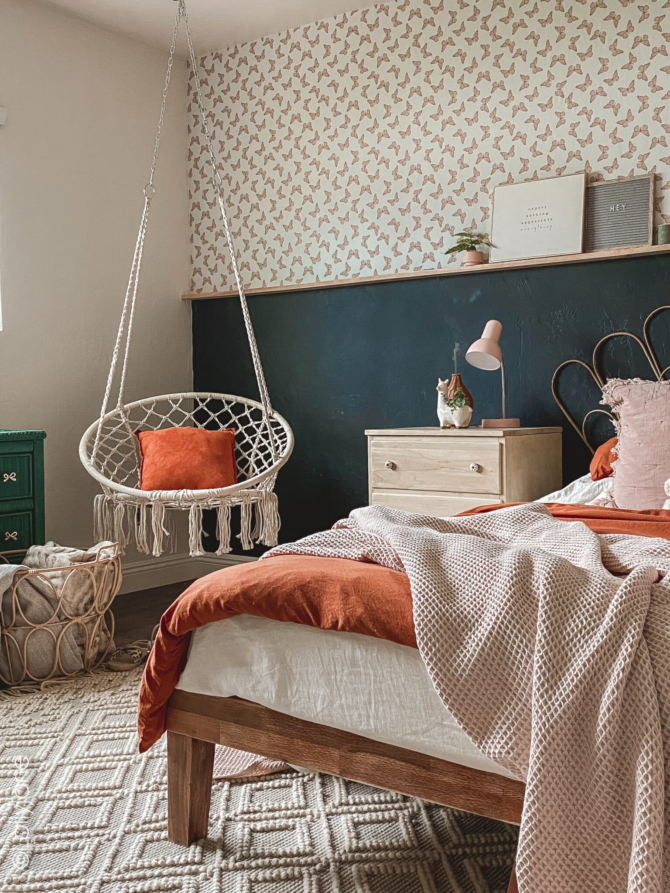
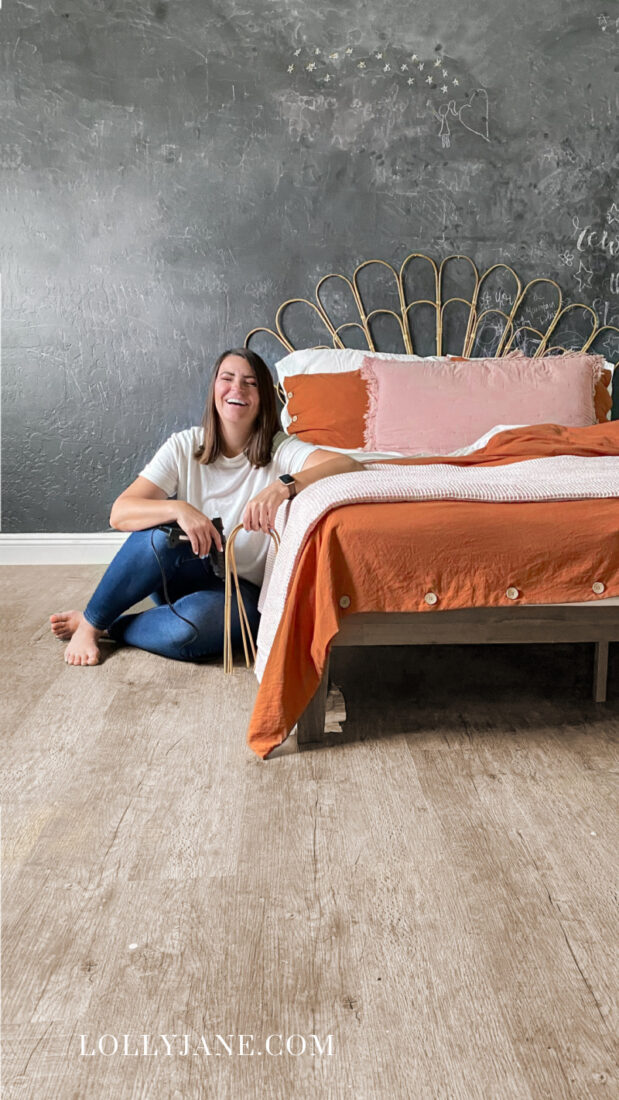
Here’s a sneak peek of how the room turned out (below). I love it!
SEE THE FULL BOHO GIRLS ROOM REVEAL HERE
SHOP THIS ROOM
It’s happy and cheerful but playful enough for a teen yet mature enough that it can grow with her. Mom win!
If you’re also in our boat using your kid’s room as a guest room, visit tips here on how to keep it organized.