Open Kitchen Shelves
We’ve got the easiest tutorial for open kitchen shelves. From install to styling, these beautiful modern but cozy kitchen shelves can be hung in a few minutes and are guaranteed to be the shining start in the heart of your home!
removing old cabinets
This kitchen is getting a $500 makeover, enough to tide us over until the construction market slows down and we can get a major remodel going.
This is our 70’s kitchen, the same kitchen we were born in! (Not literally, we were born in a hospital but brought home to this very house nearly 40 years ago.) Our parents live next door and our sweet dad was excited to help us remove the cabinets he put up with those same hands nearly 4 decades ago.
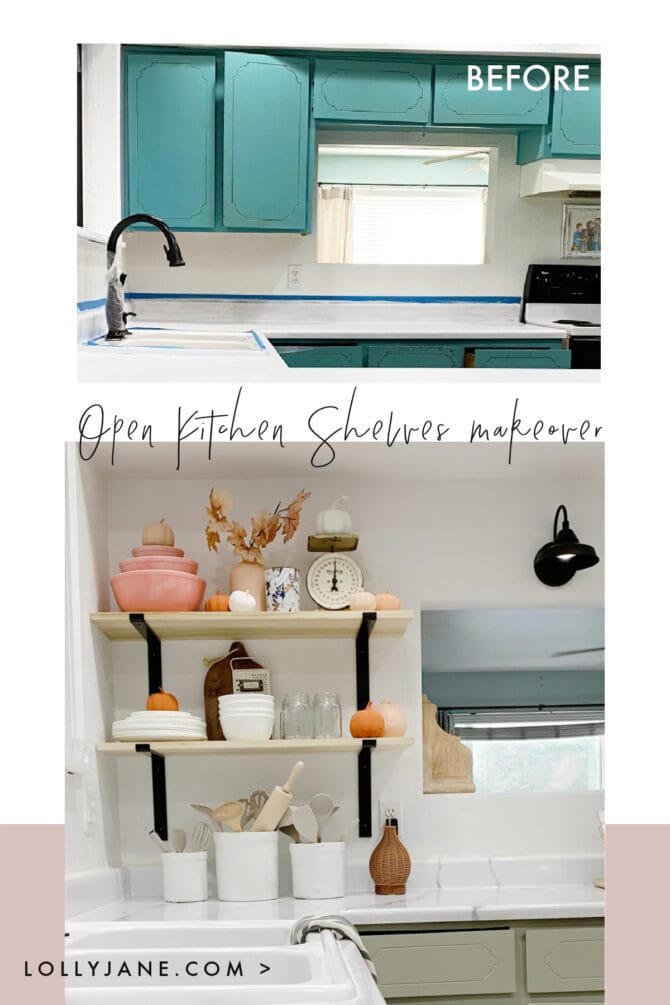
Here’s a peek at the wall we’re working on this week. Can you believe the before!?
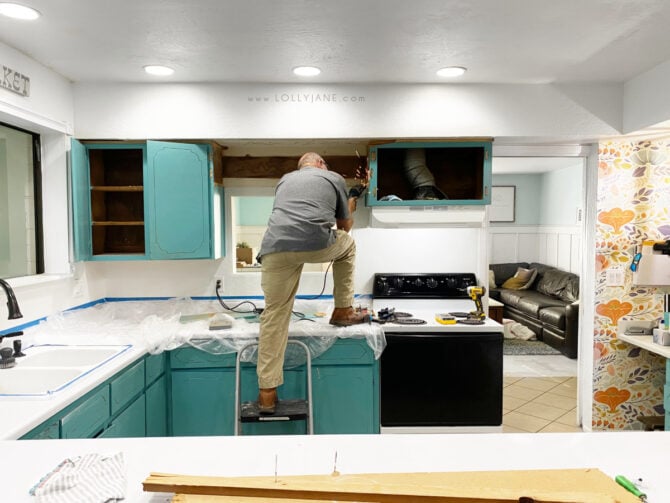
When I bought the house several years ago, I painted the cabinets aqua because I couldn’t afford to replace them. Since then, I’ve toned my decor pallet down and am currently appreciating a more simplified look…less busy, less clutter.
SHOPping FOR OPEN SHELVES
After our impromptu DIY epoxy counters, I needed to get my kitchen put back together in a hurry. It was Saturday evening and I was headed out of town on Monday but keeping the everyday dishes far away from the sink (in the pantry) wasn’t working out, my kids function better and are more responsible with organization so I headed to the store for quick options. Plus, the counter needed 7 days to cure so I needed to keep things off the counter and find a spot for them to place them.
Open shelving is flexible, budget-friendly and ideal for collections.
After hitting up Target and 2 thrift stores, I didn’t find any shelves that I liked so as a last ditch effort before heading home (and to browse Amazon), I went to Home Depot. I know the layout of their store really well because I’m there too much, lol, I went to the lumber aisle. One of the side aisles off the lumber aisle is full of DIY options like brackets and more of the unique hardware, different than the hardware aisle.
I spotted these sleek, metal brackets and thought they’d work pretty well. After reading the label, I realized they hold 200 lbs (as a set) plus the sticker on them guides you to the exact wood size you need one aisle over in the lumber department. EASY.
The biggest decision my husband and I had to make was which kind of wood we preferred. Since the brackets aren’t cheap, I wanted to go with pine but he insisted on poplar. We ended up spending the extra $20 on poplar wood but it looks so clean and doesn’t have the imperfections or warping that pine has so it was a win-win in the end.
supplies to build open shelves
These measurements will depend on your own space, our shelves are 12″ deep x 1″ thick x 36″ long.
To build two shelves, you’ll need:
- 2) 12″ brackets
- 1) 12″ x 1″ poplar, 6 feet total
- miter saw (you can use a hand saw or even have Home Depot cut it for you)
- drywall anchor & screws
- drill
building open shelvES
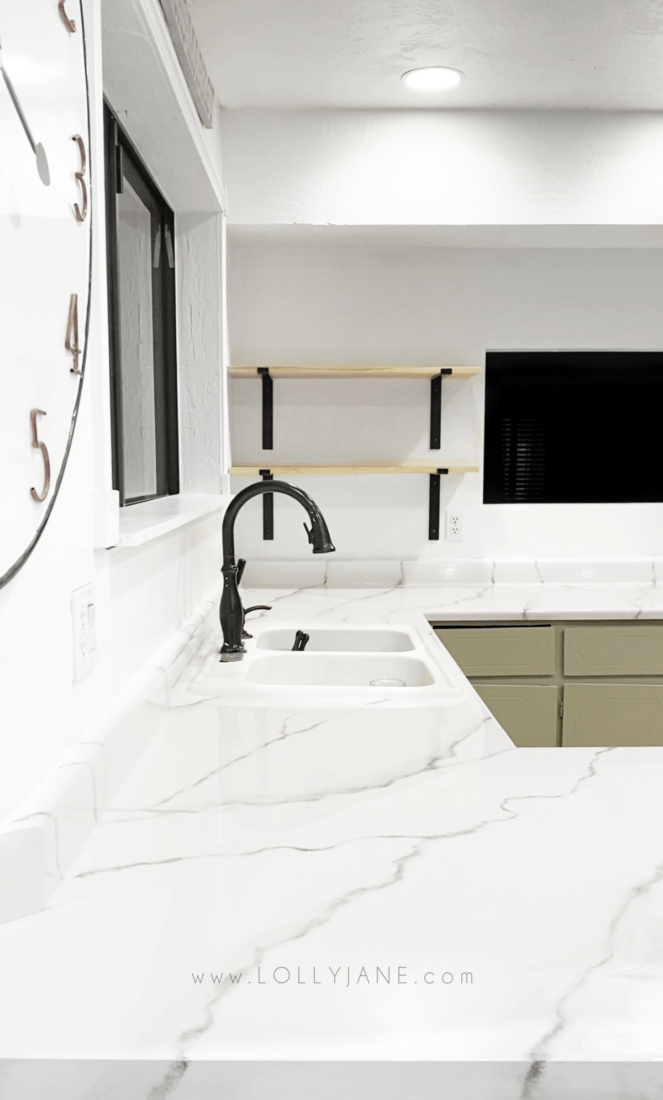
To install the open shelves, we started from the bottom up. We left a 3″ gap between the top of the counter backsplash (so it’s about 6″ above the actual counter). We then grabbed a stack of our daily plates and knew we had plenty of room to go as high as we needed so we placed the top set of brackets 3″ above the bottom set.
We cut the wood to size, this will be dependent on your own space. Our pieces of wood are 36″ long.
I love that we have a good 24″ above the top shelf for seasonal decor. Yes, those really are the only daily dishes we use: a stack of Correll plates, matching bowls and mason jars.
visit more shelf tutorials
STEP BY Step process to install open shelves
REMOVE CABINET/REPAIR DRYWALL: If you’ve removed your upper cabinets, you’ll need to first patch your wall. We use this drywall repair kit because the pink to white color change lets you know when it’s dry. When dry, sand then paint your patches.
MEASURE YOUR SPACE: I knew I had about 3′ x 3′ to work with for my wall. Before you shop, get a good idea of how tall your brackets will be so you have enough room for your dishes when you put your shelves up. We initially planned for 3 shelves but after getting home, we realized we didn’t take into consideration how long the bracket bottoms would be so we skipped the 3rd shelf to make up for it.
STAIN/PAINT WOOD: Depending on what look you’re going for, now is the time to prep your wood. After cutting your wood to size (ours is 3′ long), we sanded the sides and edges so it’s super smooth. At this point, I’m still deciding on what color to paint it overall but once I decide, I’ll seal it with a wax or polycrylic for easy cleaning. (To be continued 😉
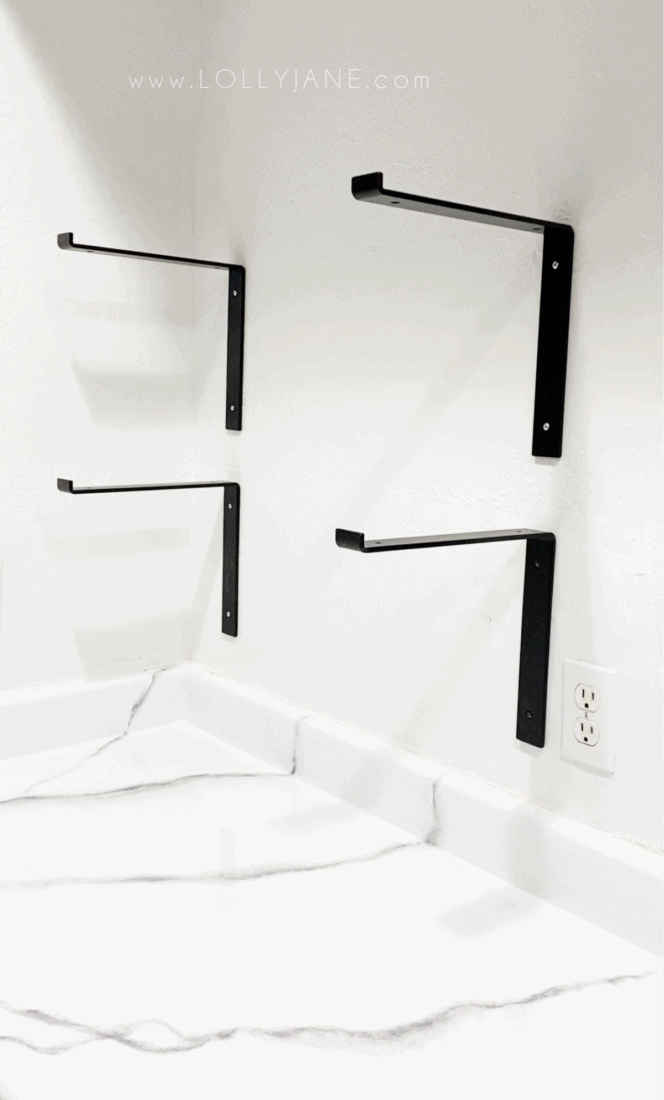
MARK YOUR BRACKETS WITH A LEVEL: We eyeballed where we wanted the shelves to go then got out the level and measuring tape to ensure they’d look professional and even. We started with the right bracket: we held up the bracket, held the level to it then marked the 2 holes. We used the level to draw a light pencil mark from the bottom to the other bracket about 2′ away so we knew the bottoms would line up. After measuring the equal distance, we used the level to be sure the 2nd bracket was level then marked the holes.
ANCHOR THEN SCREW: Someone on Instagram asked me what anchoring means. If you aren’t drilling directly into the stud, your shelves will be dependent on the thin drywall for support. To ensure they can support the weight, nail/screw/hammer in anchors into your pre-marked holes so your screws have a better grip. Anchors add extra strength to the overall support of the screw and in turn, the overall weight capabilities of your shelves. 1 bracket can support 100 lbs but our anchors support 75 lbs so between the 4 (2 each per shelf), we’re confident they’re holding strong. Once your anchor is in the wall, add the bracket on top of it then screw through the bracket and into the anchor. You should be left with a tight fit!
SCREW THE SHELF TO THE BRACKET: Underneath the bracket arm that holds your shelf, screw small wood screws to the underside of the wood. That will secure the wood in place so it doesn’t move around.
DIY Open Kitchen Shelves
Materials
- 2 Brackets
- 1 piece Poplar Wood Board cut into multiple desired sizes
- 1 saw home improvement store can cut wood
- 8 drywall anchors + screws
- 1 drill
Instructions
- Remove Cabinet/Repair Drywall
- Measure Your Space
- Stain/Paint Wood
- Mark Bracket Holes + Level
- Install Anchors into Wall
- Screw Brackets into Anchors
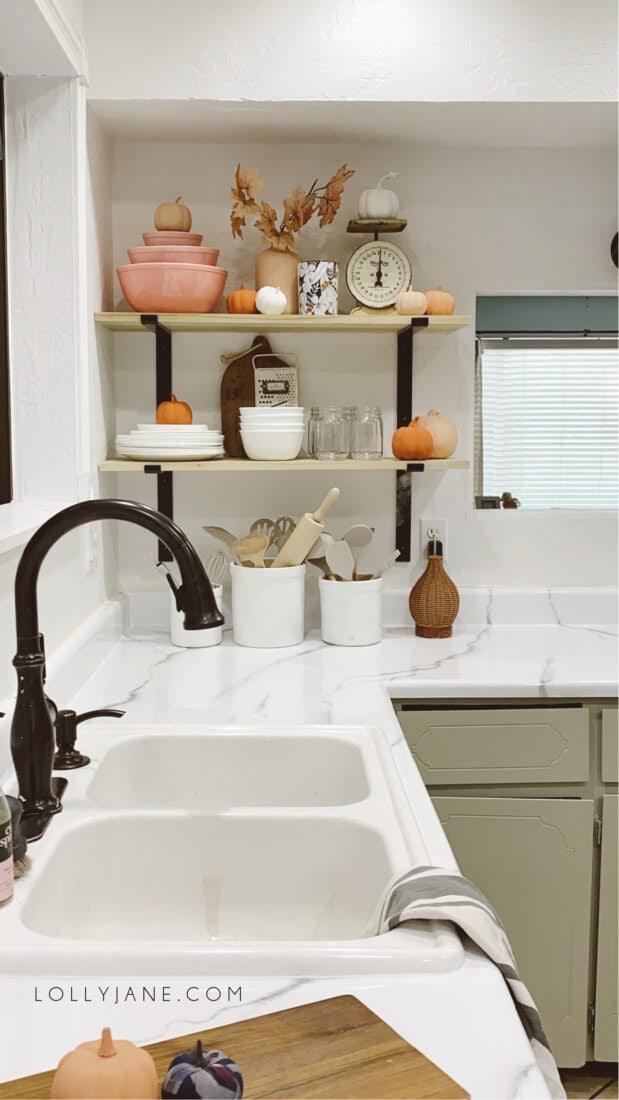
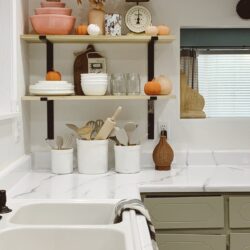
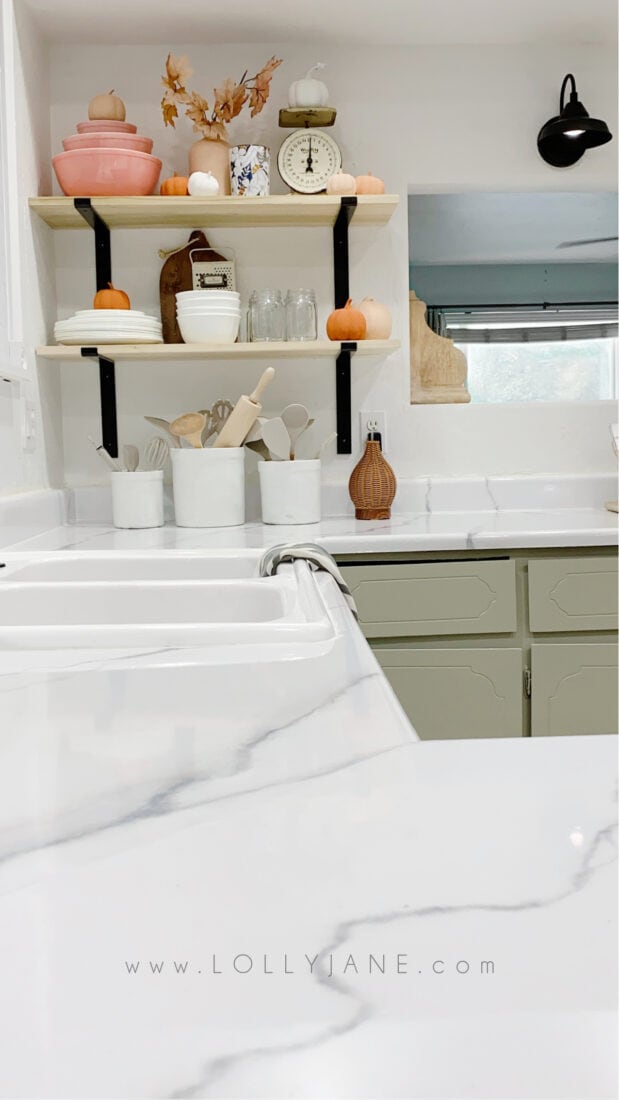
STYLING OPEN KITCHEN SHELVES
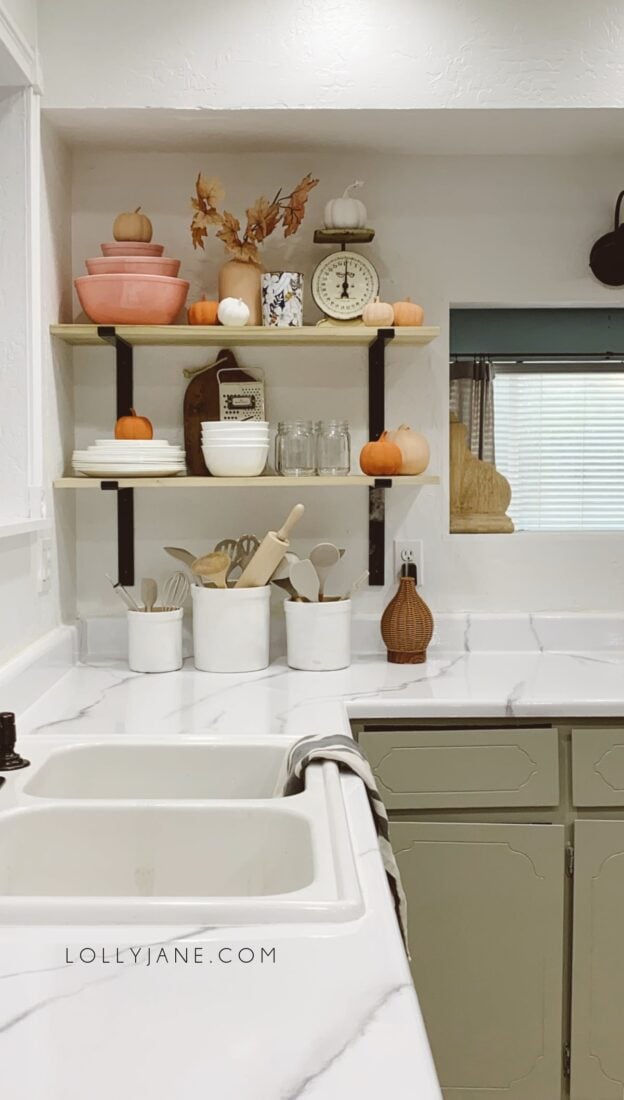
I put the everyday dishes on the bottom shelf: the plates, bowls and mason jars for cups. Since we have a built-in water dispenser, we mostly use our insulated water bottles so the mason jars don’t get used a ton.
We have a HUGE pantry which houses the rest of the “ugly” dishes that we used to store in the old cabinet: mugs and many, many mis-matched insulated water bottles.
For the top shelf, I’ll swap it as the holidays come and go so this month, it’s full of our recent fall craft: our easy baking powder painted pumpkins.
I love my thrifted scales, I have 6 of them now and miss them lined up on my old dining room shelves. The new dining room is very minimal which I’m loving but I’ve got to find a spot for the rest of my scales, they’re too pretty to keep hidden in the pantry.
I also added my thrifted set of Pyrex bowl for a little color and love the mismatched pinks going on. From there, faux fall leaves left over from our popular fall wood bead wreath in our baking soda painted vase completes the look!
SHOP THIS POST
We’ve based this shopping list from our most asked about items from our Instagram community. Feel free to leave further comments below! As an Amazon Associate and member of other affiliate programs, I may earn from qualifying purchases at NO extra cost to you! Thank you for supporting our small business!
- Pyrex Bowls *thrifted, check Etsy for similar
- Set of Canisters *thrifted, painted white, check Etsy for similar
- Baking Powder Pumpkins, tutorial here
- Silicone Utensils
- Rattan Diffuser
- Wood Rolling Pin
- Scale *thrifted, check Etsy for similar
faq about open shelves
What kind of wood do you use for open shelves?
Pine is the most affordable option. It stains or paints easily. These shelves are poplar but we’ve made shelves from pine, oak and even barnwood! Get creative! You can use glass or metal, too.
Is MDF okay for shelves?
You can use MDF but because it’s not real wood, it may sag over time depending on the weight of it. Be careful if you’re putting items on it, too, like dishes. If they’re still wet from the dishwasher, they can warp MDF.
How thick should wood be for shelves?
This is totally personal preference. We’ve had 1″ all the way up to 4″, it depends on the final look you’re going for. If you’re worried about stability, be sure you’re anchoring your brackets if you can’t find the stud for them.
please pin!
We’d be honored if you pinned this image so your friends and family can enjoy this project too! xo