How to Paint Furniture the Ridiculously Easy Way
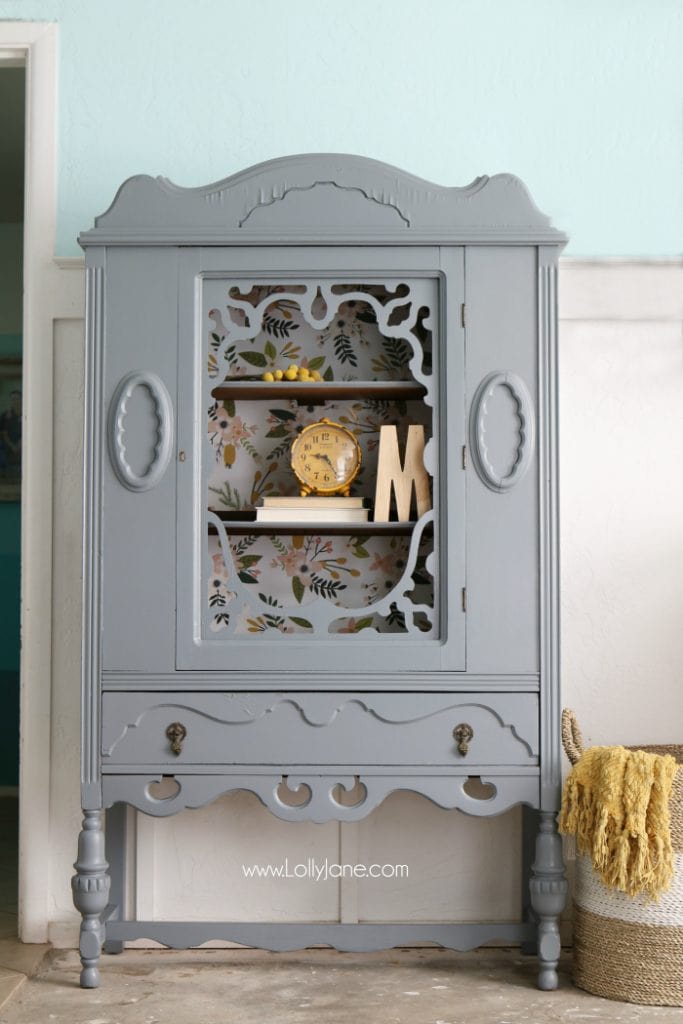
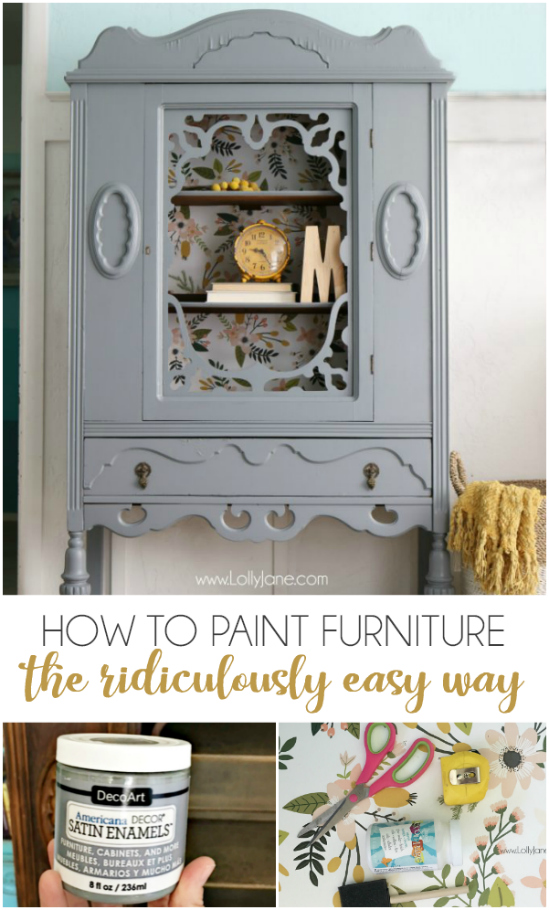
Check out How to Paint Furniture the Ridiculously Easy Way: this easy DIY Painted Hutch Makeover before and after looks amazing! You’ll love this gorgeous gray hutch with floral paper makeover. Such a dramatic before after furniture makeover Using less than a jar of Paint and some wallpaper.
DIY Painted Hutch Makeover – Satin Enamels Paint
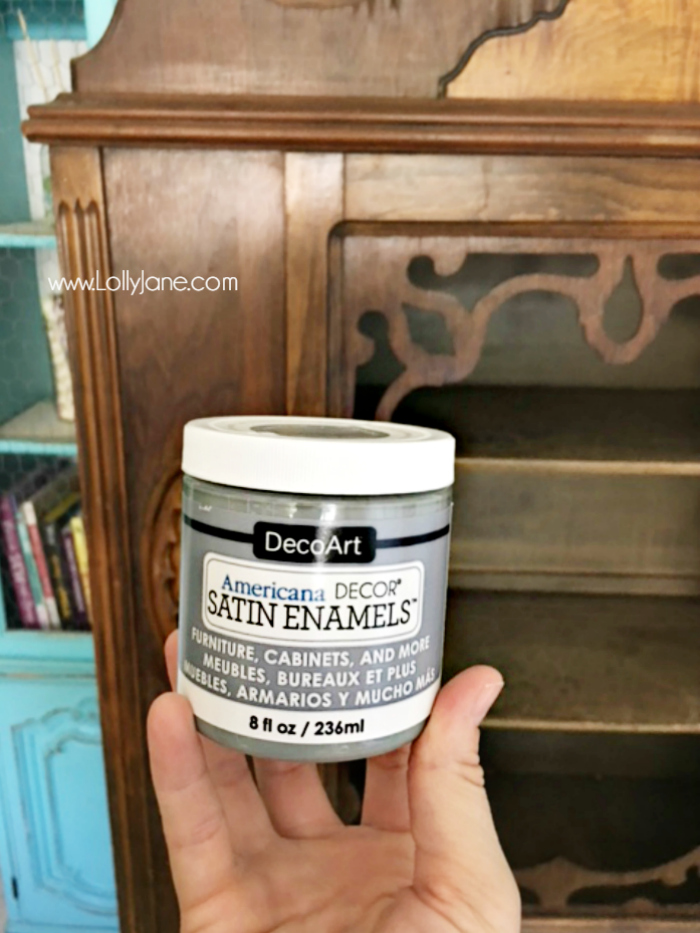
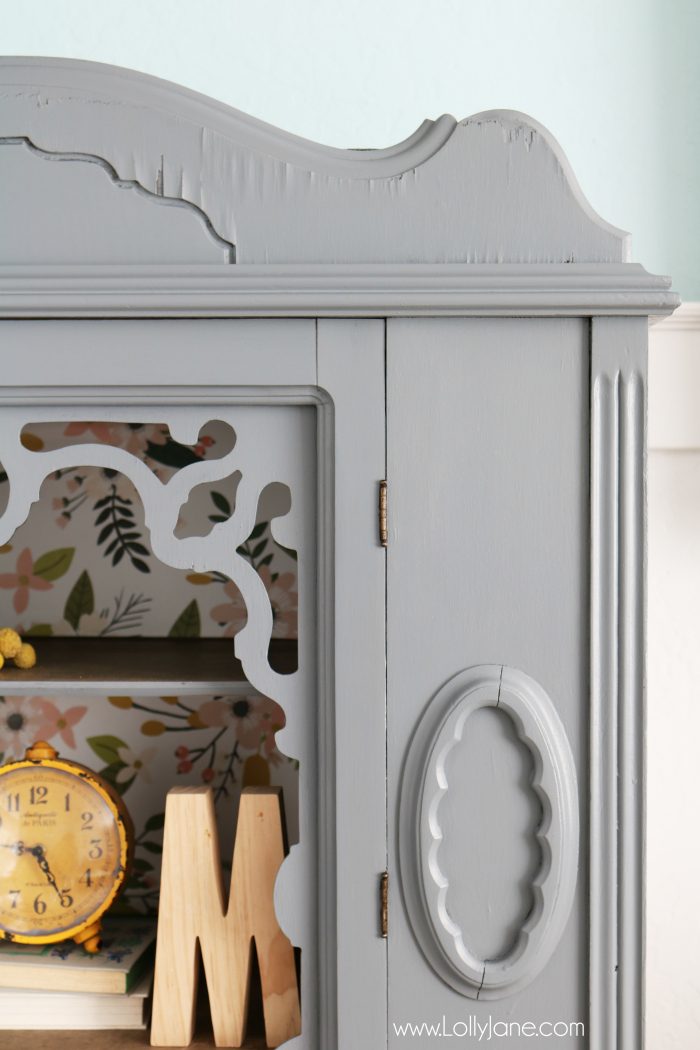
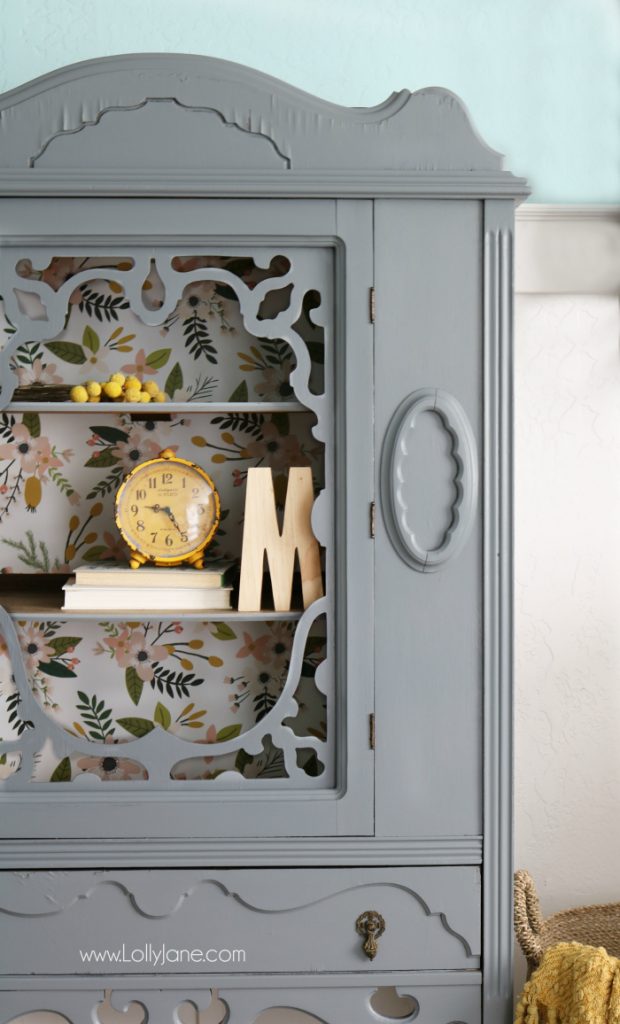
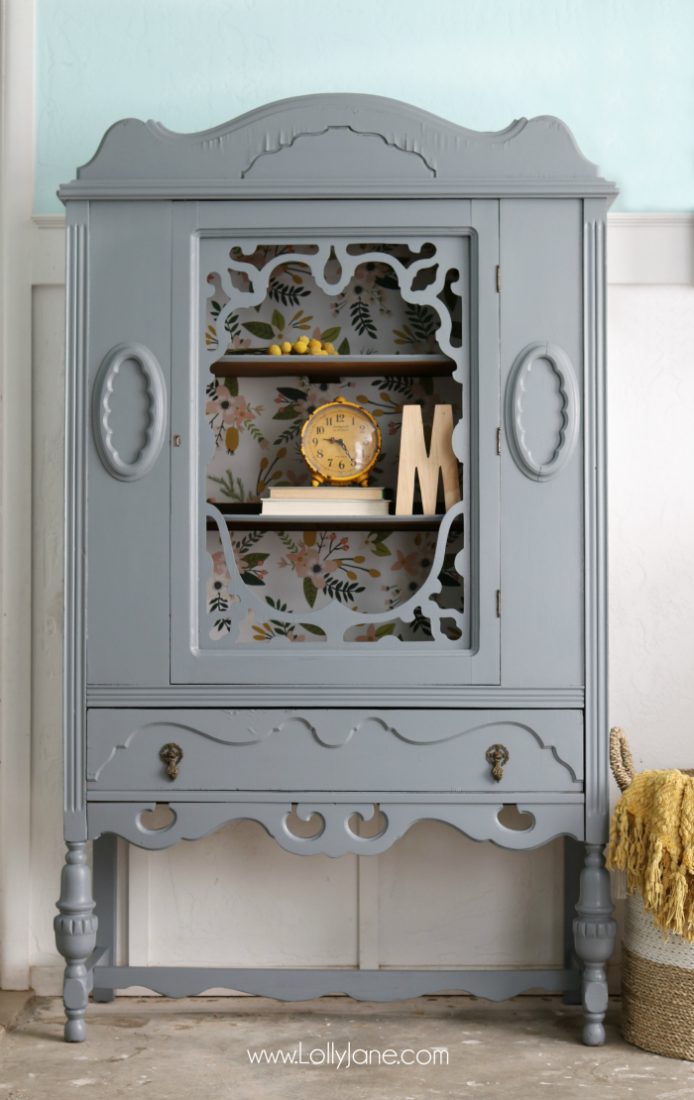
We are so in love with our newest furniture makeover, this lovely gray hutch. Our friend Heather knows us well and when was selling this beauty for $100, she knew I would be first in line. I don’t have anywhere to put it in my cozy little farmhouse but I knew she needed a facelift so I brought her home and am now determined to find her a space to shine! Americana released a new Satin Enamels paint so I grabbed a jar and am so happy with how it turned out! I documented my whole process on Instagram (@lollyjaneblog) and you all were loving it too! I was debating about distressing it or leaving it as is. Giving it a hearty distress would compliment the “wrinkles” on the top of the hutch from past wear and tear but for now, I think she’s pretty darn gorgeous as is. I really love my new gray hutch with pretty floral paper backing.
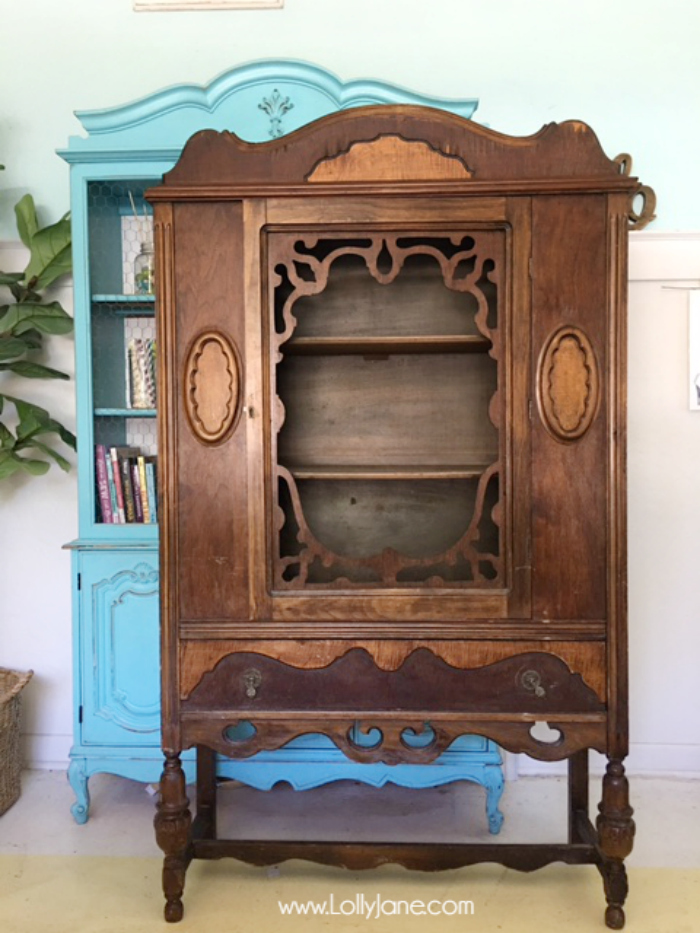
Here is the beautiful antique before it was painted. We found faded paper on the backside that said it was built May 21, 1928. It was in pretty rough shape: the lock was broken, the top had severe water damage, the bottom sides were chewed up and it was covered in light scratches and dings. Who treated this beauty so badly over the years?
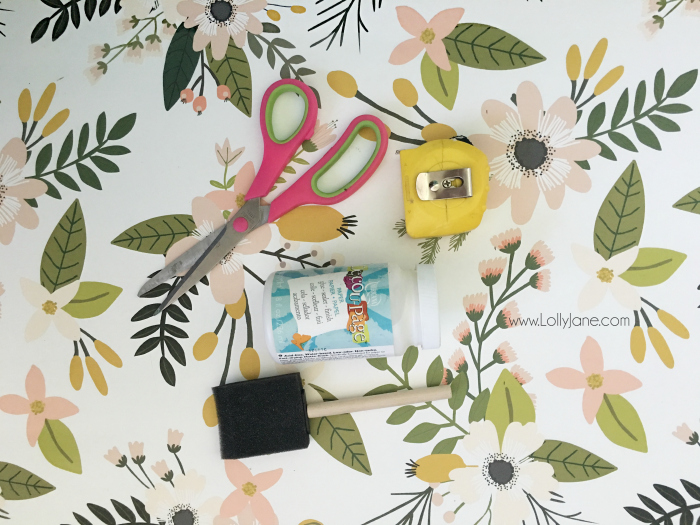
Supplies Needed For DIY Painted Hutch Makeover
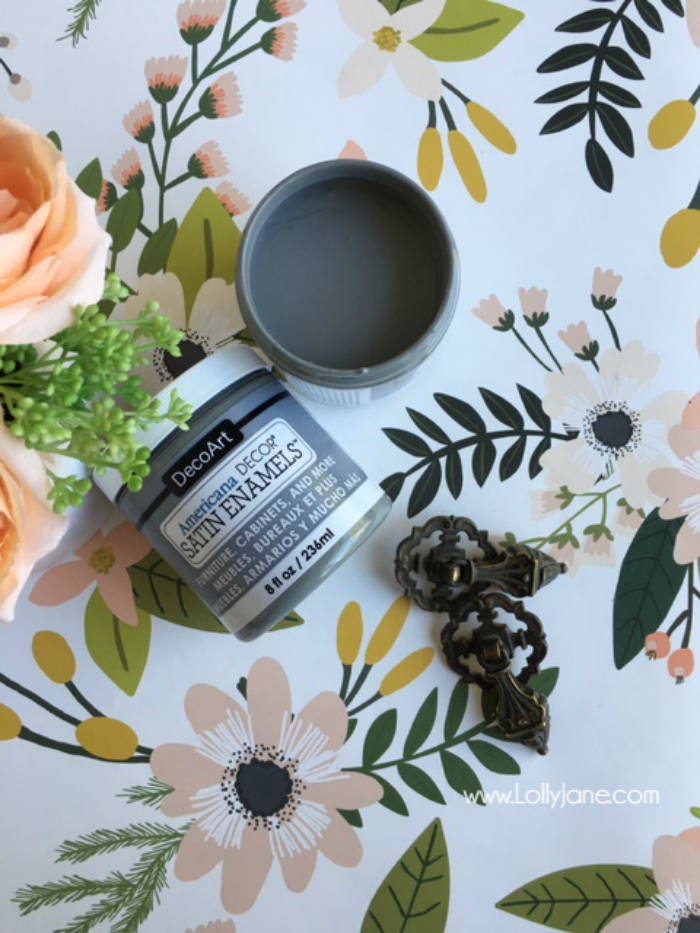
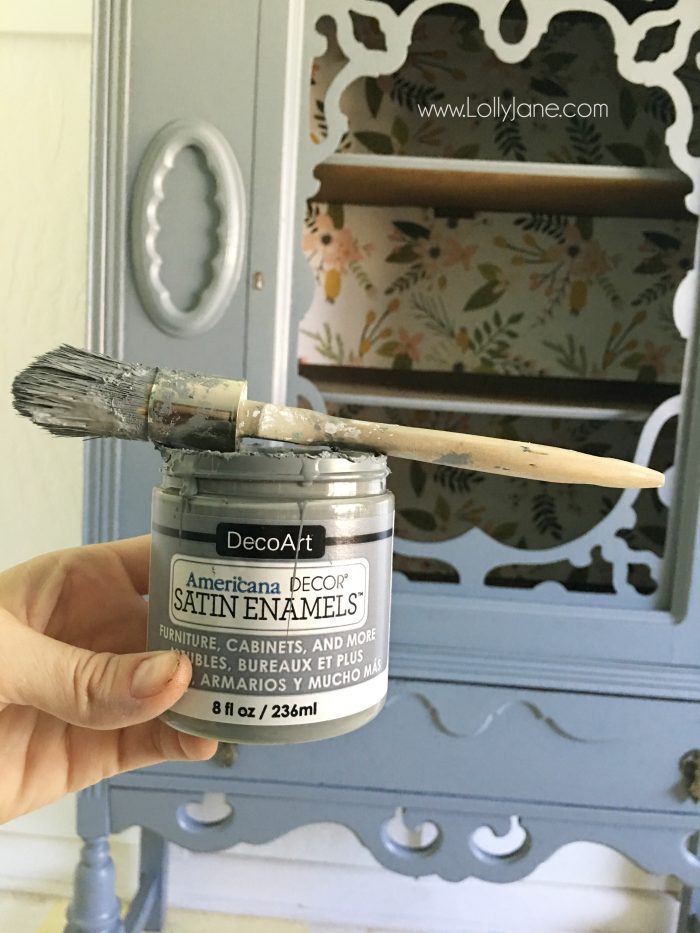
- 1 Jar Smoke Grey DecoArt Satin Enamel
- 1 Paint Brush
- 1 Roll of Floral Wallpaper
- 1 Jar of Decoupage
- Measuring Tape, Scissors, Pencil
- Optional: Sealer + New Paint Brush *I didn’t seal since this it’s stored in a low traffic room.
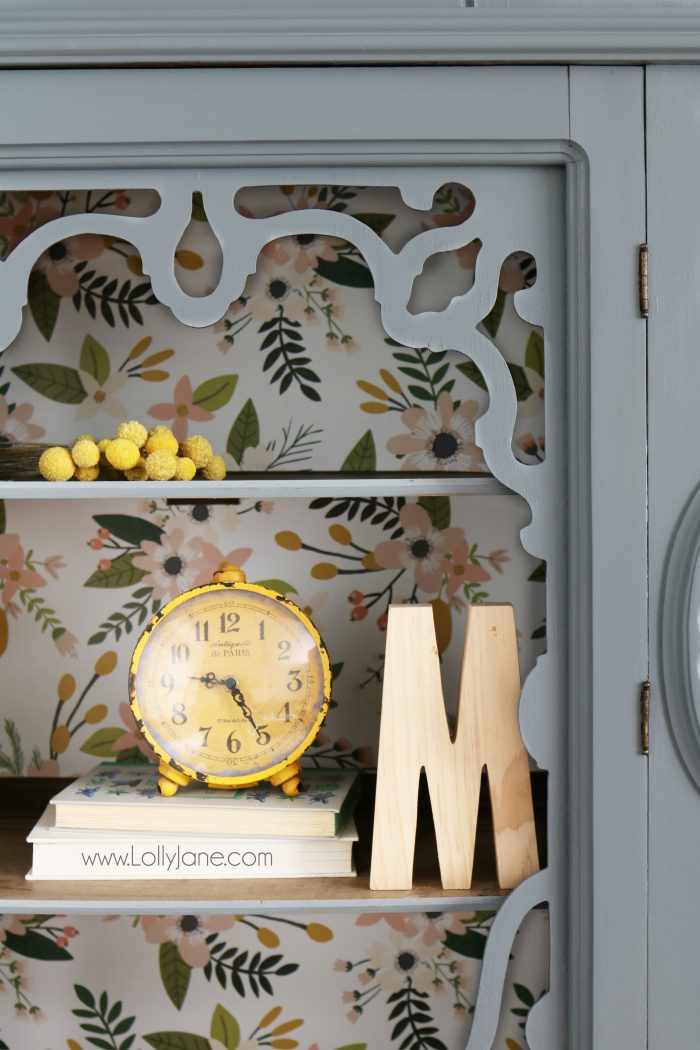
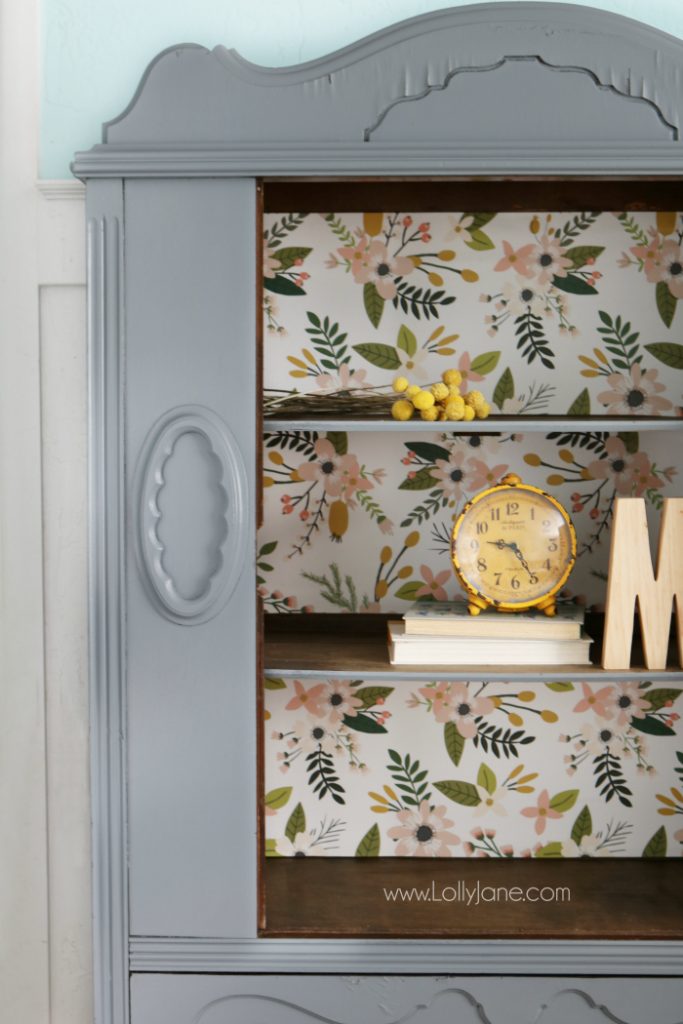
We knew we wanted to pair “Smoke Grey” with a floral paper on the backside of the hutch like my aqua hutch shown behind this one. We found this sprigs and blooms design and chose the gift wrap option. Doesn’t it look amazing with the paint?
How to Paint Furniture The Easy Way
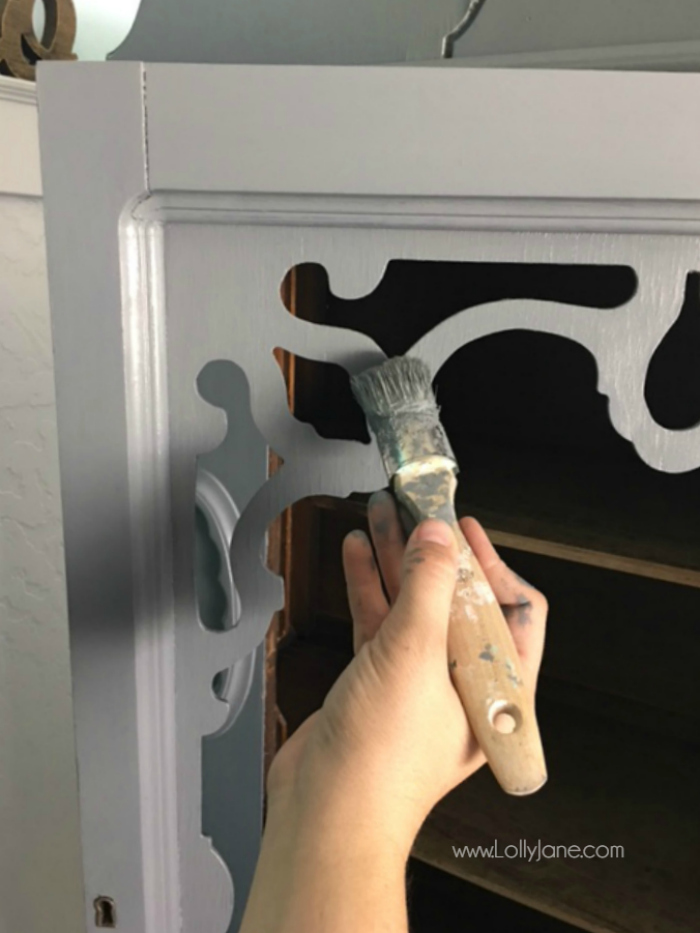
When we first started painting furniture over a decade ago, there were so many rules and it was really intimidating. Since painted furniture is so trendy now, paint companies have really dumbed it down for consumers so all you need know is a jar of this satin enamel paint. No prep, just paint! I started hand brushing the paint on and immediately noticed how fast it dried. I had to move fast which was great because I was able to immediately start my second coat. When painting, be sure to go WITH the grain of the wood, not against it, for a more natural look.
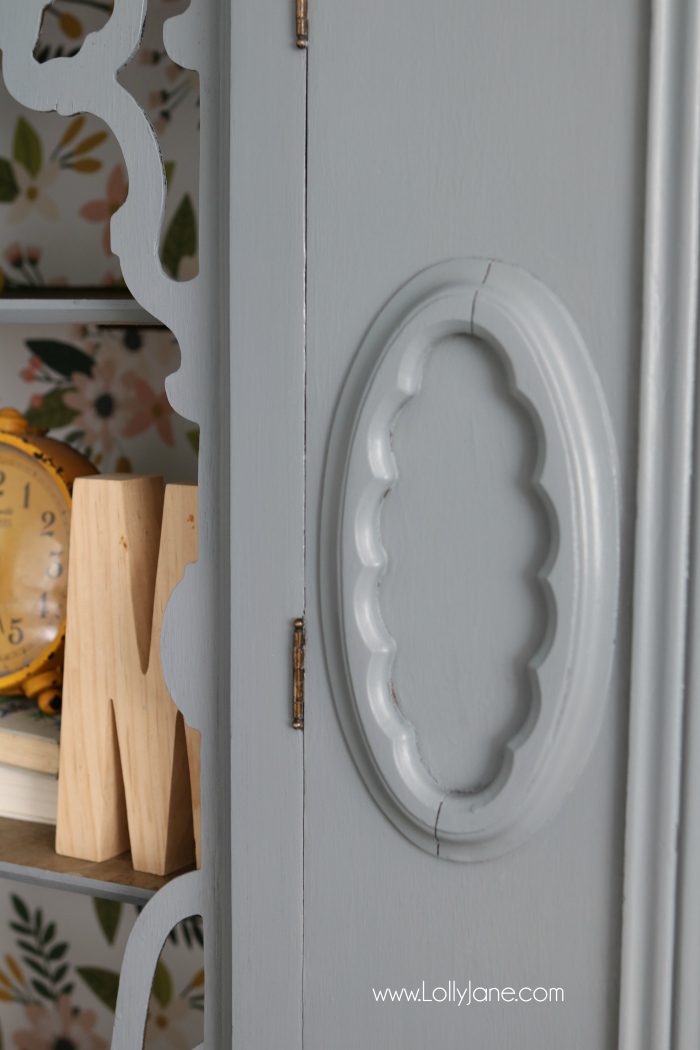
DIY Painted Hutch Makeover – No Brush Strokes!
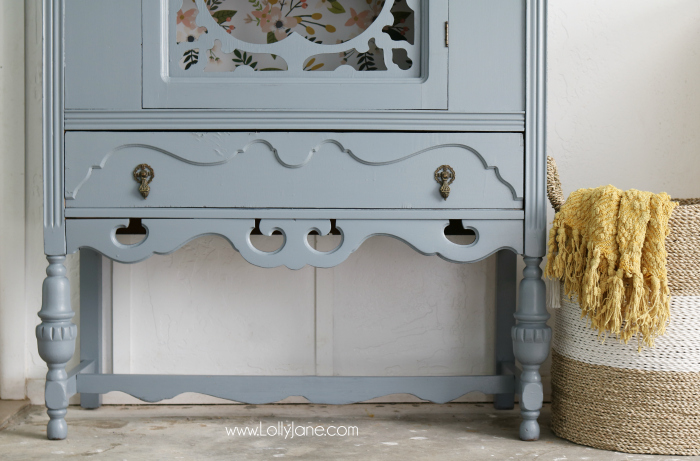
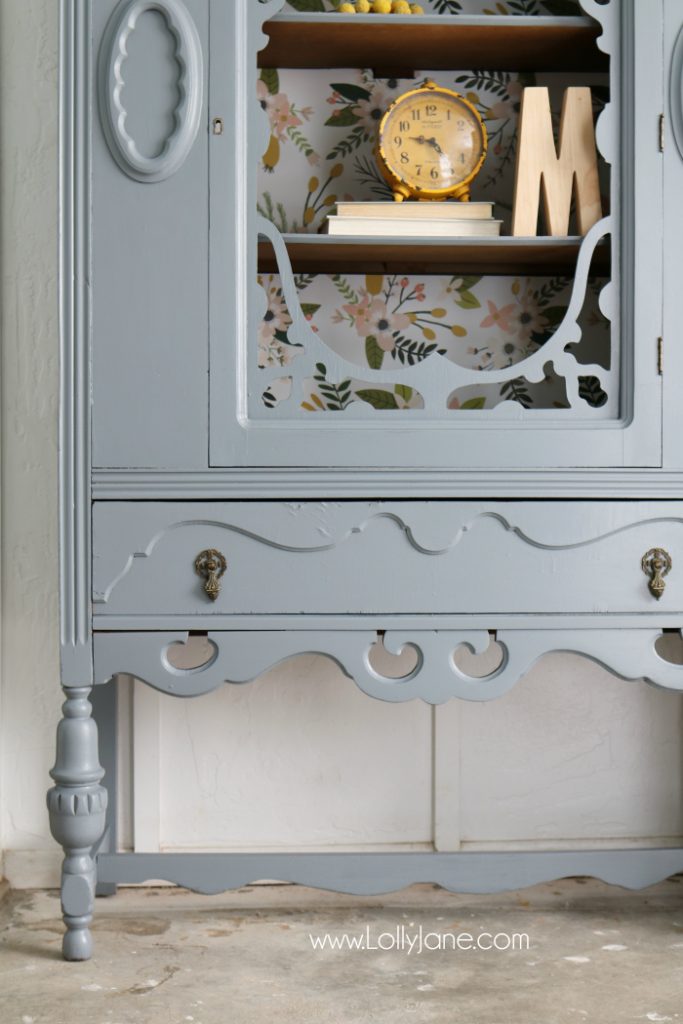
Notice how smooth the paint is? I was pretty surprised how thick it went on and that it didn’t leave brush strokes. That’s a major win to this pro painter!
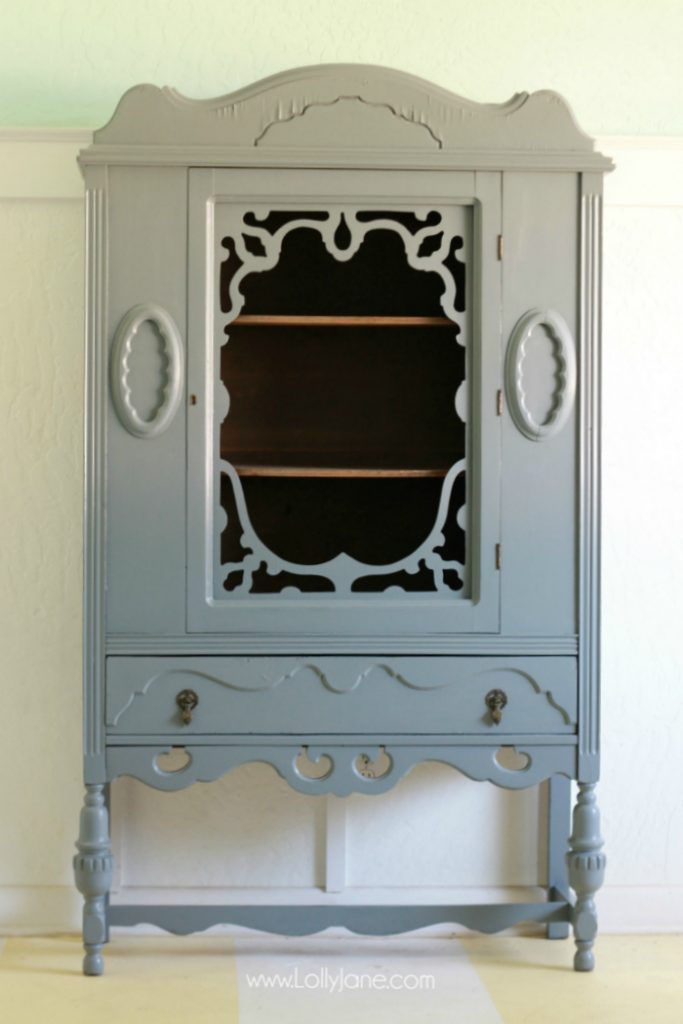
Here she is again, freshly painted! Isn’t it so pretty? What a transformation!
I decoupaged the paper onto the back using a foam brush, very fast process. Simply measure, cut, paste.
DIY Painted Hutch Makeover – Easy Floral Accent
Isn’t this paint/paper combo perfect together?
I did a light sand but the water damage was pretty gnarly. I still love the outcome, character counts.
Visit more of our Furniture Makeovers:
- Chalk Paint Side Table
- Stained Dining Room Table
- Red Glossy Dresser
- Black Side Table
- Navy Stacked Dresser
DIY Painted Hutch Makeover – Satin Enamels Paint For The Win!
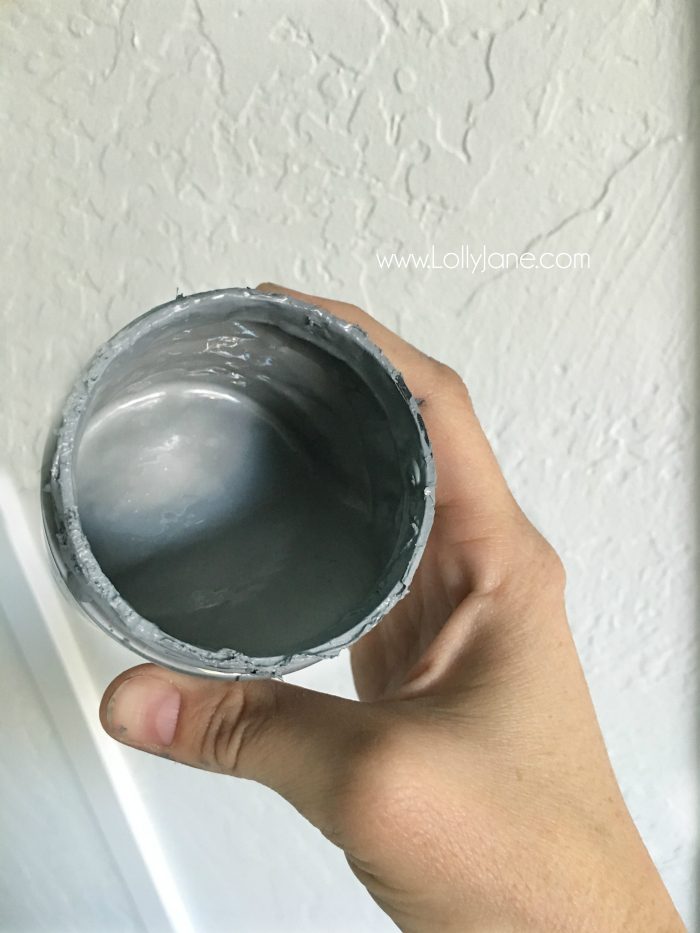
I had 3 jars of paint ready for this hutch and was happily surprised to use 2/3 of only 1 jar! Wow!
Please pin so your friend’s can see how easy this DIY is as well!
Thanks so much to our favorite paint company, DecoArt, for sponsoring today’s post, see our disclosure. And thanks to you for supporting companies that keep LJ rockin and rollin! See more of our DecoArt furniture makeovers like our baby crib turned porch swing using Outdoor Living paint, plus our chalky finish chair makeover and lastly, our chalky finish rolling garden cart.


Nice! I love love love the wallpaper and am going to look it up now! It would look great in the drawers of an antique vanity I’m fixing to start. As always, you do beautiful work! ?
Gorgeous,I have several pieces that I would like to redo but have always been afraid of messing them up. You have shown me how easy this can be and I think that I will soon go paint shopping and give a small piece of furniture a try. Thanks for giving me the courage.
Oh yay, Lori, glad to hear you’re feeling empowered! YOU CAN DO IT!! xo
I realize this post is old but I just purchased a somewhat similar china cabinet last night and noticed some potential issues I may have. Were you able to somehow take the shelves out of your cabinet to paint/wallpaper? If so, how?
Hi Ashley! We left the shelves in and painted the fronts only. We then papered around it too. Hope that helps 🙂
I love that hutch it is gorgeous and I love the makeover it is perfect
Thank you!! I looooove how it turned out too!
Love love love it – you make it look so easy!! I want to go paint something NOW!!
Hi friend!! I didn’t love the paper process, next time I’ll use a spray adhesive instead of decoupage but I love how it turned out in the end, yay!
Okay this is so adorable. I love the floral mixed with the gray! GREAT JOB! Thanks for sharing at the Monday Funday Party. — Emily
Your beautiful curvy legs hutch is my featured for this week at “Inspiration Galore Project Party”, at fabifabu.com. Thank you for posting. Hope to see you there this week.
Gorgeous makeover! The paper looks absolutely lovely with the grey paint. Thank you so much for linking it up to our Inspiration Galore Project Party. Pinned and saved.
What a gorgeous makeover! I love the color you chose and the floral paper is the perfect finishing touch. Thanks for sharing at Snickerdoodle. I’ll be featuring your hutch makeover at today’s party. Hope to see you there!
This is such a beautiful transformation! The color is great and the paper backing looks so cute! I can’t believe it only took 2/3 of the jar of paint, wow!
I was pleasantly surprised, too!! Thanks, Keri!
love love love! thanks for sharing on craft schooling Sunday!
Thanks sooo much!! So glad you love it 😀
Wow! What an incredible transformation! Love the grey paint with that floral print. Featuring this makeover tomorrow night at our best of the weekend link party! Thanks so much for linking up with us!
I love Deco Art! You guys did a great job with the hutch revival. It was featured on A Little Bird Told Me Link Party.
Oh my that hutch is too cute! Love that color too. Thanks for sharing!
Wow! That hutch is so unique and gorgeous, I totally get why you chose it to makeover. The color is gorgeous and the florals add a pop that I love! Thanks for sharing your makeover with us at Merry Monday this week!
Your hutch turned out to be lovely!! Thanks for sharing at Merry Mondays.
Stunning! I love the fabric choice! Thanks for sharing. You are one of the features at the Make it Pretty Monday party at The Dedicated House. Here is the link to this week’s bash. http://www.thededicatedhouse.com/2016/09/make-pretty-monday-week-192.html Have a happy week! Toodles, Kathryn @TheDedicatedHouse
Beautiful job on the hutch. I absolutely love chalk paint and have been using it for a few years. It never fails to transform old and ugly to new and beautiful. Thanks for sharing at Your Inspired Designs.
That turned out great and I love how little paint you used. Awesome coverage.
Gorgeous ~ I love it! Thanks for sharing @Vintage Charm. Pinned to our Features & Favorites!
Thanks so much, Cecilia!! XO
This is so beautiful! I absolutely love the wallpaper you used, it looks great with that paint colour!
Thaks, Alysha! We are so excited how it turned out 😀
Wonderful transformation. Love the floral paper you used. Thank you for sharing with us at #HomeMattersParty.See you again next week.
Thanks so much, Sahana!!
The cabinet is beautiful and the paper on the back is the right touch. Lovely job.
What a transformation! I love the colour #NaturallyCrafty
Thanks, Catherine! The color is amazing, right?
This is such a great transformation! I love that piece of furniture and the color and paper combo is absolutely beautiful! Well done!
Aww, thanks, Kristen!
Looks great! Love the paper backing too! Visiting from No Rules Weekend Blog Party #200.
Thanks for visiting!
I love this piece and the wallpaper is fabulous! Thanks for sharing it with SYC
hugs,
Jann
Thanks so much, Jann! XO
I love the color that you used. I recently painted a sleigh bed with this paint and I could not believe how little paint it took.
Seriously! I was amazed how little we used as well! Highly recommend!
Love the color and especially the paper!! Great makeover. Pinning. Thanks for sharing 🙂
Thanks so much, Laurie! We’re so happy with the final outcome too <3
They gray you chose here is SO elegant and dreamy 🙂 We just started a new link party over at grandmashousediy.com called the “To Grandma’s House We Go” party that you might be interested in, thanks!
Thanks so much! We’d love to party with you!
Wonderful transformation, ladies! I love the chairs too. Thanks for sharing.
Thanks, Sandi!
It’s such an interesting piece and it looks beautiful. I especially like your choice of paper! Thanks!
Thanks so much, Jen! I love how it turned out!
This looks great! I just finished painting my entire formal dining room set with Annie Sloan paint. It’s so fun to see the difference.I love the color you chose! Thank you so much for sharing this at #100HappyDays!
Hi Valerie! We have yet to use ASCP, we need to try it for comparison. We love the sheen on this without having to add wax or another sealer (:
Did you use any old brush or is there a specific kind we need to buy?
Hi Brittney! We used a BB Frosch paint brush, you can snag one from bitly.com/bbfrosch, we used a medium size. (:
It’s stunning!!! And totally agree! Character counts 😉
Thanks so much, Kristie!! Flaws on furniture is my fav 😀
Wow! This is lovely! What a transformation!
http://www.sistersweetly.wordpress.com
Thanks, ladies! It was a fun makeover (: