Acrylic Scroll Wood Hanging tutorial
This DIY Acrylic Wood Scroll tutorial is sponsored by Adobe Photoshop Elements 2018. All opinions, as always, are our very own.
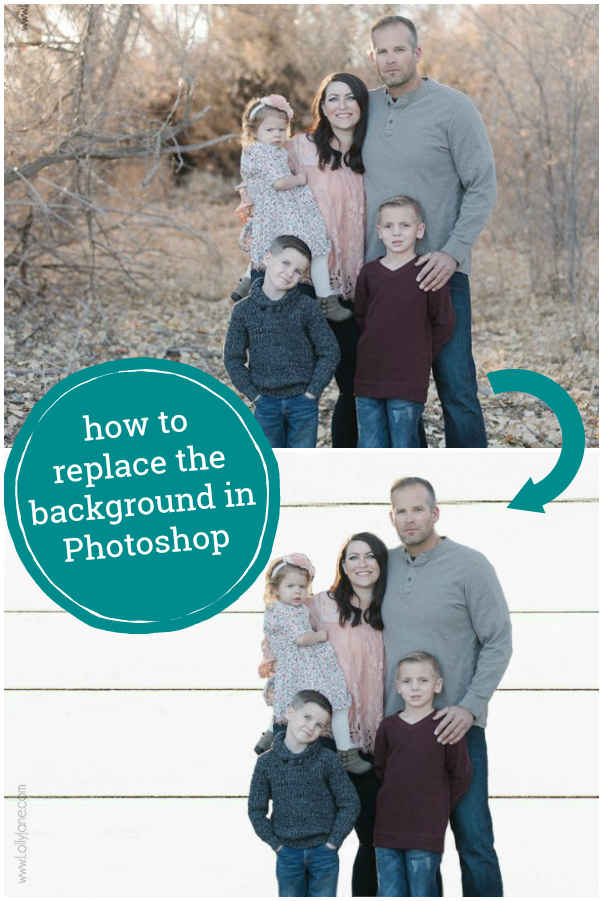
Have a great photo but the background isn’t so great? Is someone’s eyes closed or not smiling? We’ll teach you 2 easy tricks to easily fix that in no time, thanks to Photoshop Elements 2018!
diy acrylic wood scroll – photoshop elements 2018
Behind every blogger’s flawless photos is a great editing software program. To get crisp pictures that help enhance our images (or hide dust bunnies under that DIY chair we just built, haha!) we rely on Photoshop Elements. Besides brightening images and fixing blemishes, Photoshop Elements 2018 has some EASY features that have blown my mind… and have me giddy to take even more pictures in the moment. It helps me not to stress about “perfect backgrounds” as I can fix that (or a silly face or closed eyes… ahem 6-year old child of mine!) in just a few steps! Mom win. And I got it all fancied up in our newest DIY Acrylic Wood Scroll Wall Hanging so it’s a house win, too!
Photoshop Elements is a total game changer for my editing and I can’t wait to share with you how this…
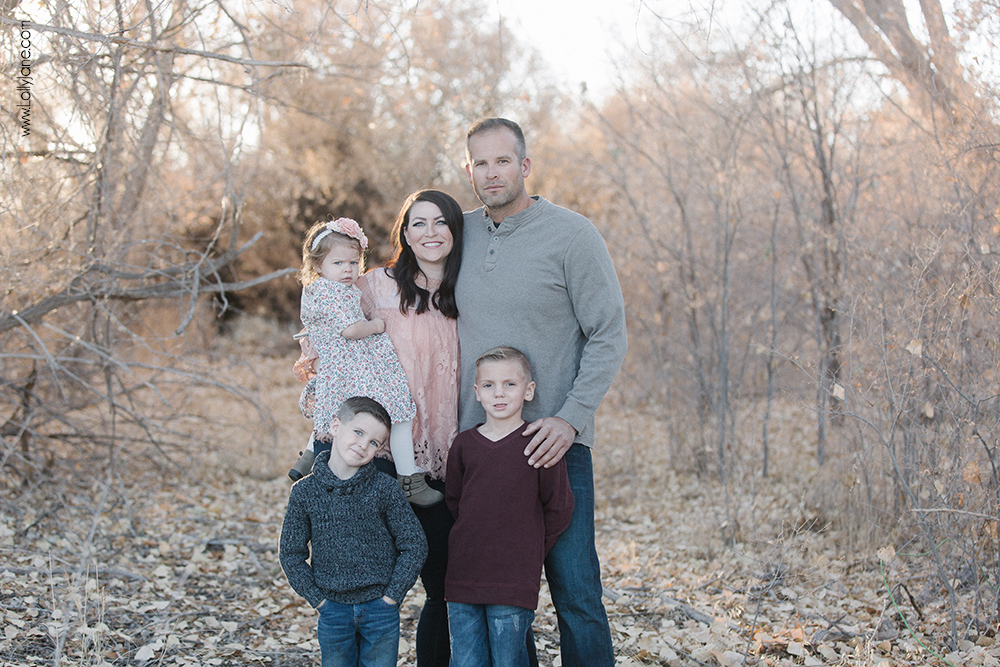
…turned into this…
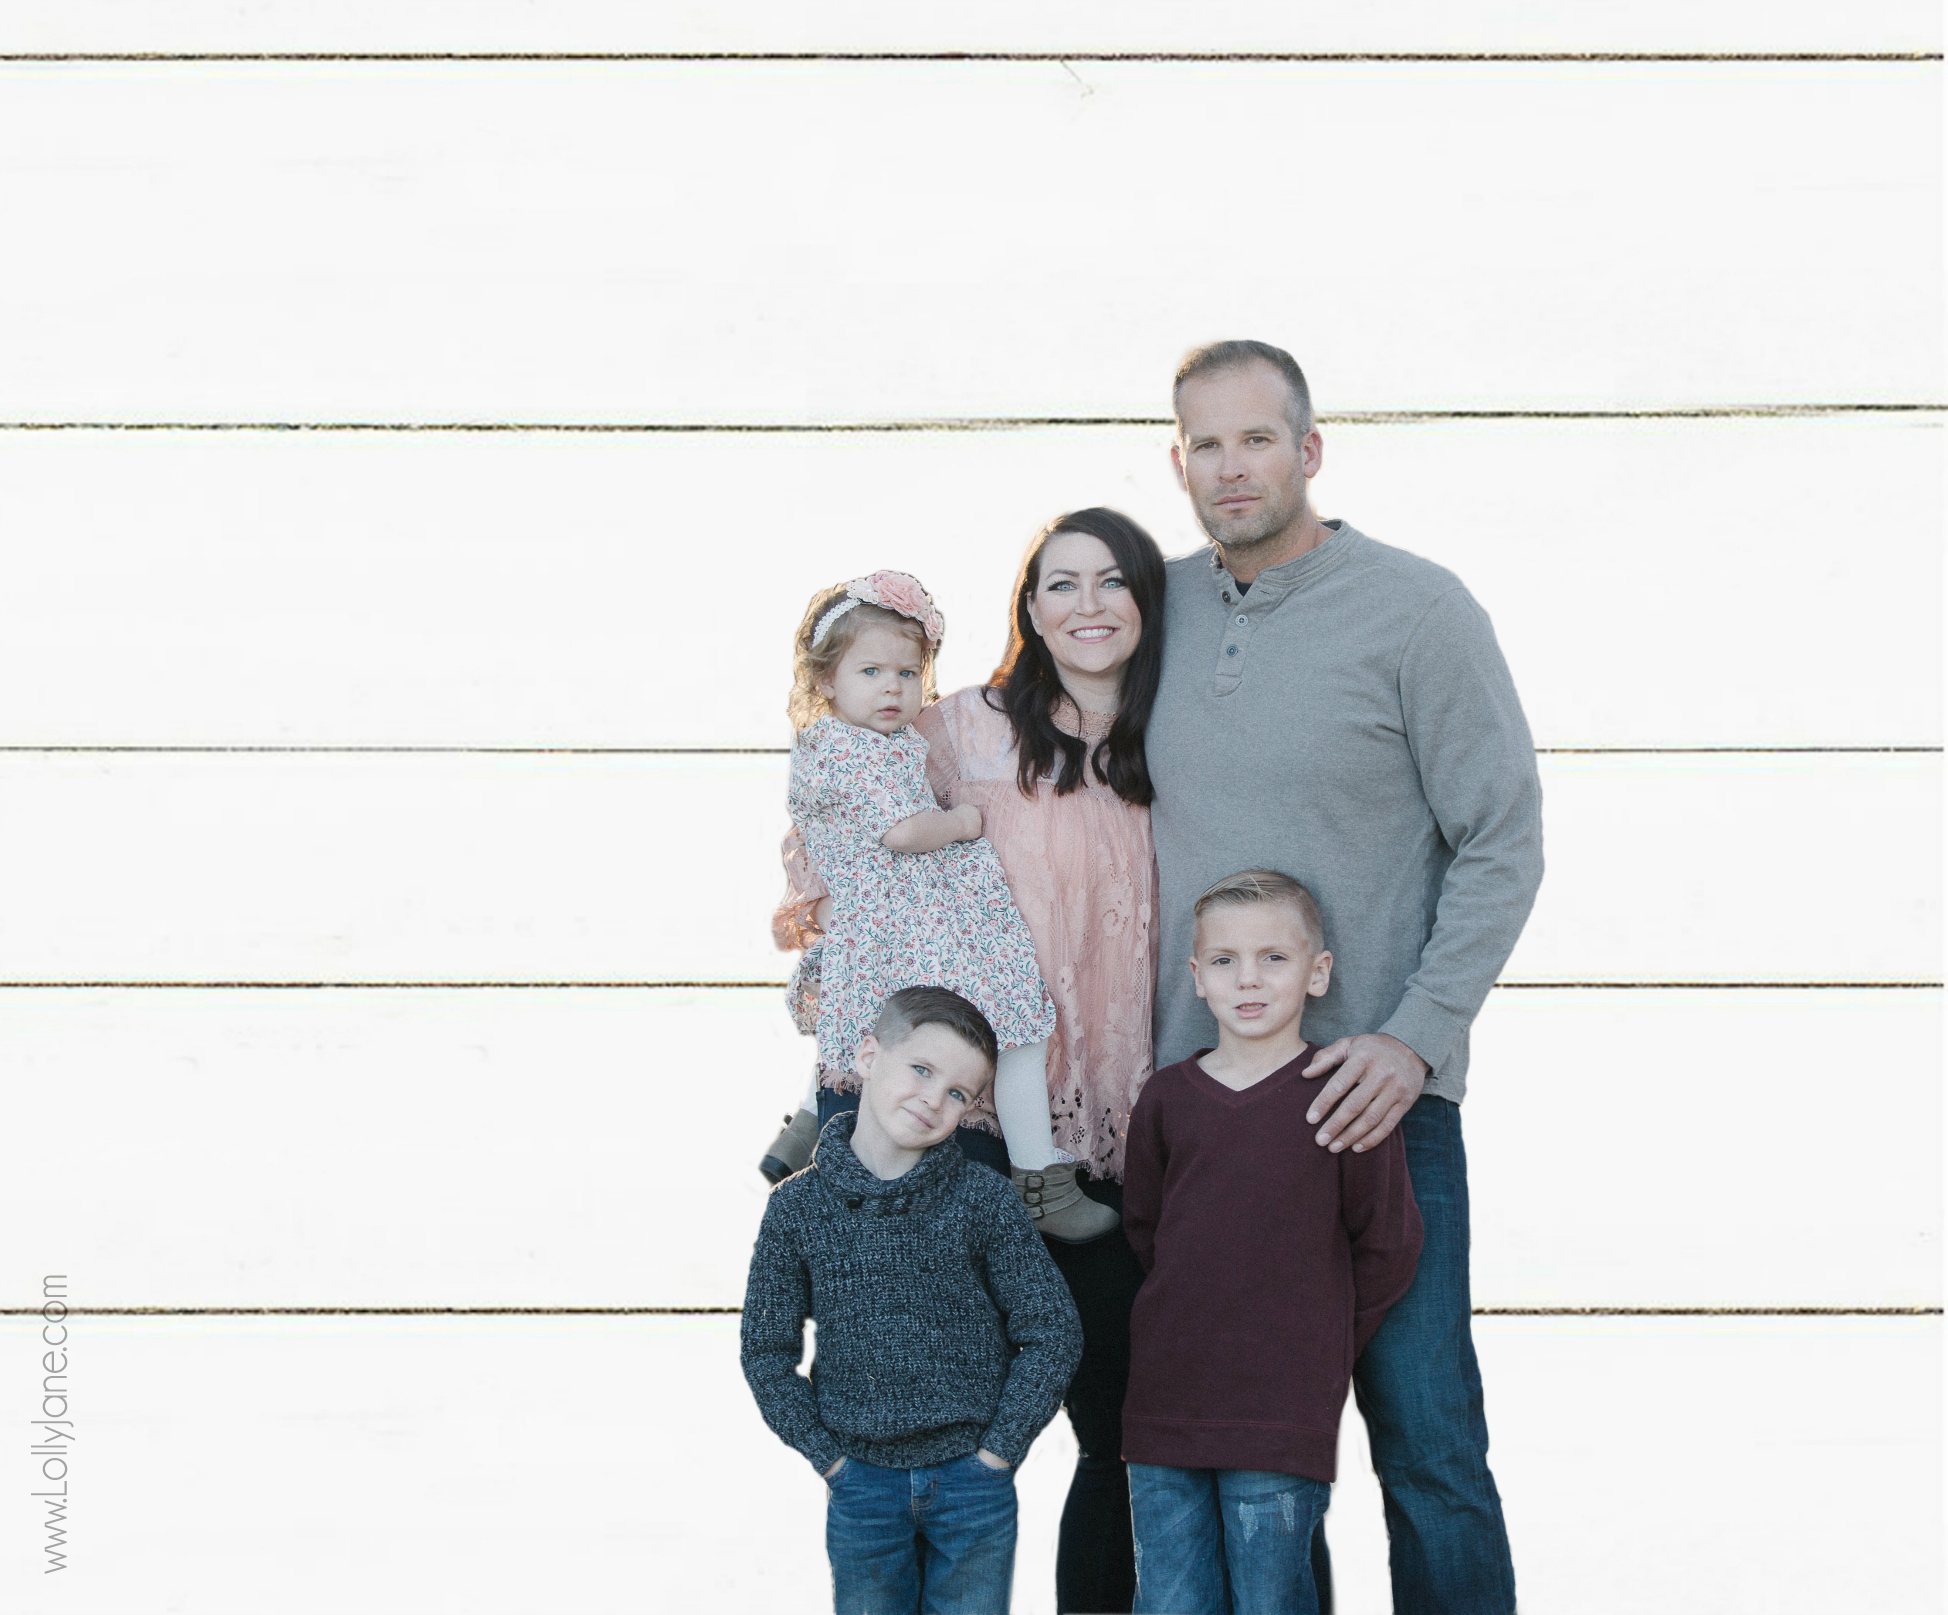
and now… this!
Before I get to the scroll DIY, I want to share these easy-to-do edits in Photoshop Elements 2018.
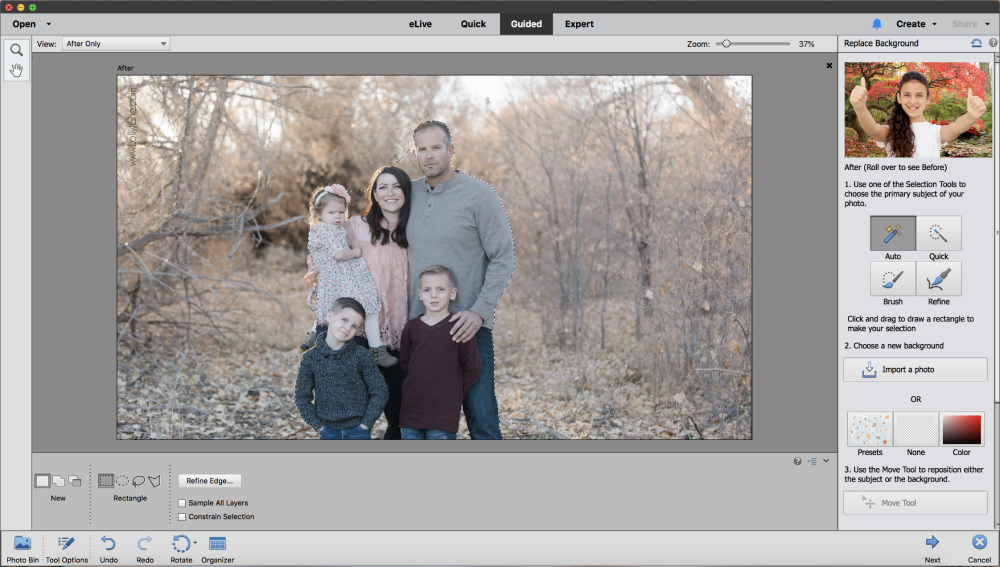
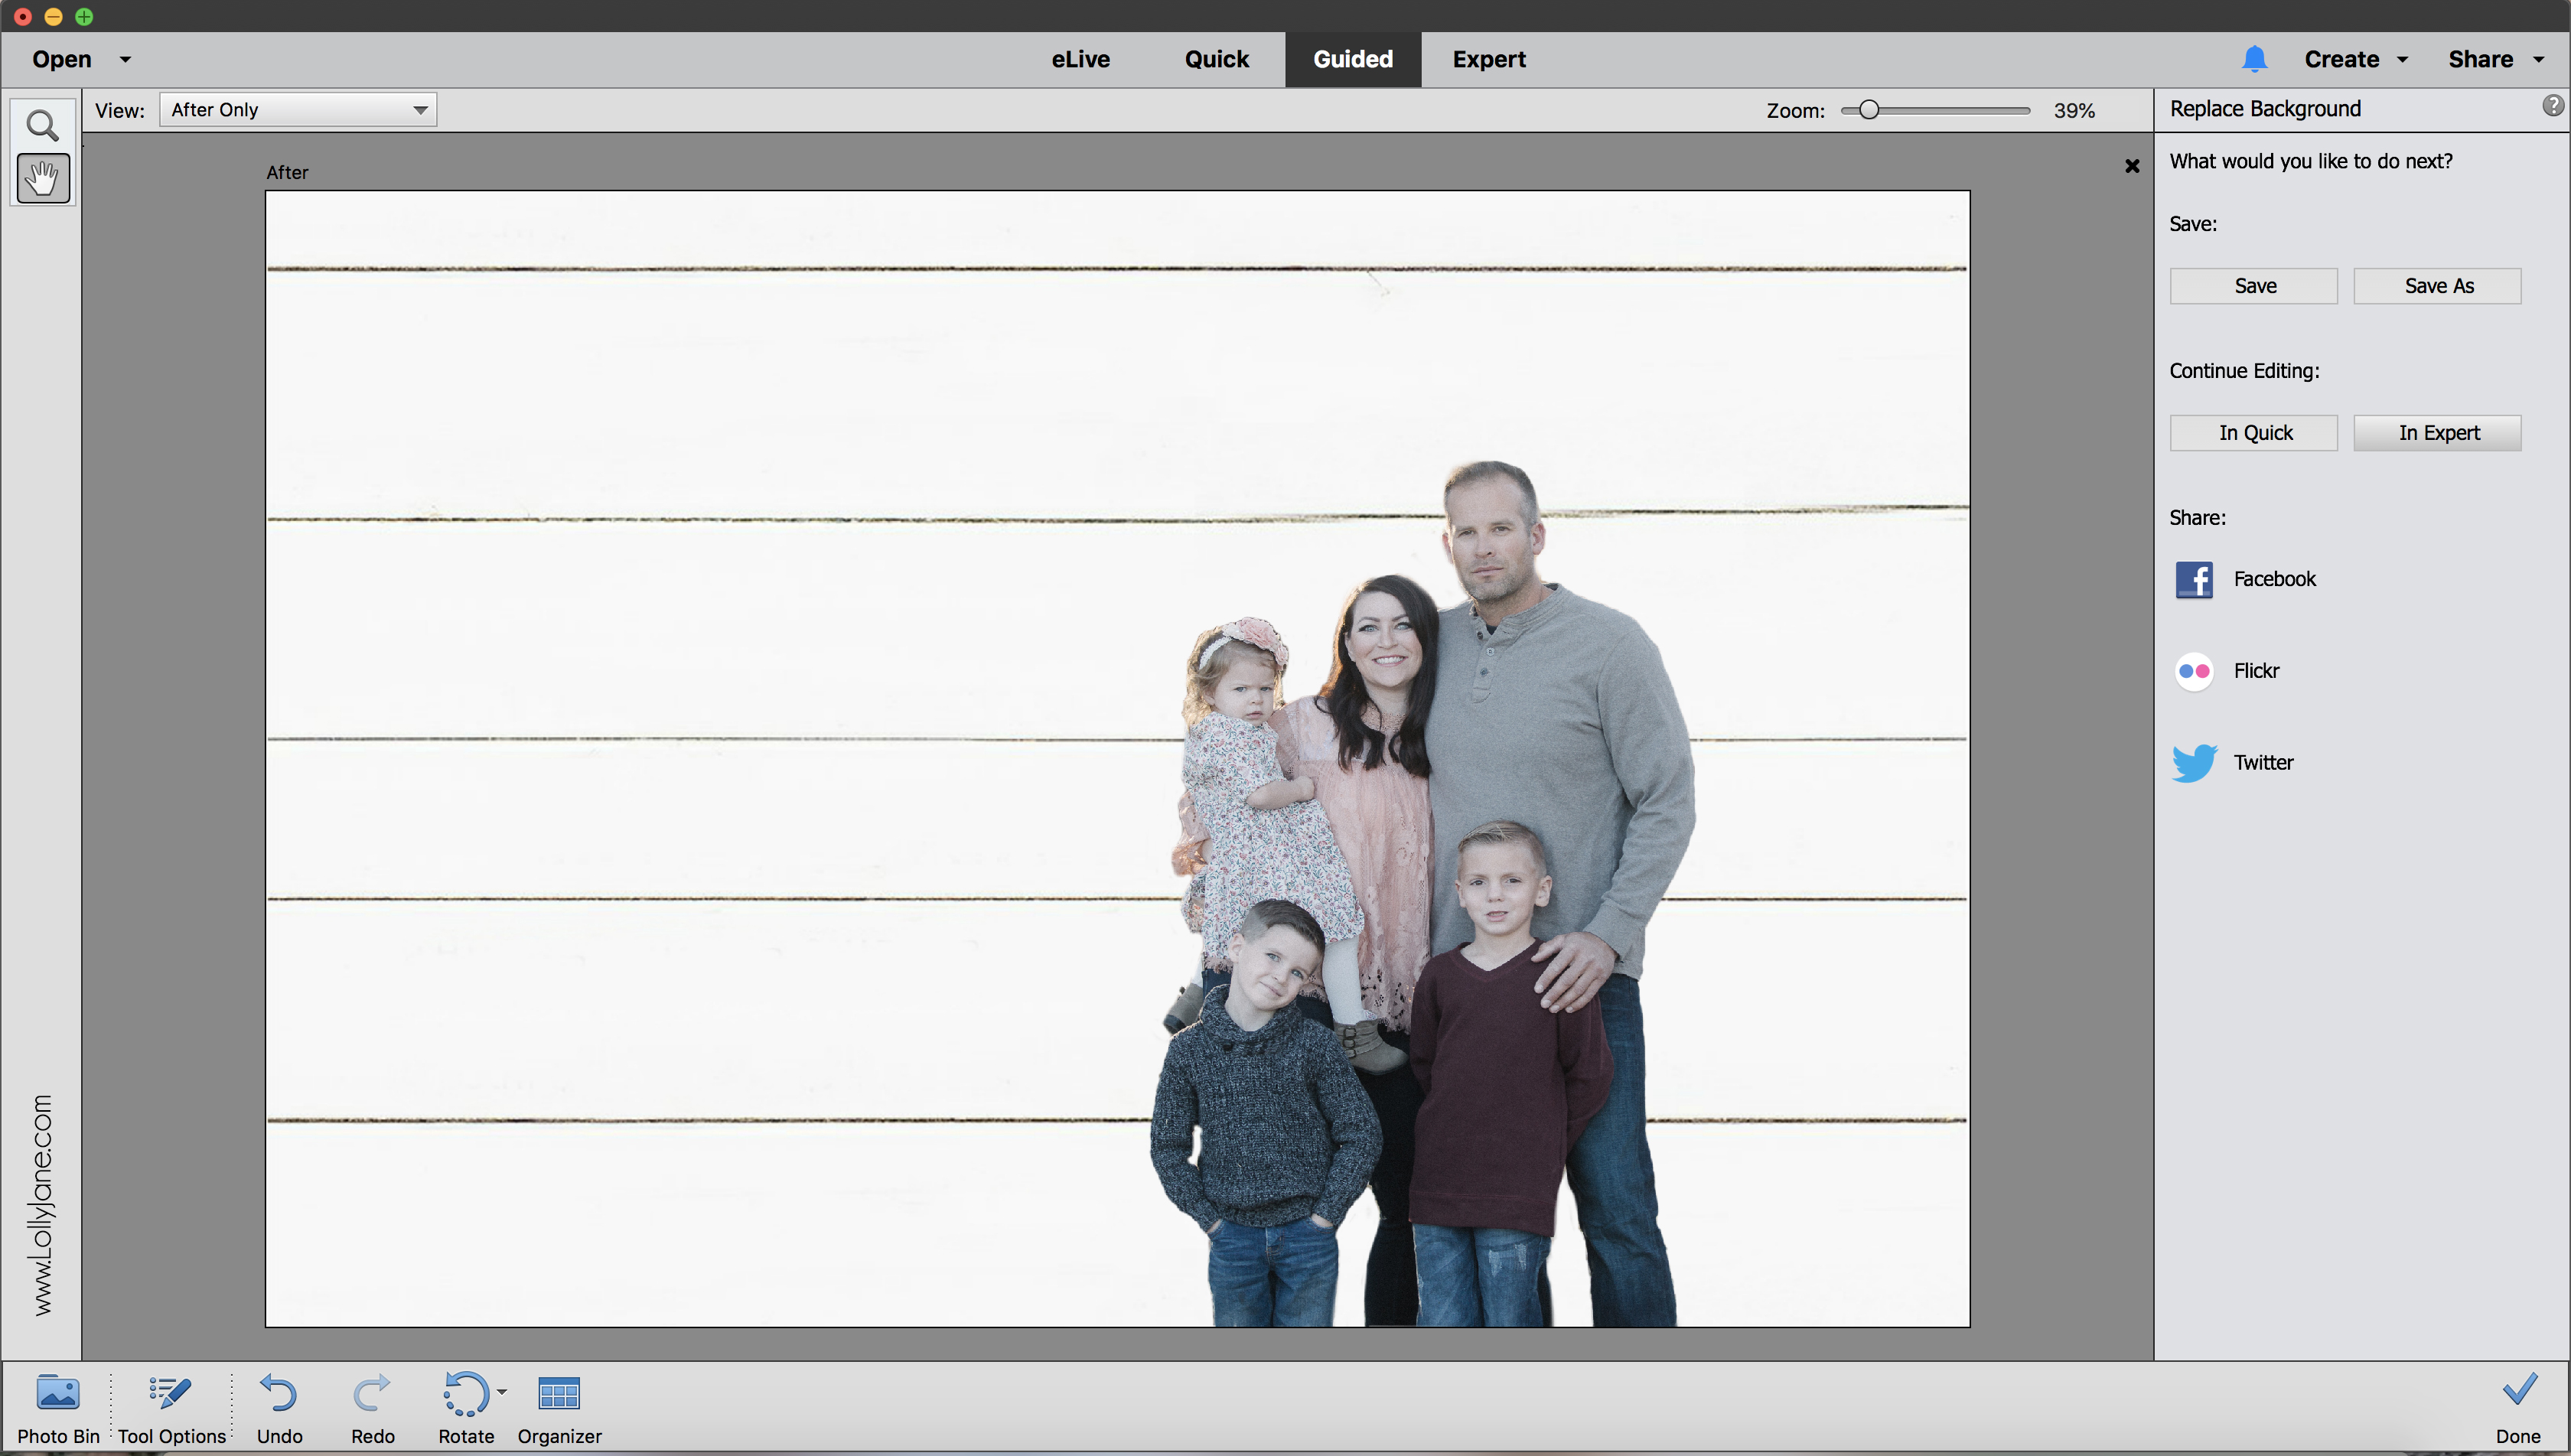
REPLACE BACKGROUND IN PHOTOSHOP ELEMENTS 2018
- Open your photo in Photoshop Elements 2018.
- Click the “Guided” tab, then select “Special Edits” and you will see “Replace Background” in the corner, click that.
- Use the Auto Selection tool around the part of your photo you want to keep and you’ll see those cute marching ants ready to work.
- You can either use PSE 2018’s presets or upload your own image to use as the background.
- It’s all about the details so use the Refine Edge Brush to either Add (bring back the original image that the marching ants could have missed) or Subtract (this erases what the Auto Selection tool pulled over and your background will appear.) Be sure to use the sizing tool to get inside all those cracks (between legs, under arms, etc.) to really make your background look legit.
- That’s it! Super easy to do and in just a few minutes you have completely transformed your photo!
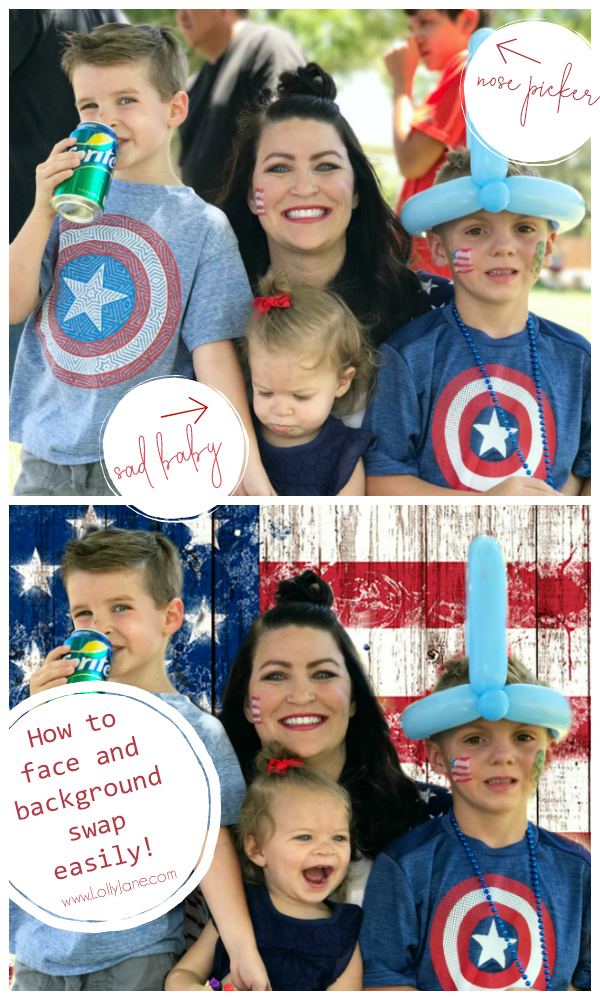
If you have a few images to choose from and you like your facial expression better on one, but your son’s eyes are actually opened on the other, then don’t fret! You can simply “face swap” and merge the 2 photos into one. It’s like magic!
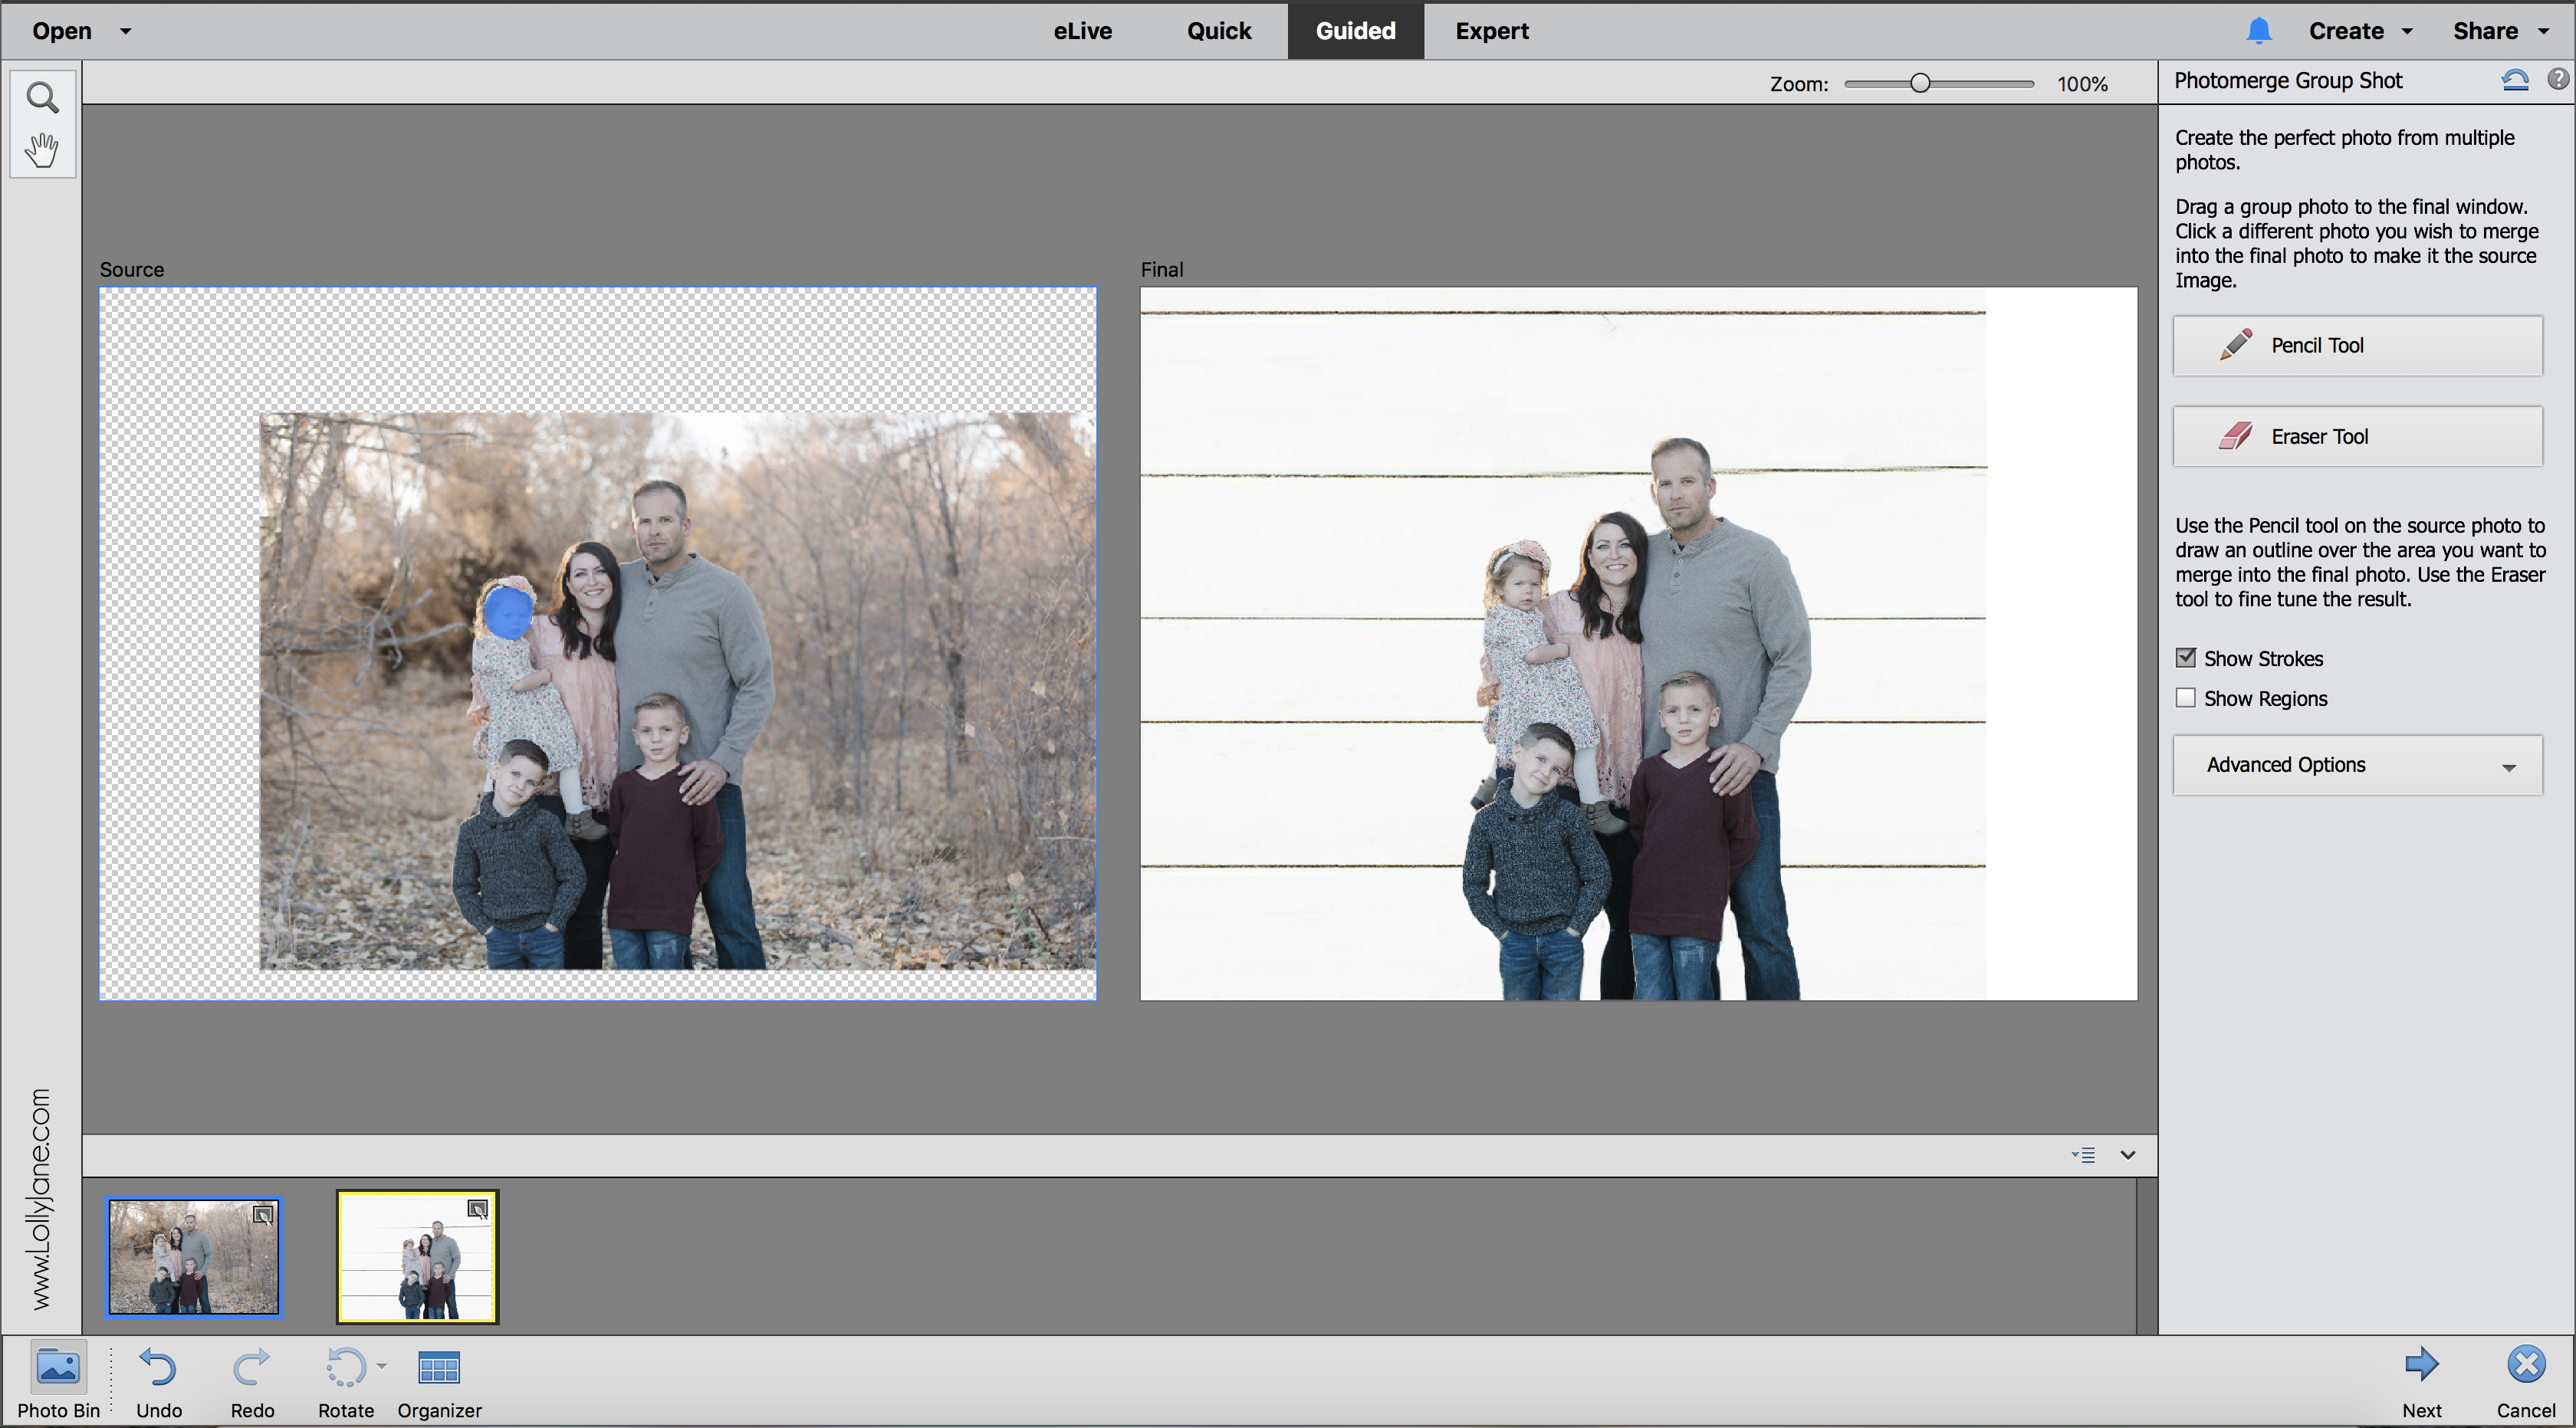
PHOTOMERGE GROUP SHOT IN PHOTOSHOP ELEMENTS 2018
Click the “Guided” tab, then select “Photomerge” and you will see “Photomerge Group Shot”, click that.
Select your “source” photo (this is the one you will want to pull specific faces over to be on the final image) then drag your base image to the right.
Use the Pencil tool and highlight the face or person you want to be pulled over.
That’s it! PSE 2018 does all the work for you! If you pulled too much over, then use the Eraser tool to tidy up the image.
You can get your own FREE trial of Photoshop Elements 2018 HERE if you would like to play with these edits.
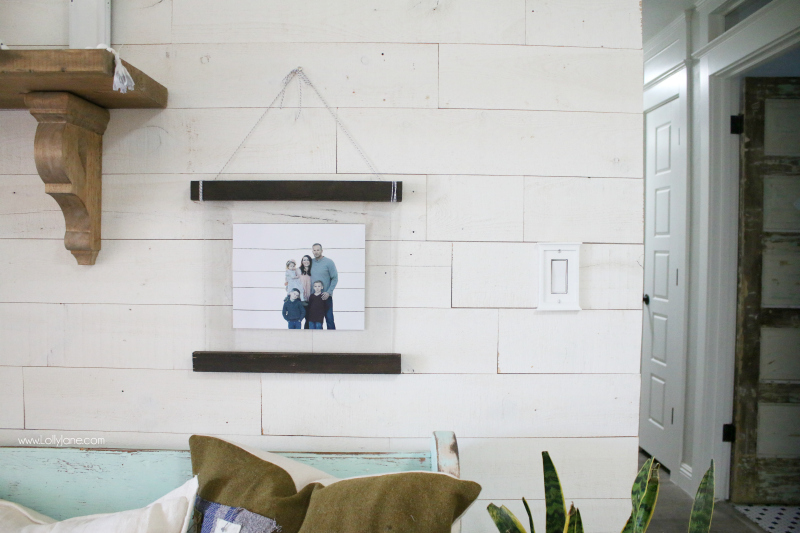
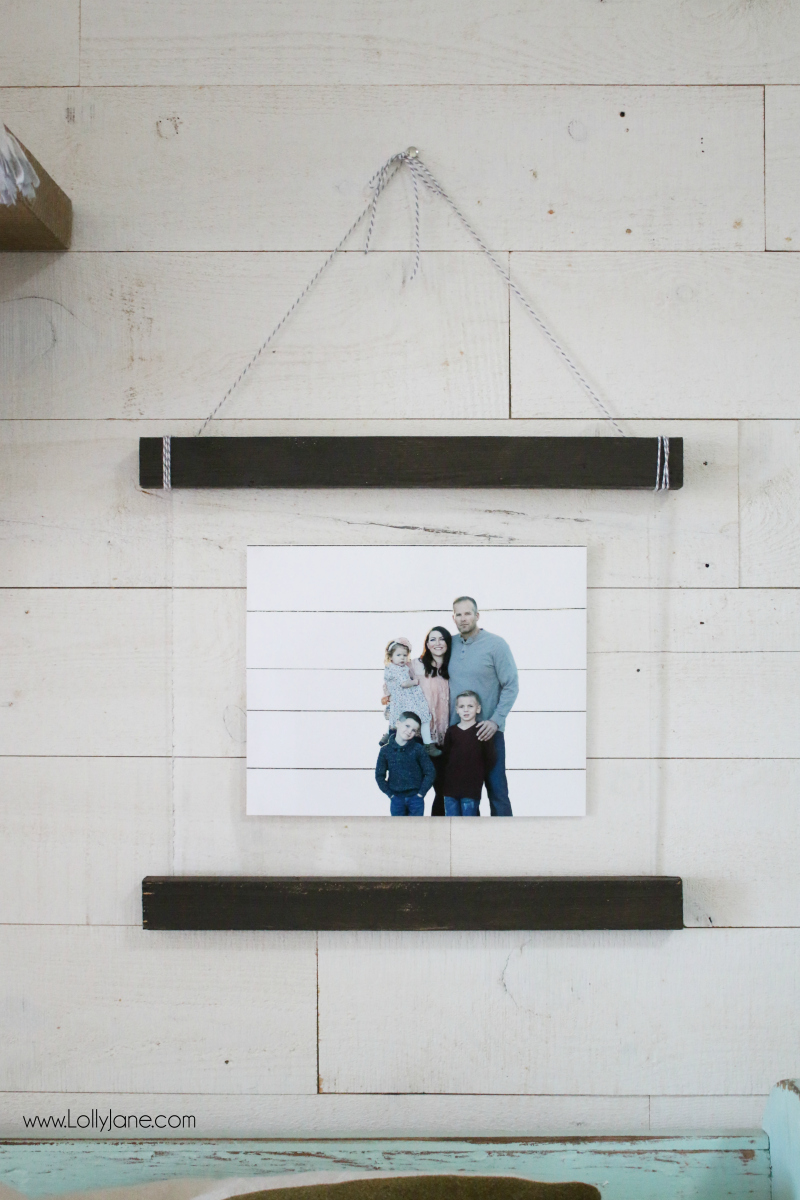
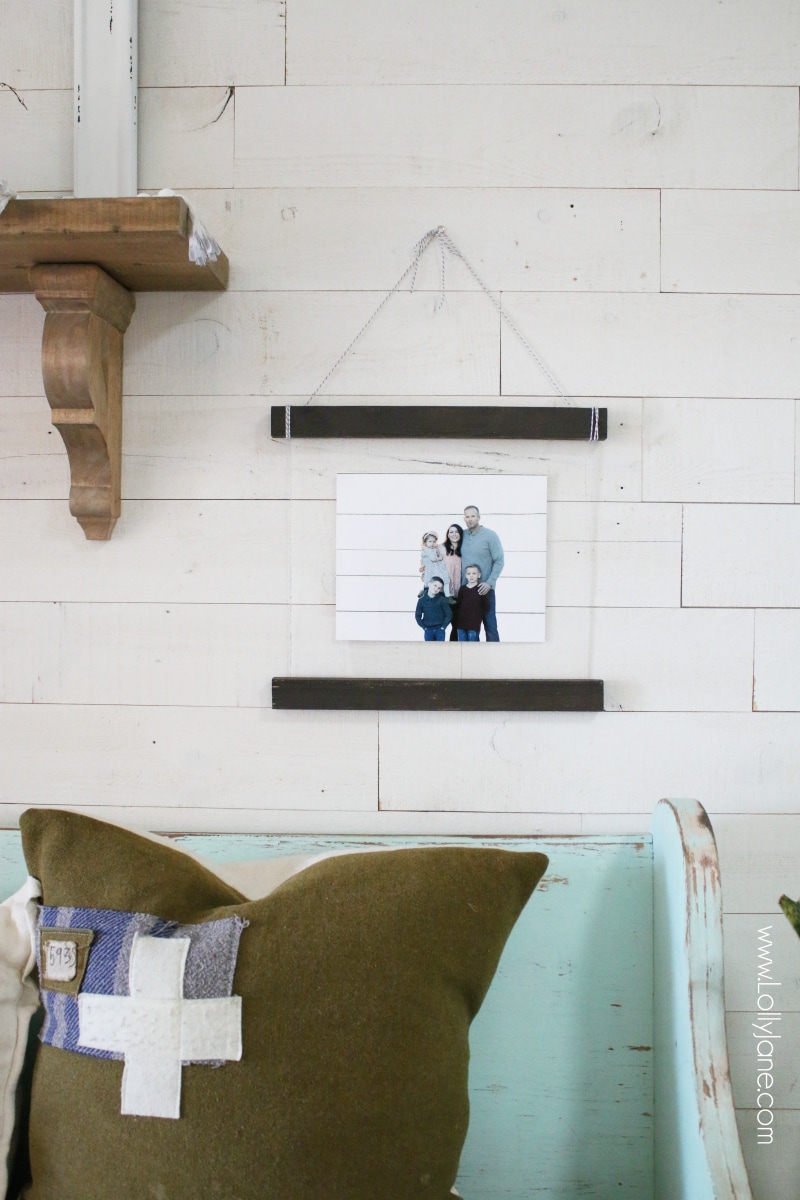
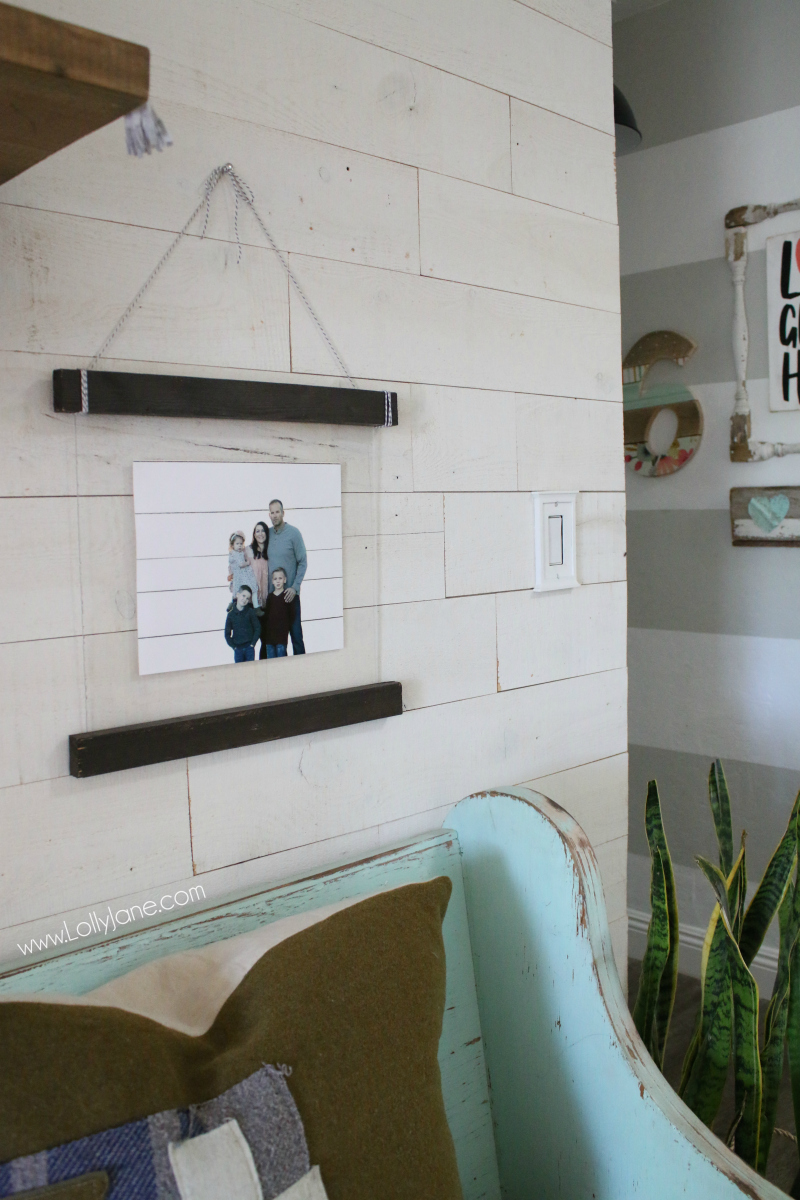
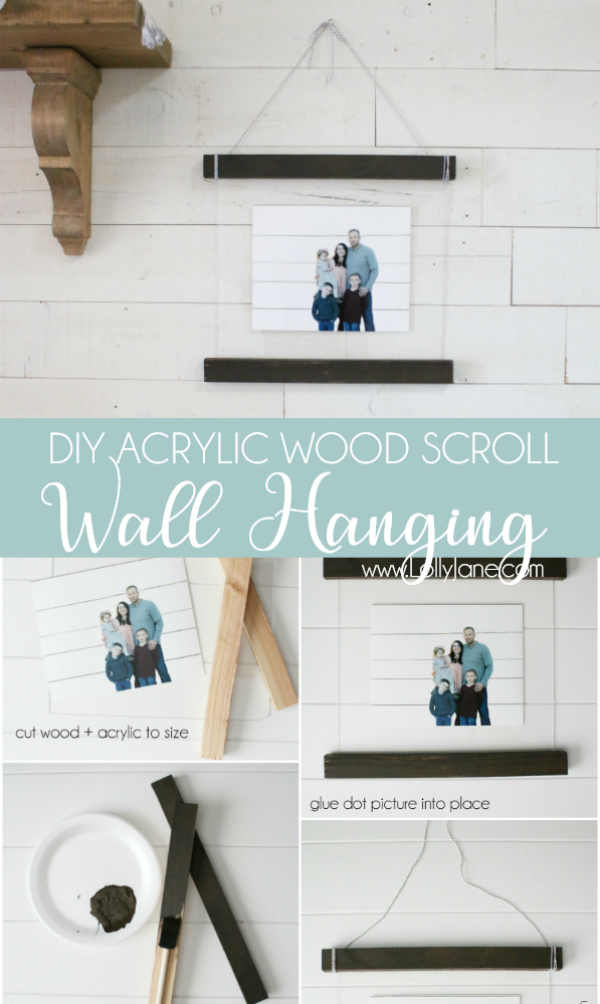
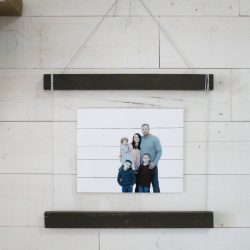
Now, onto the craft tutorial! I am always moving things around and loved the idea of our fabric wall hanging, but thought it would be great to fill it with our latest family photo and be able to update it each year so viola! Our updated wooden/acrylic wall hanging scroll was born.
DIY Acrylic Wood Scroll
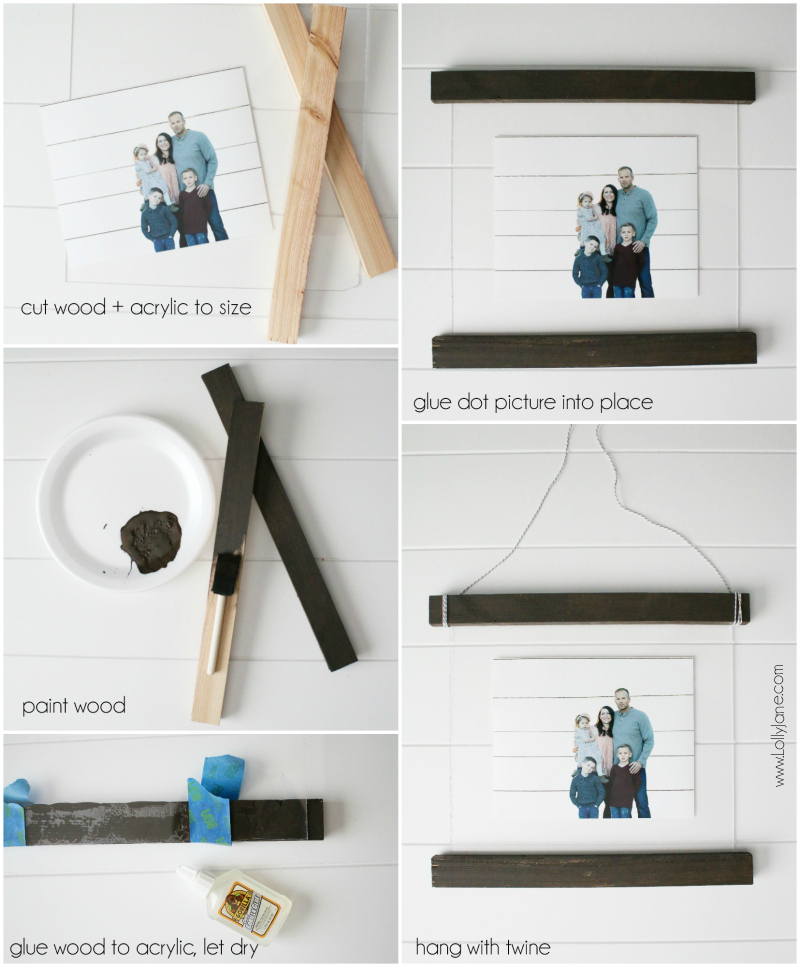
Supplies needed to create a DIY acrylic wood scroll:
- (2) 2″ x 16″ sized wood pieces
- Plexiglass cut to 14″ x 14″
- Hot glue (or Gorilla Glue)
- Acrylic paint + foam brush
- Glue dots
- 8×10 photo
How to create a wood hanging scroll:
- Cut wood + plexiglass to size.
- Paint wood.
- Glue wood directly to acrylic.
- Use glue dots to attach picture to acrylic.
- Wrap twine around top pieces of wood to hang.
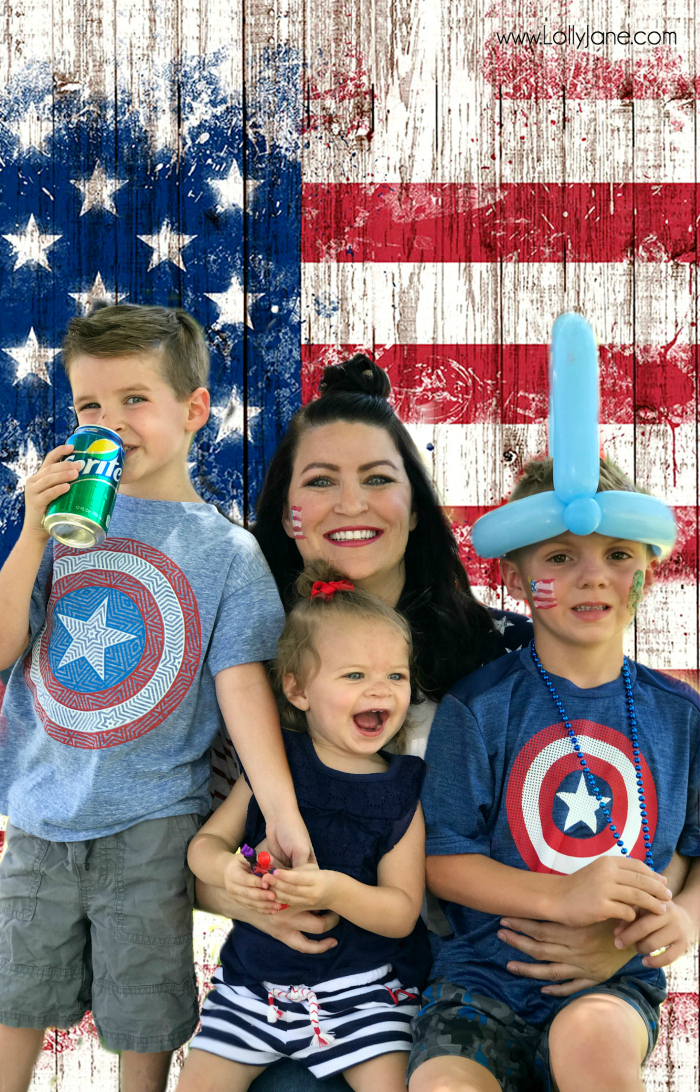
Last 4th of July, we spent the morning at our community park with games and face painting, balloon making, and more. When my husband snapped this picture he didn’t wait until another family was walking by and caught their son on camera picking his nose… and now it is in my shot forever. OR SO I THOUGHT! I simply uploaded a festive background and ta-da! Fixed.
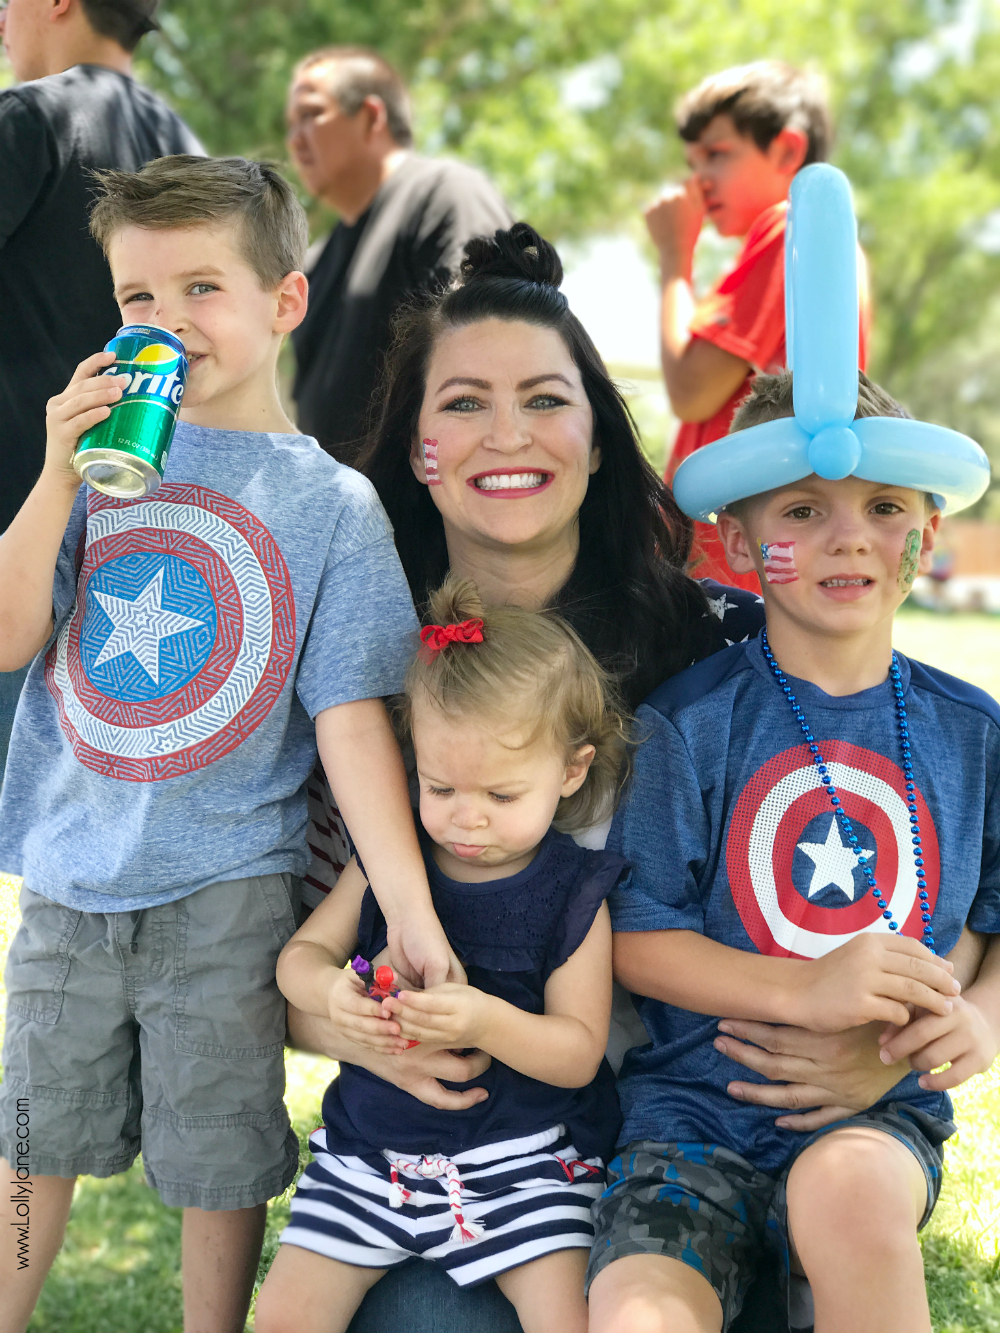
And, I was able to use the Group Photomerge Guided Edit to fix my wiggly 1-year old’s face to be looking up and not down. Whoo hoo! Dare I say, picture perfect? Yes, yes I do. 😉
Would you like to try Photoshop Elements 2018 for free? You can get your own trial here. We would love to see your own images with new backgrounds, perfectly-merged photos to finally get everyone with their eyes opened and smiling, OR just tell us your favorite edits!
Please pin so your friend’s can implement this easy tip too! PHOTOSHOP TUTORIALS:
WALL HANGING:
Acrylic Scroll Wood Hanging Tutorial
Materials
- 2 2″ x 16″ sized Wood Pieces
- Plexiglass Cut to 14″ x 14″
- Hot Glue or Gorilla Glue
- Acrylic Paint + Foam Brush
- Glue Dots
- 8×10 Photo
Instructions
- Cut wood + plexiglass to size.
- Paint wood.
- Glue wood directly to acrylic.
- Use glue dots to attach picture to acrylic.
- Wrap twine around top pieces of wood to hang.


Oh yay! Thank you Jenny! 🙂
Best tutorial EVER on this!! I actually think I’m going to give photoshop a try. You made it seem less scary to me.