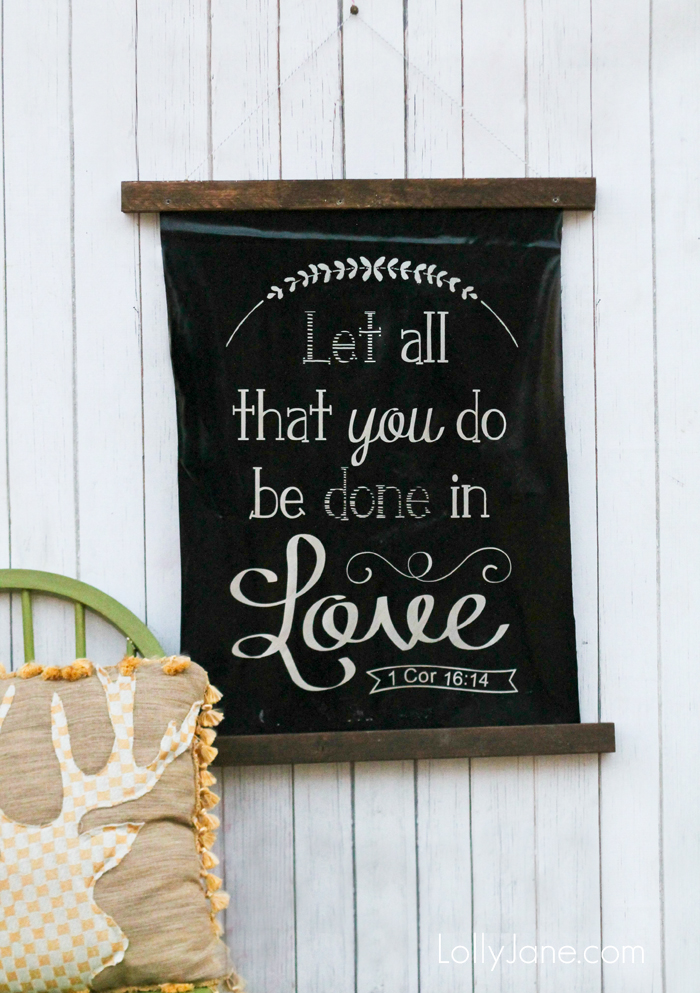
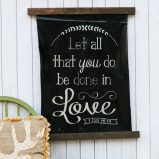
Sharpie faux chalk art
I love fonts. And hand painted signs. And printables, oh so many pretty printables out there. I love font mixing and curles and stripes together. I came across a Sharpie challenge in my email and jumped at the chance to be apart of it. The guidelines were “no more mugs” ha! I also love the chalk art trend and wanted to try the look on a permanent source. I’m a sucker for a good quote and remember all the ones from my childhood like “Cleaning the house while the chidren are cleaning is like shoveling snow when it’s still snowing” I totally get that as a mom now so I proudly display one saying “Raising kids is like being pecked to death by a chicken”. But on a serious note, I fondly recall my mom’s “As for me and my house, we will serve the Lord” and “return with honor”. I have “Be Kind” and “You are so loved” in my home and a few chalk board with seasonal and inspirational quotes I swap out. I’m so happy to now display “Let all that you do be done in Love” from the Bible. And I hope you do too since I think this Sharpie chalk art is pretty original, well at least more so than writing on a mug (; And if you follow us on Insta, you’ll already have seen when we snagged these cute metallic markers and many of you already are believers!
Supplies:
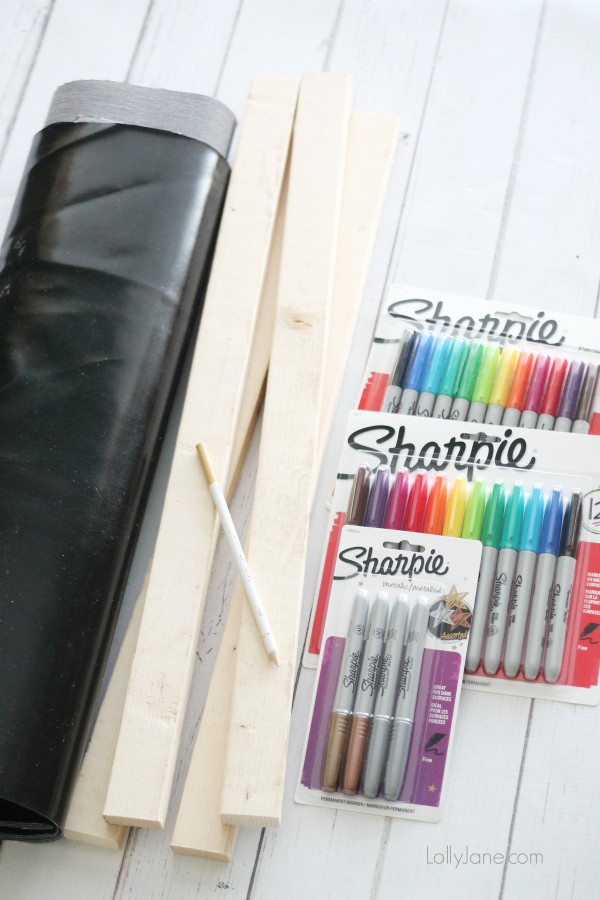
- Vinyl fabric (snagged mine on clearance from JoAnn’s)
- Sharpie® Metallic Fine Point Permanent Markers
- Acrylic paint
- Foam brush
- Drill (6 screws)
- Staple gun
- Tape
- Bakers twine
Directions:
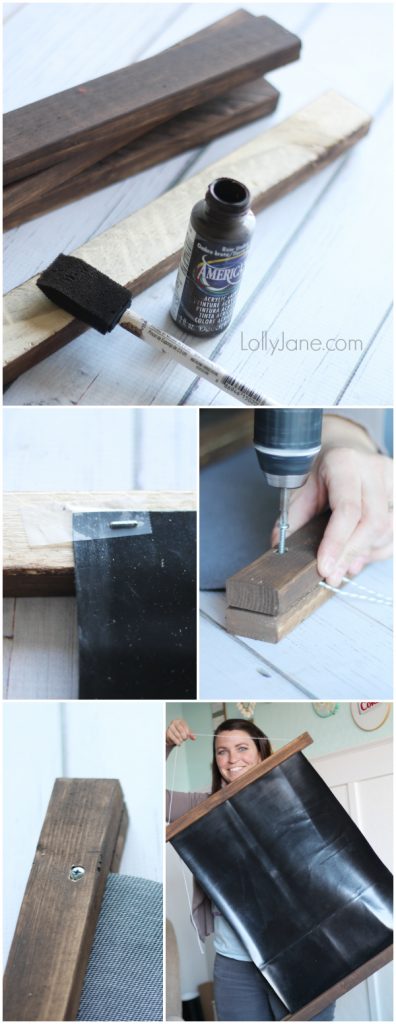
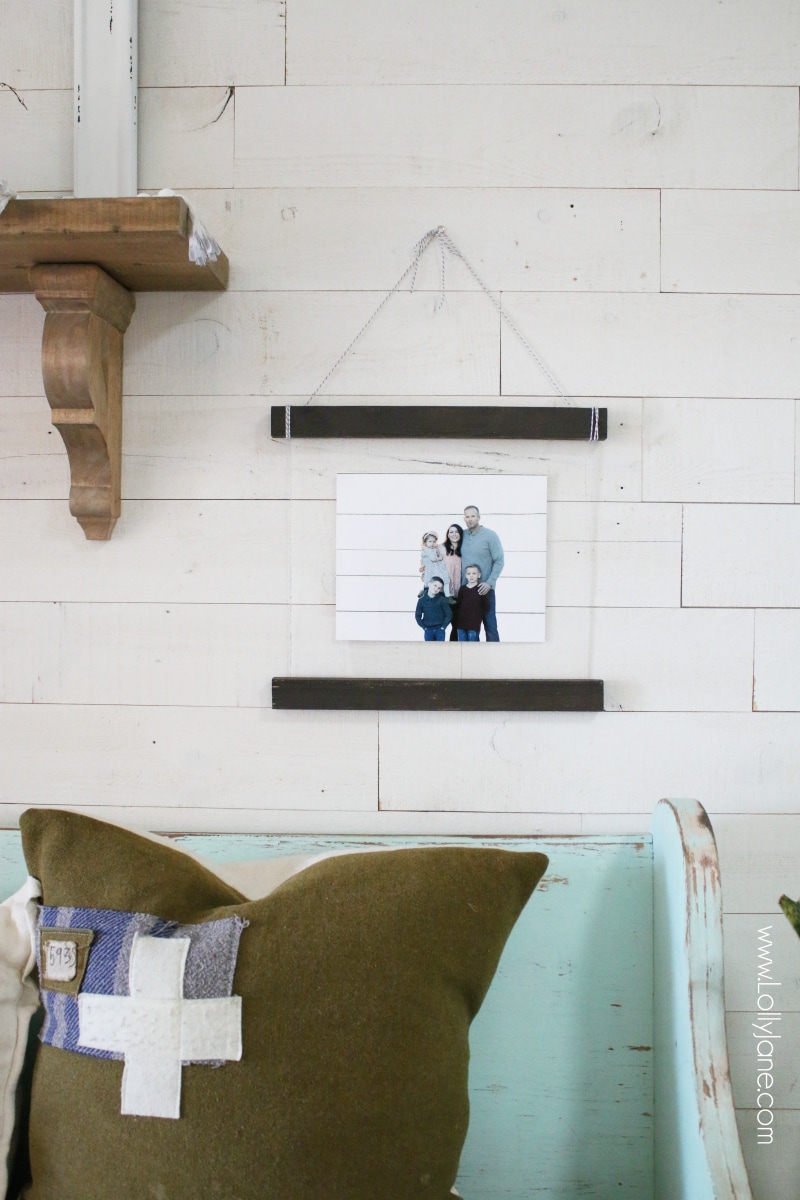
- Cut vinyl fabric to desired size, mine is 20” x 16”.
- Cut wood into 24” strips.
- Paint brown.
- After it’s dry, lay fabric on top of wood, tape into place temporarily.
- Staple gun to wood to secure it.
- Screw into the back of the wood in 3 places to attach the two together.
- Staple gun bakers twine to the back to display.
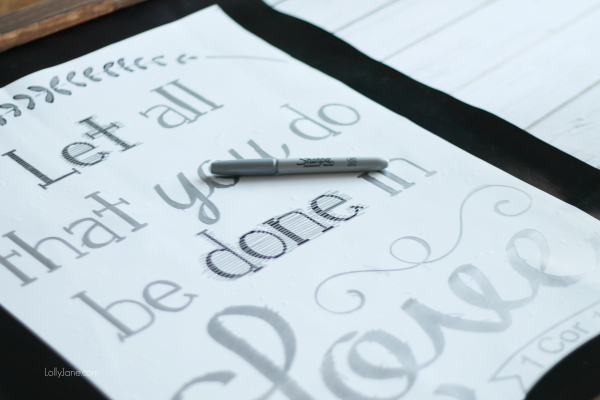
We’ve shared our stencil method to create signs a million times in the past. Same concept here, cut your vinyl lettering out, negative weed the letters out.
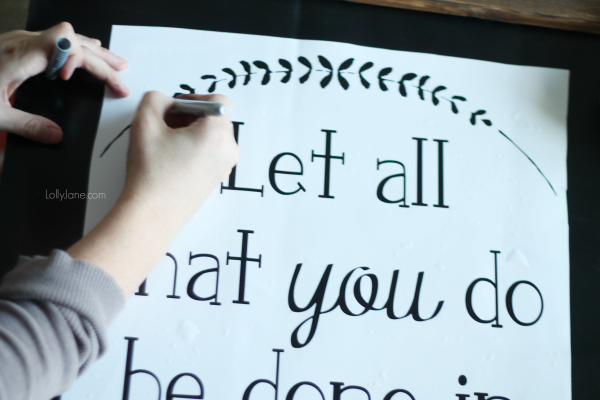
With your metallic silver Sharpie, fill in the stencil slowly. I didn’t notice any bleeding, it came out nice and sharp (get it? pun intended)
Note: The Sharpie will not dry quickly. It’s been 2 days and will still smear in some spots so remove the vinyl carefully, very very carefully! The nice thing is that if it does smudge a little, you can rub it and it’ll come right off since it’s a vinyl fabric.
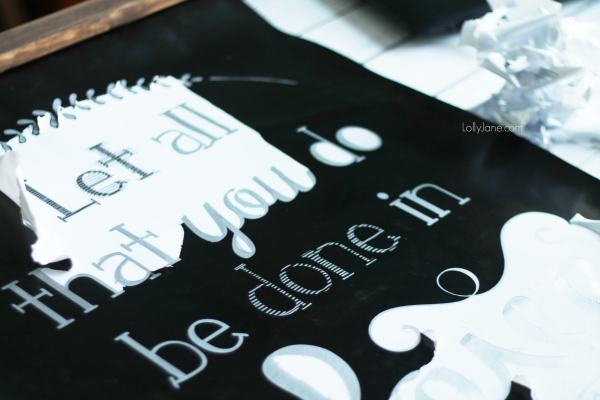
Although you can’t touch it (and why would you want to since it’s to display!) it sure is pretty to look at.
Visit all of our home decor projects too like these DIY White-Washed Planters,
or our easy DIY Farmhouse Chic Shelves!
Sharpie Faux Chalk Art
Materials
- Vinyl fabric
- Sharpie® Metallic Fine Point Permanent Markers
- Acrylic paint
- Foam brush
- Drill (6 screws)
- Staple gun
- Tape
- Bakers twine
Instructions
- Cut vinyl fabric to desired size, mine is 20” x 16”.
- Cut wood into 24” strips.
- Paint brown.
- After it’s dry, lay fabric on top of wood, tape into place temporarily.
- Staple gun to wood to secure it.
- Screw into the back of the wood in 3 places to attach the two together.
- Staple gun bakers twine to the back to display.
You have a lot of broken graphics on your blog 🙁 The main graphic on this page is broken and most of the graphics for the color block coasters are broken as well. Could you please fix them?
Hi Anna,
Thanks for the heads up! Got them fixed up, hooray!
very pretty!
Thanks Jessica! (: xo
LOVE it!! 🙂
Thanks for popping by, Becca! xoxo
I LOVE this! I think I may make my very own. 🙂 Thanks for always providing us with such awesome inspiration!
Well you are very welcome, m’dear! Have fun creating!