DIY pet bed made from a chair
Hello Lolly Jane readers! I’m Amy and I blog about “all things home” over at Home Remedies. I’m so happy to be back, sharing another quick and easy DIY project with you. While it’s well known that February 14th is Valentine’s Day for us humans, did you know the month of February also has a day of love set aside for our four-legged friends? That’s right; February 20th is also known as International Love Your Pet Day. February also happens to be my little pup’s birthday month so I figured I would do something extra special for him; while also giving new life to a rickety old chair destined for the trash. (I realize that the chances of your chair looking just like mine are pretty slim, but the process for making this pet bed would be very similar to what I’m showing you today).
So let’s get started. The supplies needed for this project are :
- Wooden chair
- 16″ – 18″ Throw pillow of your choice (mine was an 18″ pillow, but you can adjust yours to fit your particular chair)
- Power drill and drill bits
- Pre-drill bits
- Circular Saw
- Tape Measure
- Pencil or pen
- Sandpaper
- Level
- Needle-nose pliers
- Flathead screwdriver
- Spray paint in your choice of color (I used Rust-oleum Paint plus Primer in Gloss White)
- Angle square (optional)
- 2 3″ wood screws (all other screws were re-used)
Remove the chair seat from the chair back. Mine had four screws holding it in place, but I also had to saw through the bars between the chair legs (at the bottom of the chair) to get mine to separate completely.
Shorten the chair back. This step may be optional depending on the height of your chair back, but I felt mine was a bit too tall so I chose to shorten it. I did this by measuring an equal distance from the top of the chair, then marking both side edges where I wanted to make my cuts. Using the circular saw, Hubby made the cuts through the wood, but didn’t cut through the caning. We were afraid the saw would shred it, so we used some kitchen scissors to cut that part. This step simultaneously removed the back chair legs as they were connected to the portion of the back that we cut off. (If you’re lucky and don’t need to shorten your chair back, you could basically flip the seat over, screw the seat into the seat back using the existing holes, and cut the back legs flush with the bottom of the seat base).
Next, it was time to make the “posts” at the foot of the pet bed. Basically, the seat gets turned over so you’re looking at the underside (this is where your cushion will eventually go). The “front” legs of the chair will become the bedposts. Measure an equal distance on each chair leg, mark, then make your cuts.
Sand down any rough edges left after cutting off the legs.
We then removed the cushioned seat from the seat frame. It was held in place by four screws. Next we removed the fabric and foam from the under-lying plywood base, using the pliers and screwdriver to pull up the staples that held it in place.
When you’re done sawing, sanding and removing staples, you’re left with the seat frame, the plywood seat base, and the back of your chair. It’s now time to give each piece a couple of coats of spray paint.
Once the paint has dried, it’s time to put it all back together. We used the same screws that we just removed to screw the plywood seat base back onto the seat frame.
Next, we pre-drilled two holes into the back of the chair, using the existing holes in the seat base as our guide. Using the 3″ wood screws, we connected the chair back to the base (please note: you may need shorter screws depending on the thickness of your chair pieces).
Insert your throw pillow and admire your handy work!
Oliver loves his new bed, and I hope you enjoyed this project as well! Thanks so much for letting me share with you today! I’d love it if you would follow me over at Home Remedies where you’ll find more quick and easy DIY and Home Decor Projects.
You can also connect with me here:
Facebook | Instagram | Pinterest | Twitter | Blog
Until next time!
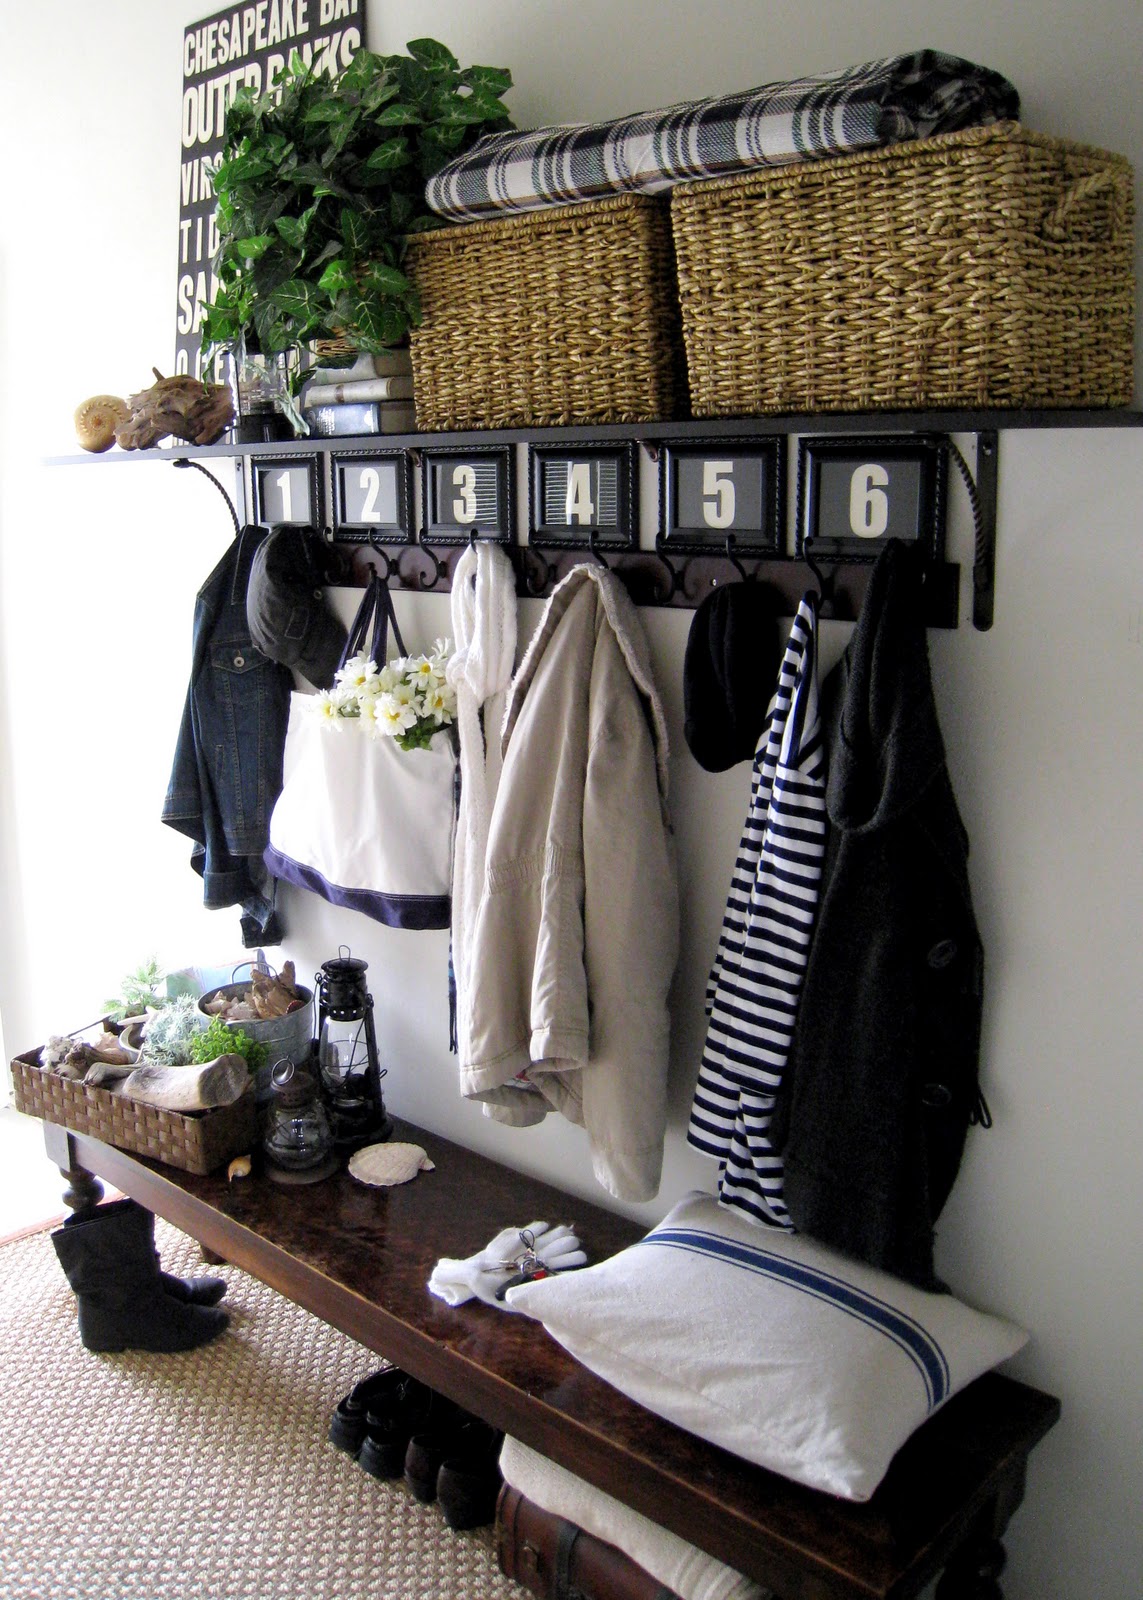
A big ‘ol thanks to darling Amy for being here! She has a ton of fab DIY’s on her site like her PB-Inspired Entry Way + her Pillow Covers from Napkin Cloths tutorial:
If you missed her DIY Industrial Style Message Board you gotta check it out!
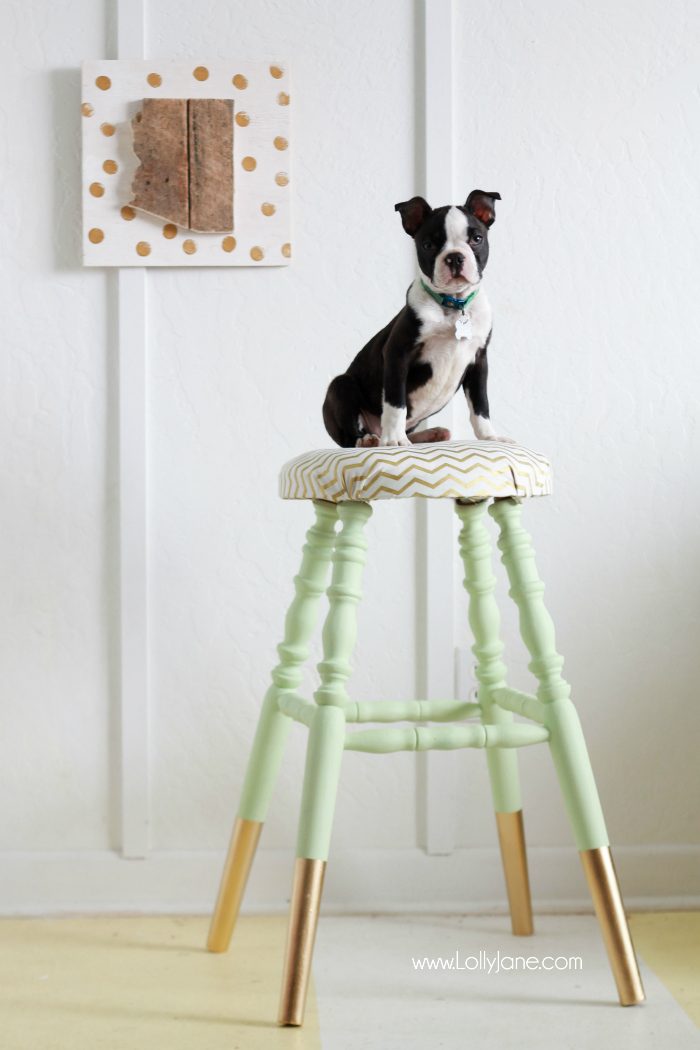
And, in the spirit of sharing our own pet, meet Kelli’s Boston terrier Winston, our little Lolly Jane mascot that we just love love love sitting atop our latest revamped gold-dipped stool!
2 Comments
Comments are closed.