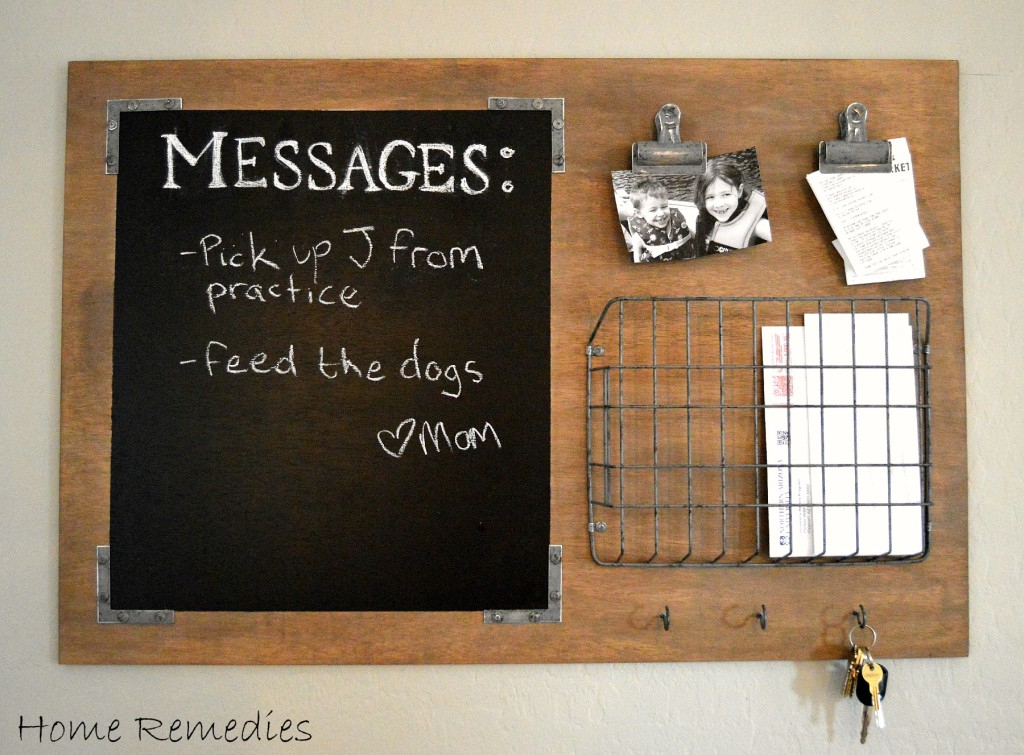
DIY Industrial style message board
Looking to organize the whole family? This DIY Industrial style message board is a breeze to make, customize plus it has all the command center must haves, in style!
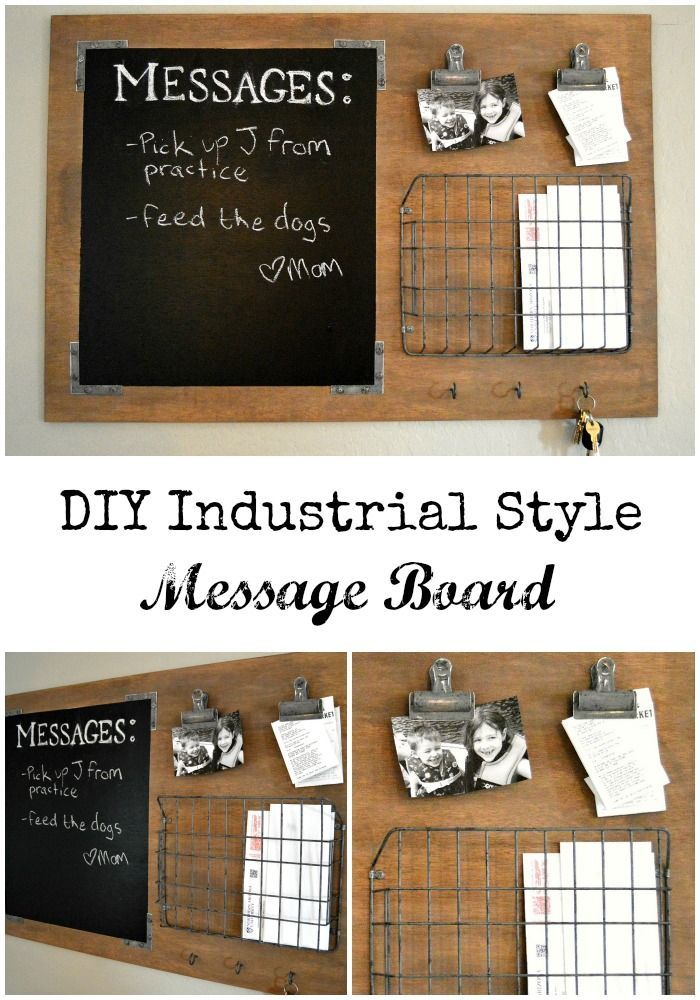
Hi, I’m Amy from Home Remedies! I don’t know about you, but the start of a fresh, new year always makes me want to get organized. With a hubby and two busy kiddos, one of whom just started driving, it’s hard to keep up with who needs to go where, and when! Yes, we live in the age of smart phones, and they’re great for keeping track of appointments and checking in with each-other when we’re all on the go, but sometimes you just need a place to scribble a quick message, park those receipts, and corral the never-ending pile of mail. I looked high and low for a “message center” that would fit my family’s needs while still fitting in with the rest of my home decor, but couldn’t seem to find anything I liked, so I decided to make one.
DIY Industrial Style Message Board
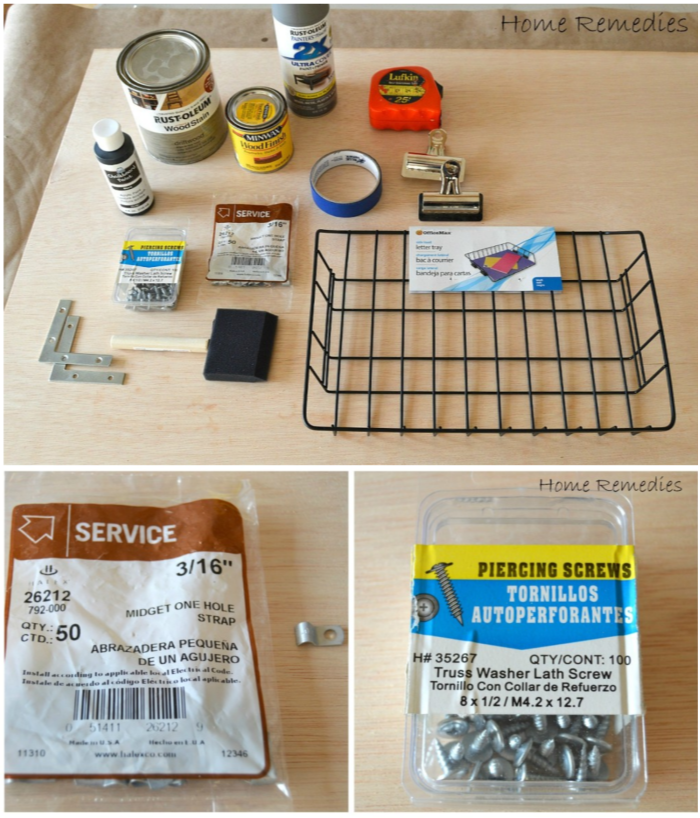
Supplies to Make an Industrial Message Board
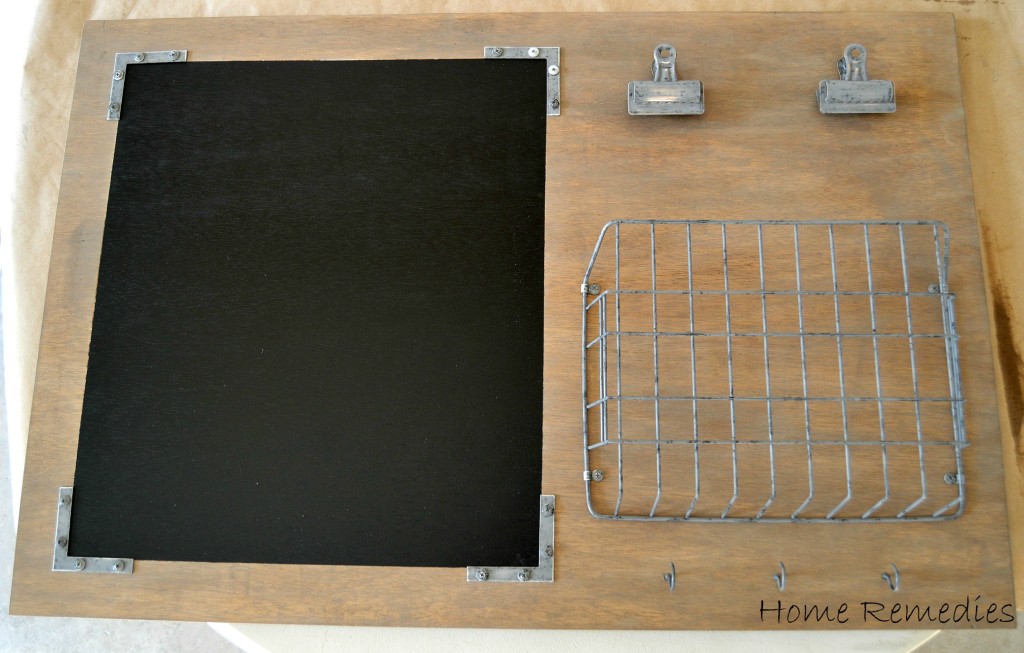
- 1 Piece of plywood – mine was a 2′ x 4′ x 1/2″ thick piece of plywood, pre-sanded on one side. It was cut down to 3′ long for this project.
- Measuring tape
- Cordless drill
- 150 (medium) grit sandpaper
- Painters tape
- Rags for staining
- Paint brush or small roller
- 1 Side-load letter tray
- 2 Bulldog clips
- Screws (8 x 1/2 / M4.2 x 12.7 Truss washer lath screws)
- 4 3/16″ Midget one hole straps
- 2 small D-ring hangers
- 3 1 /4″ cup hooks
- 4 3″ flat corner braces
- Rust-oleum 2x Ultra paint + primer in Satin Granite
- Minwax wood stain in “Provincial”
- Rust-oleum wood stain in “Driftwood”
- Black chalkboard paint
Check out More Organization Ideas
How to Make an Industrial Message Board
- Cut your wood to the desired size and lightly sand the edges.
- Wipe off any dust.
- Rough place your items on the board, for a good visual of item placement.
- Tape off the area that will become the chalkboard. I measured 2″ from the left, top and bottom edges, making my chalkboard area 17 1/4″ w x 19 3/4″h.
- Stain the wood using Provincial, avoiding the taped off chalkboard area. Don’t forget to stain the edges of the board!
- While the stain dries, spray paint the bulldog clips, screws, and hole straps using the gray spray paint. Then, using black chalkboard paint, lightly distress the painted pieces. Once dry, lightly sand for an aged, distressed look.
- Apply the Rust-oleum, Driftwood stain. The key to getting this look is to apply the Driftwood stain lightly, working in small areas, then wiping off immediately. If some areas end up looking too gray, go back over them with Provincial using the same technique (apply lightly, work in small areas), until you get the desired look.
- Once the stain is dry, remove painters tape, tape off outside area of chalkboard, and apply 2-3 coats of chalkboard paint inside the taped off area, letting each coat dry completely before applying the next coat.
- Once all the paint and stain is dry, turn the board over and screw in the hangers.
- Turn the board back over and place the basket centered between the right edge of the board and the left edge of the chalkboard (1 1/2″ from each edge, 3 5/8″ from the bottom edge). Secure the basket using 4 of the one hole straps.
- Measure 2 1/2″ down from top edge of the board and screw in the bulldog clips, 7 1/2″ apart from each other.
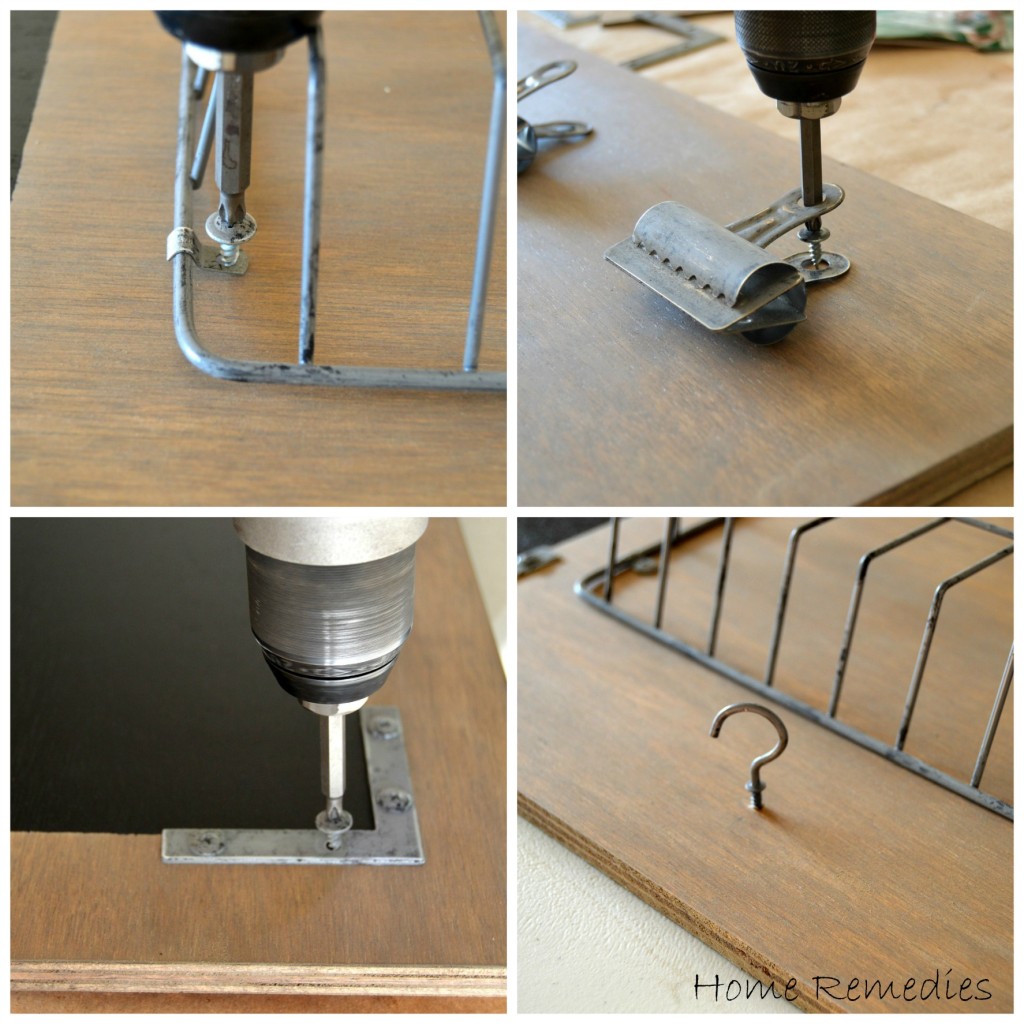
- Place the corner braces around the edges of the chalkboard and screw into place.
- Measure, then screw in the cup hooks (1 3/4″ from the bottom edge, 3 3/4″ apart from each other).
Thanks so much for letting me share this project with you today! I’d love it if you would follow me over at Home Remedies where I share quick and easy DIY and Home Decor Projects. You can also connect with me here: Facebook | Instagram | Pinterest | Twitter | Blog
Please PIN so your friend’s can make one too!

This DIY is awesome with three littles this is a must have I cant wait to try this!!
So happy you like it! Amy is a genius!
Oh I love this idea and the tutorial is so easily understood. I can totally see this working for me. Thanks Amy!
Agree, Katie! Amy is so talented! (:
Thanks for popping by! XO
This is such a great idea! I LOVE the rustic/vintage look of the basket and clips!
So happy you love it!-we do too!
I love this! And it looks so easy to make! Definitely going to be trying something like this soon!
It’s seriously darling, isn’t it? We can’t wait to bust out our own!
I love this idea! I am totally in the market for a organization board like this! I haven’t been able to find the look that I want until now. Thanks for sharing!
~Carrie
So happy you like it, Emily! We think it’s amazing!
I love this idea! Gotta love when cute meets industrial. Thanks so much for sharing!
xo, Emily