Spray Paint Golf Cart Makeover
Give an old golf cart new life with a few cans of spray paint… and patience!
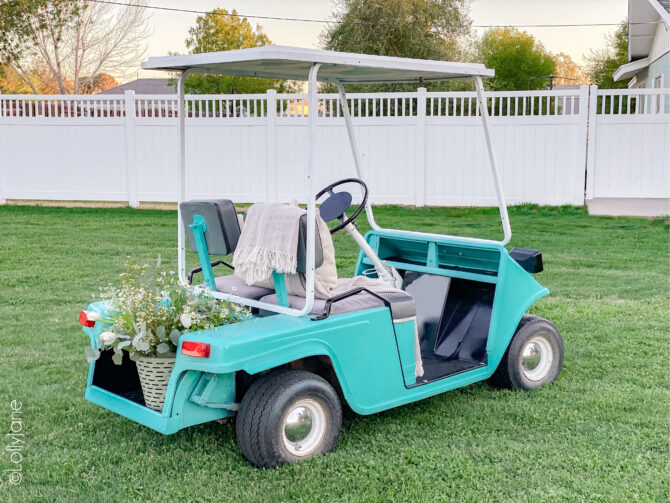
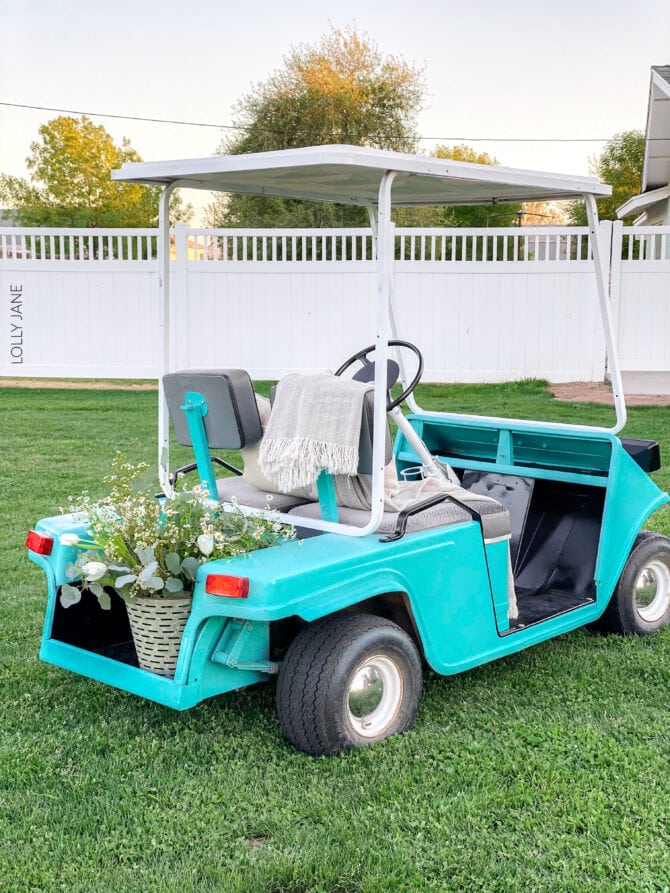
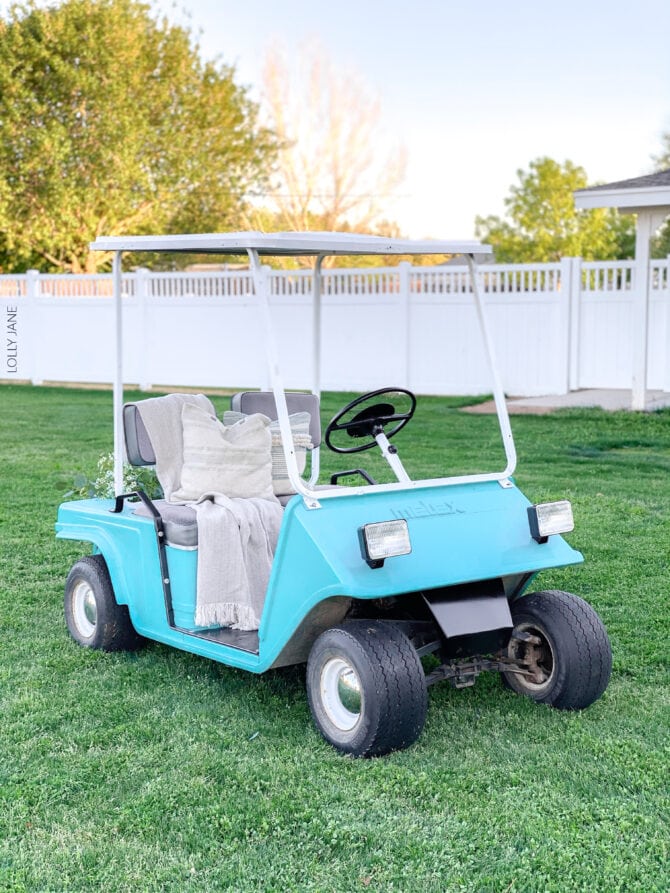
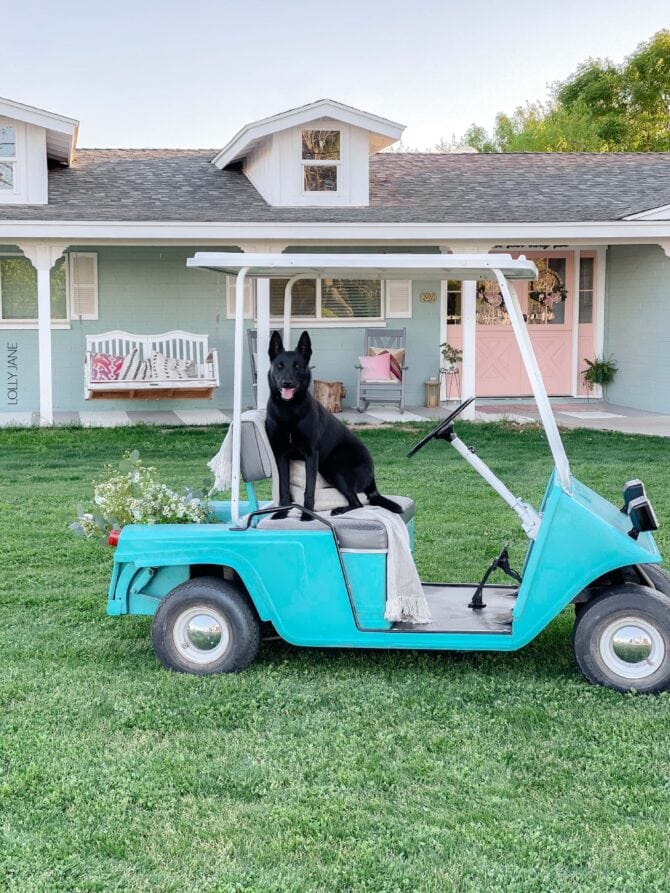
Fun fact: my golf cart was born the same year as me but, unlike me, it’s never had any esthetic upkeep! 😉 I turned my 1981 Melex golf cart into the talk of the town (well, neighborhood anyway!) with just 8 cans of Colorshot spray paint. Here are a few steps you don’t want to skip when spray painting your own golf cart!
Spray Paint Golf Cart Makeover
Before you paint your golf cart for a makeover, you MUST prep. *Insert collective groan here* The first step is to give it a good rinse. Remove any objects you don’t want wet, (like the fabric seats.)

We used a little dish soap on a few stubborn spots but mostly a hose was all we needed for thorough rinse; let it air dry. Pro tip: Use a leaf blower to help speed up the drying process!
Supplies needed TO SPRAY PAINt A golf CarT
After your cart is fully dry, time to take it apart. Depending on your own make/model, you’ll need a few tools and items to make sure it’s as seamless of a process as possible… this will be the longest part of the process but don’t skip it as taking apart what you can will ensure the most professional look.
- Adjustable Wrench
- Multi-Bit Screwdriver
- Drill if you prefer not to hand screw
- Sandwich baggies (to keep each section of bolts/screws/parts together)
Prep to spray paint a Golf Cart
After step one of prep is done you’ll need to finish prepping by blocking off the areas you don’t want to be painted. *Insert another collective groan here* We started by painting the body but used plastic wrap, for example, to cover the wheels.
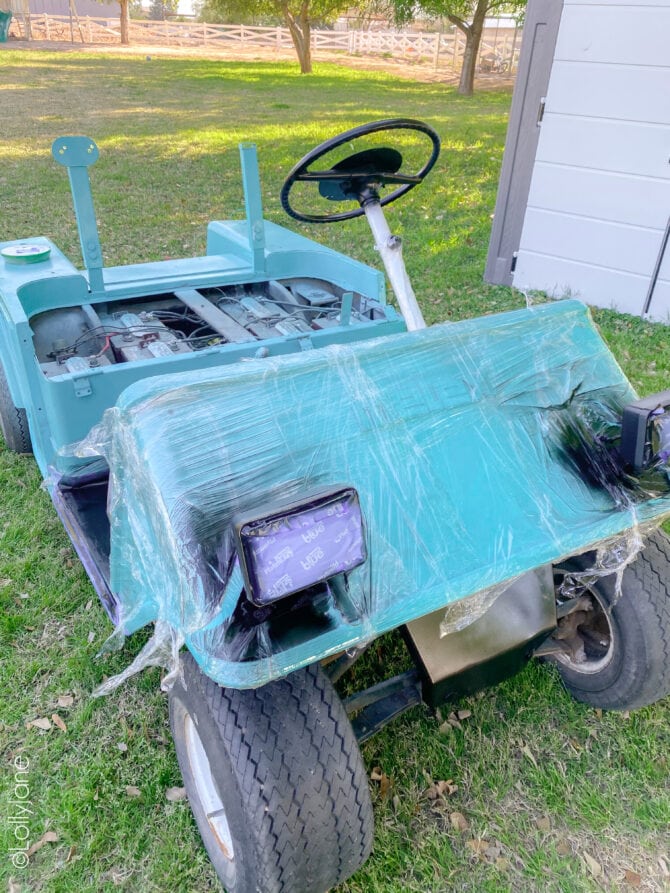
Plastic wrap paired with painters tape is the best combo for prep. Here’s what else you’ll need:
- Painters Tape
- Drop Cloth
- Plastic Wrap (Press ‘N Seal can even stick without tape but tape ensures a tighter seal)
How to spray paint a golf cart
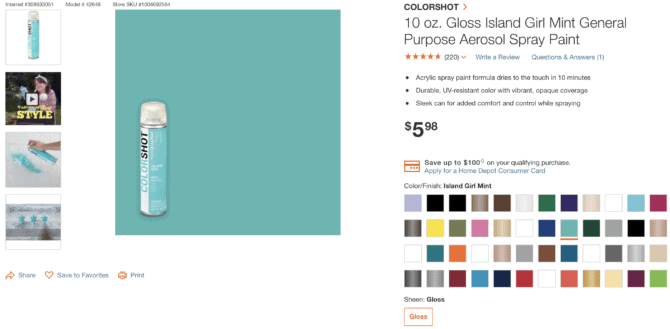
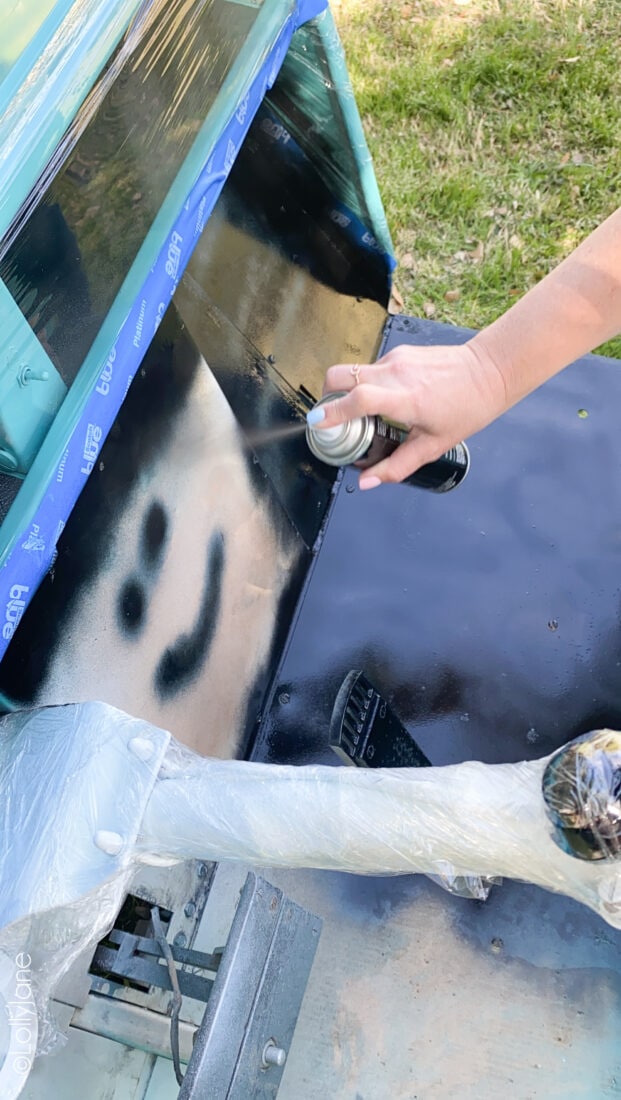
Finally, time to paint! The key to only 1-2 coats of paint is QUALITY PAINT. We highly recommend COLORSHOT (found at your local Home Depot) as it goes on smoothly, evenly and the colors are dreamy… plus the names are just so clever! You may remember our other COLORSHOT projects like our stenciled concrete in Marshmallow or my painted stock tank pool in Champagne. For this project we used 3 COLORSHOT spray paints:
- Body: Island Girl Mint x 3.5
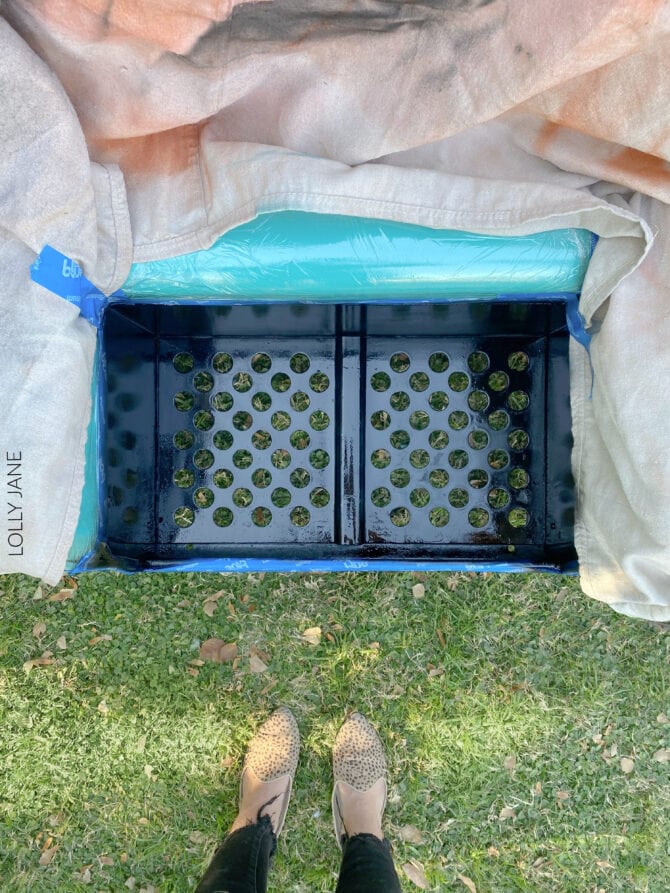
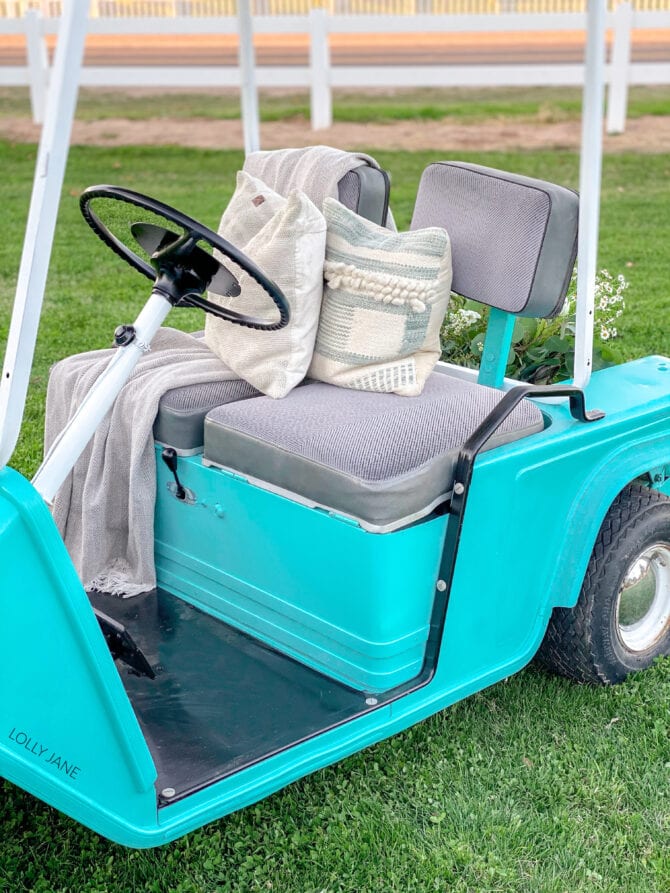
- Floor: Little Black Dress x 2
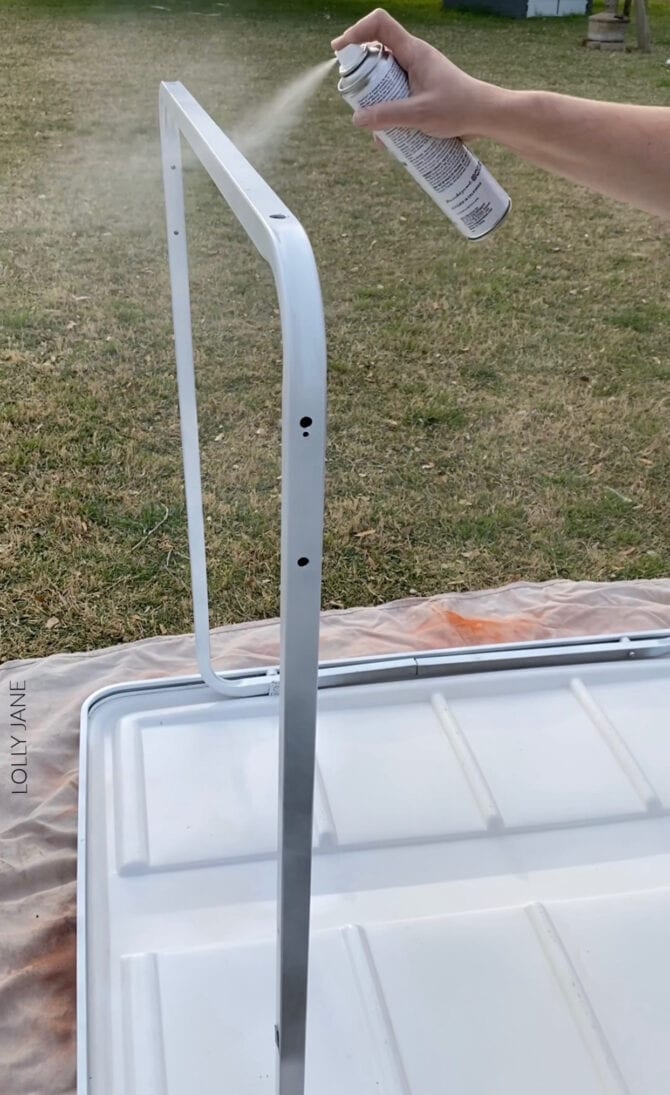
- Trim: Marshmallow x 2
Look at all of those pretty options! Oooh la la!
We started with the body since that would require the most paint. The key to little overspray is to shake, shake, shake your can for 10 seconds.
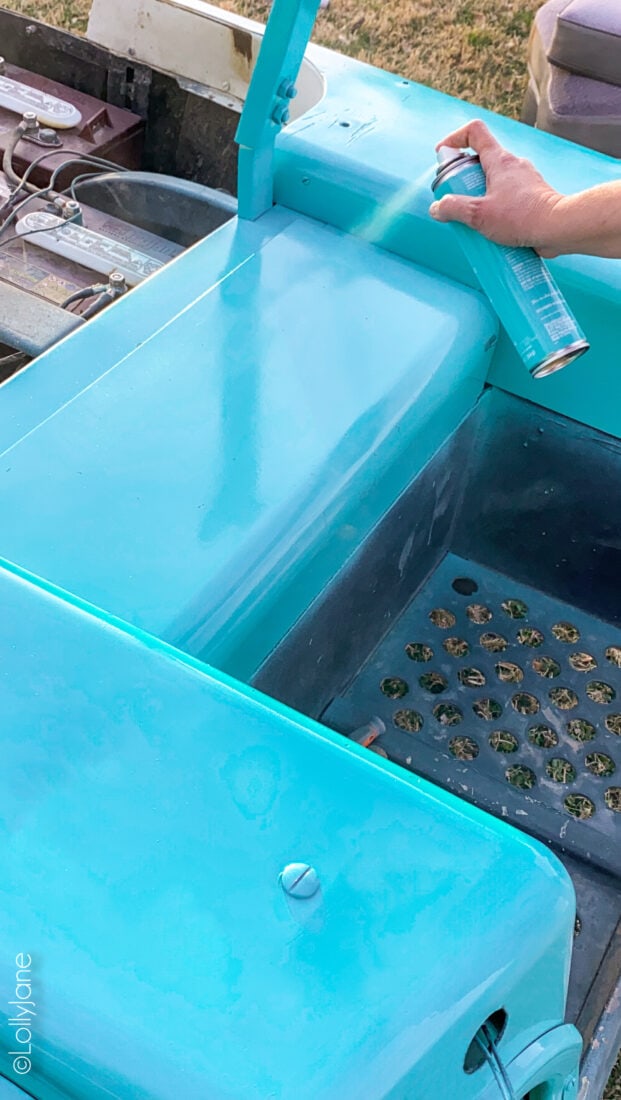
We used 2 coats (3.5 cans) to cover our little golf cart and since the overspray is so minimal (you can see it in action on our Instagram stories) we didn’t tape off too much but knew we could tape over the blue once it was dry. This vibrant acrylic spray paint dries in 10 minutes, or even quicker here in Phoenix on a hot day. Colorshot is durable and UV-resistant color with opaque coverage, a must-have with our climate. I know this paint will last a long, long time!
After the body we spray painted the trim and canopy in Marshmallow. So fresh and clean!
We finished off the makeover by spraying the floor, steering wheel and shifter in Little Black Dress. Look at that coverage already, much better than the old carpet- so excited I’ll be able to hose the floor of cart off in the future instead of scrubbing out mud spots or stains!
Lemme tell ya…
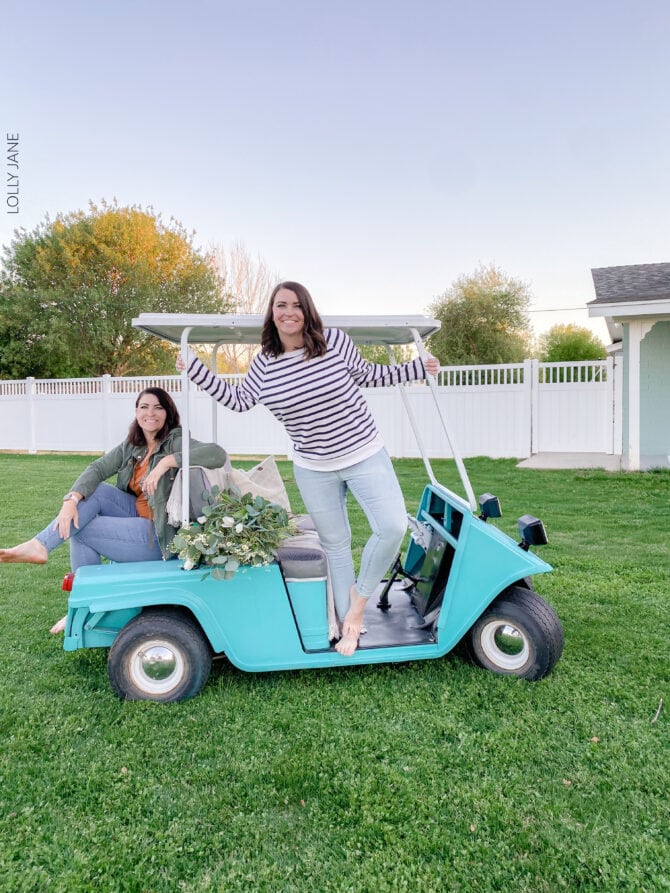
… IT LOOKS LIKE A WHOLE OTHER GOLF CART! ✨
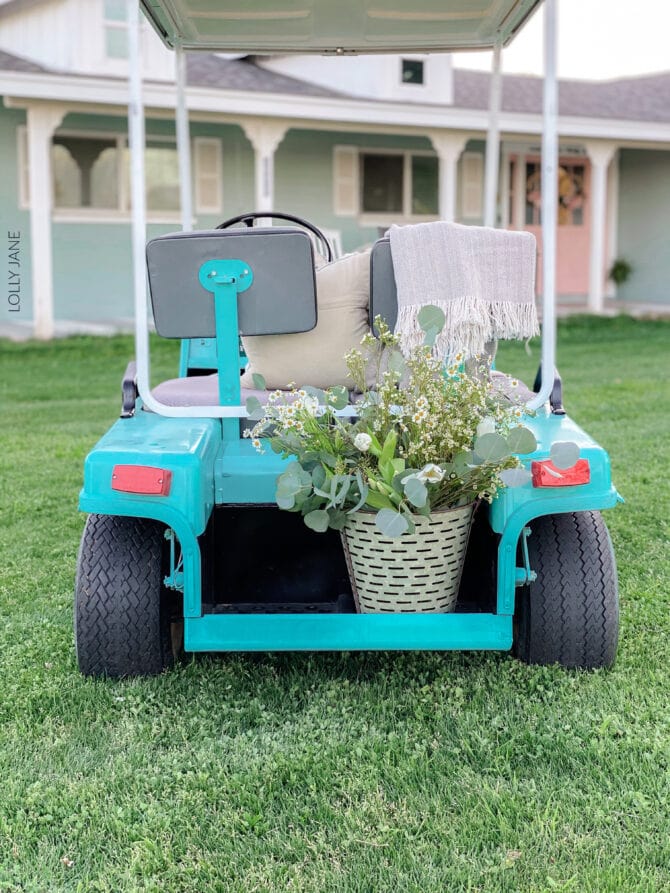
Look at those clean lines! *whistle* Very little overspray = no splatters or smudges. It is a near perfect paint job thanks to such quality paint… very doable for painters of all levels!
Colorshot gives such a smooth finish, just look at that shine! I love the gloss sheen that helps me keep this fresh paint clean… dirt, mud and kid prints wipe right off. If you prefer a flat/matte finish, Colorshot offers that too. It is just as vibrant and gorgeous, no matter the hue!
My puppers loves to ride along with me and this paint is puppy-proof! ? No matter what proj
Hi! We didn’t recover them, they were in good shape 🙂
I love your cart and the color. Thanks so much for posting this. I’ve been looking for DIY ideas for my new (old) golf cart. Did you re-cover the seats? If so, I’d love the link or ideas on how you did it!