Pottery Barn gray wash finish
Get the Pottery Barn gray wash finish on ANY piece of furniture! Perfect beginner project and only requires a handful of supplies!
Love the classic Pottery Barn gray wash finish? It’s technically called the seadrift finish and is light and airy yet still warm. The best part is it pairs well with almost any home decor style. Even better, the method to achieve this look is fairly easy and can be done on any piece of furniture, large or small!
Curbside Find Dresser
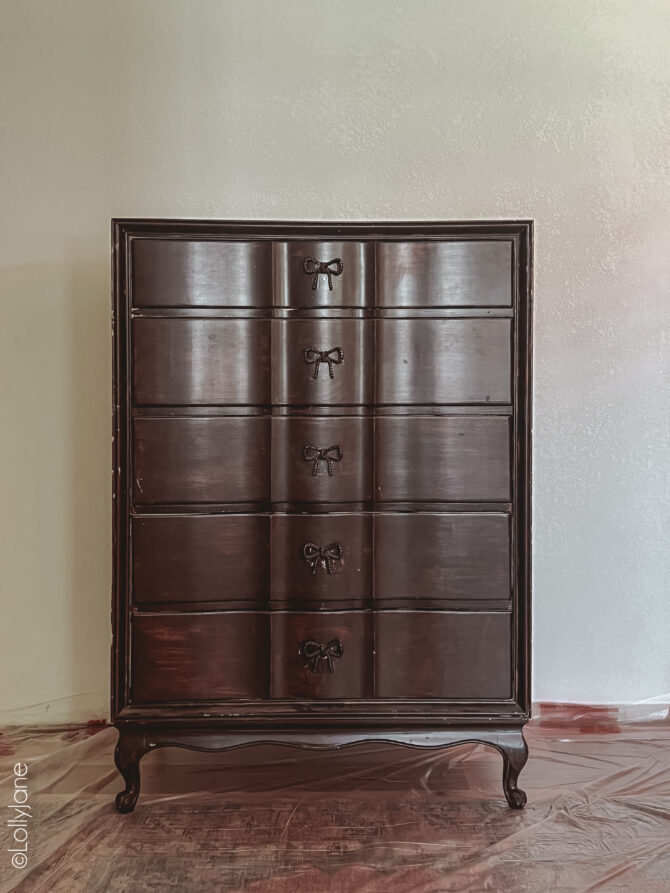
My friend Corrianne texted me about this dresser find curbside… yes, on the side of the road! I replied back, “Immediately yes!” Lemme tell ya, she is a much better friend than I am because I would not have parted with this beauty! (PEEP BOW HANDLES?! EEP!) It is in perfect shape… other than every inch of it being slathered in sloppy dark brown paint. I immediately knew I wanted to try the popular PB finish on this pretty piece to lighten it right up.
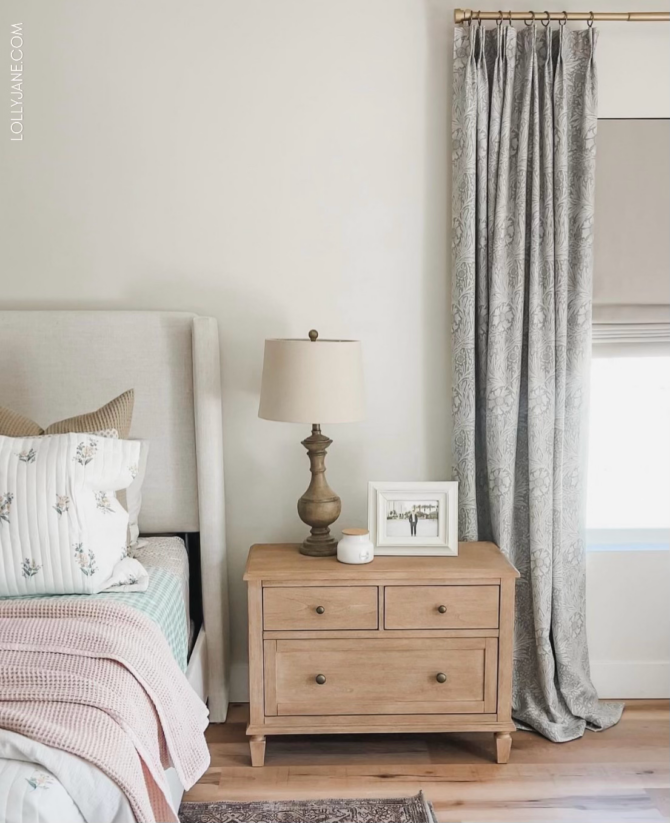
If you’re not familiar with the seadrift finish, here it is on Pottery Barn’s popular Sausalito nightstand. You can see the variation of wood tones and that is exactly what makes it so easy to replicate. Side note: Kelli has the 4-piece Sausalito set in her master bedroom and she even commented how similar the finishes look!
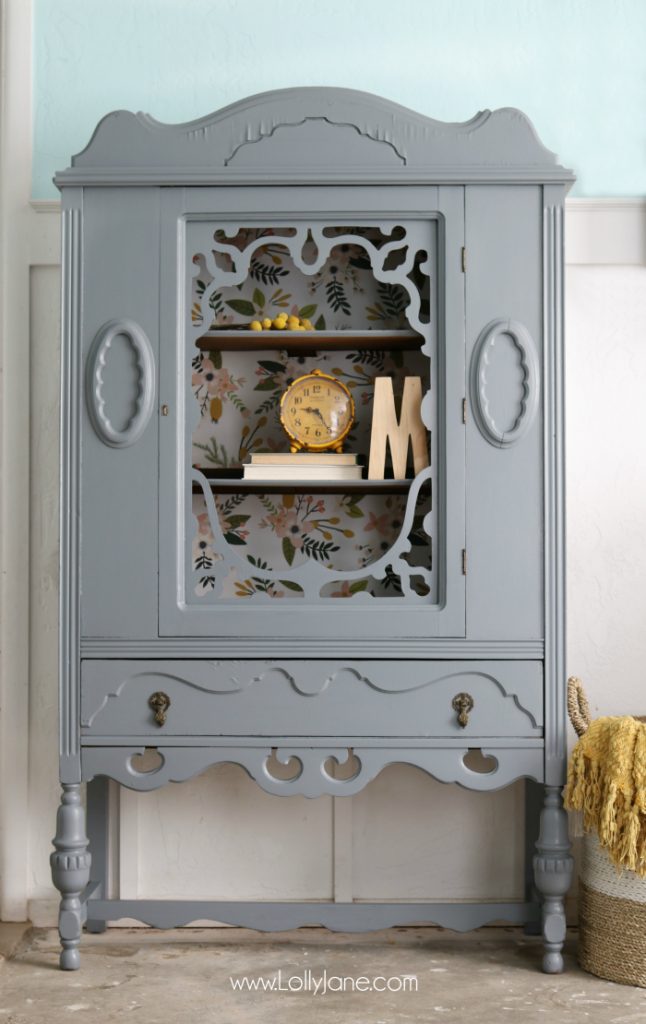
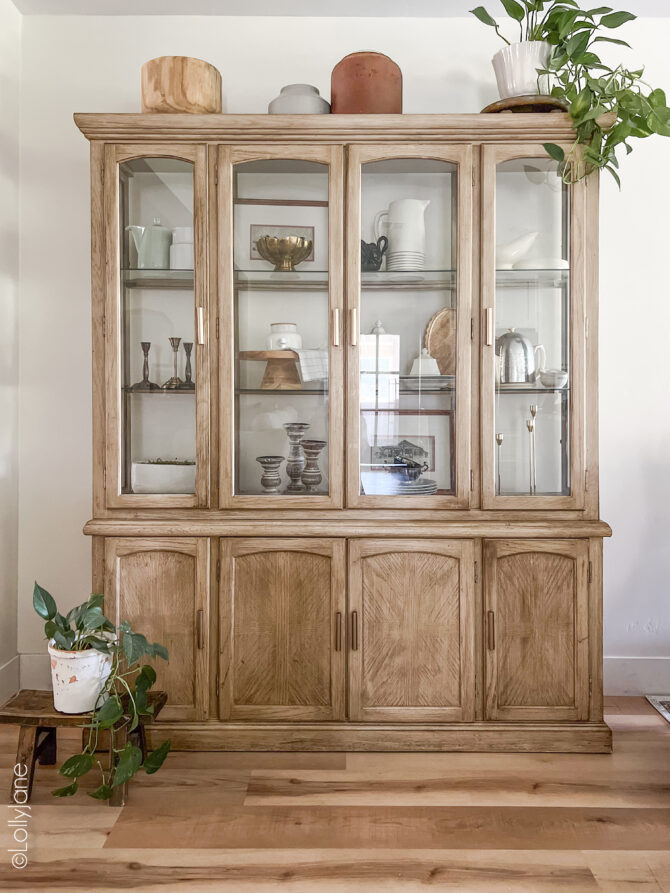
In fact, she painted a recent Facebook Marketplace find hutch in that same finish below. Isn’t it stunning?!
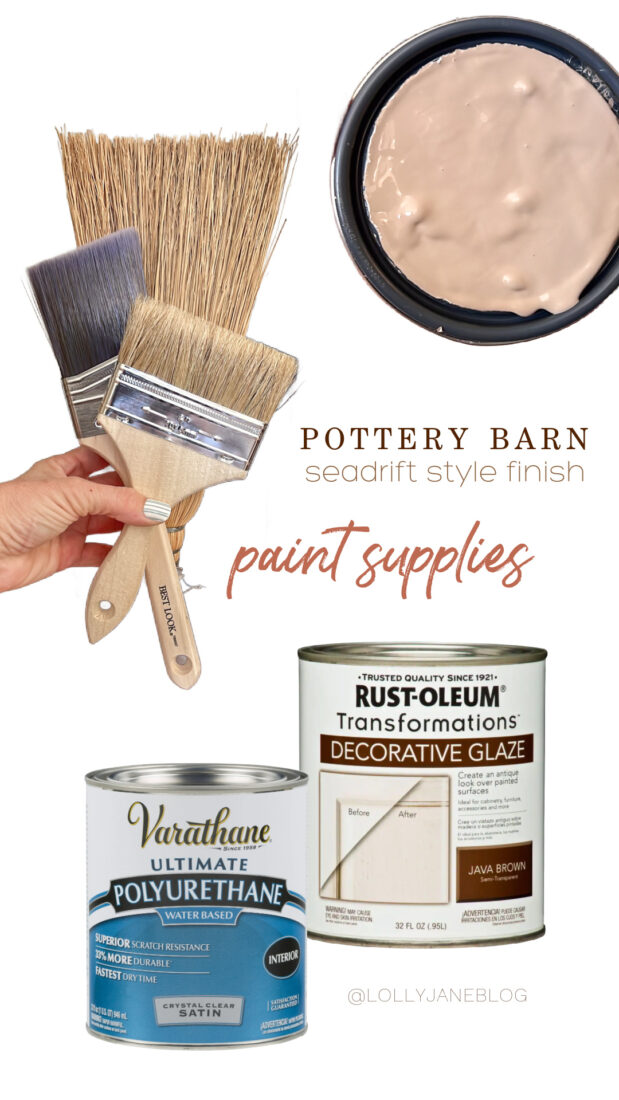
Supplies needed
I was able to borrow most of the supplies needed to achieve this finish from Kelli as a little goes a LONG way. You can easily refinish 2-3 pieces of furniture, depending on the size.
SUPPLIES NEEDED
Pottery Barn Gray Wash Finish
How to paint the Pottery Barn gray wash finish
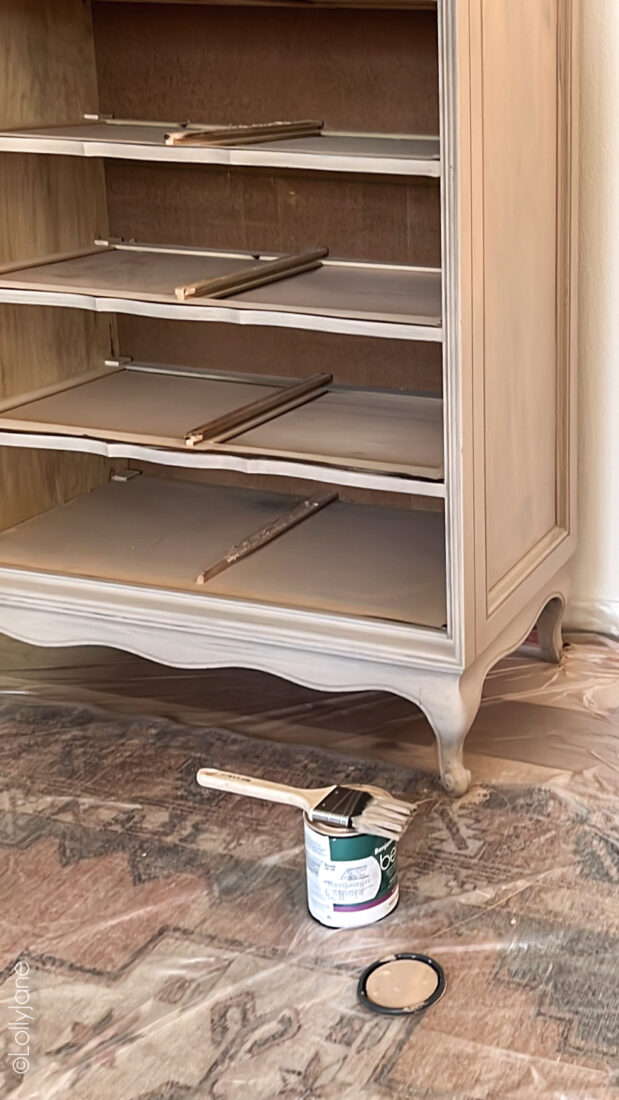
Before we get started on how to paint the Pottery Barn gray wash finish on this dresser, I first needed to prepare the surface for paint. Proper preparation is the key to any successful project! The condition of your piece of furniture will determine how much to do but generally a light sanding and a clean surface is all you need to do. For this piece I used a 120-grit sanding block then wiped it down with a clean rag.
Don’t skip the prep!
A clean piece of furniture is vital for paint to properly adhere. This can be as simple as wiping down a dusty surface or as detailed as stripping off layers of paint. If you want the finish to last, don’t skip proper preparation.
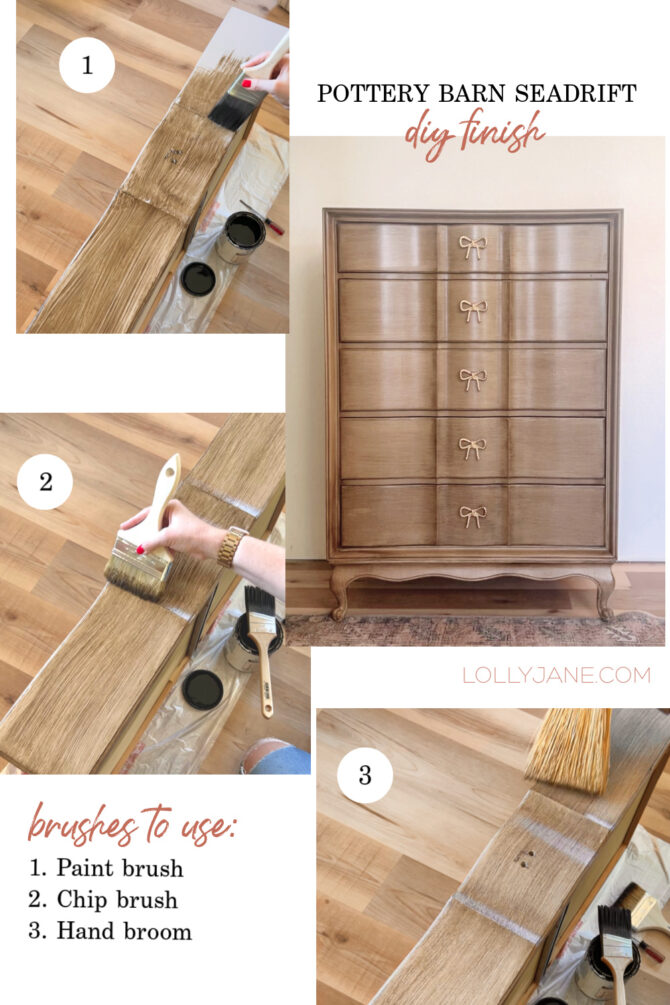
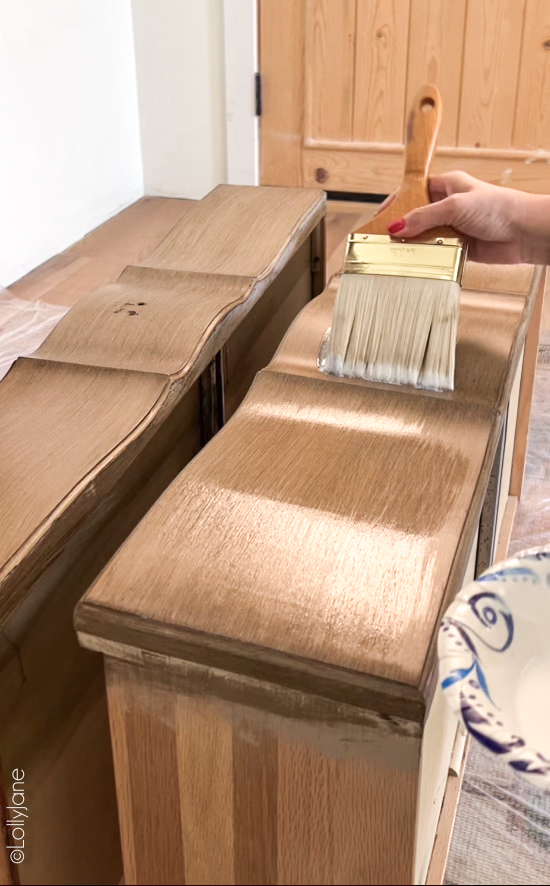
STEP 1: Start with the base coat. I used an affordable 3″ flat brush and simply dipped mine into the paint can then thinned it off on the sides of the can before applying. You will need to apply 2 thin coats of paint or until the surface is completely covered. You want to ensure your base coat is a solid wood color as the glaze is thinner than the paint and is designed to darken the paint but not cover completely. Showing through is what creates that linen style/wood variation finish. TIP: Let your base coat dry overnight to ensure it’s completely dry.
STEP 2: Decorative glaze. I rinsed out the paint brush I used for the base coat and used it for the decorative glaze. I dipped my brush directly into the decorative glaze, brushed it against the can to get off any excess drips, then simply brushed the glaze onto the dried base coat. 1-2 thin coats of glaze is all you need: the more glaze you use, the darker the piece will be! As with all of these supplies for this project, a little goes a long way.
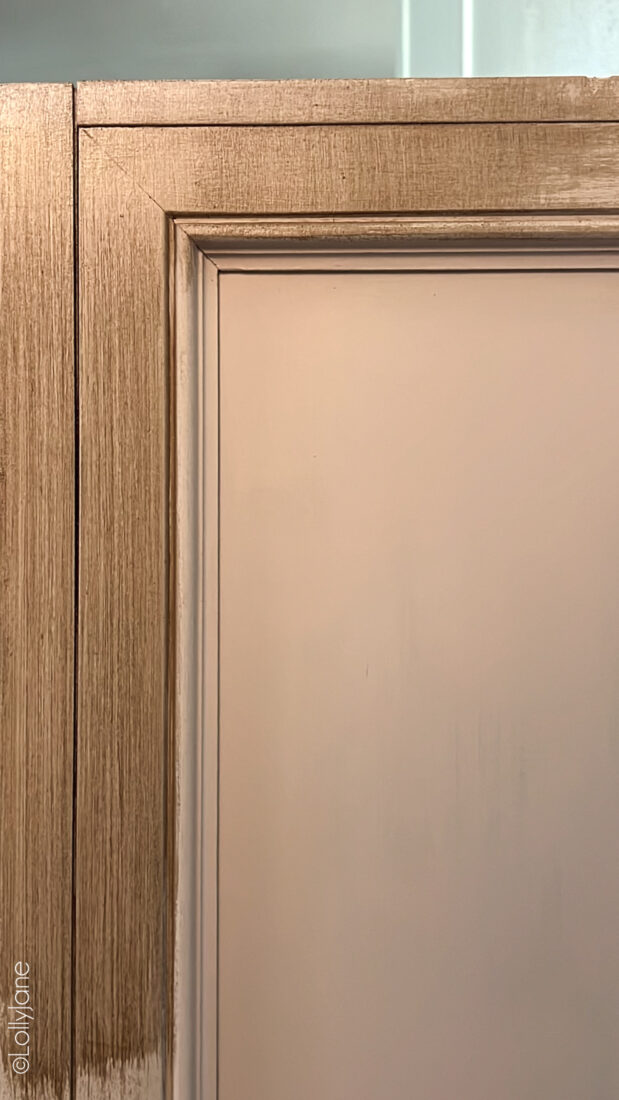
Step 3: Chip brush. A chip brush is similar to a paint brush but it has harder, frayed like bristles and this is where the magic starts to happen on this finish. Brush off the glaze and you’ll see nice thin lines leftover… this is what creates the illusion of wood grain/linen. I brushed over the glaze 2-3x to achieve this look. Note that if the glaze was getting built up then I used a paper towel to wipe off the excess.
Step 4: Corn whisk broom. After the chip brush, use the corn whisk broom in the same direction to add the last chunky lines that give this finish the signature PB style look.
Because I’m in Arizona with very dry air, I found the glaze was drying pretty quick so I worked in smaller areas and just blended it in. This is about the size of an area I worked on:
Just a note, I have read that some people like just the look of the chip brush and don’t use the hand broom. Some use a dog brush and others have used a wire brush. I think this is why this finish is so popular; it’s pretty forgiving and you can achieve the look you want with a variety of materials. Use what you have on hand if you can! Test a small area then go for it!
Seal the furniture
Step 5: Protect with Polyurethane. I am a huge fan of water based polyurethane and use it for most of my furniture makeovers. I used a flat paintbrush to brush the poly on as evenly as possible. Note that I didn’t have a paint tray handy so I used a paper bowl… doubles as easy clean up. 😉
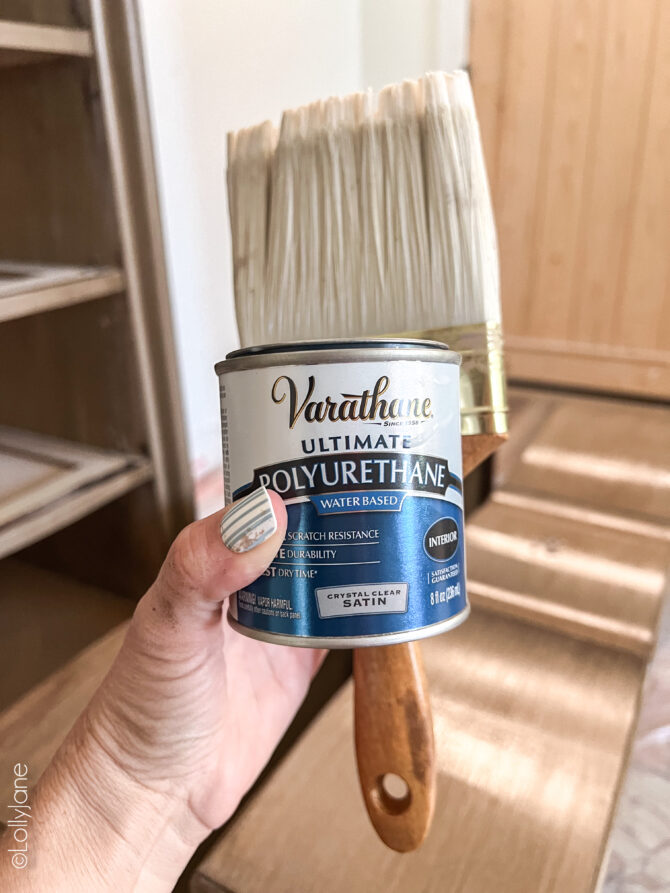
Note that the poly goes on milky but rest assures that it dries clear and does not yellow over time. The satin sheen allows for me to wipe spills but doesn’t have a super shiny finish.
How many coats do I apply?
Apply one coat if it is a low traffic piece (like this, going in my own closet.) Apply two coats for extra protection on a higher traffic piece like a coffee or kitchen table. (Let fully dry in between coats.)
That’s all there is to it. Voila!
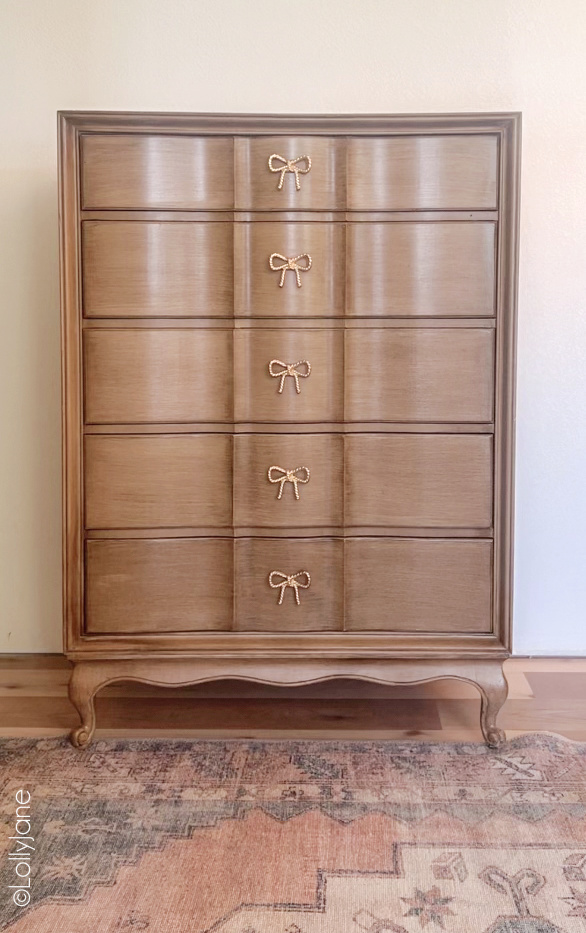
This project has a few steps that feels like you repeat 28238x but it is worth it for that finish! It goes SO fast once you get the hang of it. Aside from dry time, I was able to paint this dresser from start to finish in about 5 hours. Look at that difference:
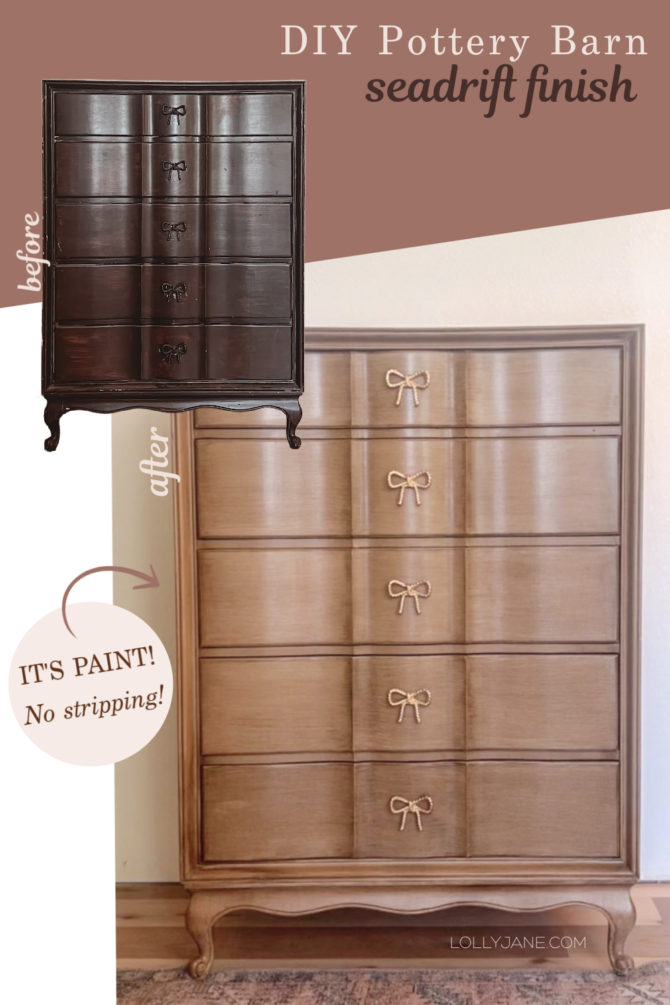
“How did you get the bows to be gold?” Come back tomorrow to see my non-toxic solution that took less than 20 minutes!
So, what you do think about this makeover? We have dozens more DIY projects to browse! For example, if you want color check out this painted hutch. Such a cutie!