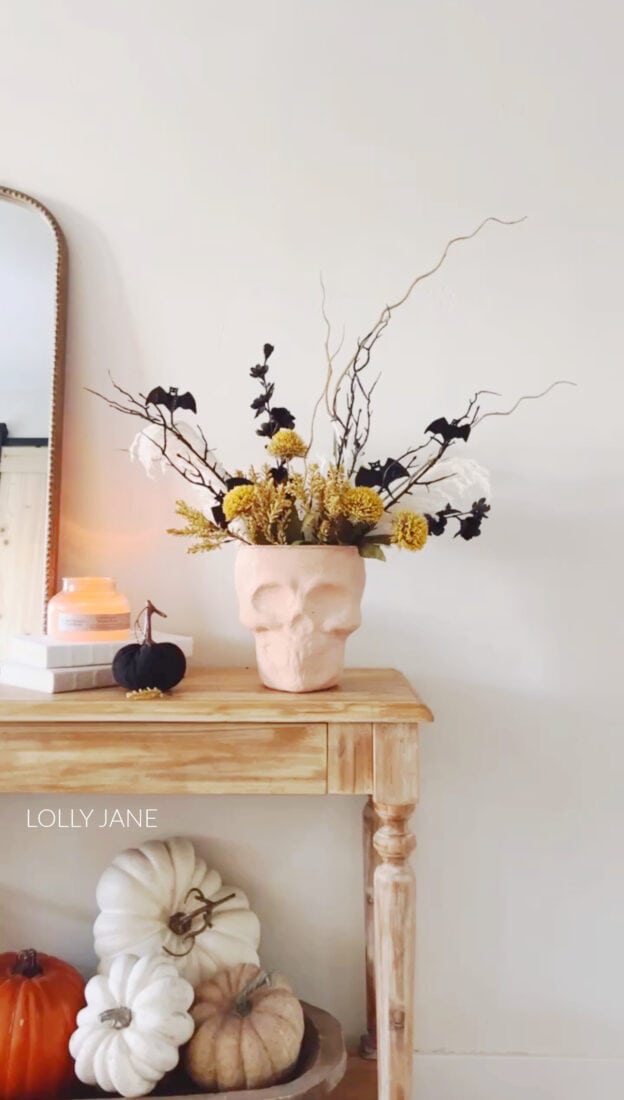
DIY Terra Cotta Skull Vase
Learn how to make this easy DIY terra cotta skull vase with the viral baking soda paint method! Such an easy and inexpensive Halloween decor project!
Halloween is just around the corner so it’s the perfect time to get creative. If you’re looking for a not-too-spooky addition to your Halloween decor, we’ve got a fun project for you. The best part is it’s just under $20 and takes less than an hour to create, start to finish!

DIY Terra Cotta Skull Vase
We’re going to show you how to transform an acrylic skull into a terra cotta inspired vase, perfect for displaying Halloween florals and spooky picks from your local craft store. This DIY skull vase is the perfect blend of scary and chic, it’s sure to be a conversation starter at your Halloween get togethers!
Supplies you’ll need
Get creative with your florals and accent pieces!*Some links may contain affiliate links which gives us a small commission if you purchase at no extra cost to you!
How to Faux Paint Terra Cotta
Step 1: Prepare the Skull
Start by cleaning the acrylic skull to remove any dust or debris. This will ensure that the paint adheres properly. Sand if desired to give the paint a little grit to grab onto.
Step 2: Mix the Paint + Baking Soda
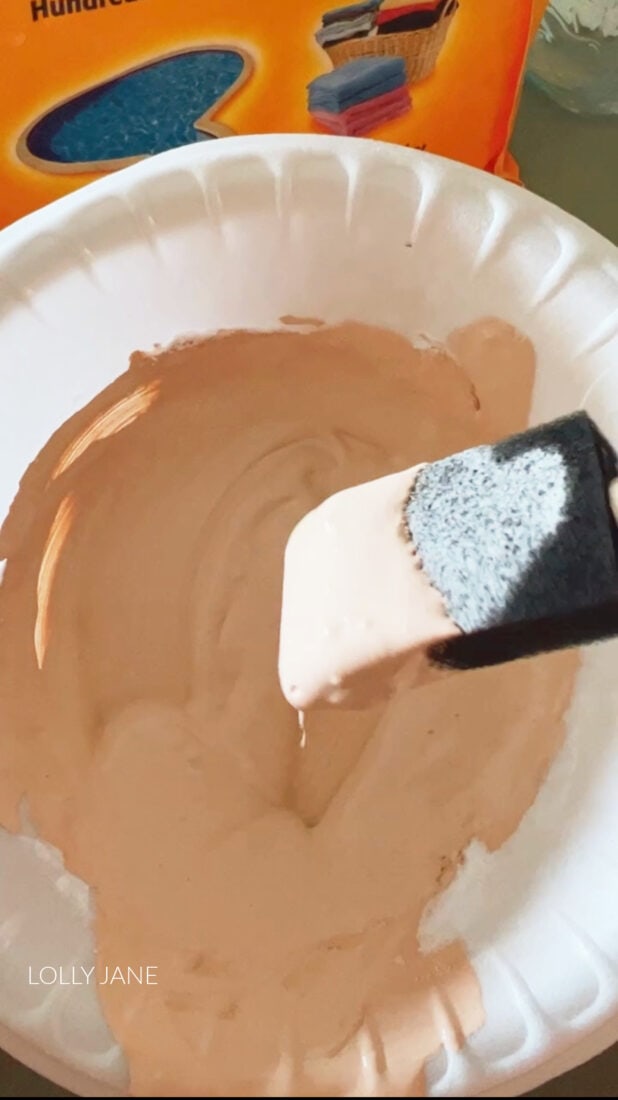
To mimic terracotta, mix 1/4 cup paint to 1 tablespoon of baking soda. You’ll want the consistency of pancake batter, but grittier 😉
Step 3: Paint the Skull
The key to successfully painting terra cotta is light coats and to let it fully dry before you apply your next coat. If you start painting before it’s dry, it’ll pull off the first layer of paint.
PRO TIP: use a blowdryer between coats for fast drying. Perfect for impatient crafters!
Remember, the goal is to mimic the look of terra cotta so crumbly-looking or chunky paint is normal.
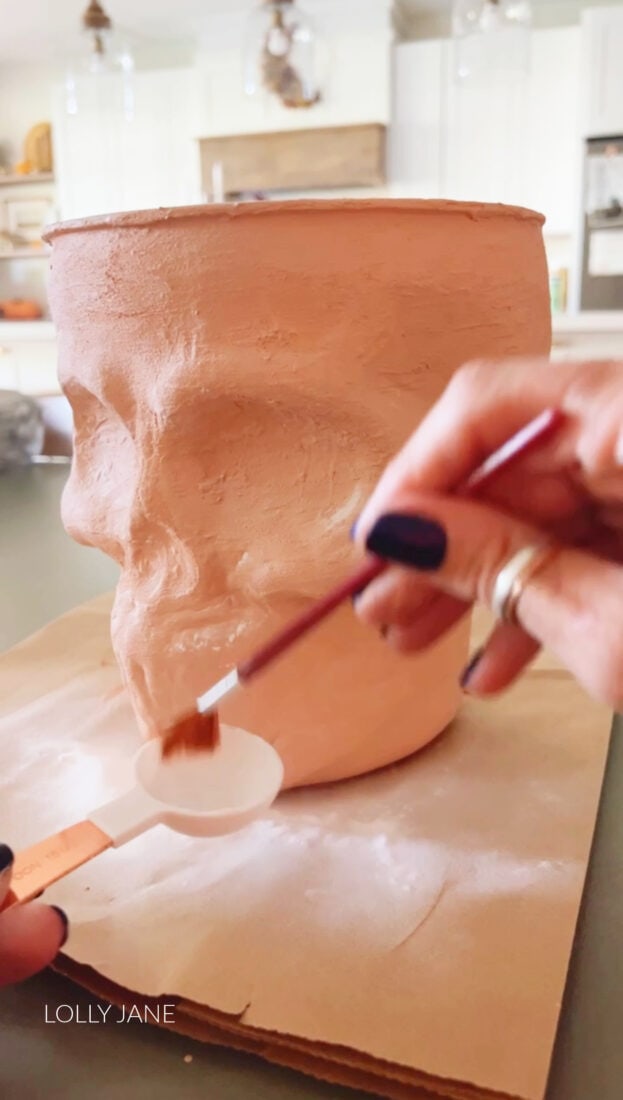
After the final coat of paint is dry, dust the skull with baking soda to create a matte finish effect.
Step 4: Seal the Paint
To ensure your paint job lasts, give your skull vase a protective finish. Spray sealing is faster and won’t break off any chunks of paint. But if you want to seal by hand, you can use a poly-acrylic or even decoupage. Any of these sealers will prevent chipping or fading over time.
Step 5: Insert Floral Foam
Place a piece of floral foam inside the skull to hold your Halloween florals and picks securely in place. Trim the foam as needed to fit comfortably. If you don’t have foam on hand, use a brown paper bag or plastic bag to fill up space in the bottom of the vase as it’s pretty deep for shorter stems.
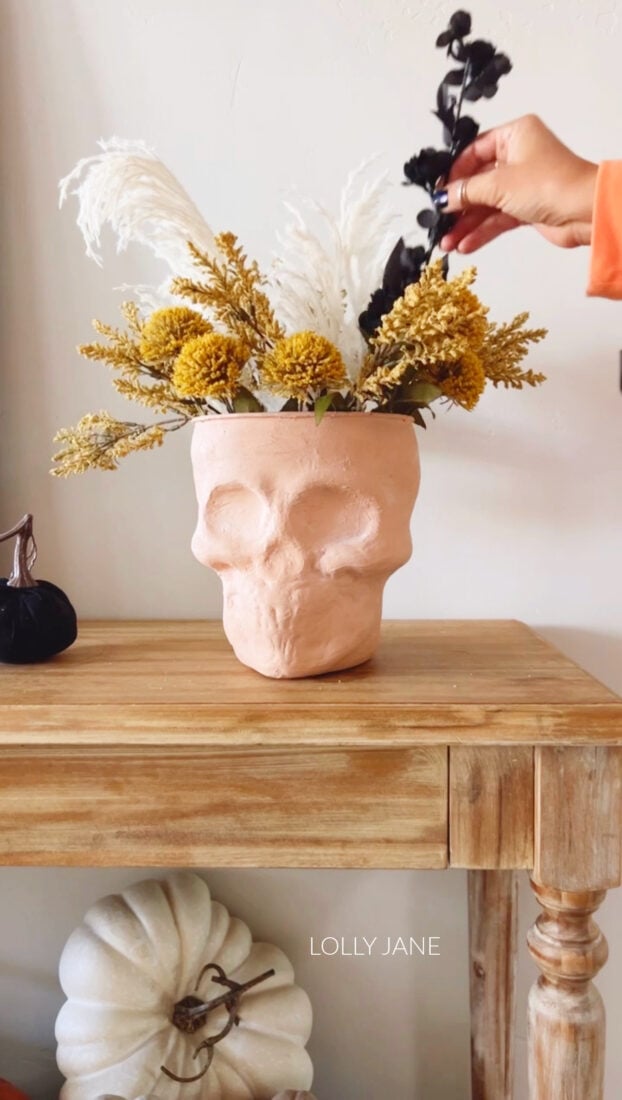
Step 6: Arrange Your Florals
Now, it’s time to have fun with your Halloween decor! Arrange artificial Halloween florals, spooky picks and any other decorative elements you’ve picked up from your local craft store inside the skull vase. Just tuck in here and there until you achieve the look you’re going for.
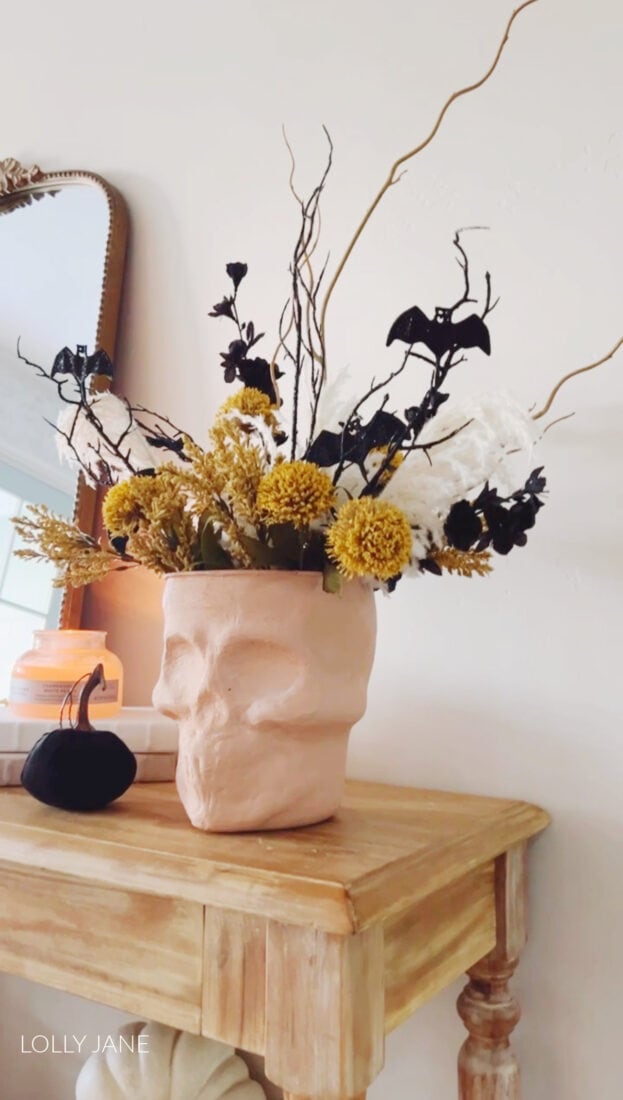
Step 7: Display
Find the perfect spot in your home to display your DIY skull vase. Whether it’s a centerpiece for your Halloween party or a spooky addition to your mantel or entryway, your skull vase is sure to turn heads.
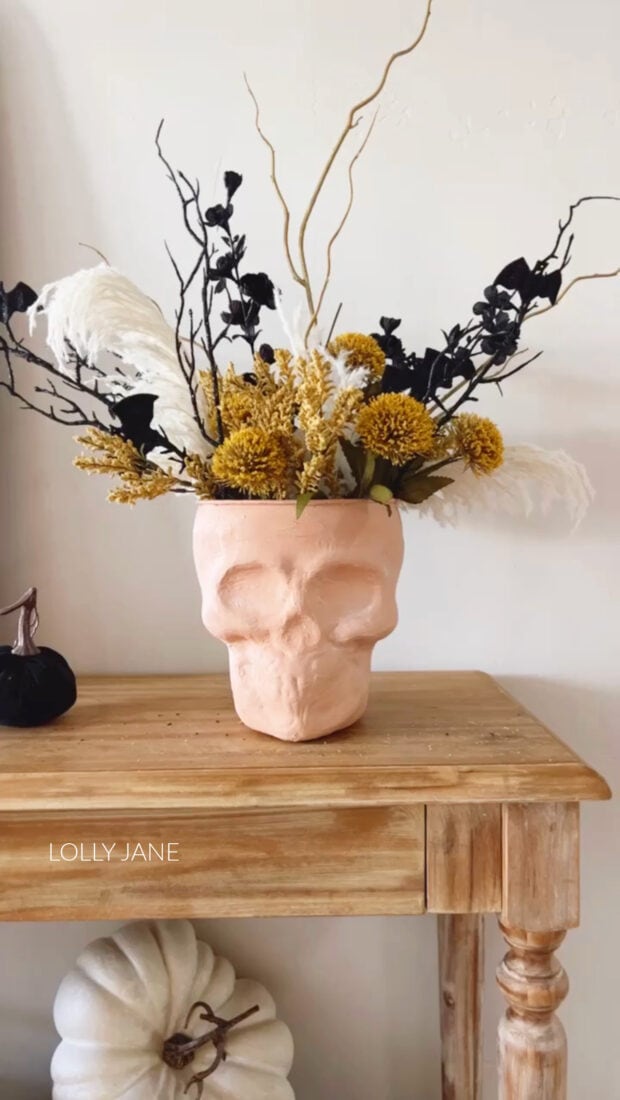
With this fun and creative DIY project, you can transform an ordinary acrylic skull into a show-stopping Halloween decoration. The terra cotta-inspired texture, combined with your choice of Halloween florals and picks, will make your home the ultimate destination for spooky fun this Halloween. Happy crafting!