DIY built-in entertainment center
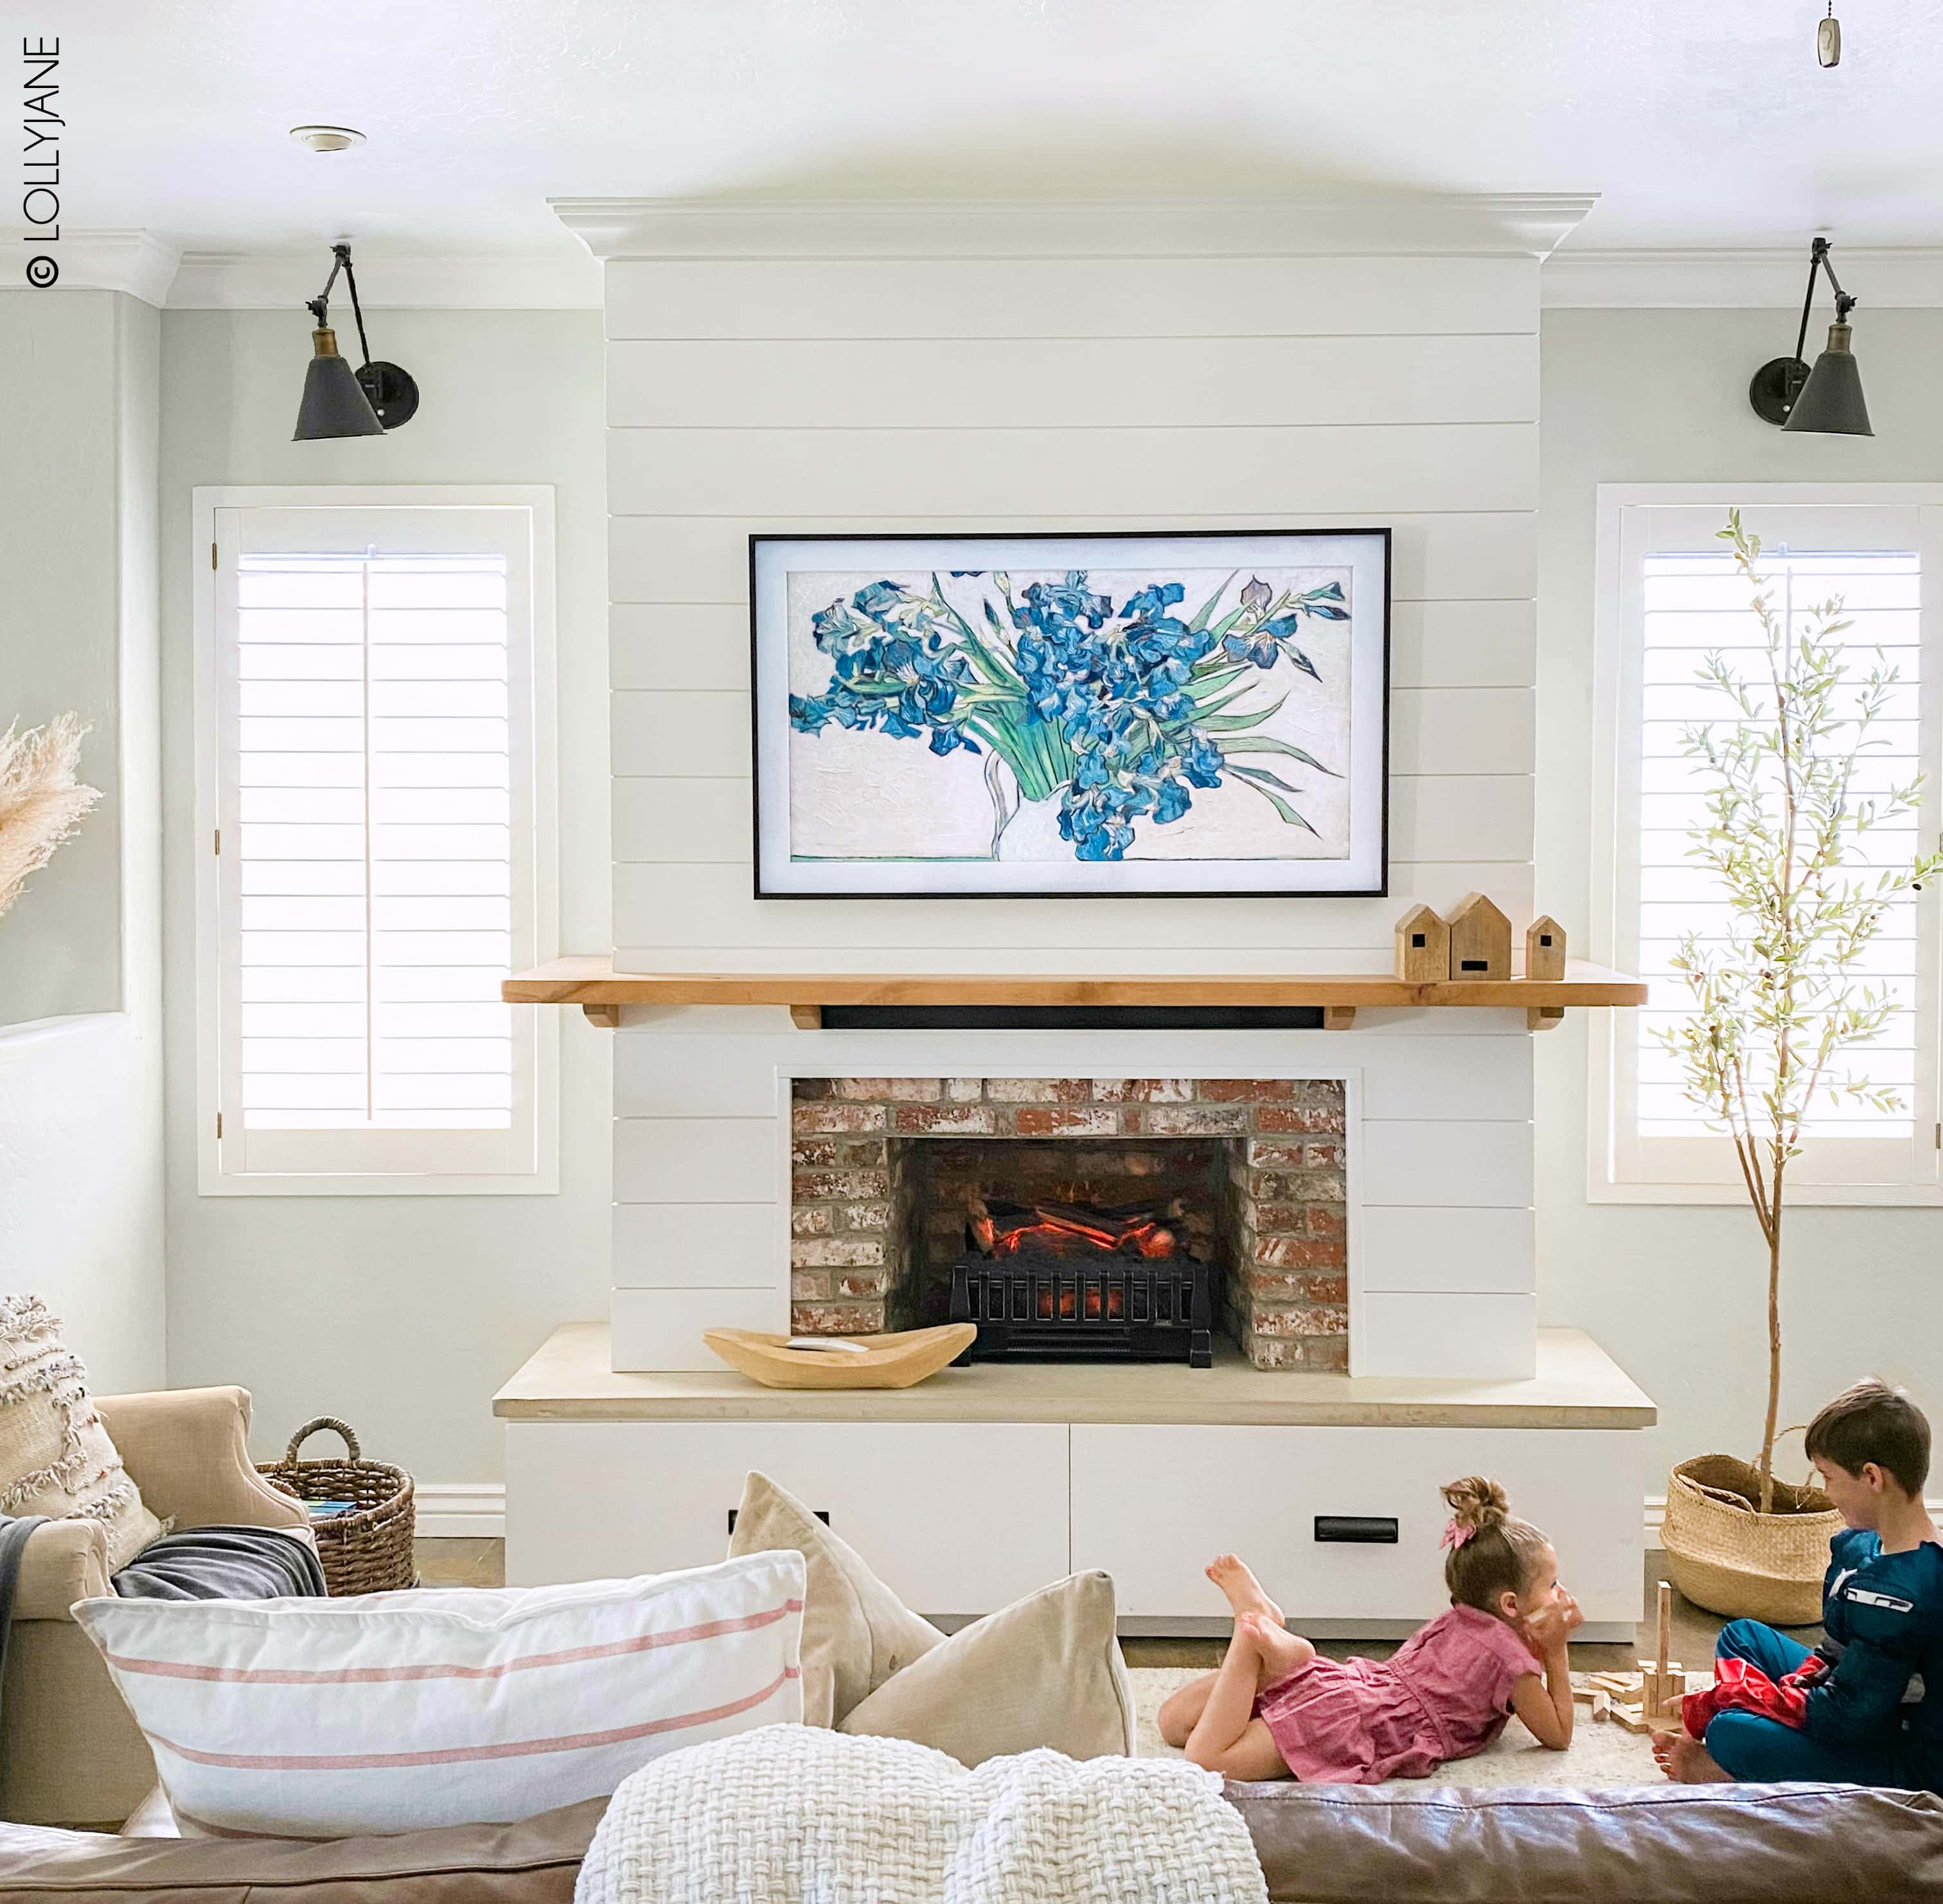
Dead space in your family room? See how we turned ours into an entertainment center that LOOKS like a fireplace!
If you’re coming from Instagram or TikTok, welcome!
DIY built-in entertainment center
We live in sunny Arizona where the weather averages warm to scorching hot… fireplaces are not a popular choice here for that reason but if your Phoenix home does have one, it is likely just for ambience. (That or is used for a few weeks in the dead of our 60 degree “winter”, ha!)
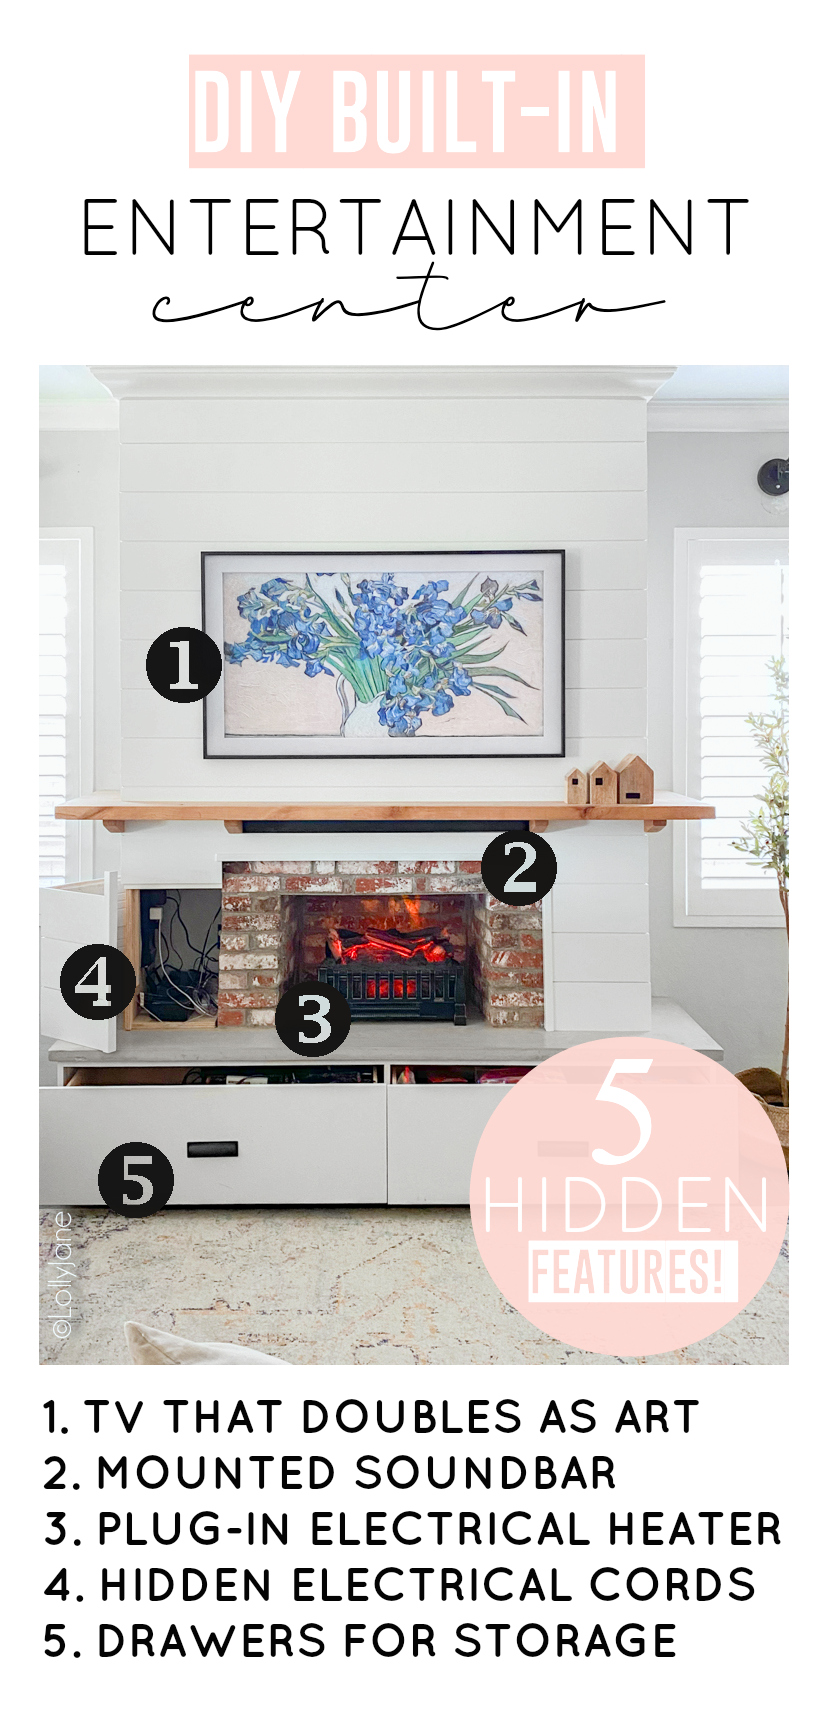
That being said, the look of a fireplace makes ANY room instantly cozy… even if it’s a hologram flame from an electric insert with faux wood. 😉 I’ll show you how we transformed a blank wall in our family room to a DIY built-in entertainment center, complete with 5 secret built-in features!
Supplies for our DIY built-in entertainment center
Everything we purchased to build/accessorize for our built-in entertainment center was from Home Depot or Amazon. Consequently, nothing fancy but together it makes for an esthetically pleasing faux fireplace.
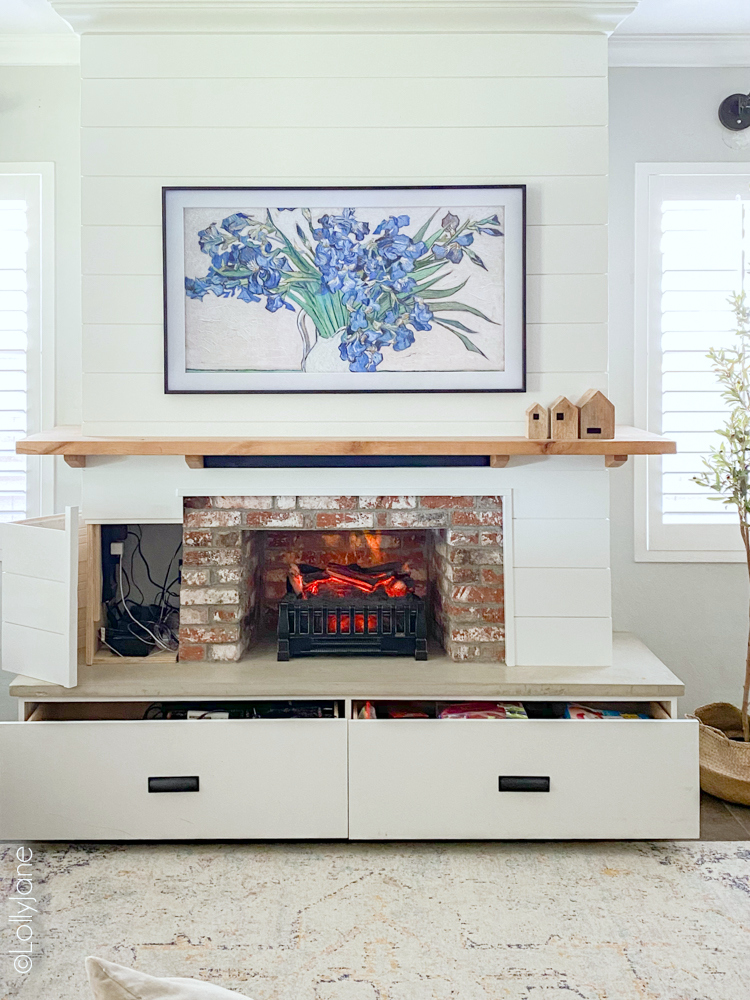
Here’s a breakdown of what we did, including 5 hidden features that really make this faux fireplace POP!
Instructions for a built-in entertainment center
Of course, measurements will vary for your own space.

Note: Note that my husband is a lineman by day (like utility worker, not football!) and woodworker by night so he built this with no formal plans. I’ll try my best for a somewhat step-by-step and if you have specific questions, leave a comment or email and I will have him answer.
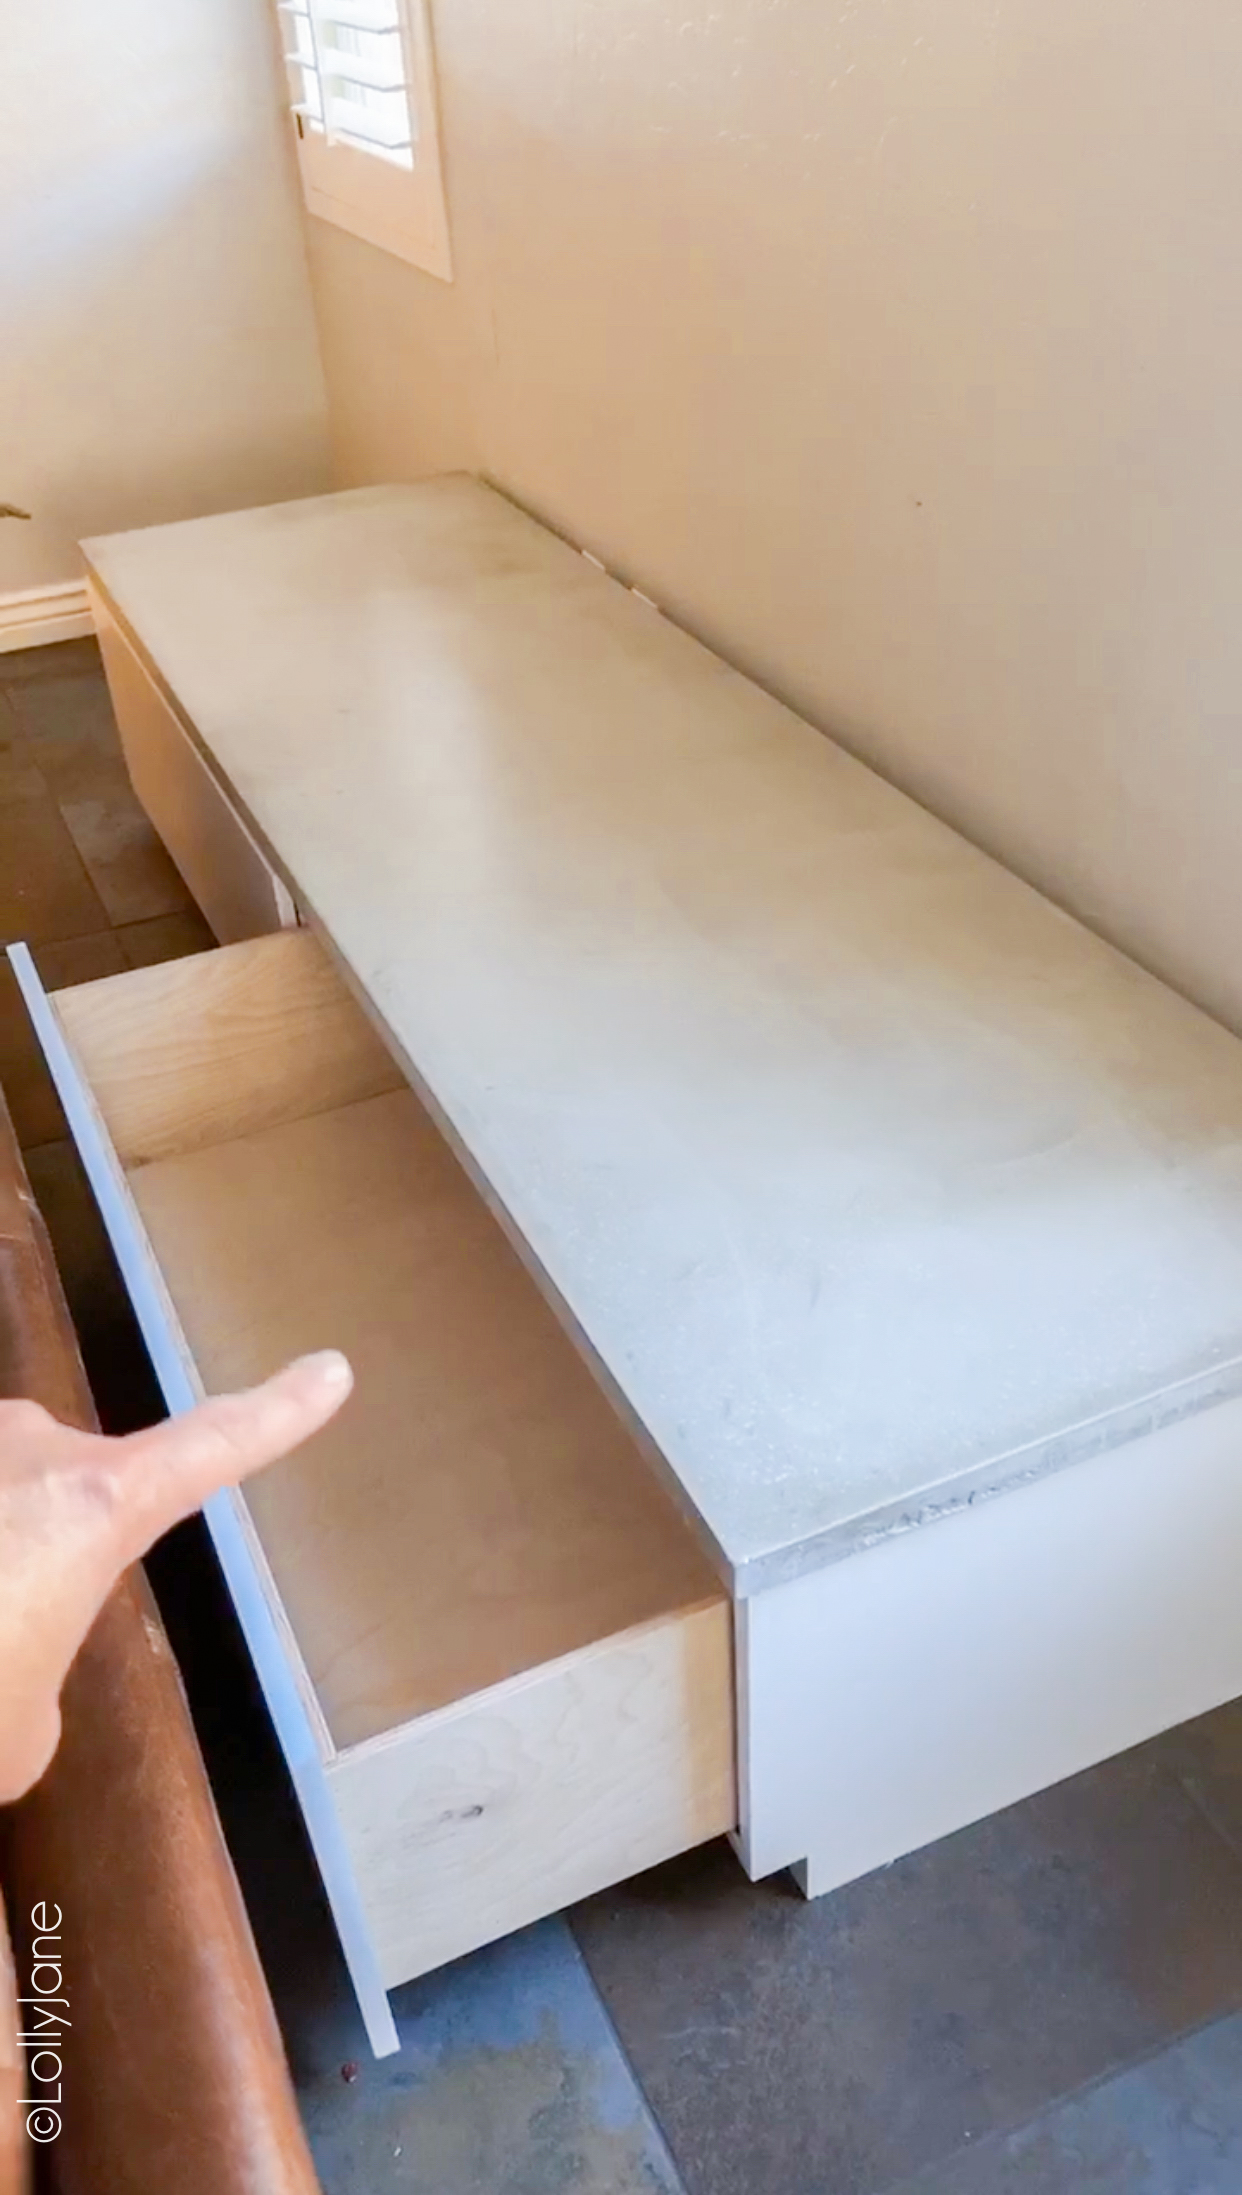
1. Bench Seat (with drawers)
Ours measures and each drawer is 86″ wide x 25″ deep x 16.5″ tall.
- Here is a similar tutorial with what we did, (but opted for 2 large drawers instead of 3.)
- You can find the drawer handles we used here.
2. Concrete Top
Ours measures 1.75″ tall x the 25″ deeo x 86″ wide, the same as the bench.
3. Brick Faux Fireplace
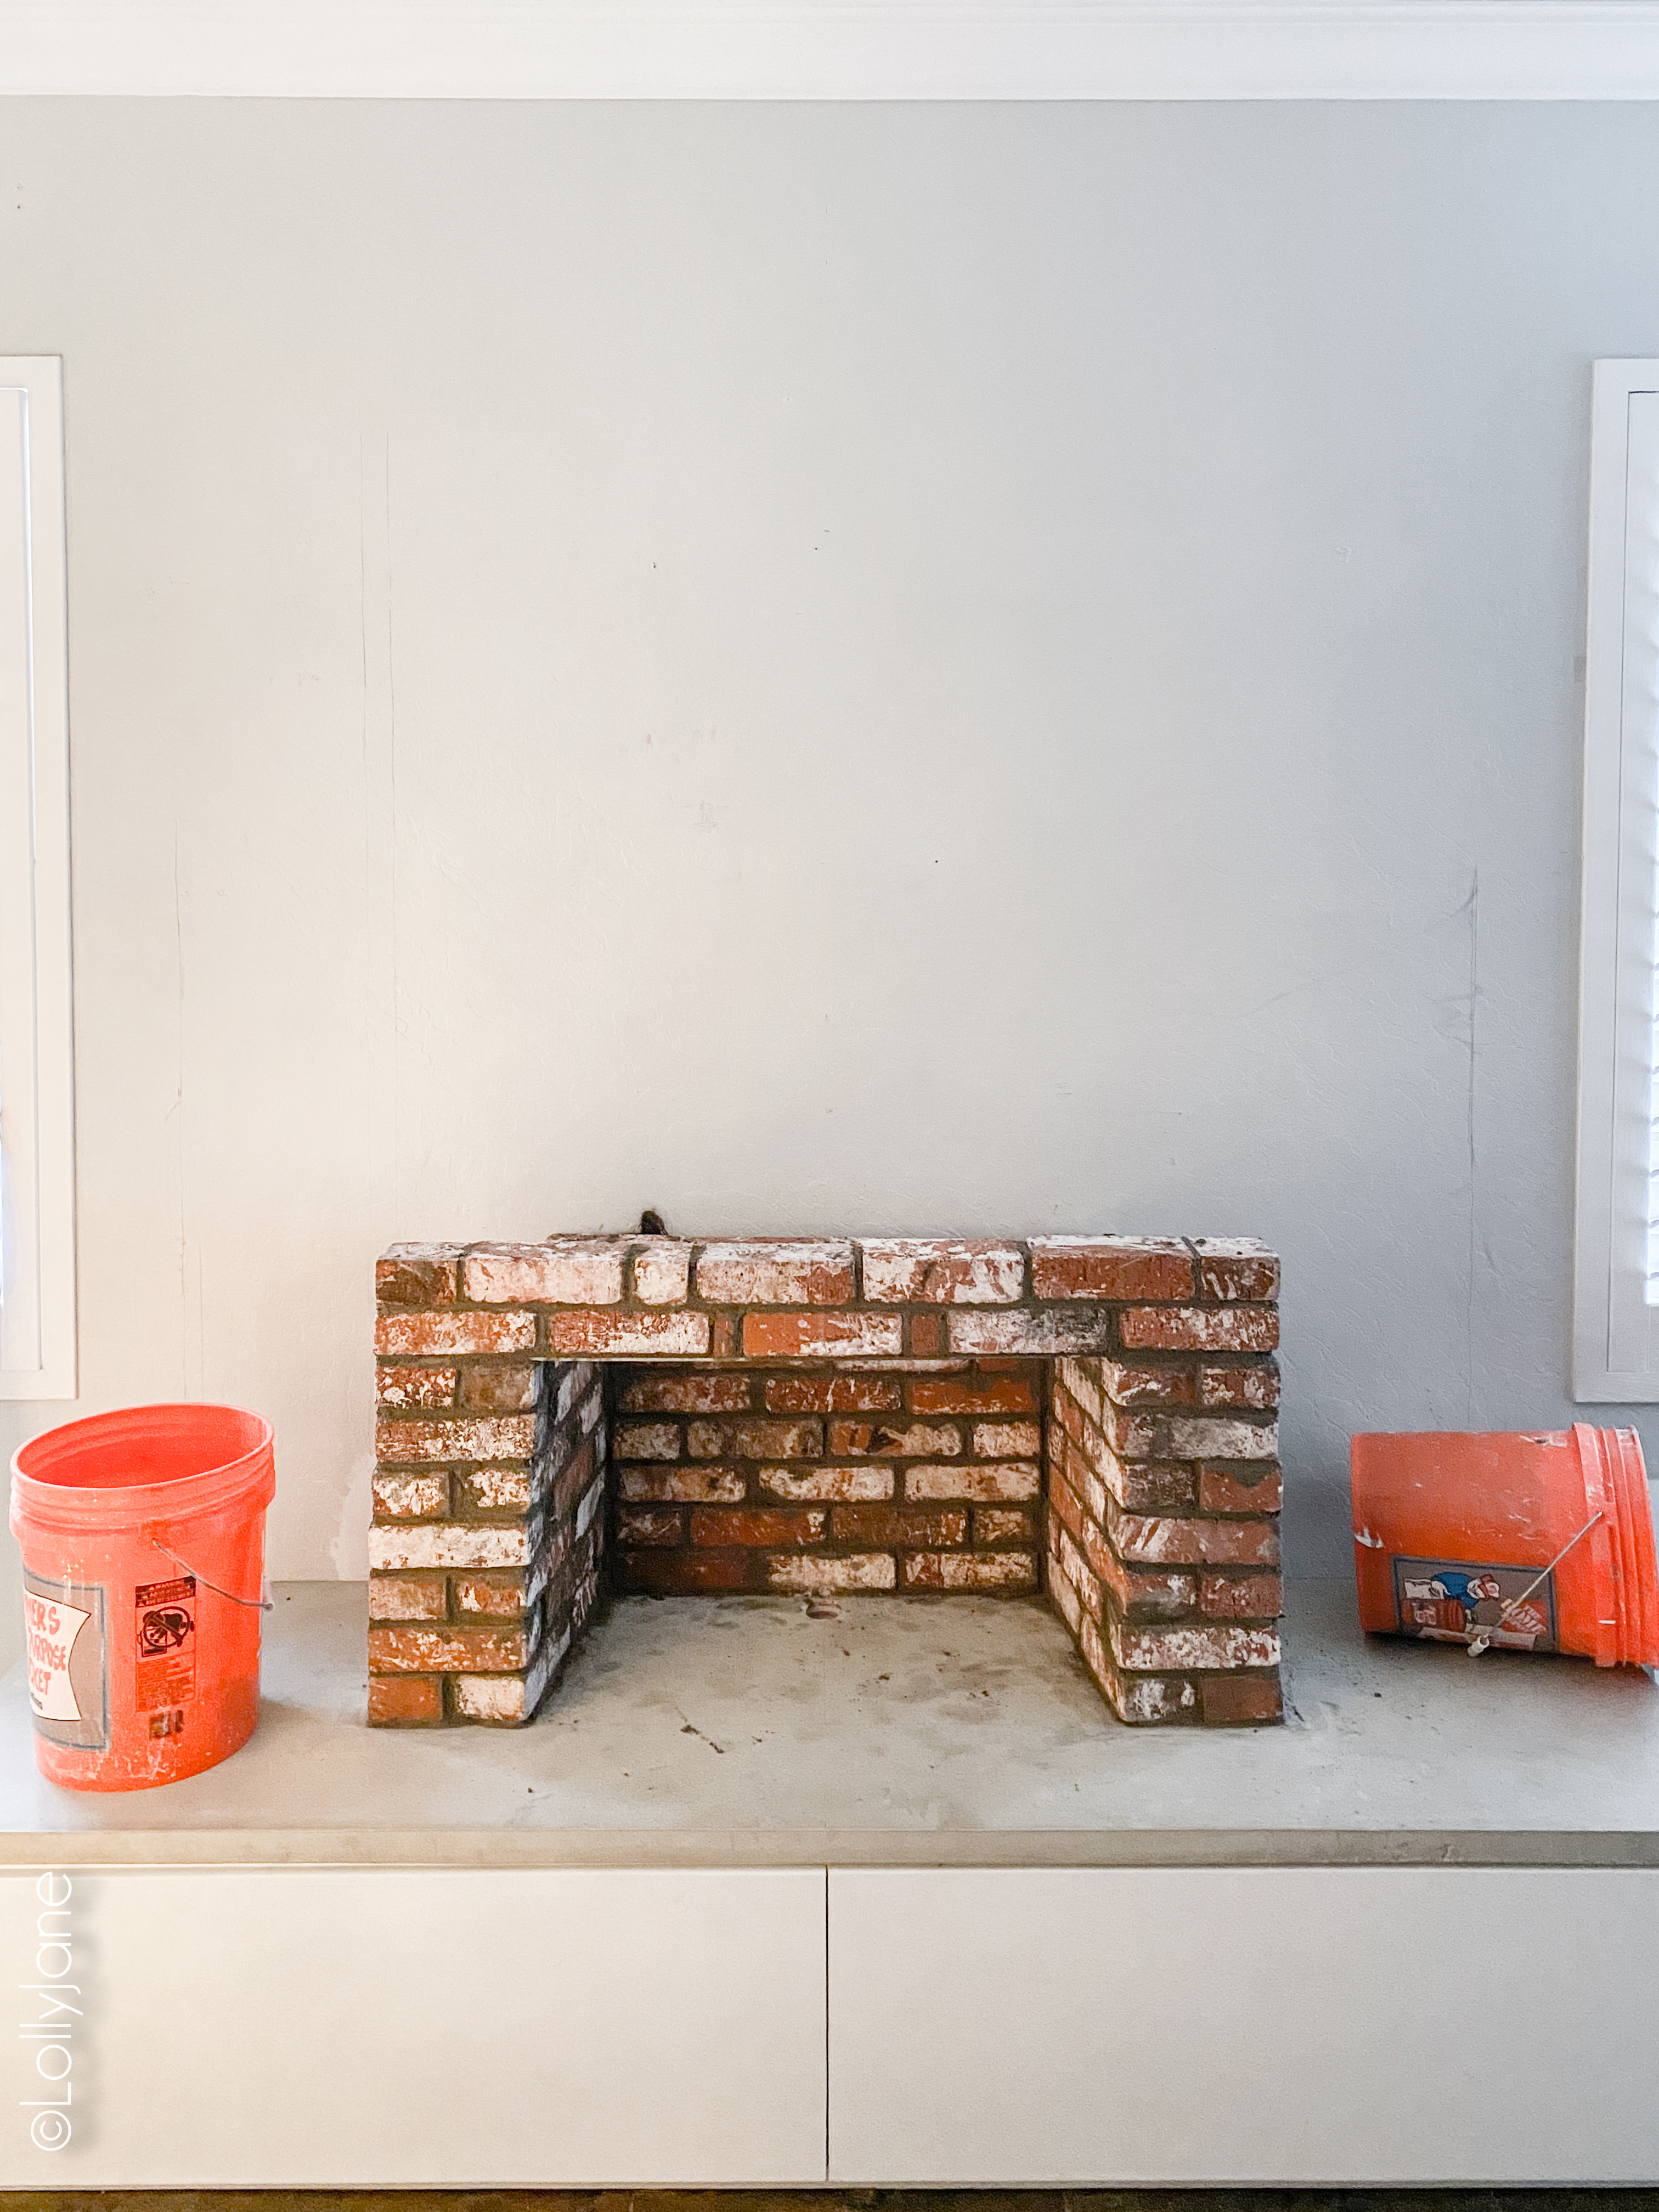
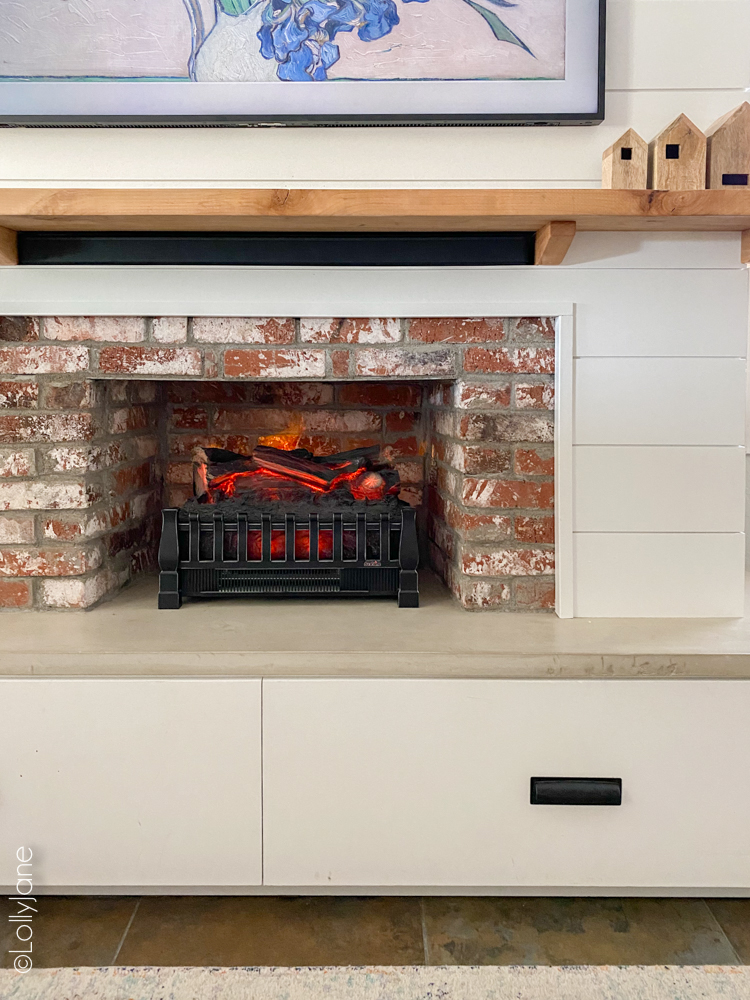
We built a Rumford style fireplace insert and love this red and white brick from Home Depot that give it the perfect amount of distress without being TOO rustic.
We used an electric heater strictly for ambience and mostly leave the heat off. Certainly if it is a chilly night, we may turn it on while in front of it only (think movie night) as it is perfect for a small room and doesn’t heat more than 10′ or so. The hologram flame looks altogether real and undeniably cozy which is what we wanted. 🙂
- Ours measures 43″ wide x 23″ tall x 15″ deep, (angles in 2″ incline.)
- Rumford tutorial found here.
- Bricks we used from Home Depot found here.
- Electric heater with realistic logs and hologram flame, (SO many positive reviews!)
4. FRAME
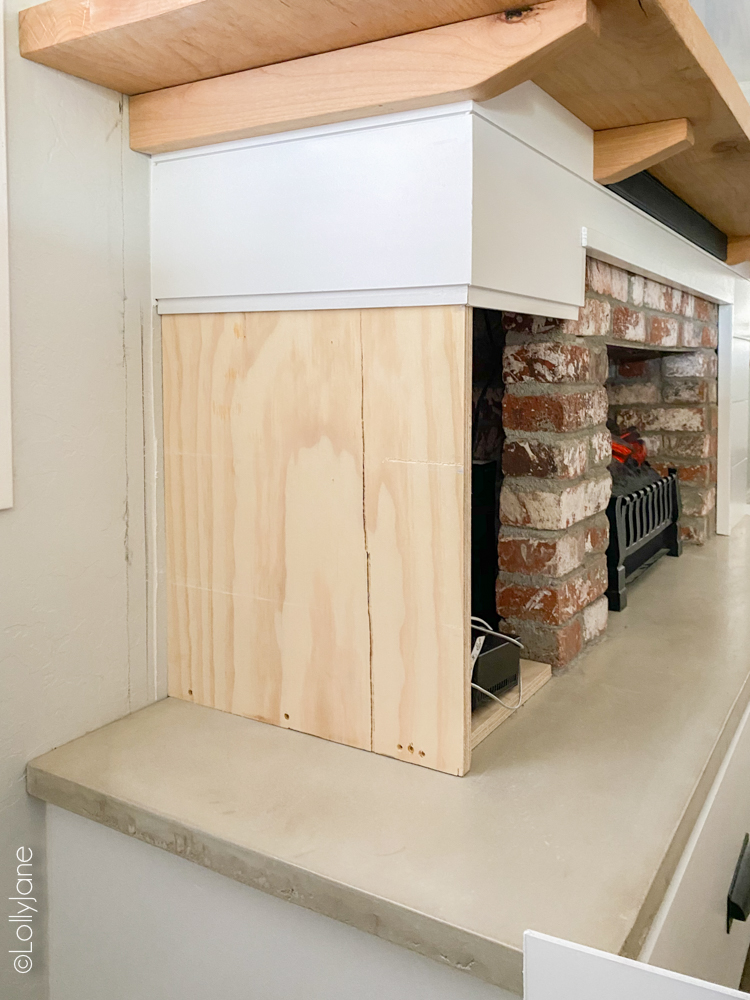
My husband built a form using sheets of plywood around the base of the faux fireplace insert and all the way to the roof, (crappy iphone pic but you get the gist!)
- It measure 71.5″ wide x 86.5″ tall x 18″ deep.
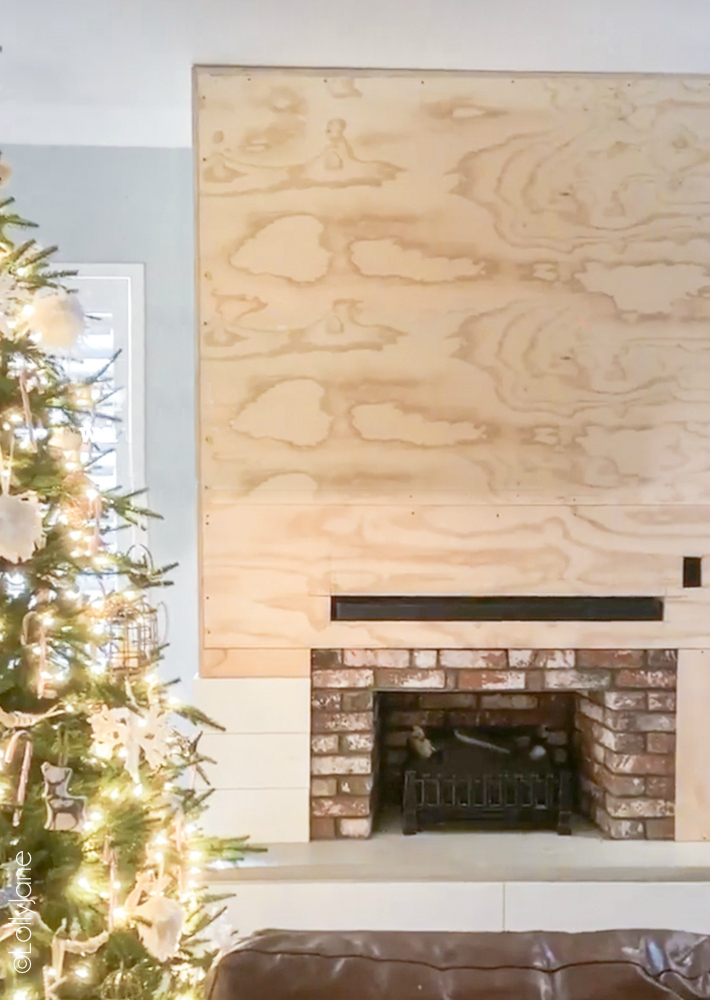
He cut out a hole for the sound bar then a notch for the TV cord. This is when be created a removable panel for the electrical elements to be safely tucked away and out of sight.
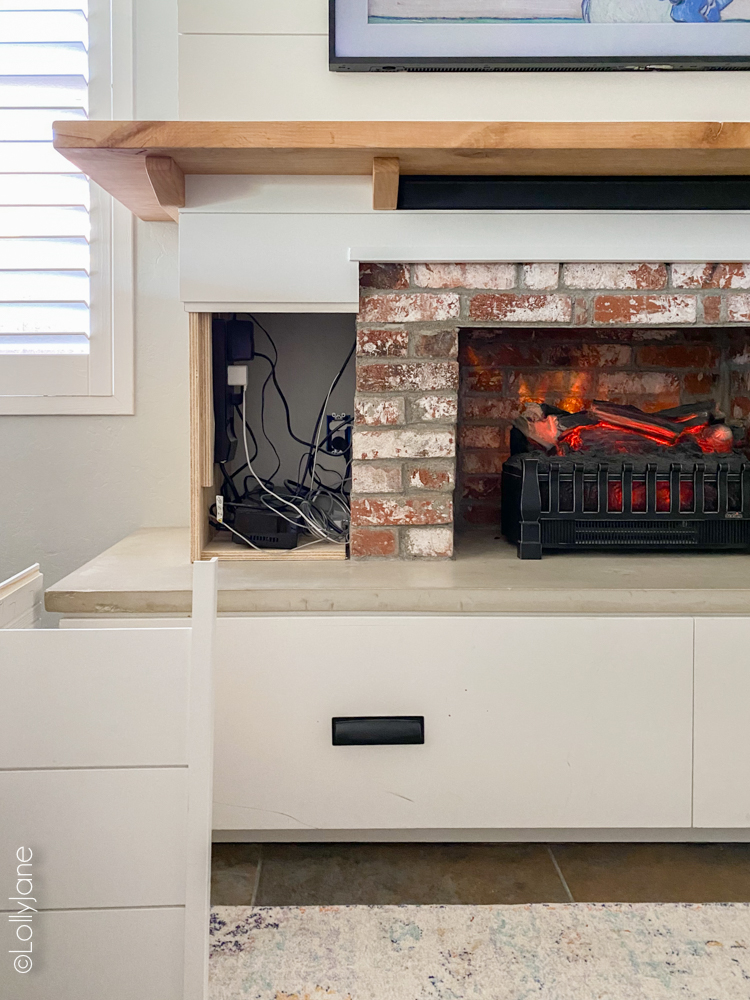
It’s large enough a DVD player or our kids Xbox or Wii to fit inside as well.
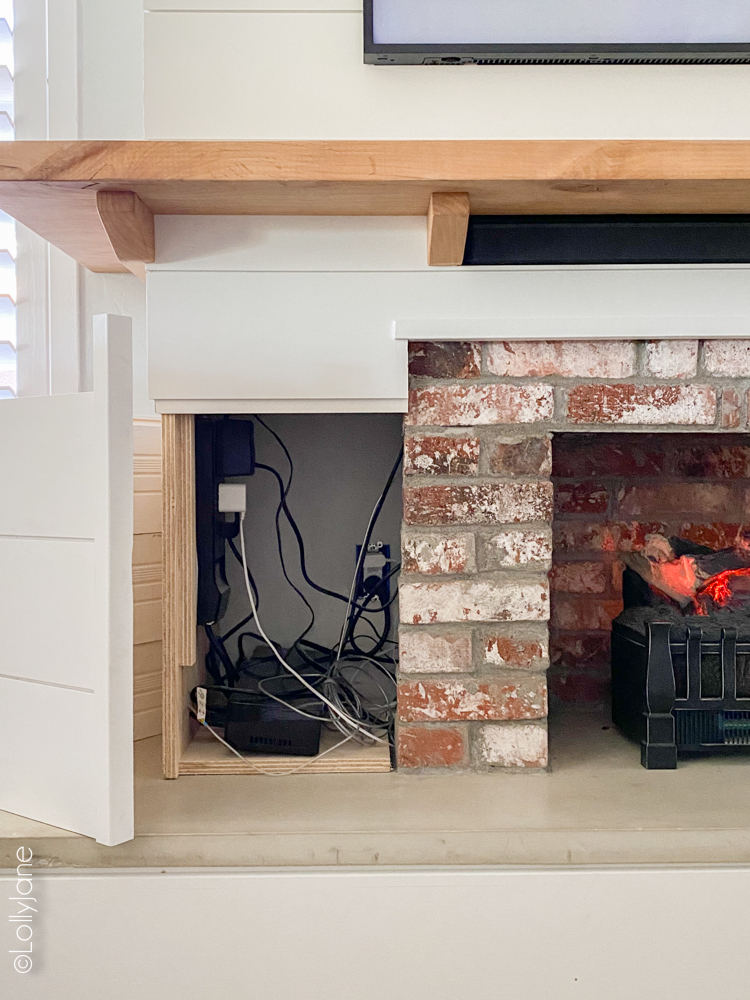
It’s a nice feature to have unattractive cords from the TV and electric heater out of sight! This is the step he also inserted the sound bar, there’s a little shelf it sits on but note: heat could damage the sound bar over time so he took an extra precautious step and added 2″ closed cell foam (1″ x2) around the sound bar to protect it. Don’t skip this step!
- This sound bar is an Amazon best seller, we have a similar one and love it!
5. SHIPLAP
Once the frame was mounted to the wall, we shiplapped over the plywood, including the panel he cut out.
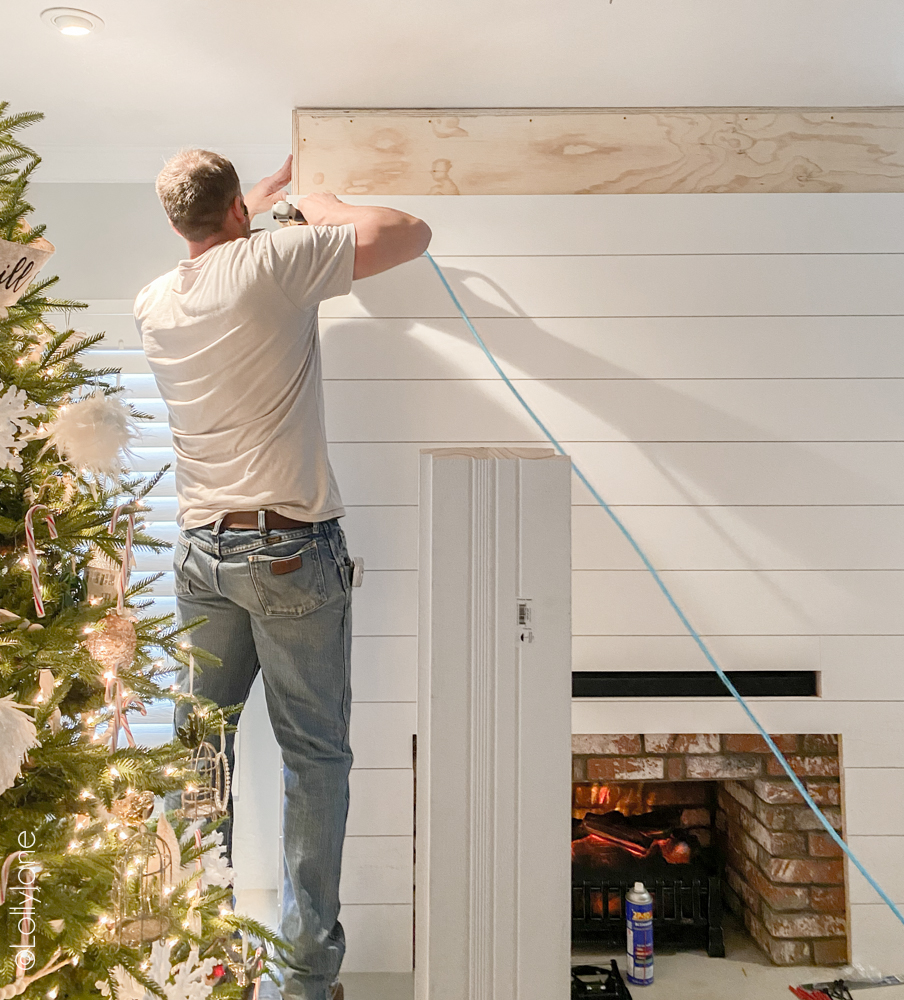
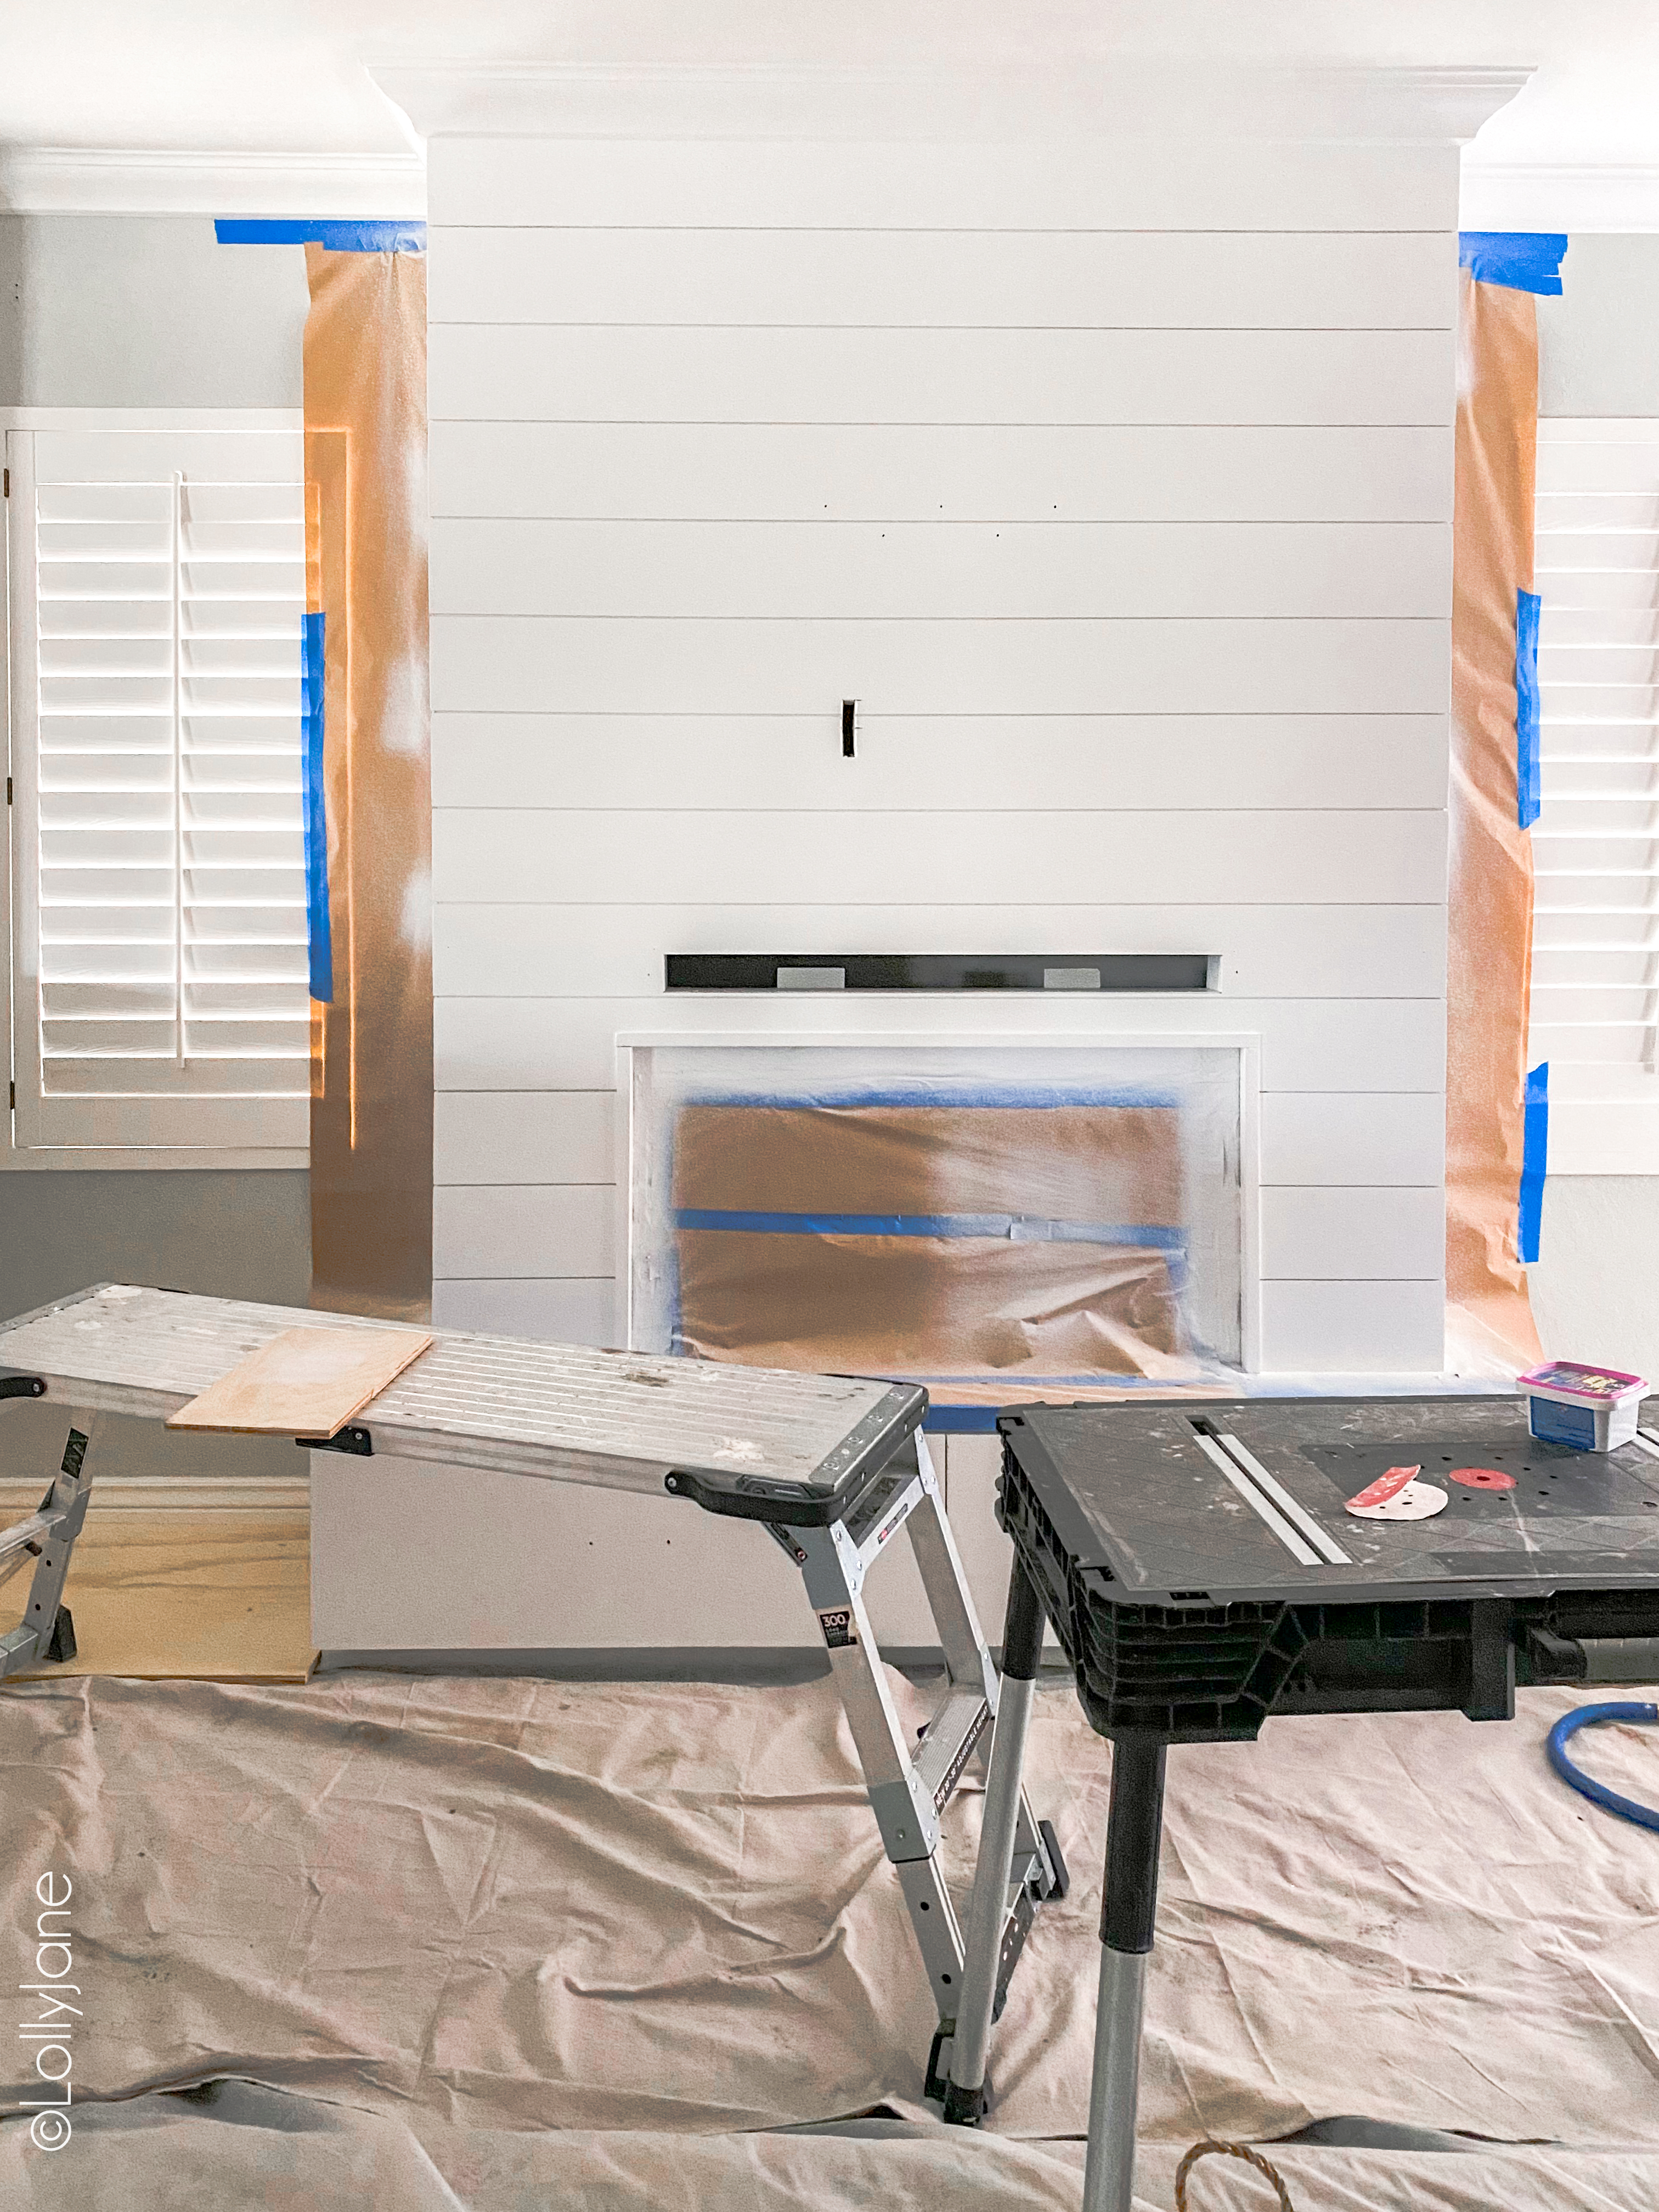
To hide the panel and make it look seamless, he added 1″corner trim around the front of the faux fireplace. We continued the existing crown moulding (our crown moulding is 6″) at the top of the shiplap to make the room more uniform.
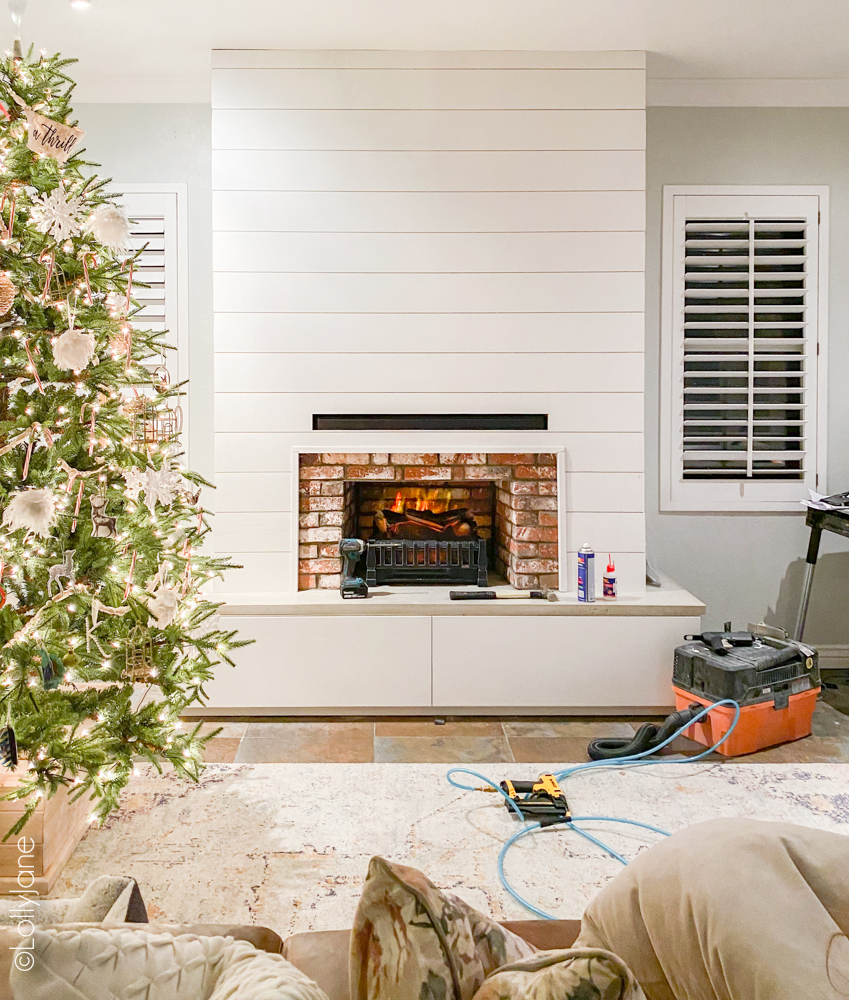
We taped off the room and sprayed the shiplap a crisp white.
6. MANTEL
If you’re a wood snob then you will love this mantel!
- Ours measures 85″ wide x 2″ deep x 2″ tall.
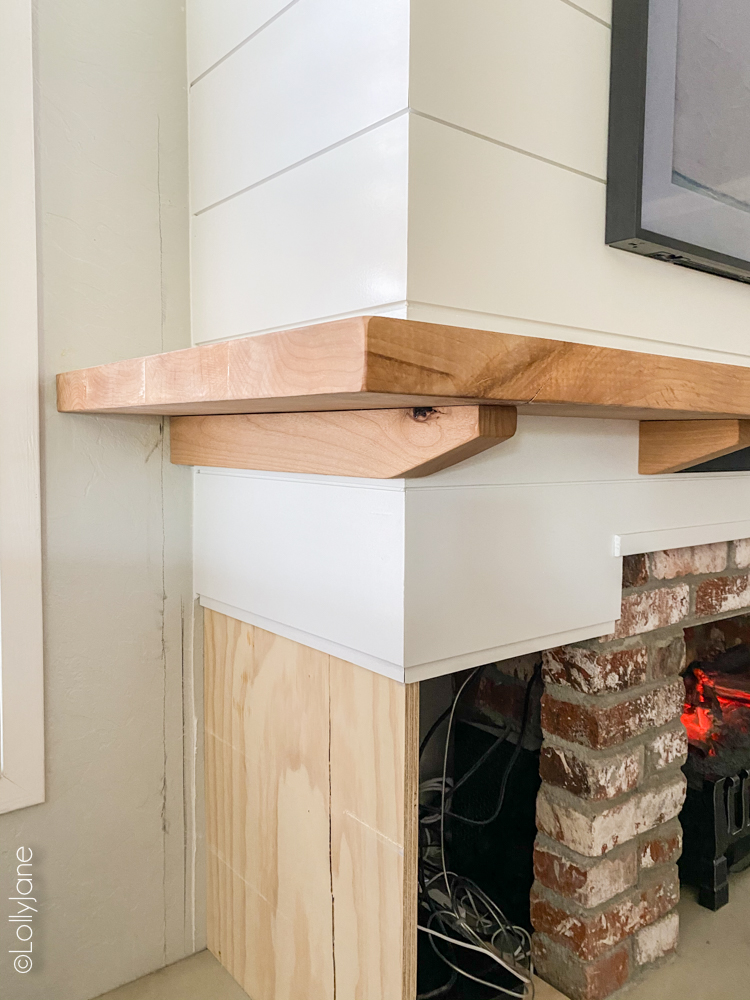
Made from alder hardwood, my husband simply created a U around the middle of the fireplace and secured it, then hand cut matching alder brackets to make it extra secure.
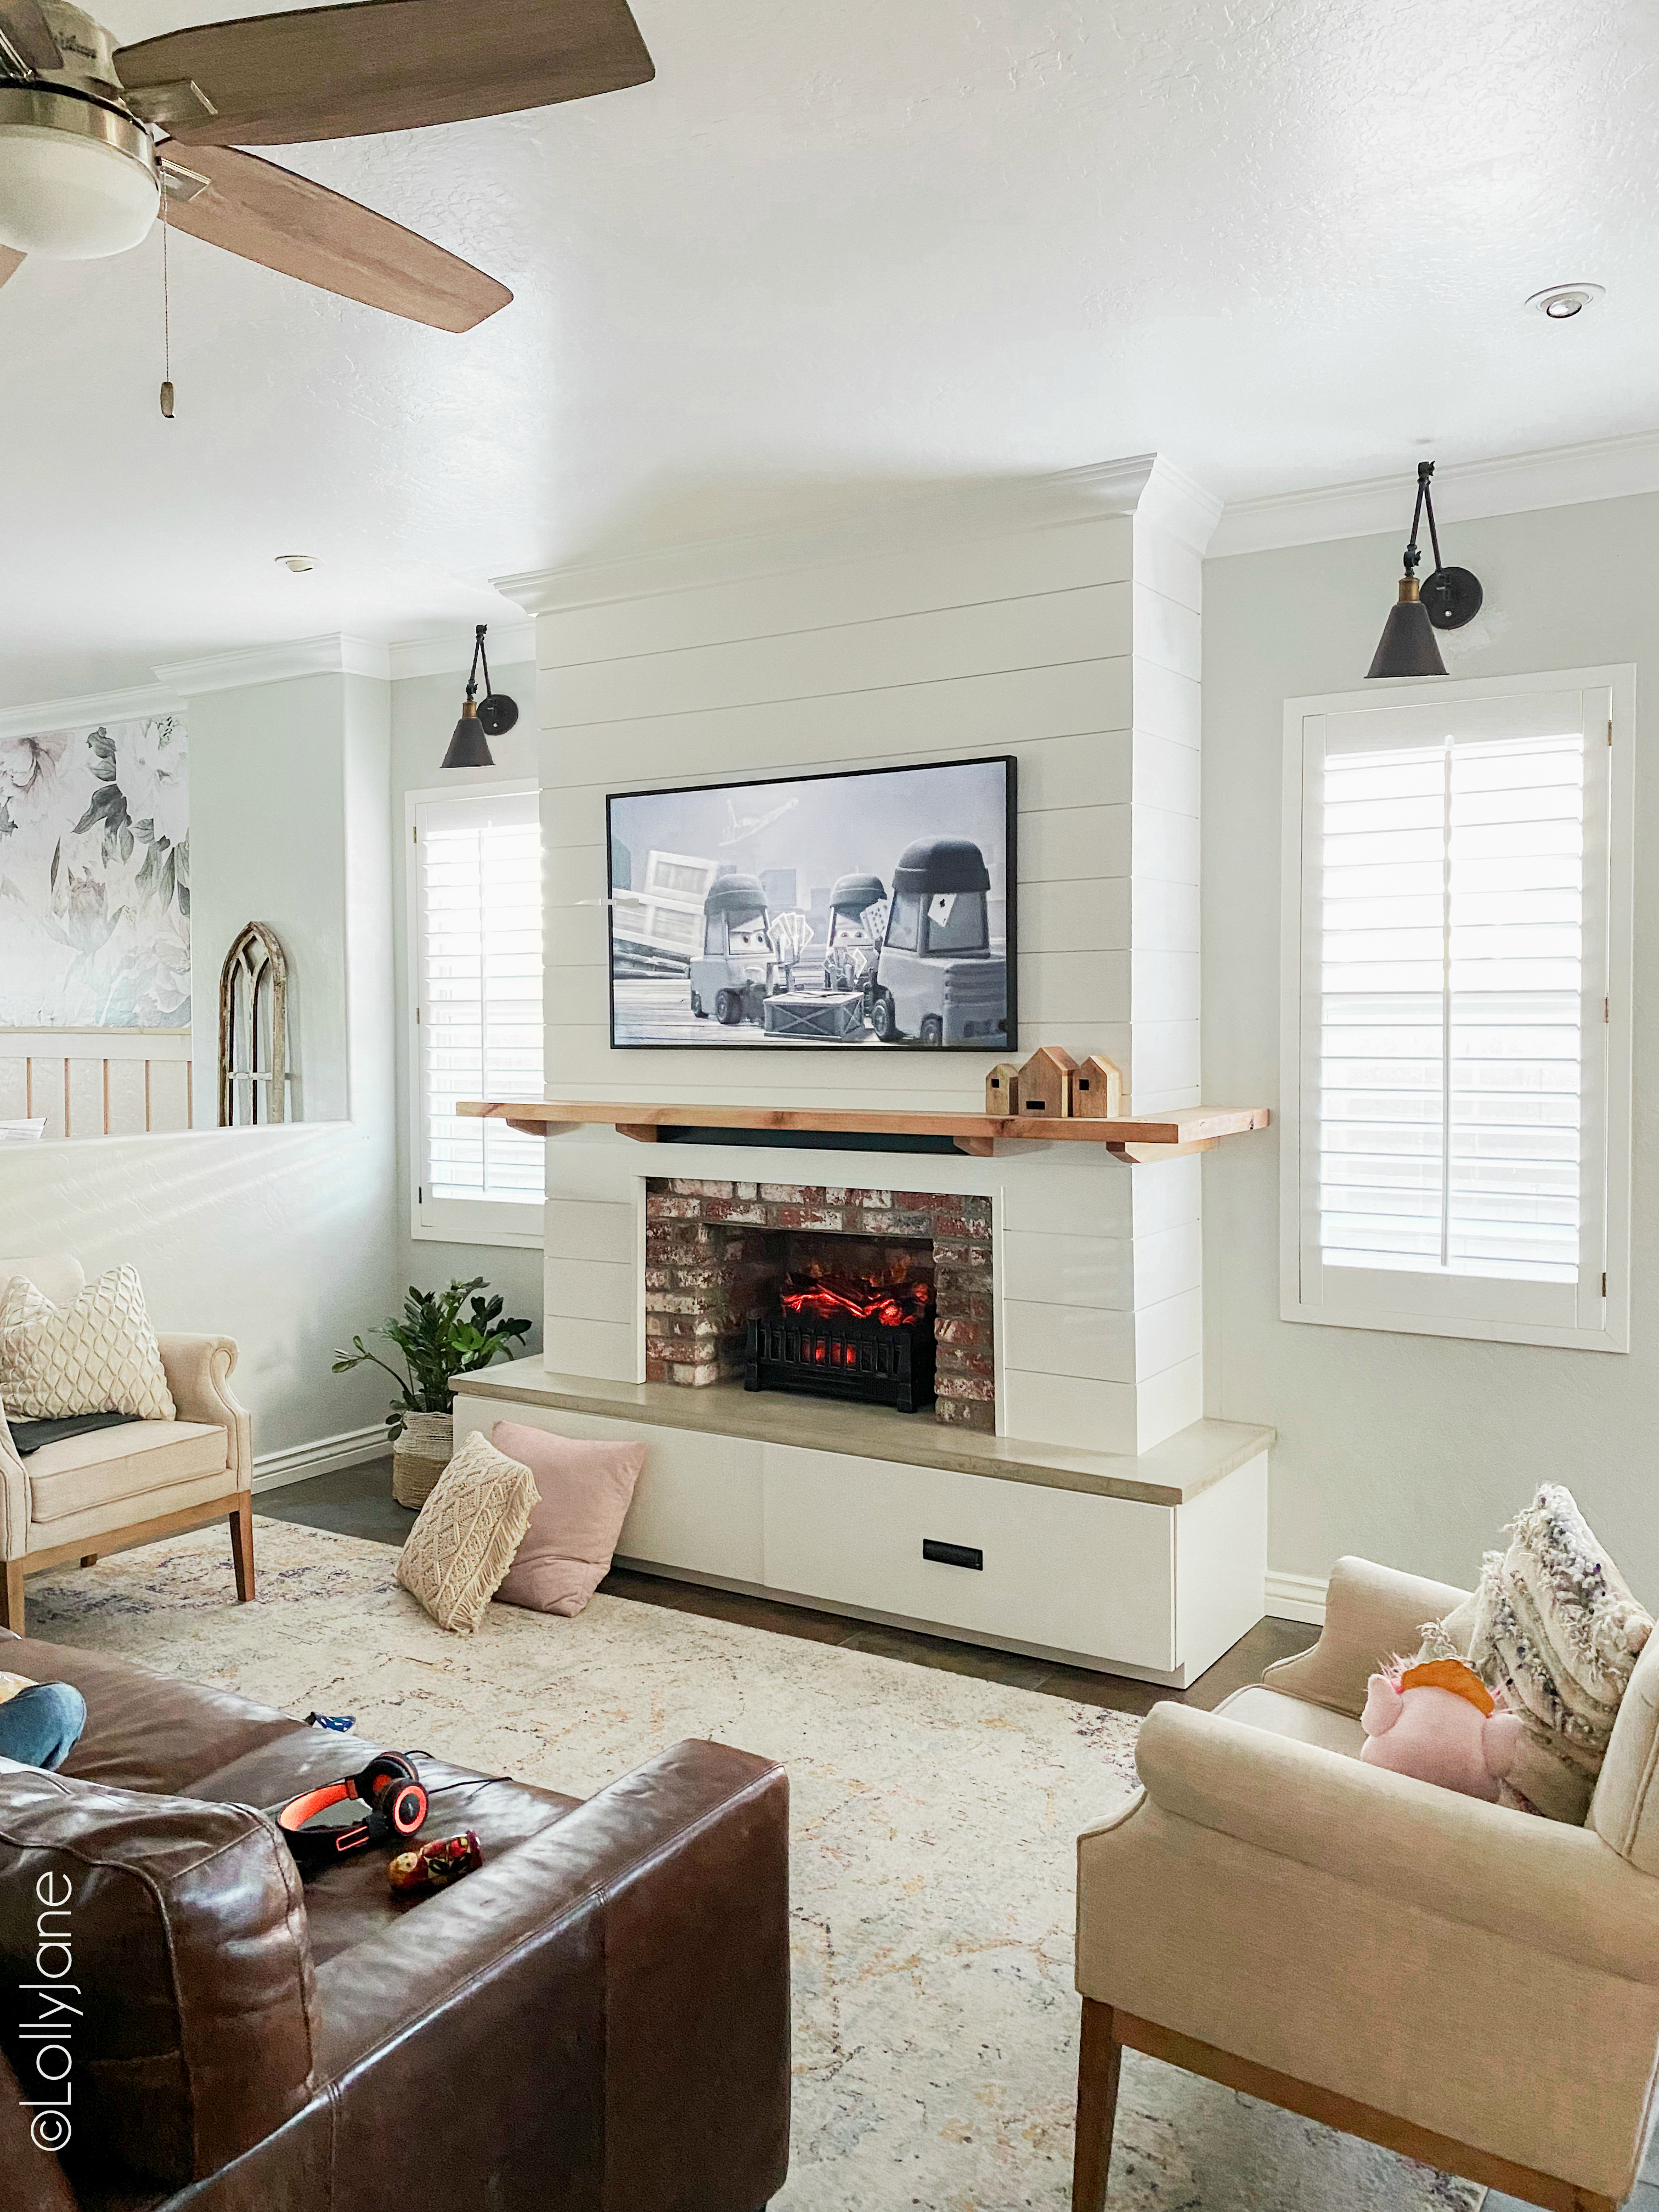
After the fireplace was finished, we debating between the smaller gooseneck OR swing arm light…
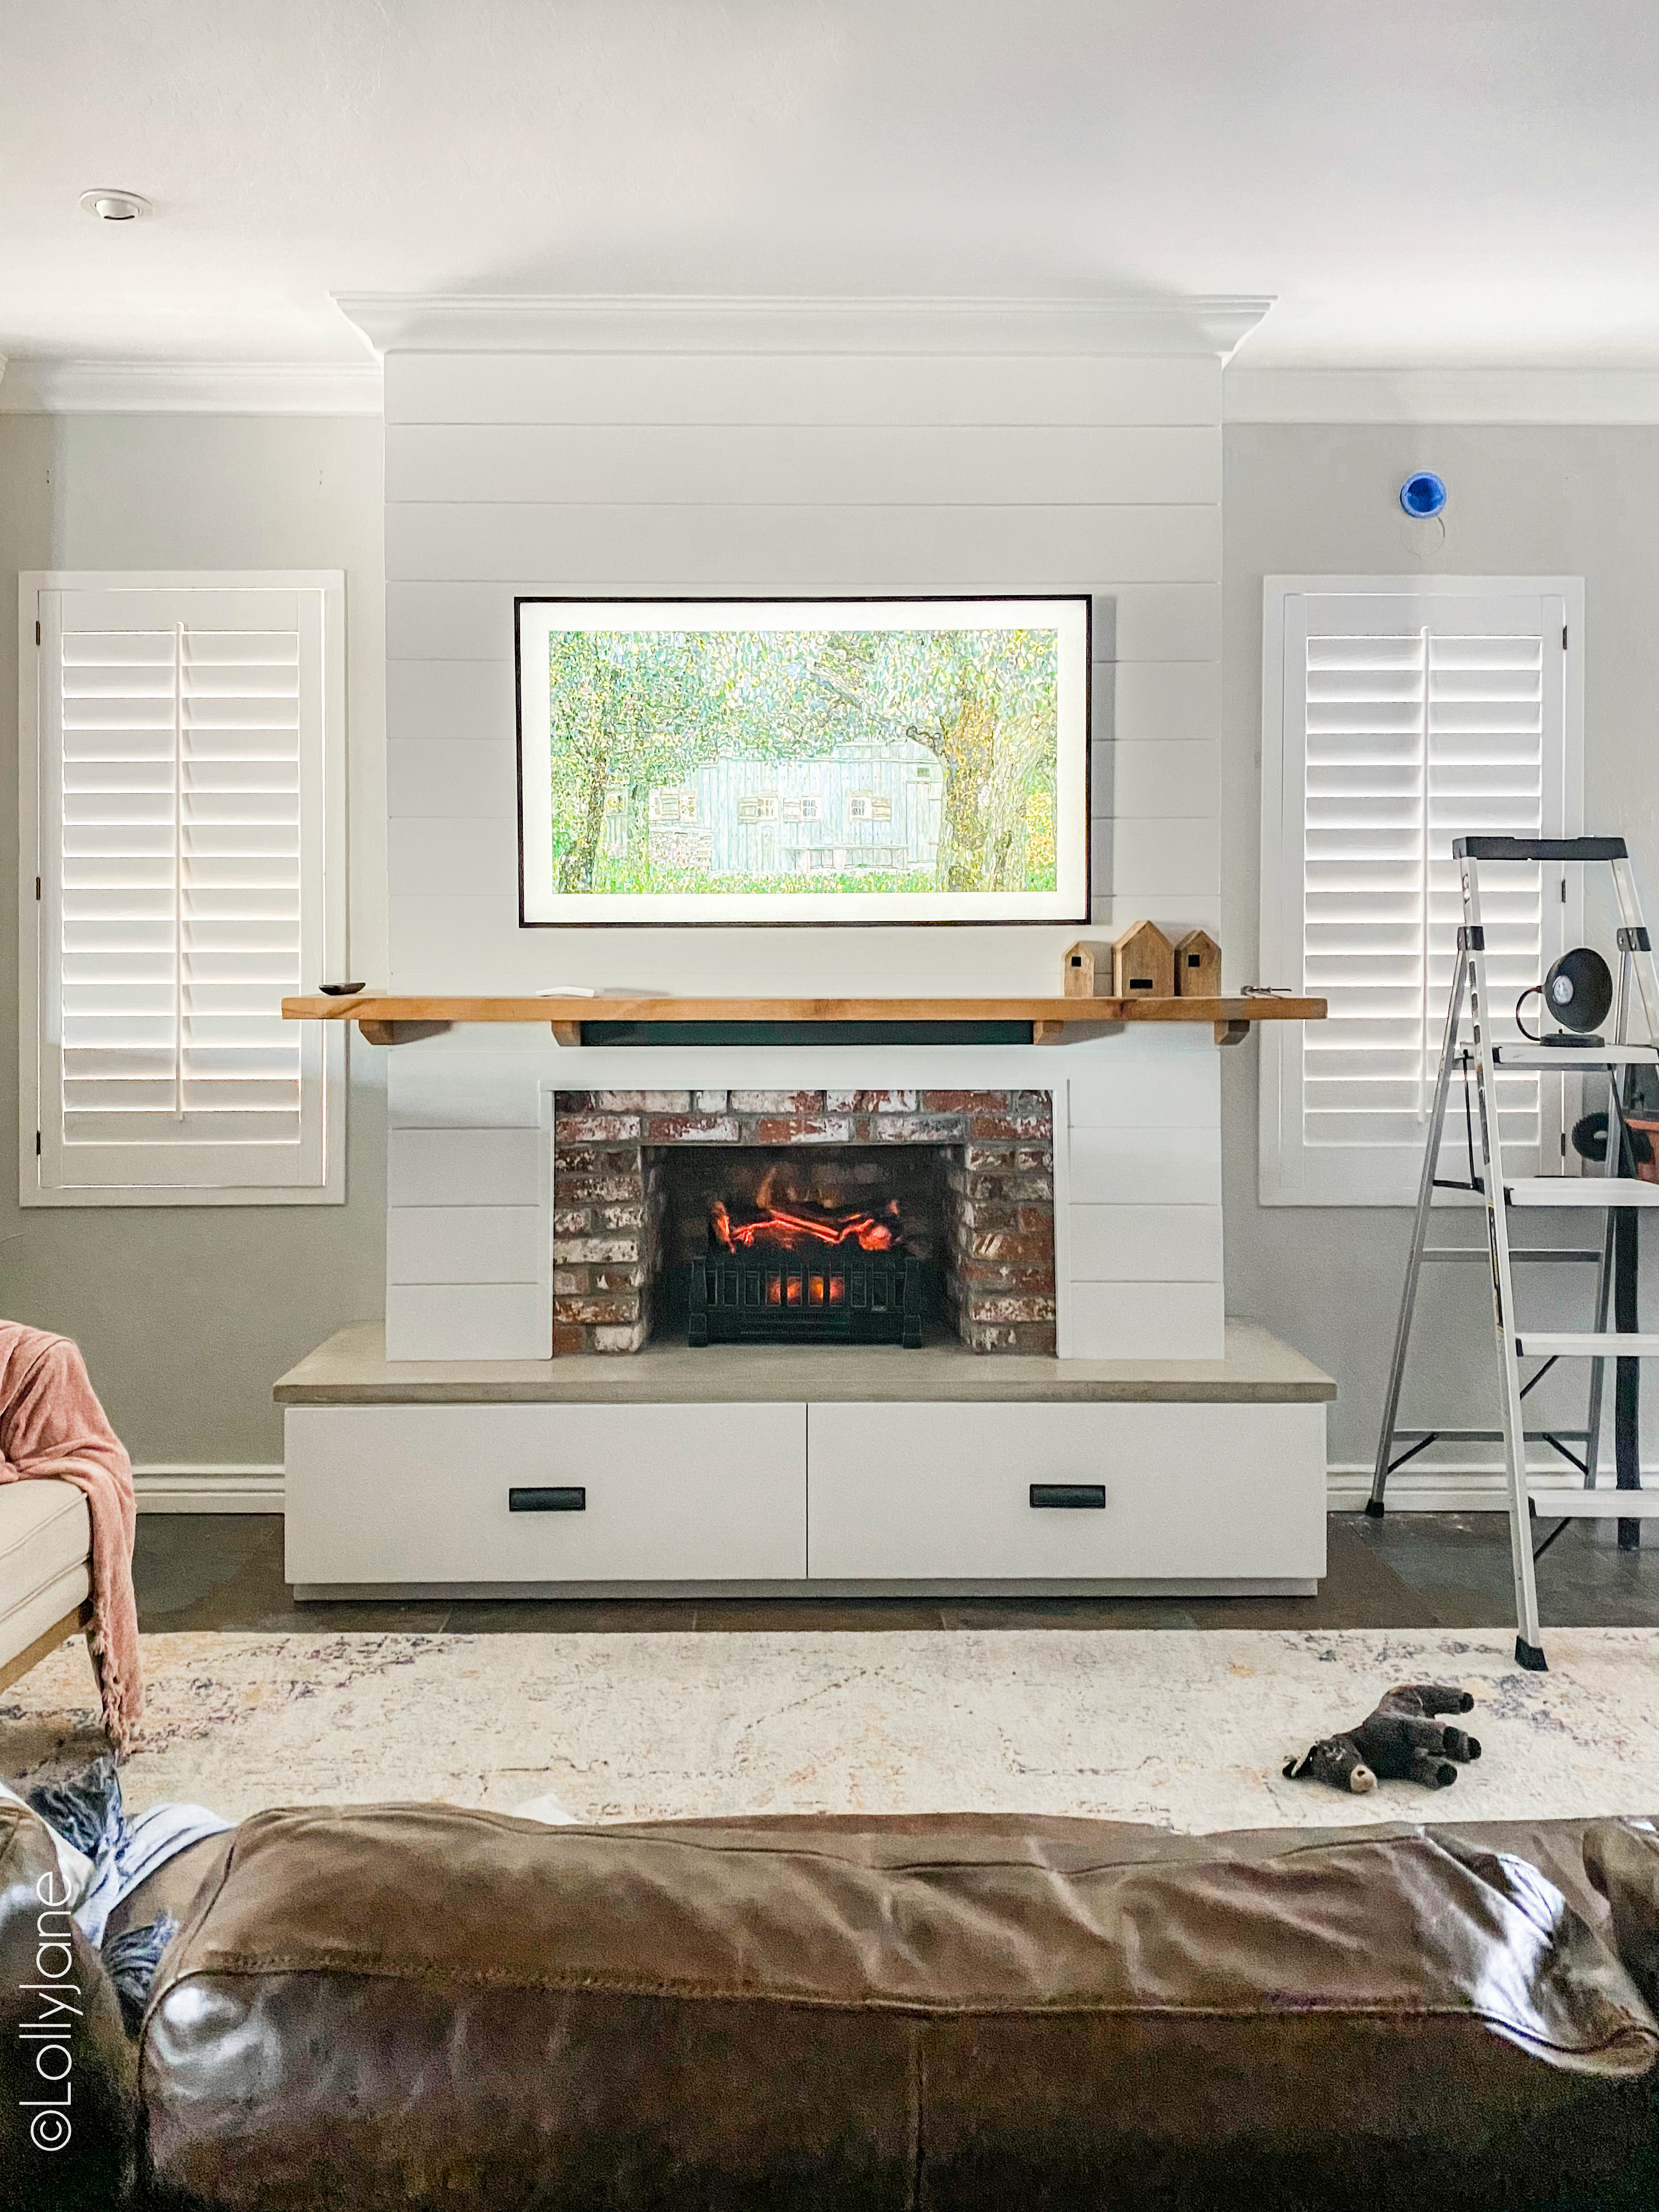
…which one do YOU like best? Our Instagram readers were 50/50!
We ended up going with the swing arm lights for now but I think the consensus was to size up to a larger gooseneck so I think we’ll go with that eventually!
7. Picture frame that is really a television!
Now what everyone loves most about this space: THE SAMSUNG FRAME TV!
It really is as boss as it looks, I am so happy with it! I got it on a Black Friday deal and now, full price, is cheaper than what I paid. D’oh! Simply follow the instructions on the box to mount. I chose the black frame to match the heater but you can also buy the frame in white or brown; it really does look like a picture frame, especially when you add the “matte” option! For easy watching, simply tilt the TV down.
Note: to save on energy, set your preference to have the TV turn off (sleep mode) when there is no motion in the room.
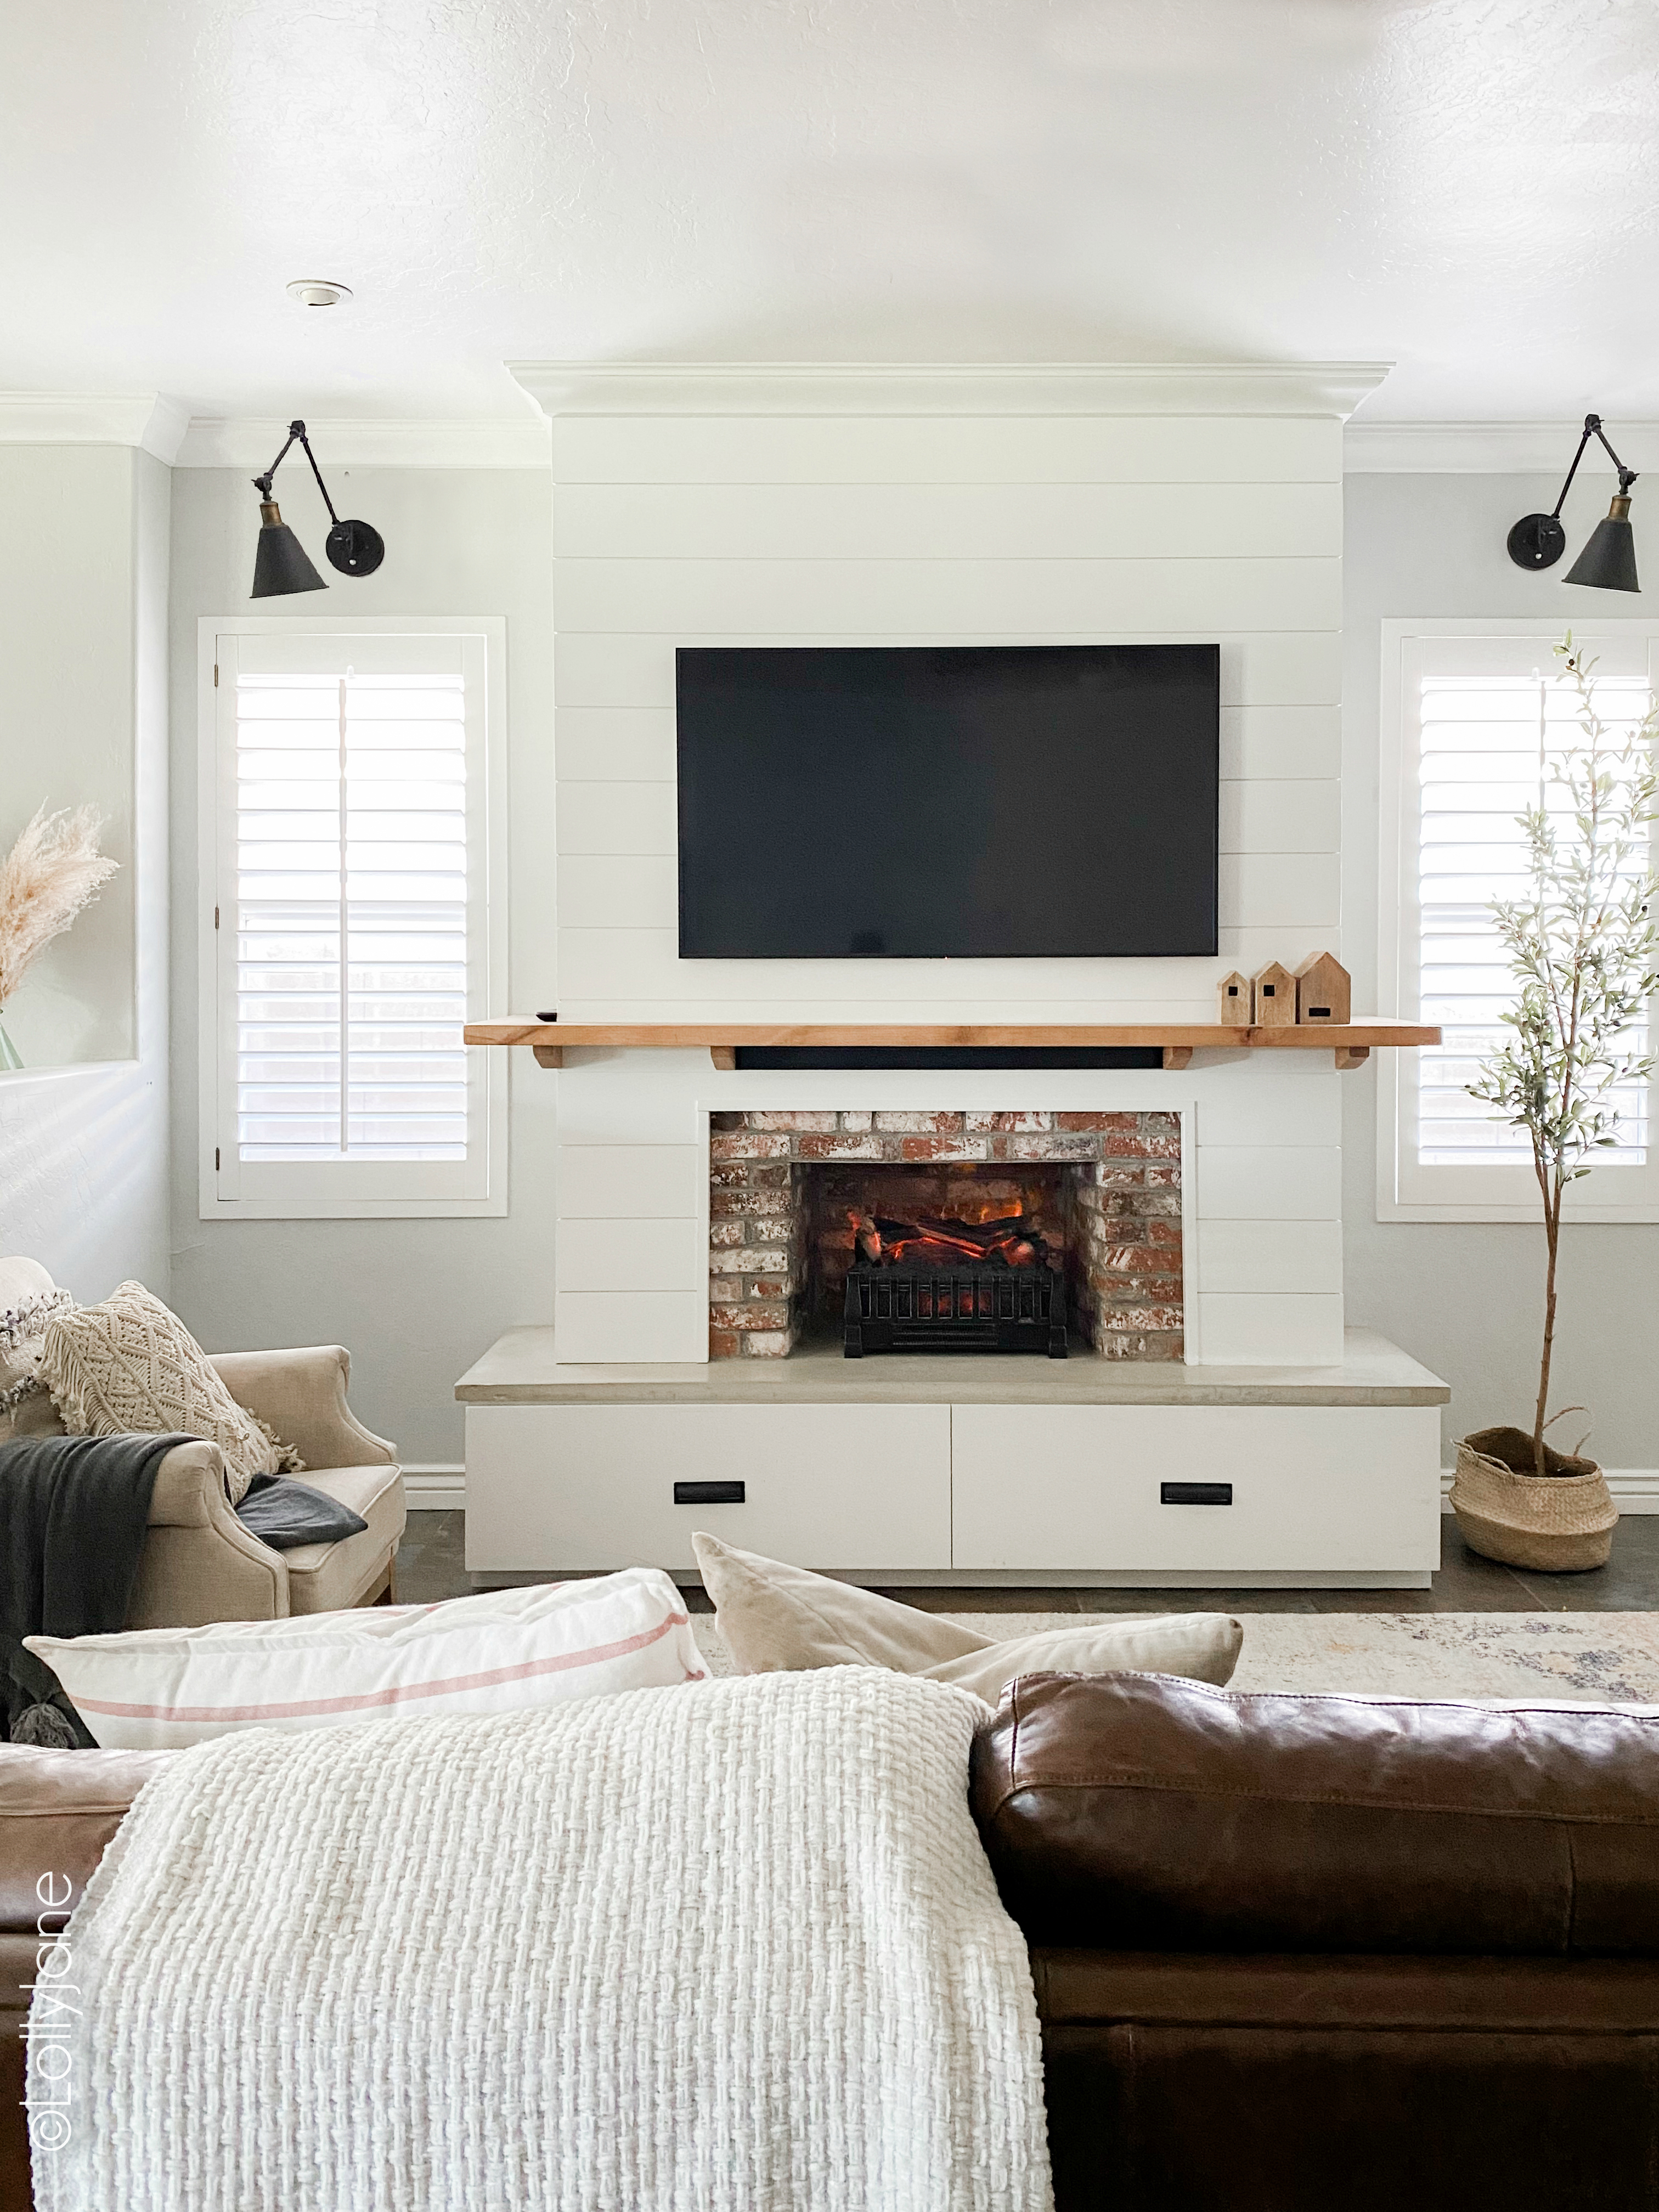
When you walk back in, hello pretty picture!
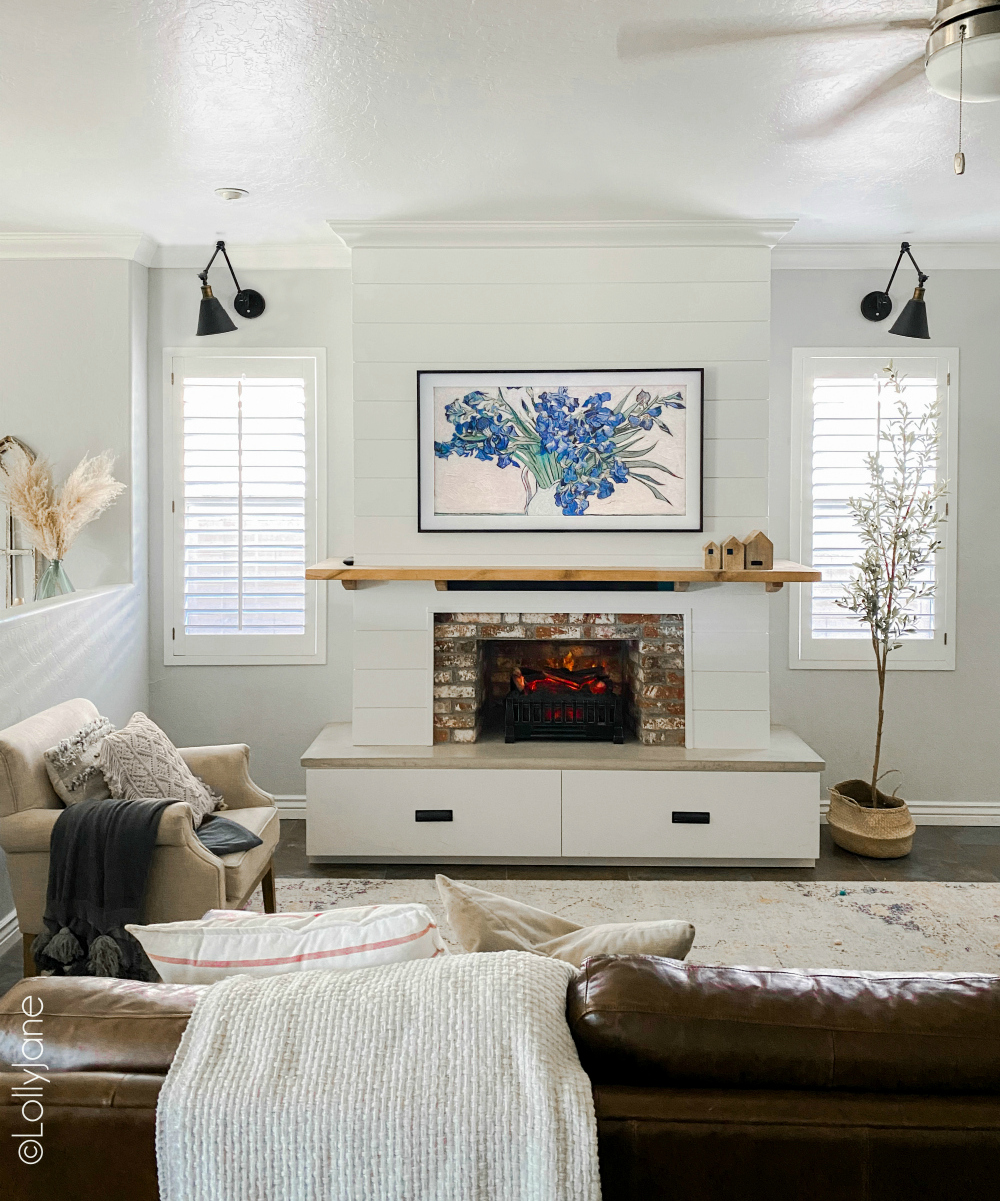
That’s a wrap! Who else thinks this entertainment system is SO sneaky (in a good way) with these hidden secrets? (PIN THIS to save for later or to share how cool this is!) In the meantime… I, for one, am just glad not to be tripping over or looking at unattractive electrical cords anymore! ?
In the mood to BUILD now? Look at some of our other favorite DIY’s!
- DIY Turn Buckle Shelves
- Free Little Library (with building plans!)
- DIY Letter Board Ledge
