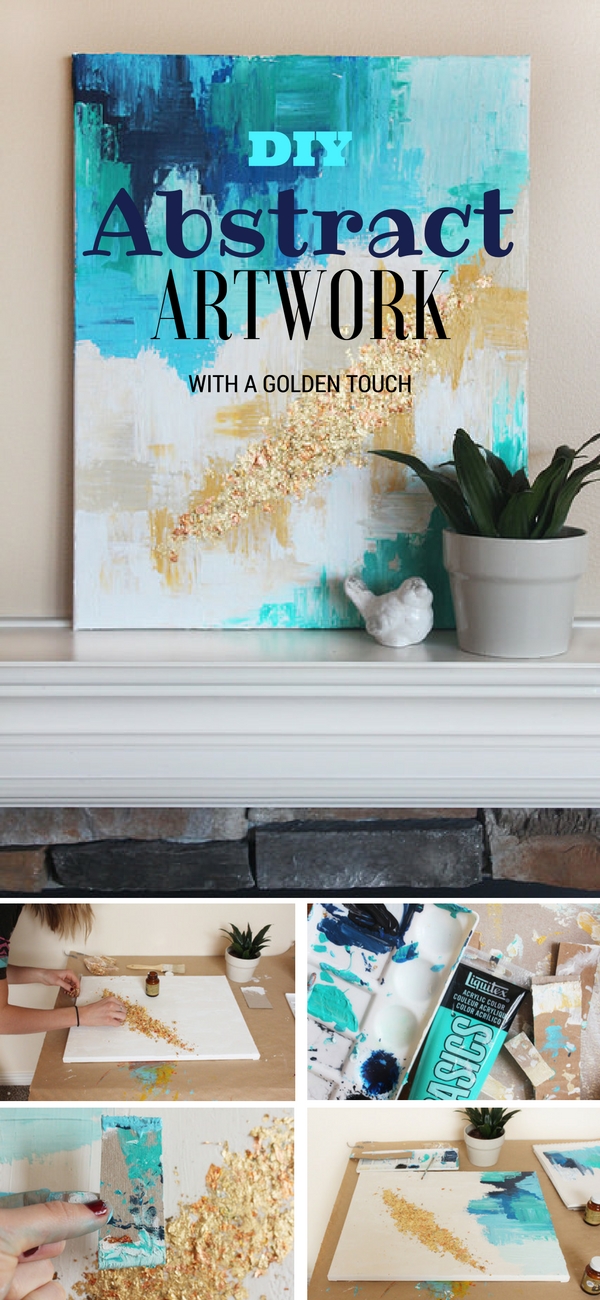
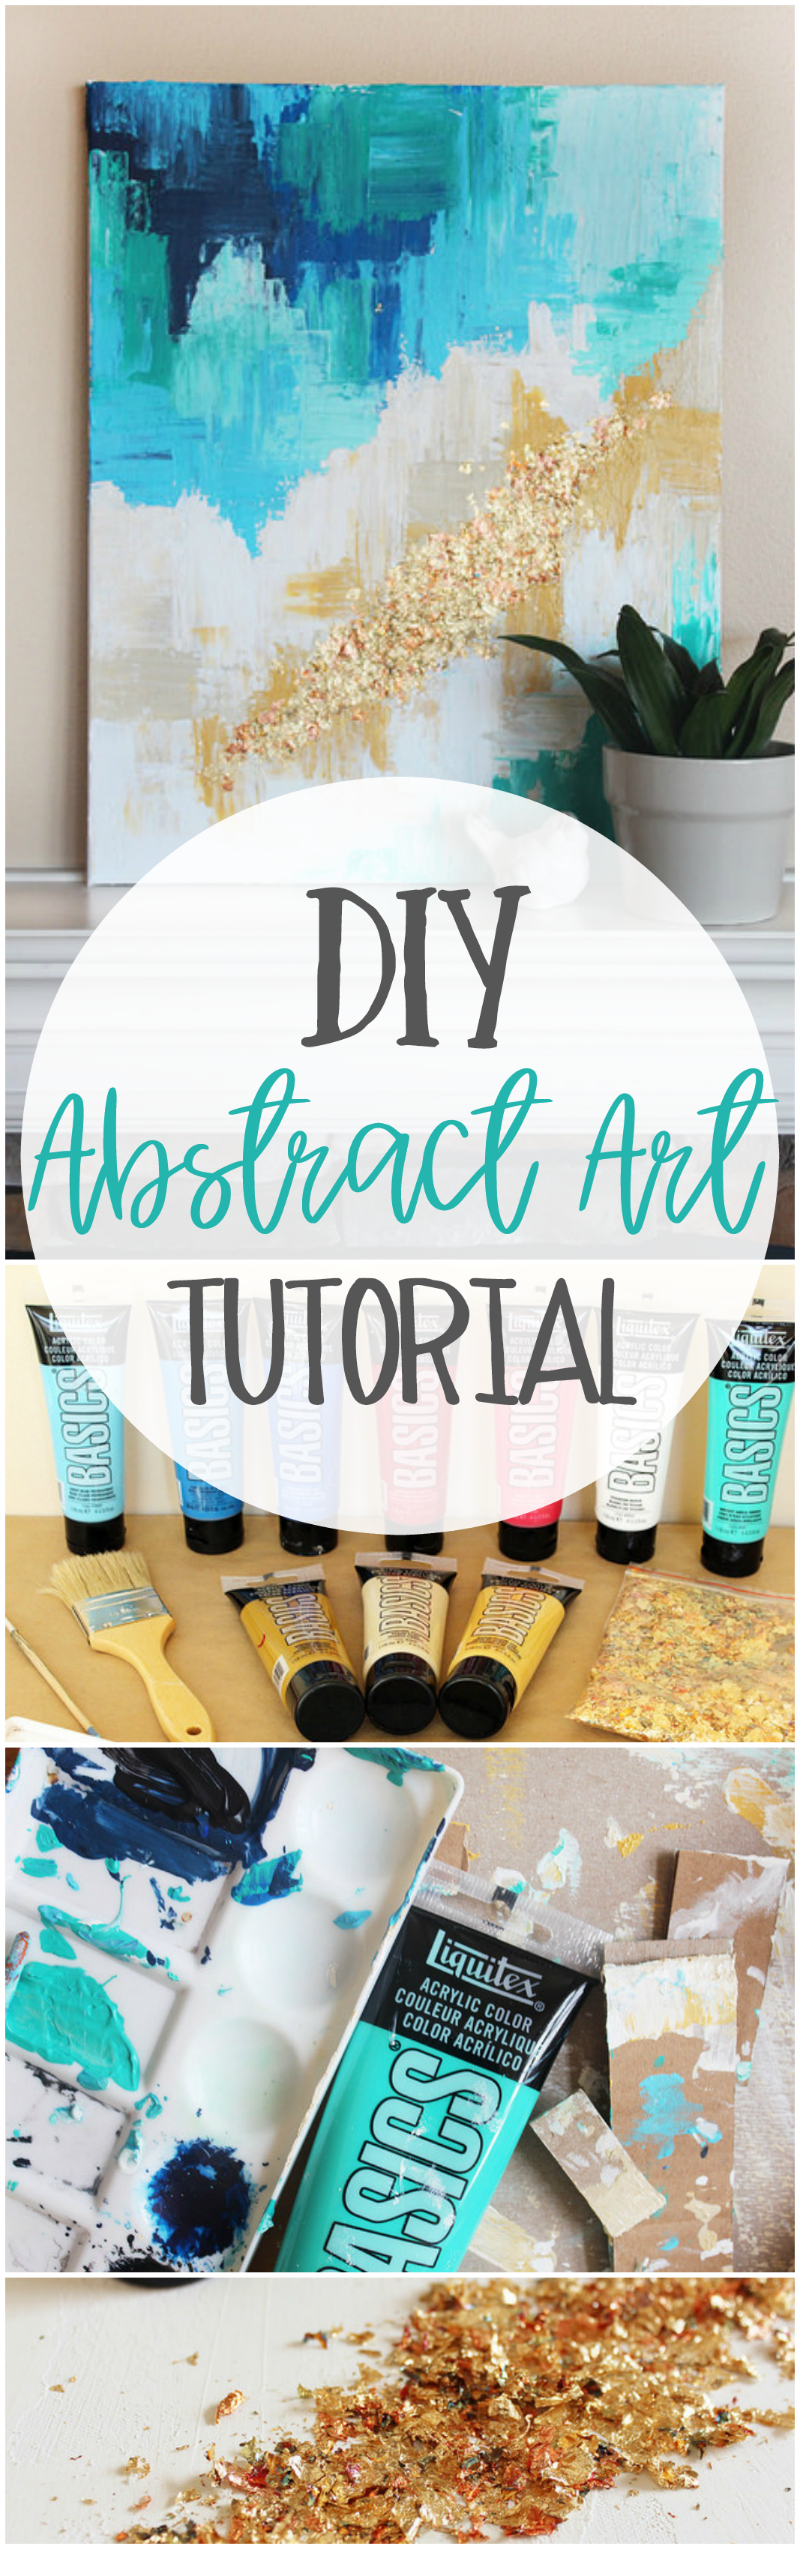
DIY Abstract Art Canvas | Easy beginner abstract art tutorial
DIY Abstract Art tutorial. Learn how to paint an abstract painting with acrylic paints and a step by step tutorial. Easy Beginner Level Abstract painting Guide.
Hi, it’s Ashley from Star and Arrow Designs! I’m so excited to share this DIY abstract art tutorial with you guys, an abstract piece to add a vibrant and textured pop to your home. I wanted to do a piece that ANYONE could do. I am a perfectionist and for that reason, have a hard time letting go to create abstract artwork.
I was painting with my toddler last week, and in 30 seconds he created a beautiful impasto painting. News flash. Looked like I needed to learn a lesson or two from him: let the fun messy part of art take over.
For more art ideas:
- 13 More Creative Abstract Wall Art Ideas
- DIY Graffiti Kitchen Island Art
- Easy Watercolor Flower Tutorial
Supplies to Paint a DIY Abstract Art Canvas Tutorial:
So, here we are, a messy, random and colorful painting tutorial. This was one of my first dips into abstract art AND acrylic paints, so it is by no means perfect, but the process is a fun one! Here it is:
These supplies contain affiliate links for your convenience. When you make a purchase after clicking an affiliate link, I will earn a small commission at no additional cost to you. I am disclosing this in accordance with the Federal Trade Commission. I only recommend products that I personally use and genuinely recommend. Thank you for your support!
- Butcher (or wrapping paper).
- Canvas (16×20 size).
- Texture: This is an optional step, but I recommend using an acrylic gesso to cover your canvas and/or a modeling paste to add some extra texture.
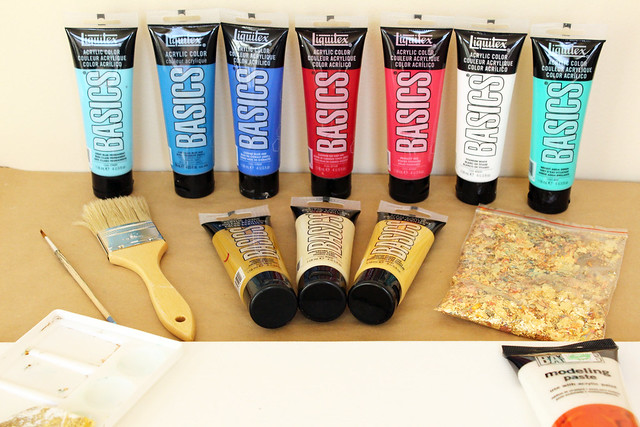
- Paint: Liquitex Acrylic paints (I already had mine on hand, but here is a great “starter kit” here).
- Brushes: large painters brush, pieces of chipboard or cardboard for applying paint.
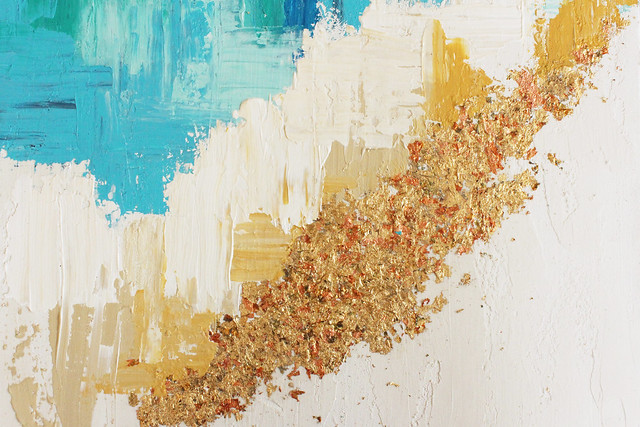
- Gold Foil Flakes: I used foil that had a variation of shades & color.
- Elmer’s glue or if you are feeling fancy, Mona Lisa metal leaf adhesive & sealer.
How to paint an Abstract Art Canvas
I set up shop by covering my table with butcher paper. This project WILL get messy so I recommend covering everything you don’t want paint splattered.
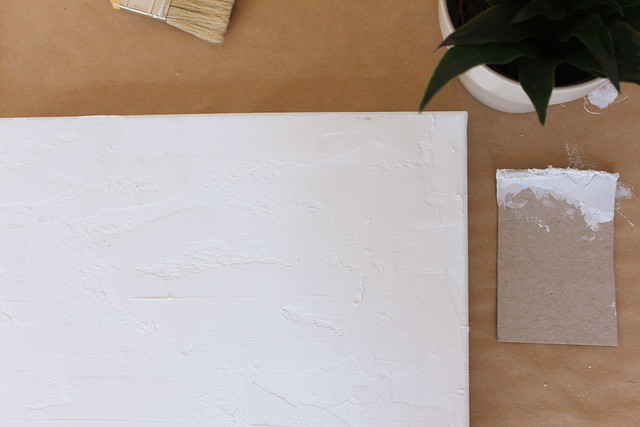
This first step is optional, but I think it adds a great base to your piece – Paint acrylic gesso over the surface with a thick painter’s brush. This covers the woven canvas texture. Generously add globs of modeling paste onto the canvas. Use a cut strip of chipboard to level out the paste. Be sure to cover the surface of the canvas, but this is meant to build up the texture. Be sure to let this dry before moving to the next step.
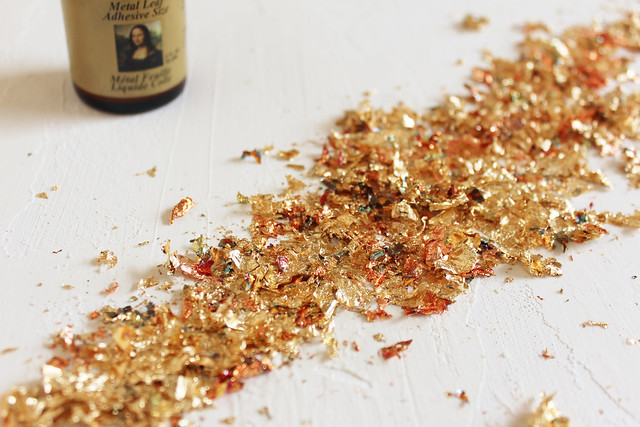
Once you decide where you would like your gold leaf, use a small paintbrush to apply a thin layer of Elmer’s glue or Metal leaf adhesive onto the canvas. Wash your brush immediately with warm soapy water.

Apply the gold leaf flakes (I used my fingers) in a thick layer to the glue. There isn’t much rhyme or reason to this part. You will be adding a second layer after painting, so don’t fuss too much about it being perfect. If you are using a sealer, wait for the glue/adhesive to dry before using your brush again to paint it over the flakes. The sealer will flatten and coat the gold leaf. You can watch a time-lapse video of the process here.
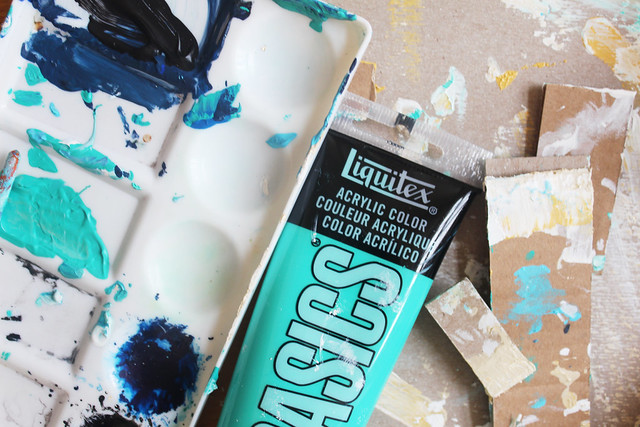
Next, create a color sample. You may have figured out what colors you want to use, but doing a “practice run” will help you figure out how you want to put them all together. I like to do this on a piece of sketchbook or scrap paper.
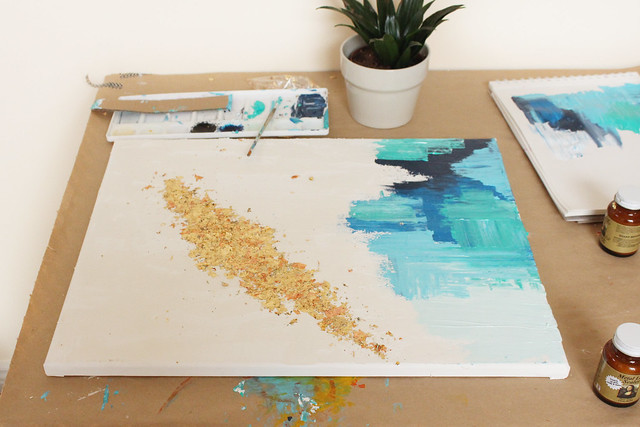
Then, start painting! I squeezed globs of paint directly to the canvas and used pieces of chipboard (cardboard) to lightly stroke down the paint. You can also apply the paint to the chipboard and apply it that way. This keeps the paint thick and easy to blend. It also keeps that yummy thick texture without showing the white canvas or brush strokes.
I had a few different chipboard pieces for my different colors but found that I liked keeping the chipboard pieces a little messy because it blends in different colors. Don’t worry about balancing all the colors. In fact, I think the abstract wall art looks best when it isn’t balanced perfectly.
Painting an Abstract Art Canvas tips:
- Layer, layer, layer. This paint is all about layers and layers add dimension.
- Blend when it is wet, layer when it is dry.
- Step back or even take a picture of your progress and look at it. I find this helps me see funky spots that need more color or touching up.
- Get a second perspective.
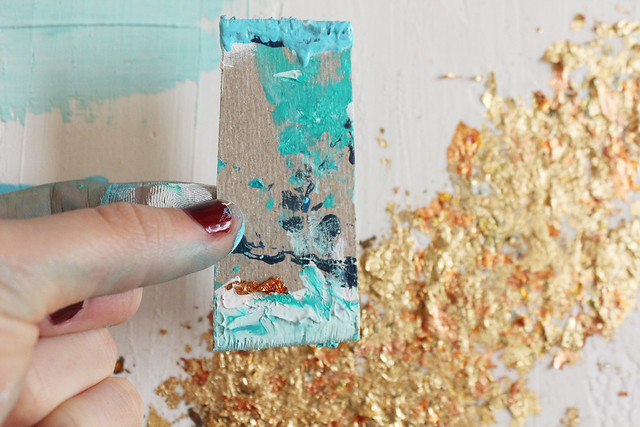
- React to the gold foil- I used thin pieces of chipboard and really tried to respond to the gold flakes, and used the shape of the gold foil to shape my painting. Beauty in randomness!
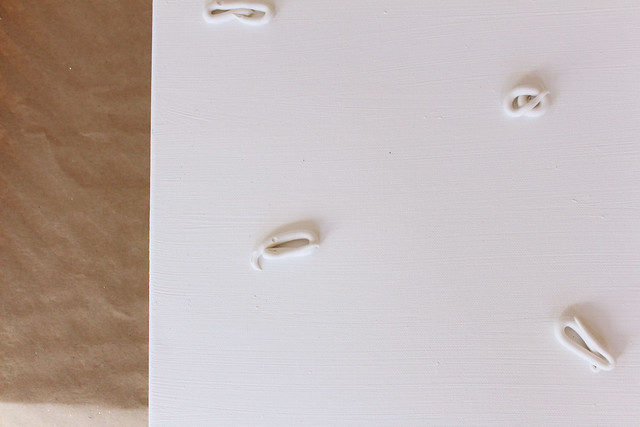
Once your paint has dried, you may want to add some more gold leaf. Same steps as above, apply the glue/adhesive and then the flakes. I scattered a couple flakes over the paint to add some more dimension.

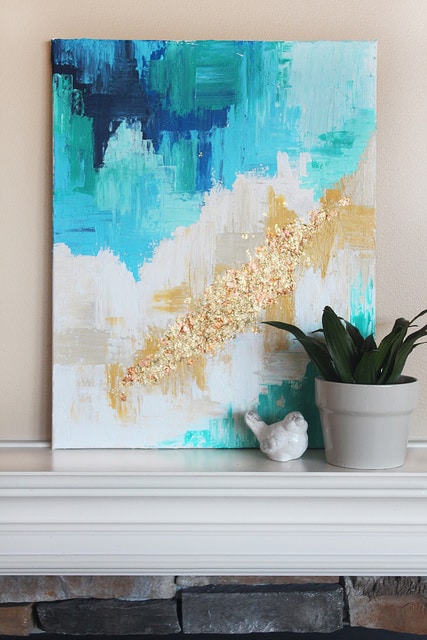
Voila! I think there are a couple spots I may layer some more, but overall, I am happy with how this project turned out. Like I said, I am a total newbie when it comes to abstract art, but I loved this project! It’s cheap and easy. Once you get started, it’s fun to get crazy with it. XO, Ashley
Looking for ways to display your new art? We love Minted’s perfect frames, oooh la lah!
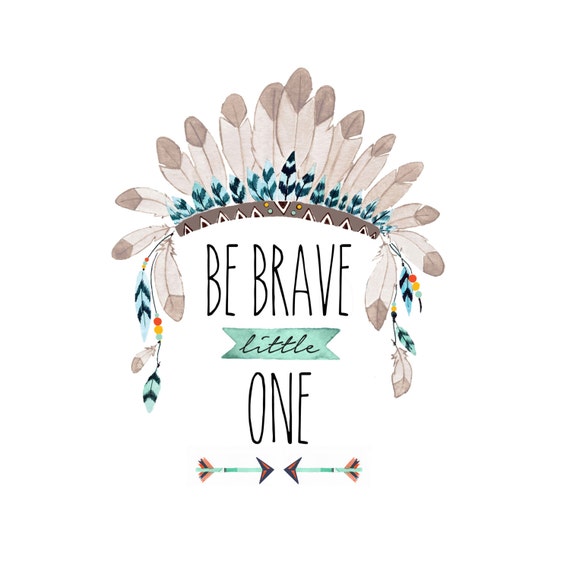
Keep up with Ash on Insta, Facebook and her cute Etsy shop full of adorable prints like this tribal nursery art,
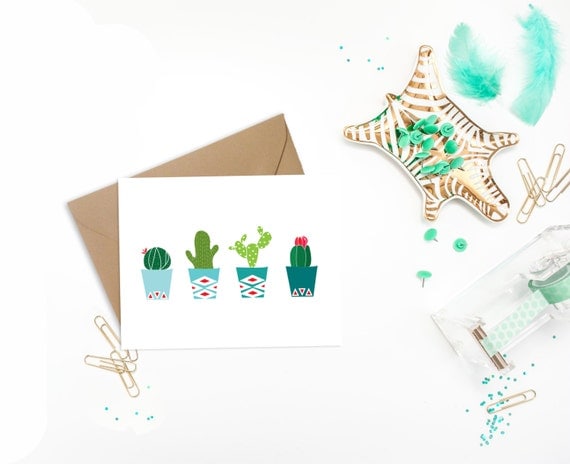
and this adorable potted cactus card!
Also visit more of our home decor ideas like our potted succulent mason jar holder,
.jpg)
and this awesome industrial message board!


Hi Angela, this was a post from our very experienced contributor Ashley of Star and Arrow Designs. You’re welcome to contact her directly for more in depth information 🙂
Ashley: [email protected]
Love this painting and appreciate your detailed description on applying the gold leaf…looked up many tutorials and most were very strict with limited internet…can become stressful for us newbies out there!
Thank you, Alex!! 😀
Love this, it’s VERY classy!
Thank you Evelyn! 🙂
Love this.
Hi Dolores! Yes, that’s correct! Her pictures are in the correct sequence so scroll down to see how she created this gorgeous piece 🙂
AM I FOLLOWING THIS RIGHT??YOU PUT THE GOLD LEAF ON FIRST AND THEN PAINT??LOVE..LOVE THE COLORS BUT CANT WRAP MY BRAIN AROUND PUTTING GOLD LEAF ON FIRST??IS THAT RIGHT??
Oh yay! So glad you like it!
This is awesome, I love abstract art, but I don’t love the prices that the stores charge for some blobs of color, that don’t usually have all the color combos that I would like. This gives me a great idea of how to do my own.
Oh no way, YAY! That is too funny you found our cactus all those years ago!! 😀 Thanks for the comment! xo
Haha! I know this is an older thread, but I found it on Pinterest. I started reading through, not paying attention to the creator. Then, I realized it said Lolly Jane. I found the cactus that y’all left at magnolia market a couple of years ago! Too funny ?. This painting is super cute and I’m about to try it!
Hi there! There is no video tutorial, just the step-by-step directions in the blog post. 🙂
Thank you for reading!
Loved the painting but I can not access the time lapse video. Could you please share a link to how this painting was created.
Hi Michael, just reapply it over the paint. 🙂 Thanks! Happy painting!
What do you do if you paint over the gold leaf ?
Your project is beautiful !
It’s not for sale, sorry!
Where can we buy the gold leaf blue painting?
She linked to the paints here: http://amzn.to/2duUJNq
Looks like Raw Sienna, Bright Aqua Green, Light Blue, Cerulean Blue, Cadmium Yellow Dark Hue and perhaps Unbleached Titanium. Happy painting!
Hi,
This is beautiful!!Do you have the list of names of paint colour that she used?
Thanks in advance 🙂
Thanks Alice! I think it would be worth the effort, so gorgeous! 🙂
I love this. As soon as I can find the time, I plan to try it.
So glad it helped, Jay!
Hi, I am so glad to have seen this . I can’t paint but love 3d art work amd usually add 3d components to canvases I buy to add more ” life ” – like a beach scene – I will add grass and baby turtles maybe sand .
Your blue and gold leaf is literally something I have had in my mind for nearly a year bit was mot site how to add texture which is important in my art work and the gold leaf I wanted to use but jave always been told it is very hatd to work with unless you are a pro. What you have done is exactly what was in my mind but couldnt verbalise . Amazing ! Bless you .
Jay , from the Gold coast
Hi Kim!
No we’re not- this was a step-by-step contributor post by the talented Ashley of Star & Arrow Designs. She may make you one, feel free to reach out to her (her contact info is in her bio.)
Thanks! 🙂
So are you selling this?
Thanks Alisha! We love this print too (:
I absolutely love abstract art and the hint of gold adds a hint of elegance. Too awesome!
Hi Jeanine,
You can buy them at a hobby store or Walmart (here’s a link: https://www.walmart.com/ip/Speedball-Mona-Lisa-Metal-Flakes/24404342)
I love it! Where did you get the gold flakes?
Have so much fun! Here is a great sealer: http://amzn.to/2knsoPP Apply after the gold leaf layering.
I love this!!! I was about to purchase a piece of art for my living room and decided to try this first. What type of sealer do you recommend? Is this applied just to the gold leaf? Is it applied after the first or second layer of gold leaf?
I believe this is the phrase you were looking for, “you could’ve gone out and bought some actual art”
Hi Marni! I like your style, way to word that girl! Thank you for piping up and haha! Yes we are twins! 🙂
XOXO
By the way, I love your ideas and tips. I’ve never painted anything in my life, nor have I ever created any original work of art. And until reading through your post, I would not have tried to create a painting, unless it was a “paint-by-numbers.” But now I’m inspired, and I think I’m going to buy the 2-pack of canvasses (excuse me if that is not spelled correctly) and give it a try next weekend. Looking forward to it!!! And I also will be checking out your site in general, hoping to find some more inspirations! Thank you so much!
P.S. – you and your sister are adorable. Please tell me you’re twins, so I know I’m not having a stroke or something, as I seem to be seeing double.
Love this piece of art! Can’t wait to make my own, thank you for the tutorial
Hi Eva: Here are all the colors she used: http://amzn.to/2duUJNq
Hi,
It is beatiful. Can you please tell what are the number of the acrylic paints what have you used.
Thanks, Eva
Agree, so pretty!! Good luck, Constance!! Hope it turns out amazing!
It is so beautiful! Abstract paintings give a special touch to the home. It will be perfect in the living room redecorating project I am working on! I will definitely be creating this artwork. I’m very excited to give it a try! Thank you! 🙂
That’s a really rude comment. Ashley is incredibly talented and her work is GORGEOUS. Sounds like you’re a little jealous, Spirit of Giotto.
Wow. Rude!
Agree, Sandy! Ashley rocked this painting, it is beautiful! Thanks for popping in 🙂
I really love the gold and the blue in this canvas. Gold and bronze are really in trend right now. This is exactly what I want for my living room. Thank you for the inspiration. Sandy
Thanks, girls! Your blog is adorbs!
Ahhh you’ll have to ask our cute guest poster, Ashley: [email protected]
Ahhh you’ll have to ask our cute guest poster, Ashley: [email protected]
Love this idea for a little pop of color! Great tutorial, and gorgeous color combo!
Hi, I love the painting! The colors you used would be perfect in my living room. Do you happen to remember what colors you used? Thanks so much!
Hi!
How much of these gold leaf flakes would you recommend buying for 3 paintings? I see they’re sold on Etsy in gram size bags.
Hi Meg! Thank you so much.
Thanks for asking! It took about 3 hours of work time. I did it in two settings, same day. I did the first layer of foil and the top half in the first setting, and the bottom half and finishing layer of foil the second setting. In the second setting (later that afternoon) I also went over some spots in the top I wanted to layer some more. I like working the main layer of paint while it is still wet so that I can blend the colors together a bit.
Drying time will entirely depend on how thick your paint is. Because I apply the paint directly to the canvas and like it thick, I gave it 2-3 hours in between.
Hope that helps!
Hi Meg! We’ll see if Ashley can answer that for you, stay tuned. 😉
Thanks!
how pretty. How long did this take you? (including drying time?) were you able to finish it in one sitting?
This is beautiful! I have a hard time being random, too but I will have to try this! And I absolutely love the added gold leaf. Amazing!
She’s super talented, right!
Agree Louisa, it’s gorgeous!
This is awesome! I’ve always wanted to try and do something like this but didn’t know where to start, thanks for sharing! 🙂
Ooh, pretty! I love the blues with the gold leaf.