Distressed mason jars | Craft room organization
Hi friends!
I’m baaaaaack! I’ve been at my church’s youth camp all week long and was totally unplugged. It. was. awesome! Back to reality though and as most of you know, I’ve been sprucing up my craft room and got back to it right away. I’ve been wanting some of my go-to items a little closer to my craft table and found the perfect solution. Psst! Stay tuned for the reveal of that table SOON- I know you’re just all dying to know if I kept the chairs all coral or painted them a different color. Oh, the IG saga continues… LOL. Take a sneak peek of the top! (;
Hmm, what was I talking about? Oh yes, a solution for storage. Well we here on LJ are a bit mason jar obsessed so it only seemed fitting to add to my hoard! Ha!
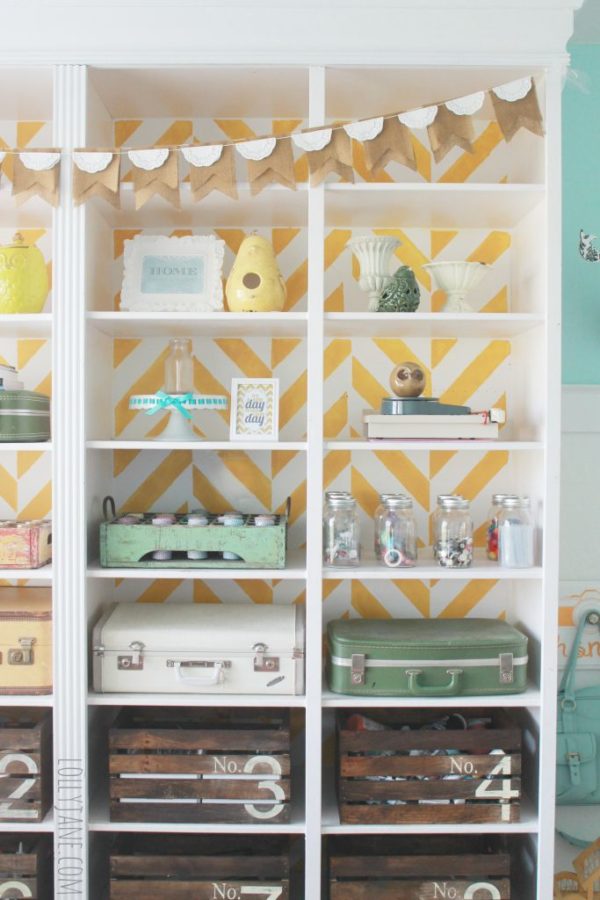
My current mason jars house all my small accessories like washi tape, buttons, glue sticks and etc. and I was having a hard time getting quick access to my daily use, taller items that would stick out of the tops of the mason jars. My scissors and paint brushes are my most used items and I wanted to store them on the table instead of behind me on my herringbone stenciled built in.
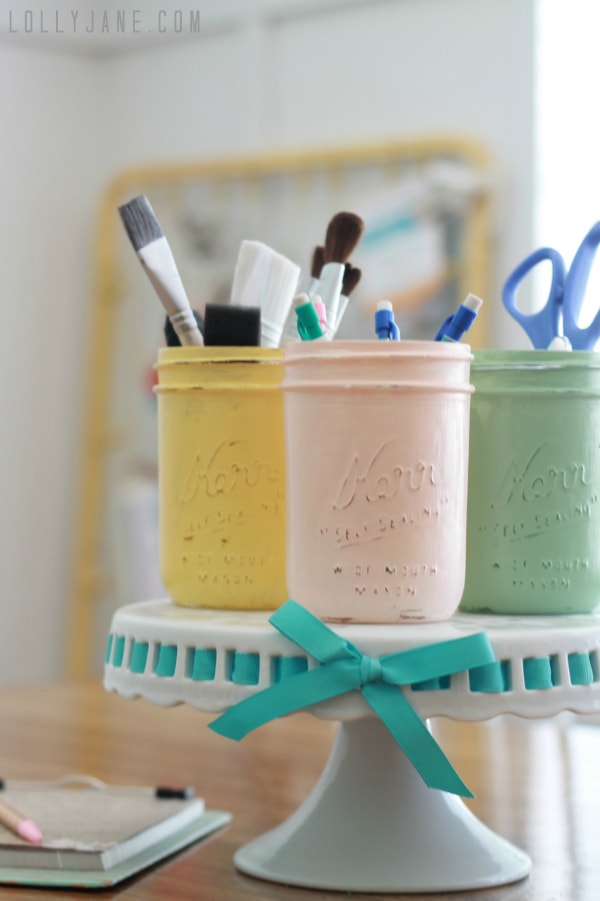
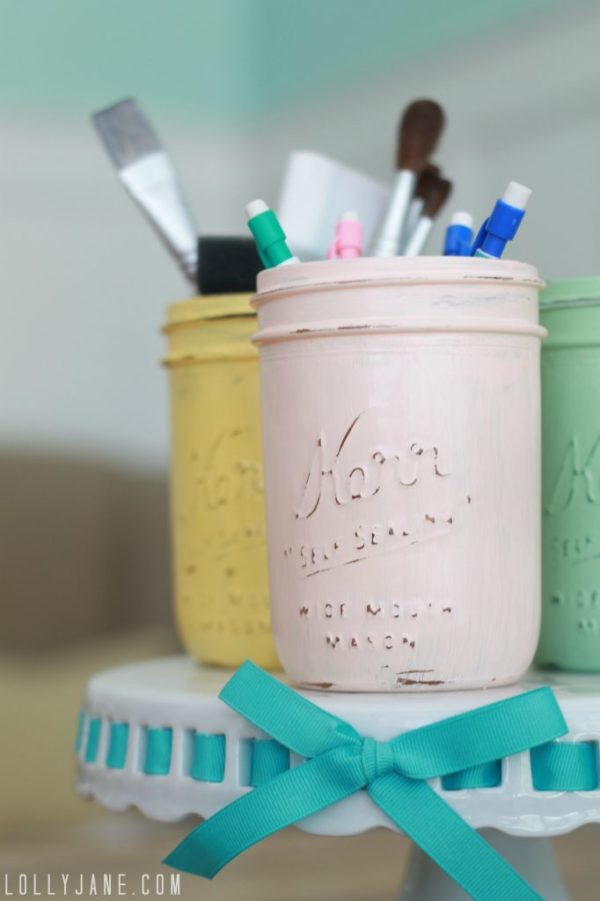
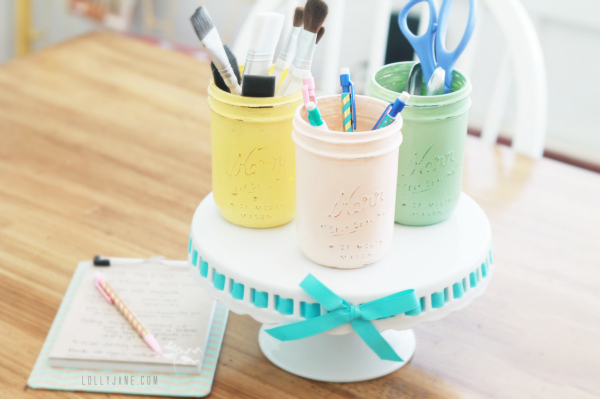
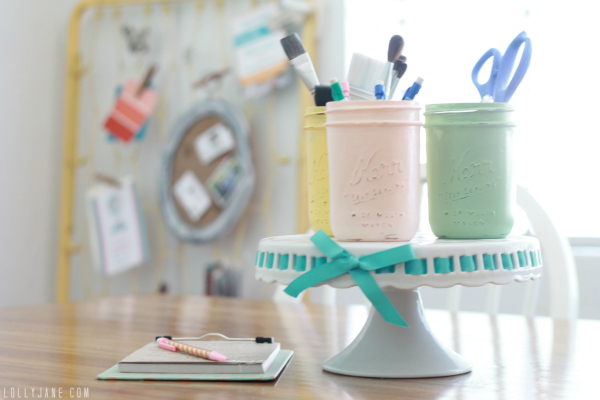
Solution: more mason jars,but distressed to add a pop of color! I lovely love love Jen’s jars, the original source for all the gorgeous DIY painted mason jar craze, so I altered the colors for my custom space:
This is an easy project and will cost you very little out of pocket. Supplies needed:
- jars
- acrylic paint
- foam brush
- sandpaper
- sealer
You can buy a 12 pack of mason jars for around $12 at your local grocery store in the canning section. Of course I already had mine on hand so they were free for me. Tip: they are also all over the thrift stores so do a little digging in the glass section if you don’t need a full 12-pack (; So anyway the paint is from your local hobby store. (We used Americana brand, of course- love their guts!) Directions:
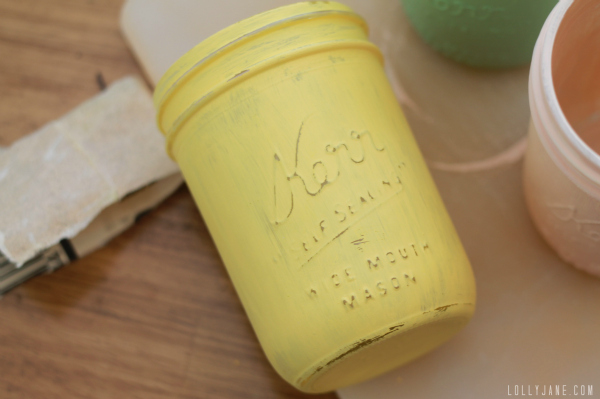
- Pick your paint colors. I used Mint Julep Green, Banana Cream and Hi-Lite Flesh. (Sidenote: I thought about eating a banana cream pie the. whole. time. I was painting with yellow and finally settled on a banana. Ha!)
- Paint the mouth of the jar the direction you would screw the lid on. Then brush up and down on the remainder of the jar just until it’s covered evenly. I only did one coat on yellow and mint, and 2 on pink because it’s a lighter color.
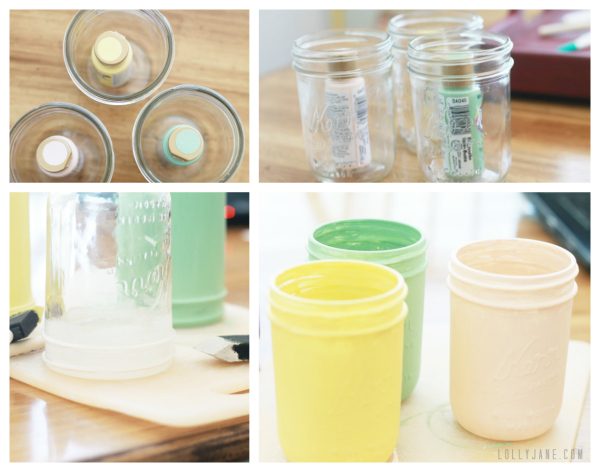
- When it’s dry (about 20 minutes) lightly sand the wording and edges using 150 grit sandpaper.
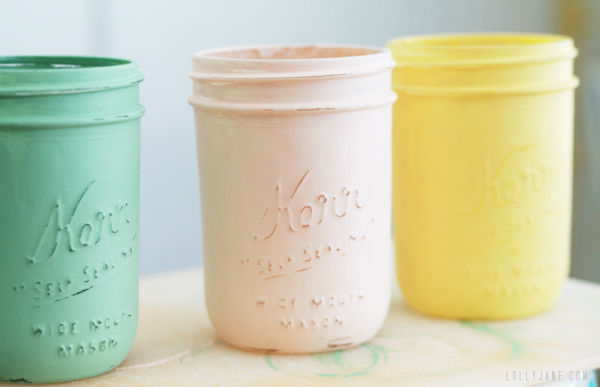
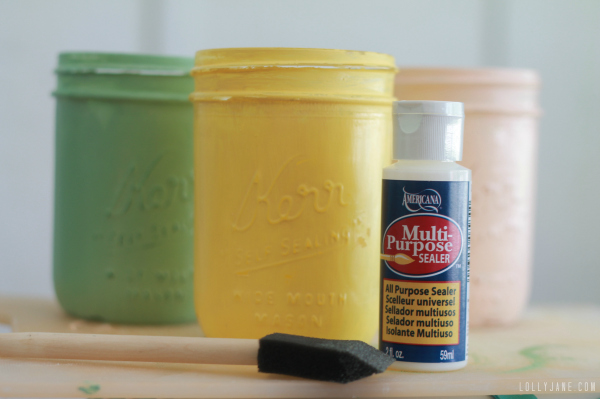
- Seal well with poly. Americana has a great size that works well for wood, metal, etc. without having to buy it in the larger cans at home improvement stores.
Well friends, that’s it.
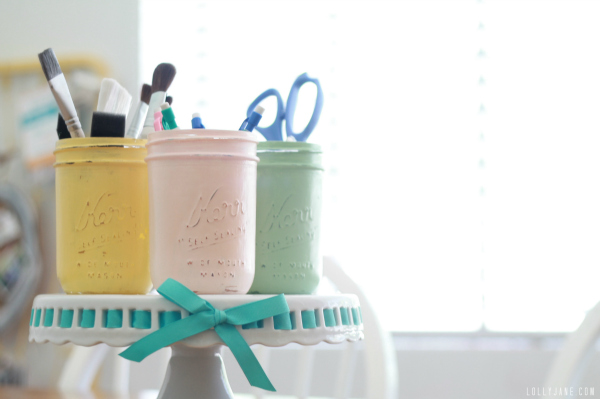
Group in three’s on a cute cake stand and you have new organization that’s now pretty AND functional!
Check out my mason jar bathroom organization solution too as well as all our fun uses for our mason jar crafting obsession. Happy crafting! xo


Thanks, Kathy (:
Love the pastel colors you choose. And I am all about some distressing! Beautiful
Cant take the cuteness.
I love the mason jars!! They are so cute and great storage!!
Just when I think I have too many mason jars, you set me straight 🙂
Can never have enough. Can never have enough. -My new mantra!
I agree! Mason jars are so cute anyway and add a pop of color and they’re all of the sudden gorgeous! (; I would love to see yours! xoxo
How can anyone NOT love these babies??? Great colors – I spray paint mine in layers with different color paints for a cool effect too – yum!!