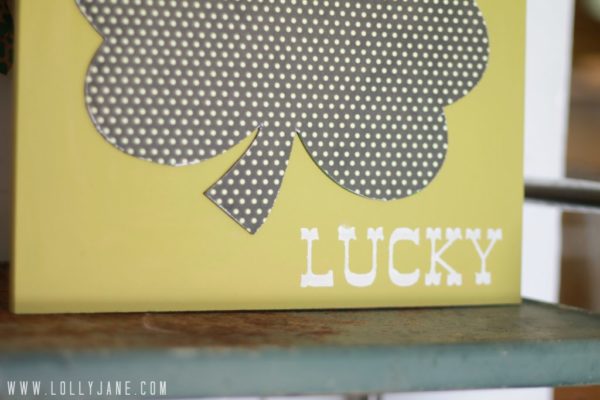
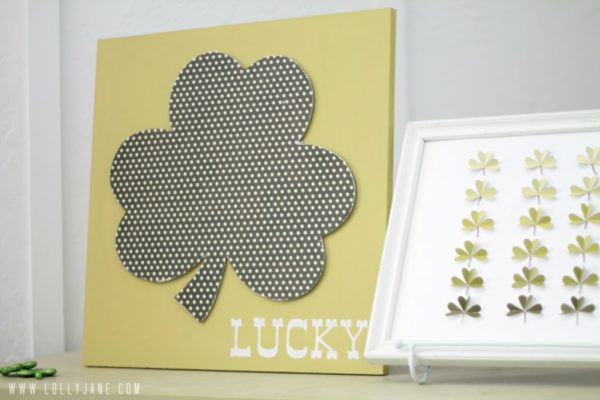
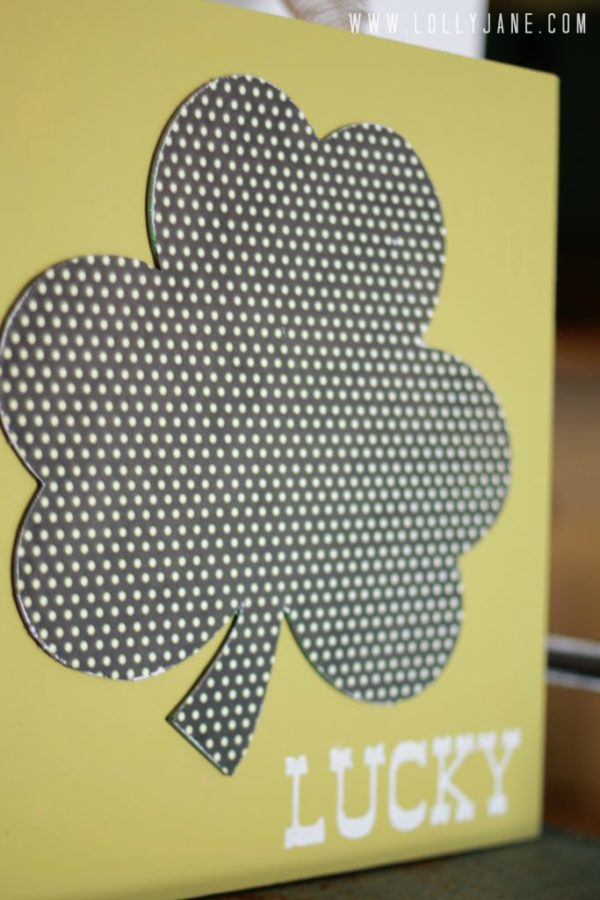
St. Paddy’s Day polka dot shamrock wood art
Wee, it’s Thursday! Only one more day until the weekend that starts a 2-week spring break for my kiddo’s…. yay! I can hardly wait for a break from the daily grind and to enjoy some fun St. Paddy’s activities with them. Okay, so it’s mostly green meals and wearing cute green clothes but at least they’ll be home to enjoy that with me! LOL
Since St. Patrick’s Day is in one week, this is the last of our green decor this year as we’re moving on to Easter and spring. We (like most of you) are sooooo ready for the warm sunshiny weather. Of course, here in Arizona we’re LUCKY (get it? lucky since the decor we’re about to show you says lucky? haha…. okay) so anyway we’re pretty spoiled with our mild winters BUT, it is suppose to rain (and snow where Kristi lives up north) so I’m waiting for the spring-y weather any day now! In the meantime, we’ll enjoy this fun St. Patrick’s Day craft (;
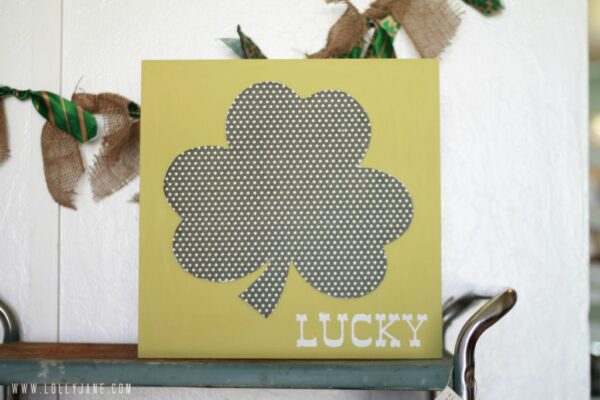
We’re all about the bright greens and golds of St. Patrick’s Day but this wood art was fun to make with more muted golds and darker greens and of course, the cute polka dots cheer it right up! Read on to make your own:
I think this took me about 15 minutes (after prep) from start to finish. Seriously! We love an easy holiday project that doesn’t take FOREVER (like our recent Shamrock tree we shared last week.)
This is a fun kid craft, too! Follow along to create:
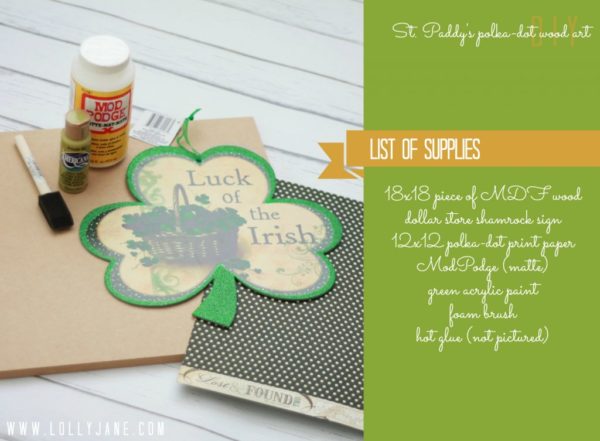
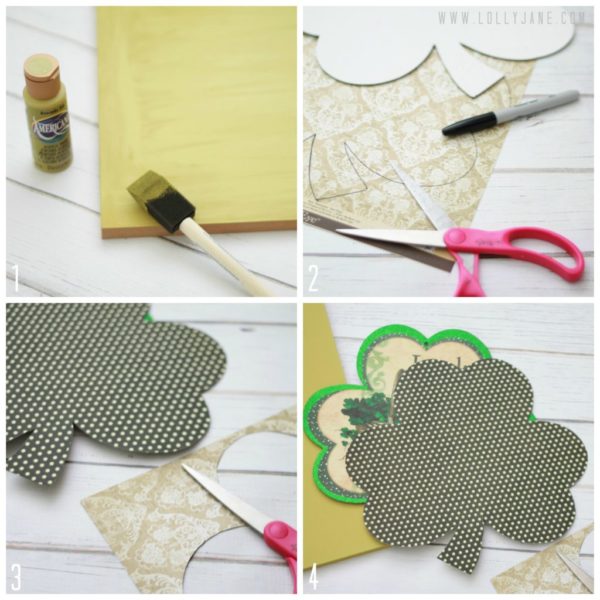
1. Paint your 18×18 MDF board (this was a scrap from our last craft night) green. We love DecoArt’s Avocado Dip- cute name and cute color! 2. Trace the dollar store shamrock onto a cute print of 12×12 scrapbook paper, (we chose polka dots.) 3. Cut out. 4. ModPodge (matte finish) onto the shamrock.
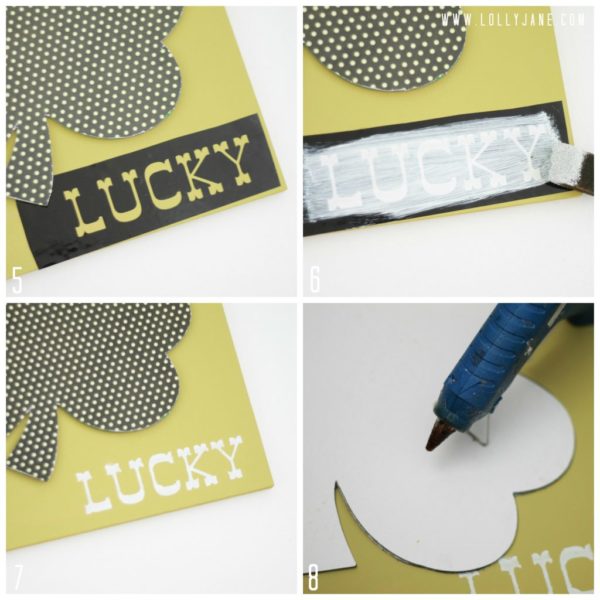
To make this craft a little bit more St. Patrick’s-y, I took over for Kristi and added “Lucky” to the bottom. I think it is the perfect finishing touch! 5. Use your vinyl cutter to create a stencil with the word LUCKY. 6. Lightly brush white acrylic paint over the vinyl lettering. 7. Peel off vinyl. 8. Hot glue the shamrock to your MDF. That’s it! An easy, inexpensive St. Paddy’s Day shamrock wood art that is easy on the wallet and easy on time. Love that!
Love the dimensional look of the shamrock on the MDF that we typically shy away from. We are all about stencils right now but this is a fun change!
Do you spy Kristi’s shamrock ombre specimen art from last year? Yep, I snagged it from her. Muah ah ha! I mean, um…. hey Kris, you left your stuff at my house! Come get it! (; Oh, ps: the very top picture is paired with my burlap upcycled tie bunting, in case you are curious.
What St. Patrick’s Day traditions do YOU have? We’d love to know! xoxo


Such a cute project! I featured you on my Kick-Off Friday post today!
http://craftivitydesigns.blogspot.com/2013/03/kick-off-friday-lucky-finds-edition.html
very cute!
So, So CUTE and SIMPLE!!! A WINNING combination 🙂 Let’s see what do we do… We go around coming up with different Rules and Reasons, why somebody should get pinched!! Lots of Running around the house!! It’s a fun day!
xo
Angelina
So cute!! We have never really celebrated St. Patrick’s Day except for wearing green. But, I’m loving all the wonderful ideas and started decorating for it this year 🙂
love this one!!!!!
Super cute Kelli! I love the polkadots!!!
I love, love, love this!! You gals have some super cute St. Patty’s decor this year! I rounded up my top 10 favorite quick and easy projects and I included this one and your burlap and tie bunting (which is also super cute). Keep it up you two!
So cute, and I love that ombre shamrock art work too!
My Irish roots are pretty deep but I don’t seem to have a lot of St. Patty’s Day traditions aside from wearing some green, and drinking some green beer…..mmm, beer and food coloring!
Haha Kimberley- your comment made me LOL! We also just love the fun festive dinner and drinks! 😀