DIY Halloween marquee letters
It’s starting to look like Halloween Town around here! If you’ve stopped by eighteen25 recently, you will know those fun gals are in full swing for the spooky holiday with month long Halloween tutorials. We were lucky enough to be a part of the fun sharing our DIY Halloween marquee letters:
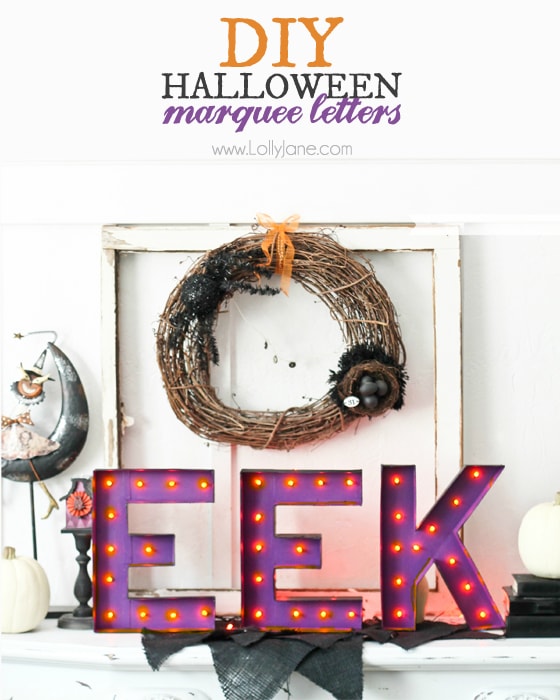
We’ve seen a handful of adorable summer marquee tutorials around Blogland and decided to put a black, orange and purple twist on it. It was a snap to make and really makes a statement that Halloween is near!
To get started you’ll need just a few supplies….
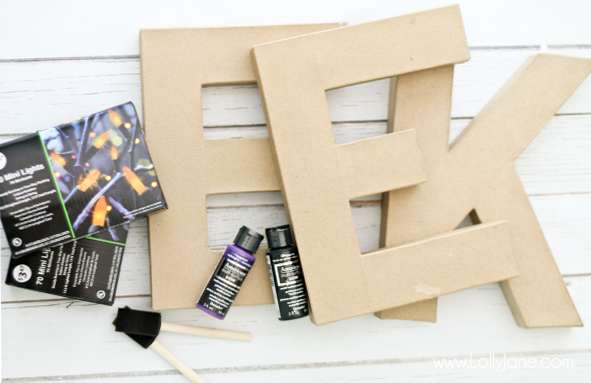
- Americana multisurface paint in black, purple.
- 12″ paper mache letters from Joann’s, (be sure to use your Joann, Hobby Lobby + Michael’s 40% coupons for each letter- score!) We originally thought of the phrase “BOO” but our Joann’s were out of O’s, darn it. “EEK!” is just as cute and sure to make the same statement.
- 70 ct. mini lights x2 (found in the Halloween aisle at Walmart)
- Foam brush x2 (fact: Kelli is a foam brush hoarder and has over 200 in her craft stash! LOL)
Alrighty, let’s get started shall we?
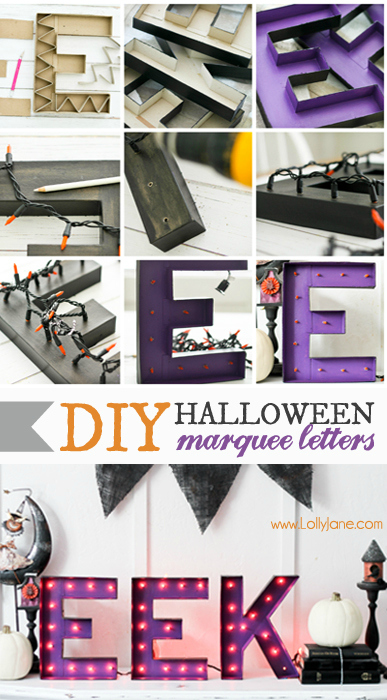
As you can see, there are a lot of steps but we promise it’s worth it for how stinkin’ cute these are!
- First things first, using an X-acto knife, remove the FACE of each cardboard letter.
- Paint the outside black.
- Paint the inside purple.
- Using a white colored pencil, mark where each bulb will go, appx. 2-ish” apart.
- Drill a 29/6″ hole through each white pencil mark, (the same as your light.)
- Push each lightbulb into the hole, nice & snug!
- Because of how the strands are made, the string won’t match up exactly with the number of holes so using bakers twine (or small zip ties) simply tie the extra lights down to the strand.
- To connect the strands to the next letter, simply plug into the outlet and keep on marking, drilling, filling in until your Halloween marquee lights are finished and eerily glowing! (;
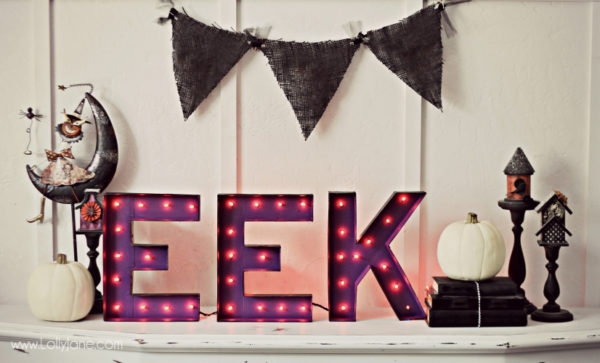
Because the strands are a bit bulky, they have a hard time standing up solo so we propped them. Still, pretty cute right? (;
Before they were plugged in….
We are huge fans of PicMonkey.com and played around with the letters in different finishes. Here’s one at “dusk”, LOL. In person for real, the lights of the glow is just so pretty!
We debated about what color to paint the inside of the letters so here’s a peek if they had been painted orange:
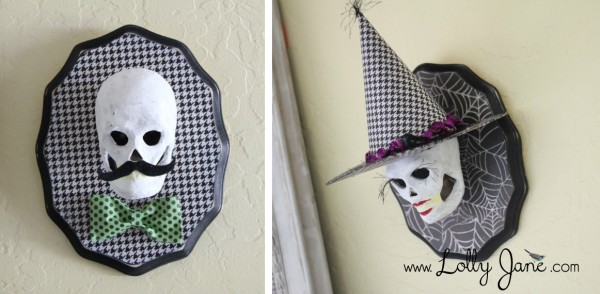
These letters are such a fun addition to our DIY Halloween decor, like our spider egg wreath, haunted birdhouses and last years project we shared in Spooktacular September, our skull plaques:
![]()
Don’t those just look amazing. You ladies did it again. Love the purple and black combination
This is so awesome and turned out so stunning! I featured you on my site here: http://printabelle.com/portfolio/halloween-marquee-letters If you’d like a button, you can find them here: http://printabelle.com/about-2
Thank you Michelle!! 🙂
Thanks, Michelle!
xo
This is AWESOME!!!!!! Such a great idea. I’m featuring this on KIS tomorrow.
This is SO AWESOME! Love it! I really love all of your Halloween decor such awesome inspiration. I want to get these letters and make each one of my kid’s names and put in on my wall! Thanks for the great post and awesome blog!
I’m in LOVE with this DIY. Just wanted you to know that I shared it on my blog because it’s so great!! http://homecomingmn.blogspot.com/2013/09/diy-weekend-plans.html
Why thank you Kayla! So sweet of you!!!! (: xo
I freeeeeaking love these! Thanks for linking them up- I’ll be featuring them tomorrow on 30days. And guess what? I get to see you in ONE WEEK!! woot woot! Love you!
Thanks Miq!!! MUAH! We are soooo stoked to see you NEXT weekend!!!! <3 Love you big! xo
These are SO freaking cute! Thank you so much! I want to spell everything out with mini marquee letters now!
Haha! Us too, Corinna! (: xo
LOVE LOVE these!!! So adorable! 😉 Bonnie
So cool! I love this!!
Thanks, Rachel!! Your Charlie Brown costume is too cute!
You guys are awesome! Love these! And I think I like Eek even better than Boo.
What a great idea and thanks for the tips as to where you can find the supplies. I also love the skull plaques. Thanks for sharing.
You’re welcome, Theresa. Such fun projects to make! (:
I LOVE this!!!
Thank you, Laura!! (:
Yay! I love the cardboard letter marquee you made. Ha, and this is pretty much exactly what I did to make my “metal” letters, just without the lights. 🙂 So cute!
Love your letters, Jennifer! The gold is SO pretty! (: