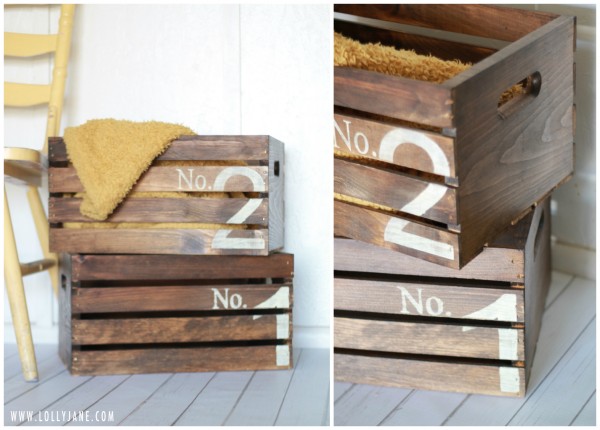
Vintage numbered crates
Happy Monday! Kristi and I are still recovering from a cray cray weekend and are now laying on the couch and can’t move Tough Mudder survivors! Whoo hoo! Anyway we’ve had quite a few comments and email inquiries on my faux vintage crates (displayed with my herringbone bookcase I showed with the sneak peek of my craft room makeover last week) and because I’m recovering, have had computer time to share the tute. LOL!
Here’s my secret to affordable crates….
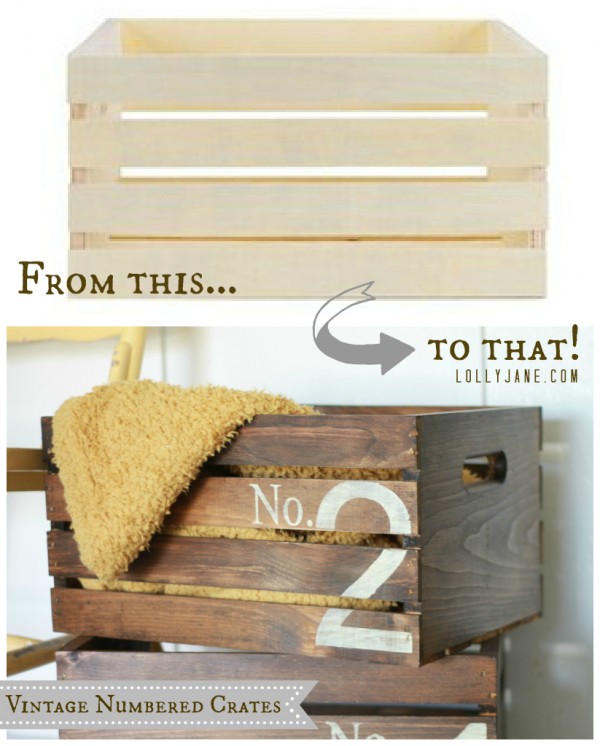
…$11.99 unfinished wood crates from Joann’s!! And, with your trusty 40% coupon it comes out to less than $8/each. Score! If you want to personalize your own storage space or spruce up a corner of the family room (they are super cute filled with extra couch blankets or pillows) take a peek at how we created ours to look like vintage numbered crates:
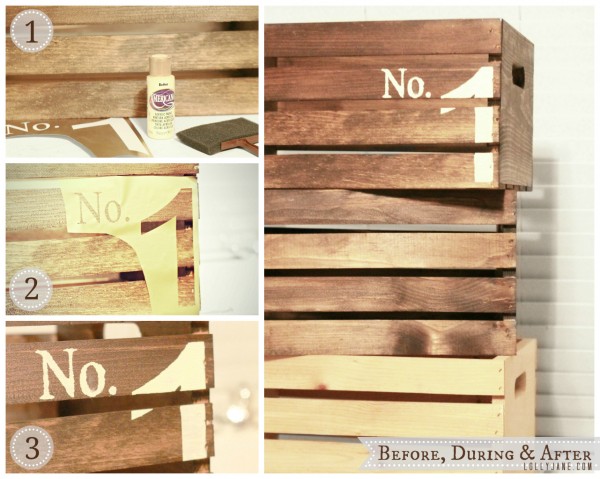
- Stain crates in Minwax, dark walnut color… pretty sure that’s the universal stain color in Blogland (;
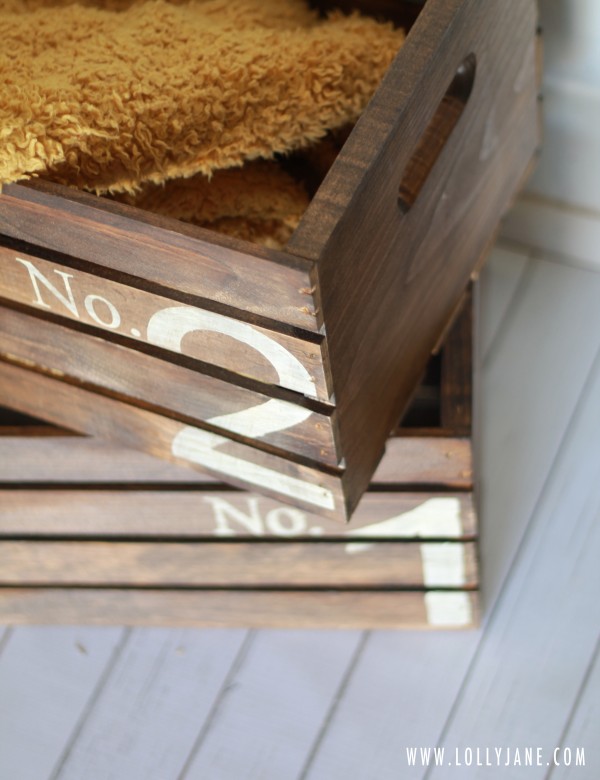
- Use your vinyl program of choice, (the layout was 7″x7″,) and design/cut “No. 1” in vinyl lettering.
- Note: The “No. 1″ is sized 2.75″ x 1.5″ in Times New Roman font, and the numbers are sized 4″ x 6” roughly in Arial font.
- Peel off backing and adhere to crate in bottom-right corner.
- Using a foam brush, lightly paint over vinyl (since you’re using it as a stencil) in Americana acrylic paint by DecoArt, in light buttermilk color.
- Lightly sand when dry and admire your new faux vintage crate!
These crates are so versatile! You can add casters to make them mobile…
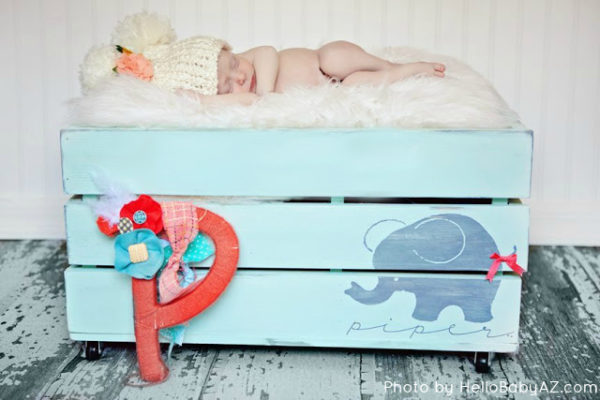
(Take a looksie at our DIY wooden nursery crate version | main pic photographed by Hello Baby! photography)
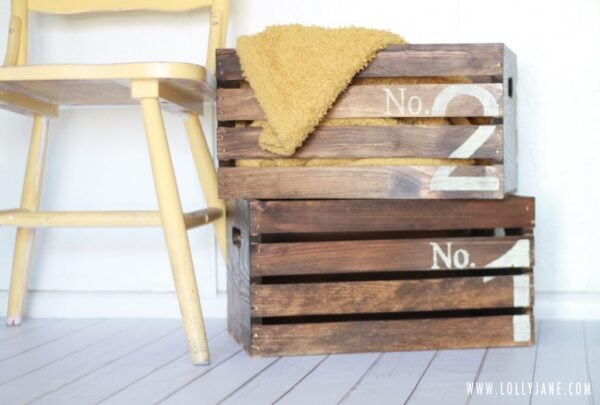
….or leave them stained sans numbers and use for everyday storage in any room of your home.
This simple crate can instantly spruce up any space and we love how easy it was to create a completely custom look for under $10.
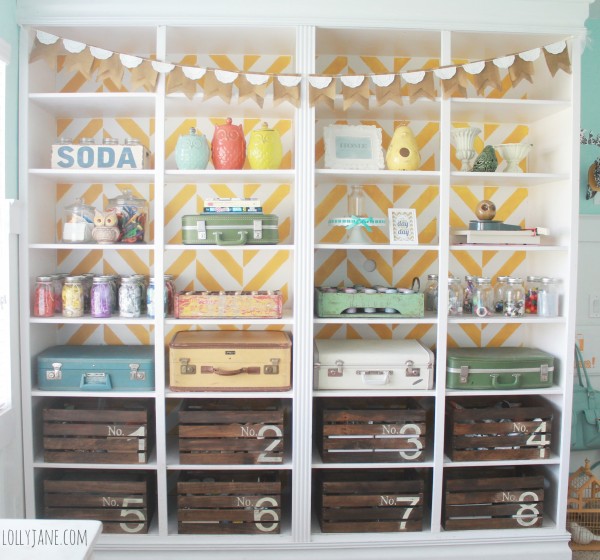
ps: In case you missed my craft room sneak peek, here are all 8 of the vintage numbered crates I’m using for my craft hoard storage. I lovely love looooooove them! (:
We’ll be back soon to squeeze in some St. Patrick’s Day crafts before Easter is here. Such a bummer there’s only a few weeks in between for decorating purposes, right?! (;
Update: Check out our burlap doily bunting tutorial, full bookshelf before and after and even a herringbone roundup!
xoxo


Hi Deborah! You bet, we have a post that shows how you can stencil anything sans a cutter 🙂
https://lollyjane.com/diy-cedar-name-plaque/
Enjoy!
In the instructions you mention vinyl?
Is that a special machine that I would need?
Can you do an old school tutorial.
Good to know!!
I found the same crates at Michaels!
LOL! Not at all (;
No. is “Times New Roman” sized to 2.75″ x 1.5″
# is “Arial” sized to 4″ x 6″ roughly
(:
can you tell me what font is used on the vintage crates for the numbers and letters?
Thanks Lauren! It’s amazing what a little stain + paint can do to spruce up those bland crates! 🙂 Happy crafting! XO
Oh my gosh! I love them! I have seen those unfinished crates in Walmart and Michael’s before, and I always thought to myself that they had so much potential. Your take on them is gorgeous! I think I see a laundry room craft in my future now.
Just a few hours to completely dry if it’s in a warm, dry area. (; Have fun creating! What a great wedding gift idea!
Thanks for the awesome idea! I’d like to put these together as a box for a wedding shower gift. How long did the stain take to dry?
Hey Krista! We use VE Lxi Master+ and love it!! Bought it from signwarehouse.com along with our industrial cutter (:
What vinyl program do you use to cut out the stencils?? I’d love to do that but don’t know how to make the stencil part. Thanks for helping a newbie. 🙂
JoAnn’s free app has coupons available 24/7! So does Hobby Lobby’s app! We got the crates from JoAnn’s but they let you use coupons from HL and Michaels on top of theirs. SCORE!
hello!
wondering – you reference a 40% off coupon so we can create these lovely crates for less… are you able to refer/advise where to get this?
thanks!
I love these so much that I actually made one for myself!
http://thejunkhouse.blogspot.com/2013/04/easy-numbered-crate.html
Thanks for the inspiration!
Your crates look great and so beautiful on your bookshelf! I’ve got this linked to my crates post too today, for inspiration!
Well thank you, Terri! Welcome! (:
Of course, I found you through a pin bc I am looking to use crates under my son’s bed for storage and love the design of yours. But that isn’t what made me comment. It was when I scrolled down the page and saw your FABULOUS craft shelves and organization that made me comment.
Very nice! and inspirational! I am pinning the photo of the shelves too.
Thanks for sharing!
Oh my! You ladies are crazy good…LOVE, LOVE, LOVE these!
I love your crates! I shared them with my readers on my pretty spring projects post, thanks for sharing your ideas!
http://make-life-lovely.blogspot.com/2013/03/pretty-spring-projects-roundup.html
Those are so great! Too bad we don’t have a Joann’s. 🙁
I love these! I keep telling myself I’m going to buy some unfinished crates to finish…now I have a great idea to go by! Thanks for sharing!
Popping over from Cedar Hill Ranch Link Party. These are DARling! Love them. I have 9 crates in my basement waiting for a makeover so I will be incorporating these in!
I absolutely love these Kelli! I’m featuring you tonight on MMM!
This is such a great idea! Love the number detail that you added to them. It gives them a sweet vintage industrial look to them. Would love to have you link up to ‘Saturday Sparks’ if you have a chance.
Thanks for the inspiration,
Suzanne
Pieced Pastimes
These are beautiful. I love how they fit in your craft room bookcase. Definitely pinning for future reference. Thanks for the inspiration!
Love the rustic crates… and congratulations on the Tough Mudder!
Love this idea! I’ve seen crates made, but buying is even easier. I love the stained look. Thanks so much for sharing. You girls have the best ideas! And congrats on surviving Tough Mudder- how fun!
Love those! They look great with the two stacked and on your shelves. I think dark walnut is the universal stain color because it’s SO pretty.
Sometimes the simplest projects are the best! I fully intend to copy this awesome project. 🙂
Love the numbered crate idea, but that craft room is awesome!!!
For great results on new wood or old gray wood, I heartily recommend briwax. It’s a wax with the tint already added, and gives amazing results. It’s one of the secrets of furniture builders recreating that antique look quickly and easily. About $12 online.
Love the crates! I’ve seen them in JoAnn’s and thought about painting them, but staining them is even better.
Thanks for linking to Take-A-Look Tuesday over at http://www.SugarBeeCrafts.com – you were featured today!
–Mandy, Sugar Bee Crafts
LOVE this idea! I’m SO doing this in my craft room. Thanks for the idea. I love your blog!
Wow, these are really cute. I love the numbers on them. I could think of several places were I could use these.
Have a great week,
Bev
Woo hoo! You did it! Congrats on finishing the race. Now you’re making me want to make another trip to Joann’s with my coupons. You also reminded me to pick up some stain. The little jar I have looks too orange…
Have a good week ladies!
LOVE your crates. You took ’em from drab to FAB! (Did you see 1825 featured your bookcase?)
OMGoodness! I love them, too!!! Super-duper cute craft storage!
Love the crates!!! They are going on my weekend To Do List 🙂
They look awesome! Hard to believe they are the same crates, so much better now.
Debbie 🙂
They look really great! An idea I might be stealing one day 🙂
Love, Midsommarflicka
Love and def copying these!!!!!
We love your cute crates!!! What a fun and creative idea! Have a great week! -The Six Sisters
TOTALLY going to make these… JOANN’S here I come ( you better have them for me 🙂 Pinning this 🙂
xo
Angelina
Love these crates! I’ve been wanting to do these exact crates for my laundry room/pantry! 🙂 Can’t wait to do them.
I am absolutely going to make these. Last year I fell in love with the look of these vintage crates and even saw an article where someone had nailed all of the crates together to make a bookshelf. I’m afraid that the bookshelf would be too flimsy though, so this project is an alternative opportunity to still use the crates in a bookshelf-y way! Awesome.
i am so making these!!!! and i am stealing your idea for your shelving…you don’t mind do you? 😉
The crates look wonderful!! Thanks for sharing this idea!