How to Paint Any Type of Floors!
Hate your indoor flooring? cover them up! We’ll teach you how to paint Any Type of floors… From linoleum to tile, laminate, concrete, vinyl or wood… Rust-Oleum’s HOME Floor Coating will transform your floors in no time.
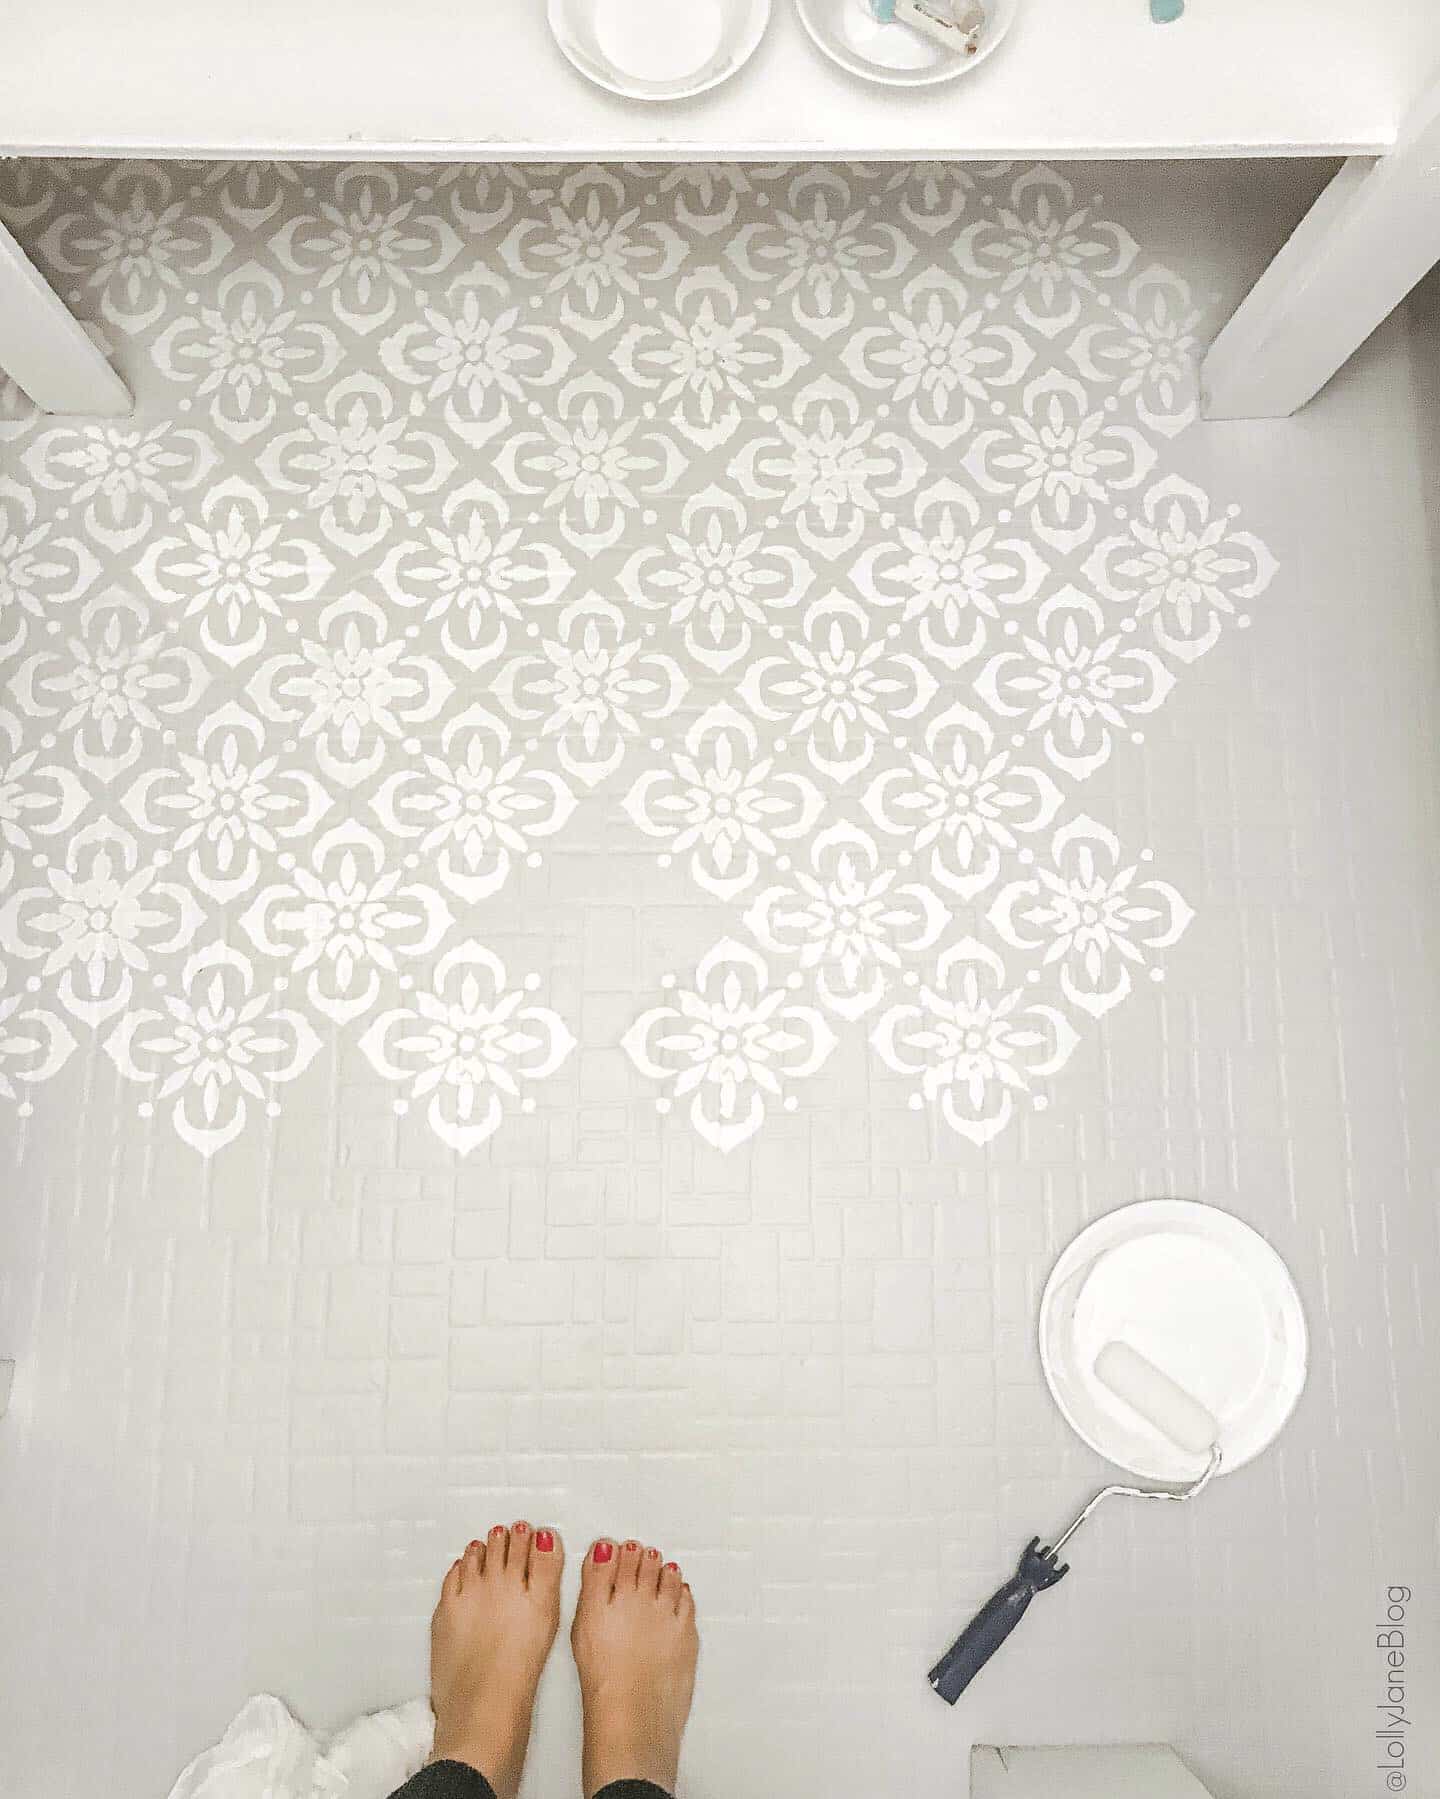
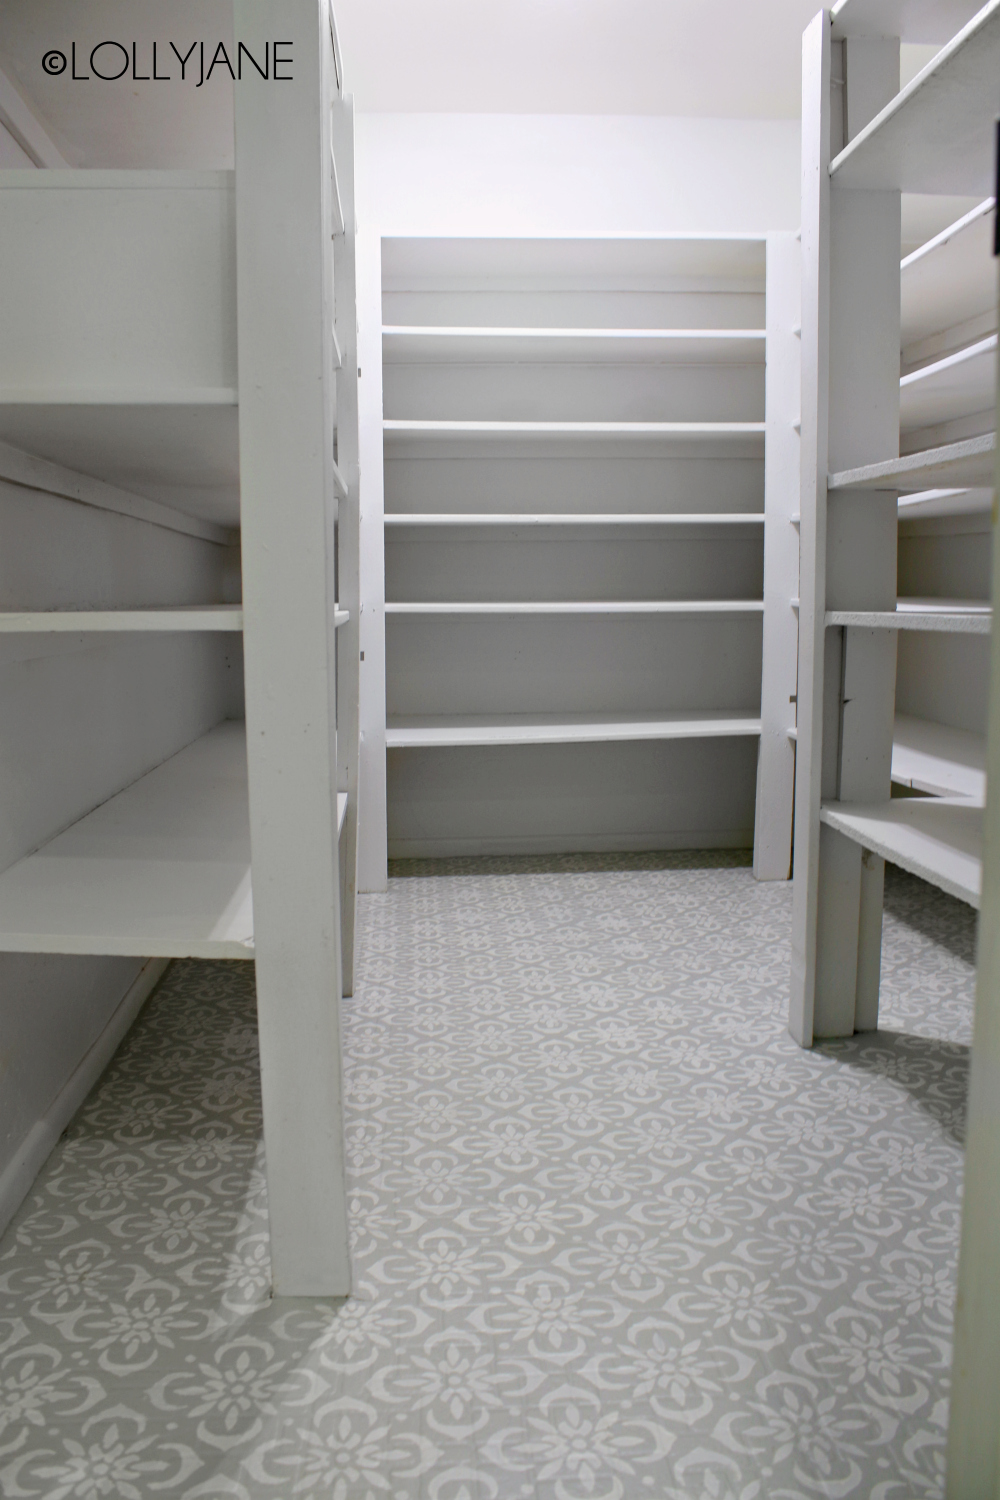
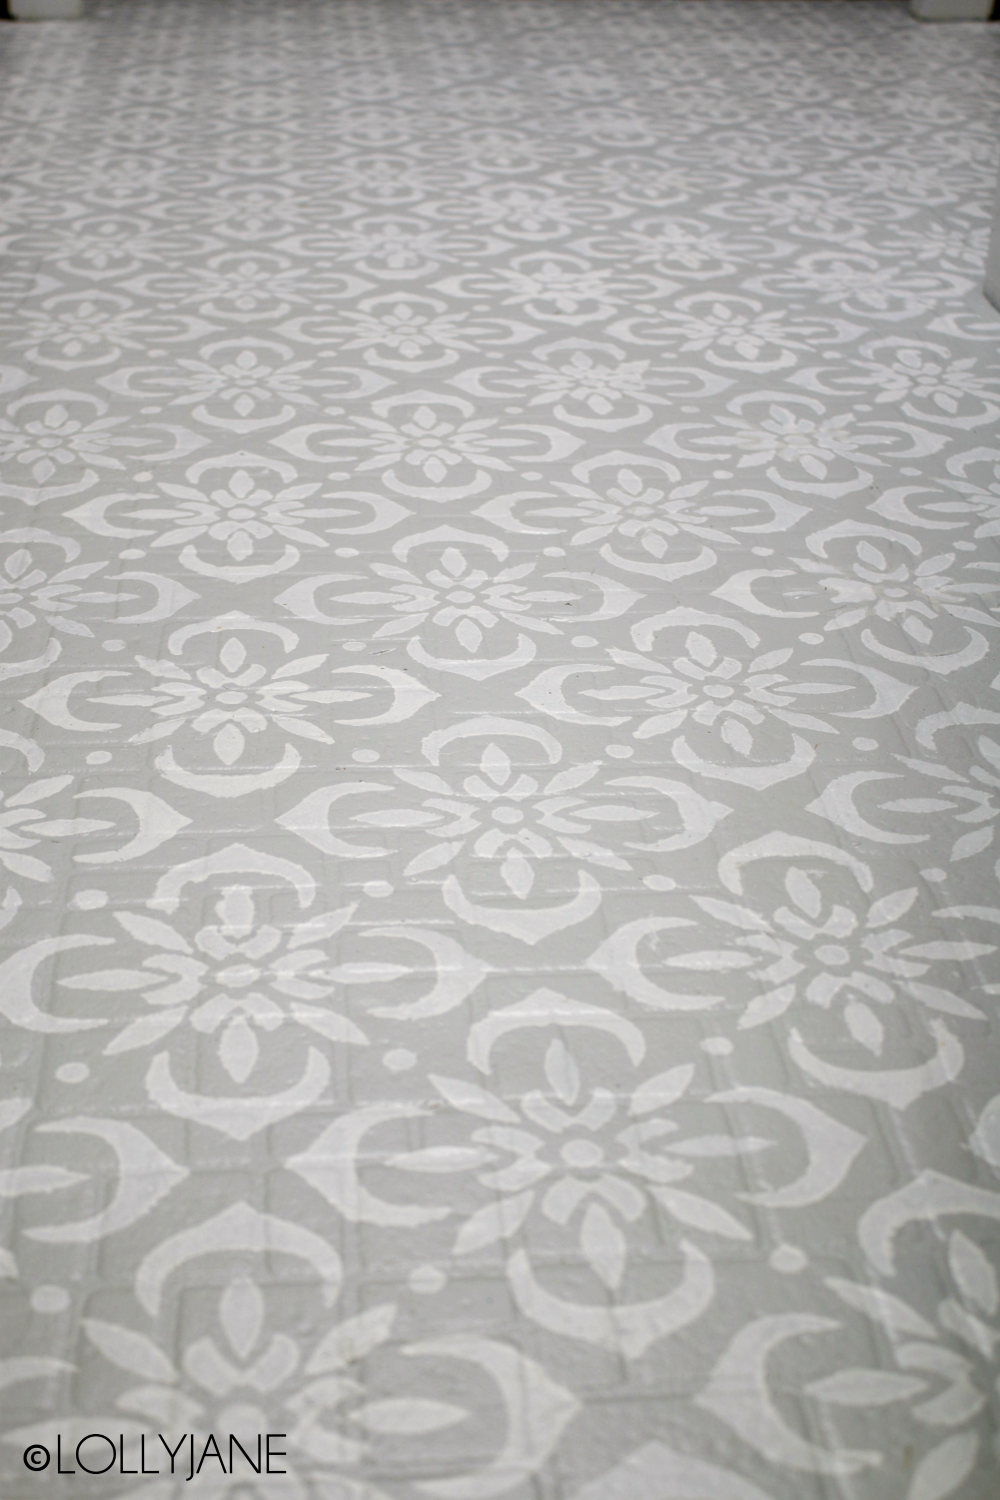
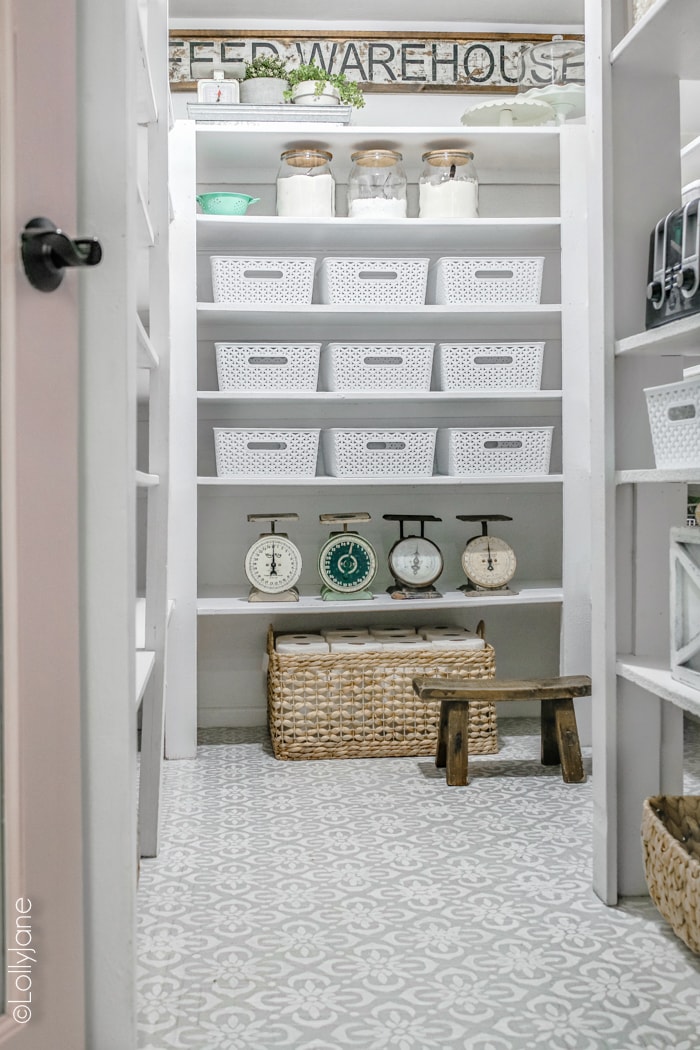
I’m sure you’ve seen all these gorgeous patterned floors in bathrooms, laundry rooms, kitchens, and even pantries! At first glance, it looks like tile but upon further inspection it’s really a just paint and a stencil. Absolutely brilliant.
Do you have an outdated floor but don’t have the budget to upgrade?
Do you hate your tile floors? Are you living on linoleum like we were?
Do you want a change but don’t want to go through demo?
Do you wish you could update your floors for less than $100?
Well you’ve come to the right blog as we’ve stenciled a dozens of spaces and are confident that YOU CAN DO THIS, too!!
You see, once upon a time we stenciled my kids bathroom with chalk paint because back then, it was a guessing game of which paint was best for painting stencil floors. That chalk paint held up just fine (thank you Rust-Oleum!) but it’s because we sealed it with 3412 layers of polyurethane. Ha!
Lo and behold, the time has arrived for paint that is MADE JUST FOR FLOORS. And not just tile floors, folks… vinyl, hard wood, concrete, and even linoleum. Dare I say, 40 year old linoleum? Yes, yes I do. Read on to see how I painted my linoleum floors in just a few days!
MATERIALS + TOOLS NEEDED TO PAINT FLOORS
Since Rust-Oleum‘s HOME Floor Coating line of paint is only available at Home Depot, you can nab all of the materials and tools needed for this project.
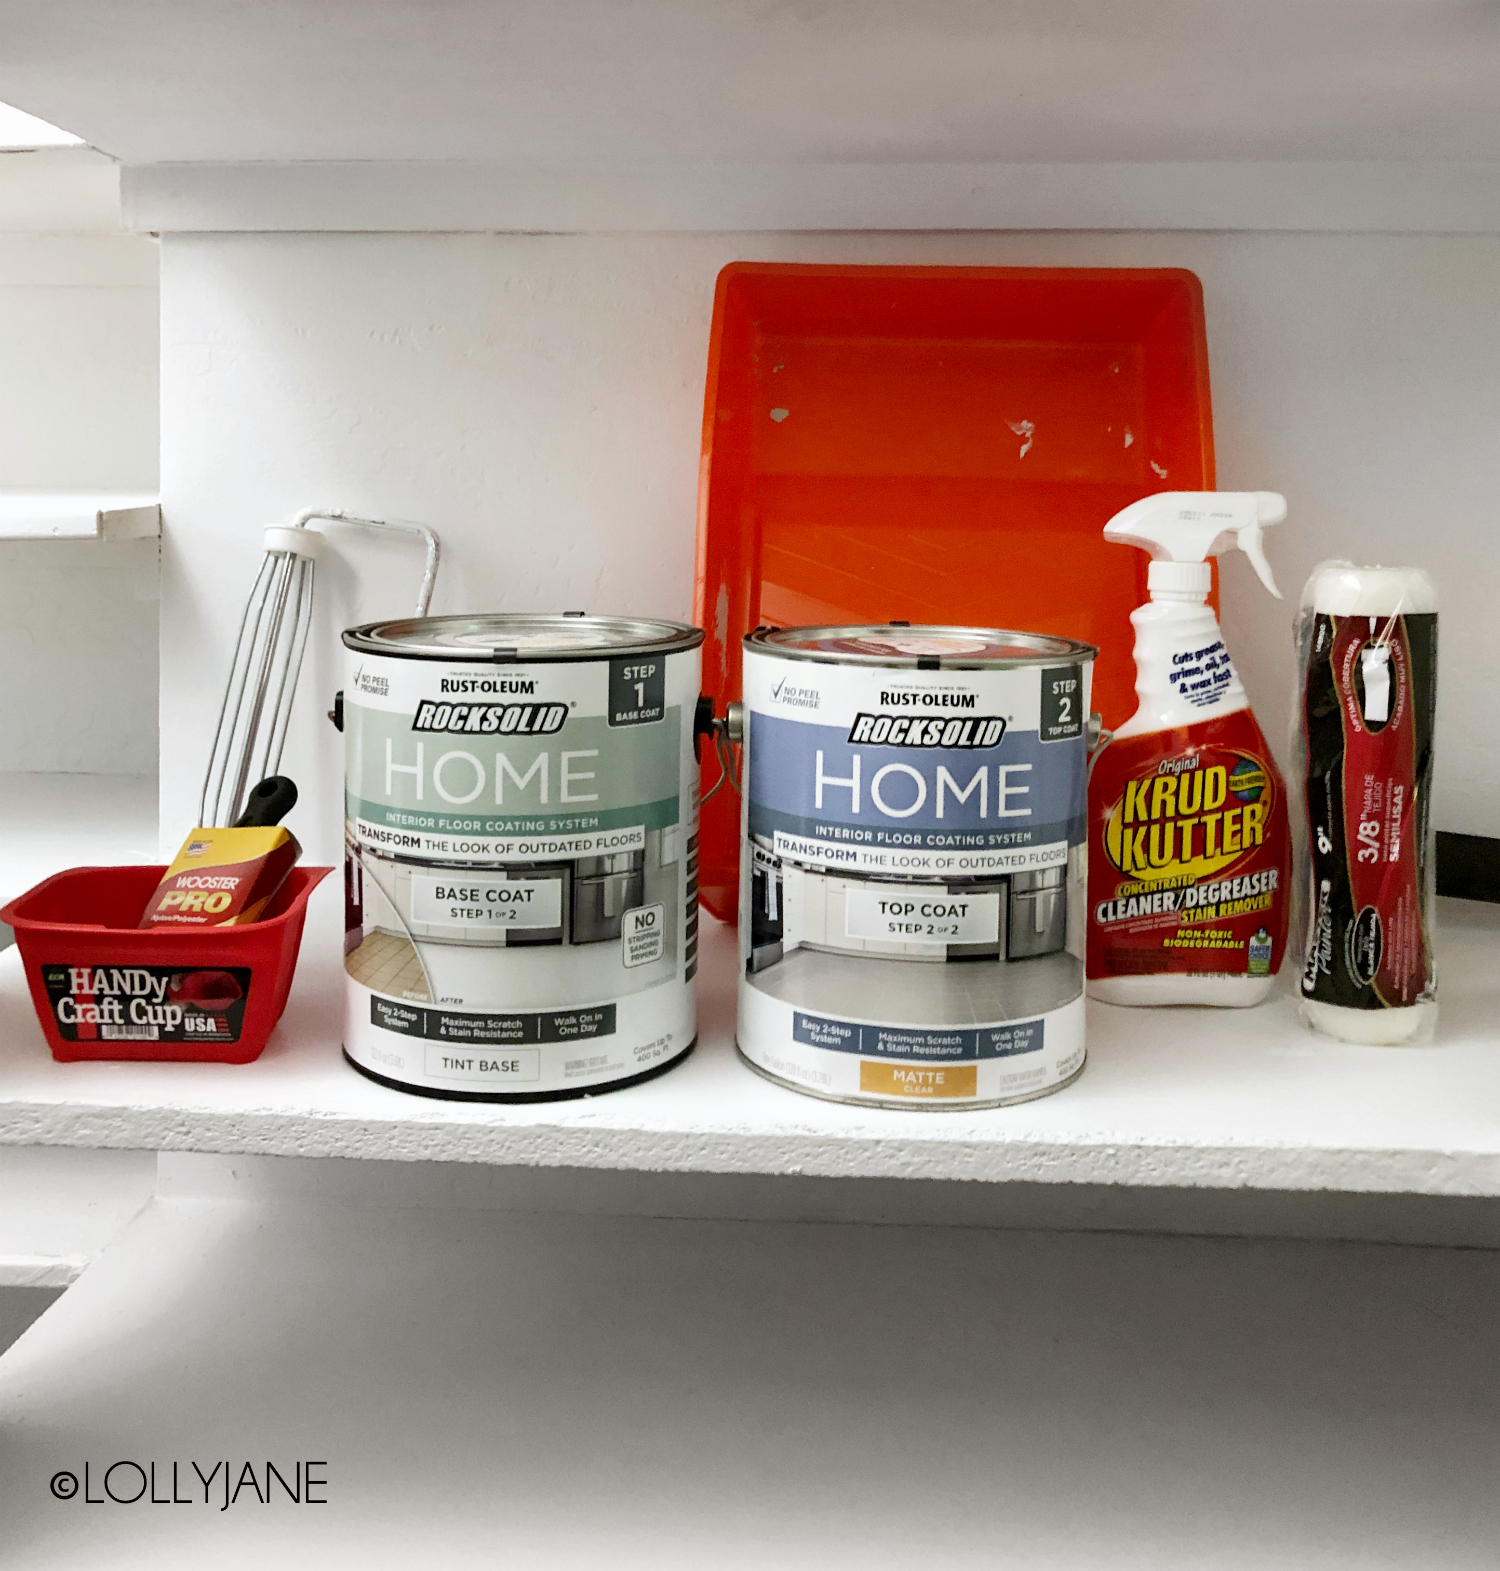
Materials
- Painter’s Tape
- Edging Brush
- 1/4″ Nap Roller
- 3/8″ Nap Roller
- Roller Frame
- Paint Tray
- Paint Cup (optional)
- Krud Kutter (or fave cleaning degreaser)
Paint
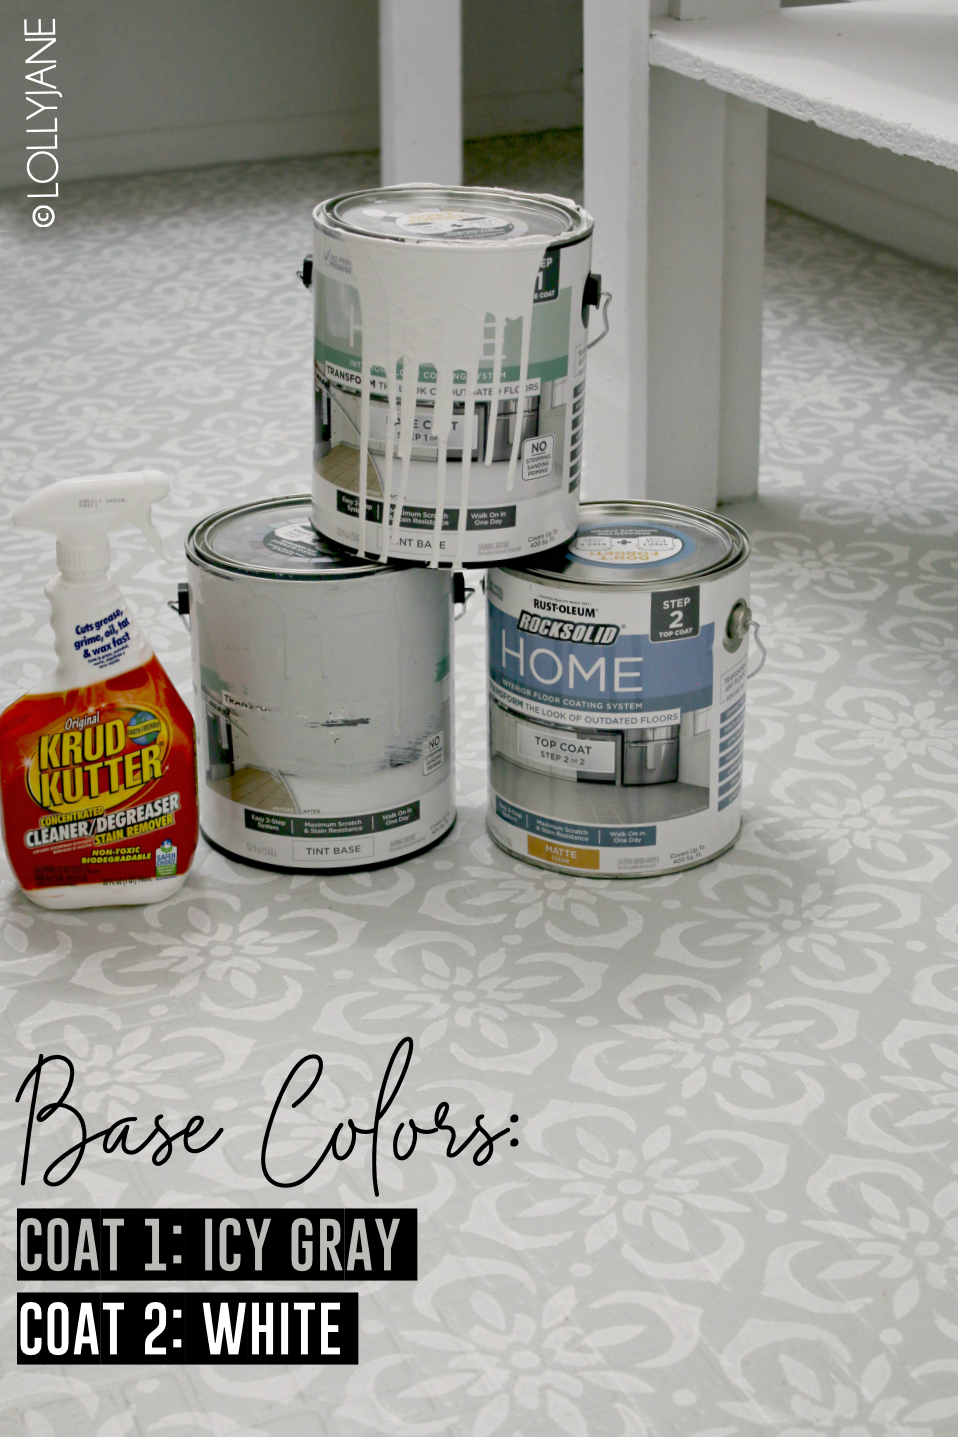
- Rust-Oleum’s HOME Floor Coating (we used the following colors: White and Icy Gray)
- Rust-Oleum’s HOME Floor Coating Top Coat (Clear: Matte Finish)
UPDATE: If you’re working on a smaller room, new paint sizes come in both quart and gallon. They also sell kits now!
Stencil
- 12″ Stencil (or preferred size, similar style linked)
- 6″ Mini Roller + Tray
- Painters Tape
Preparation for painted floors:
Don’t skip the prep! With Rust-Oleum’s HOME Floor Coating paint, you can skip the sanding and priming BUT you must give the floors a thorough cleaning. A little elbow grease now will make for a smooth application of paint later.
Cleaning the surface beforehand is more than just sweeping and mopping; a good degreaser will cut the unseen grime and gets to the nitty gritty of the floor. We highly recommend Krud Kutter as it’s a cleaner, degreaser, AND stain remover in one. Just spray on, let sit for a minute, then wipe away… it’s a small effort BUT a crucial step in preparation for paint as paint won’t stick to a grimy surface.
STEP 1: BASE COAT
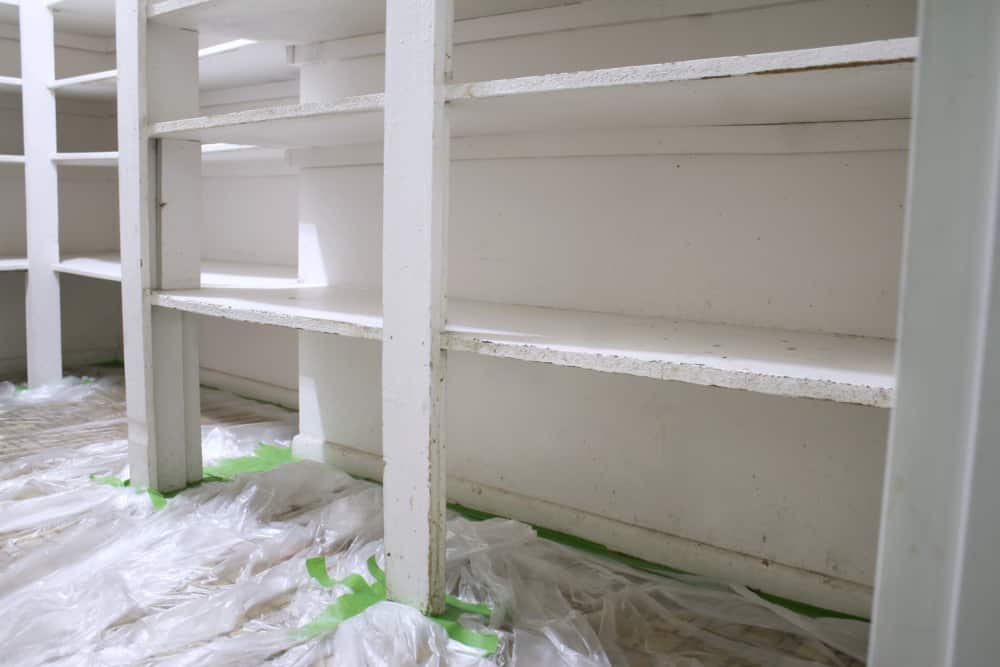
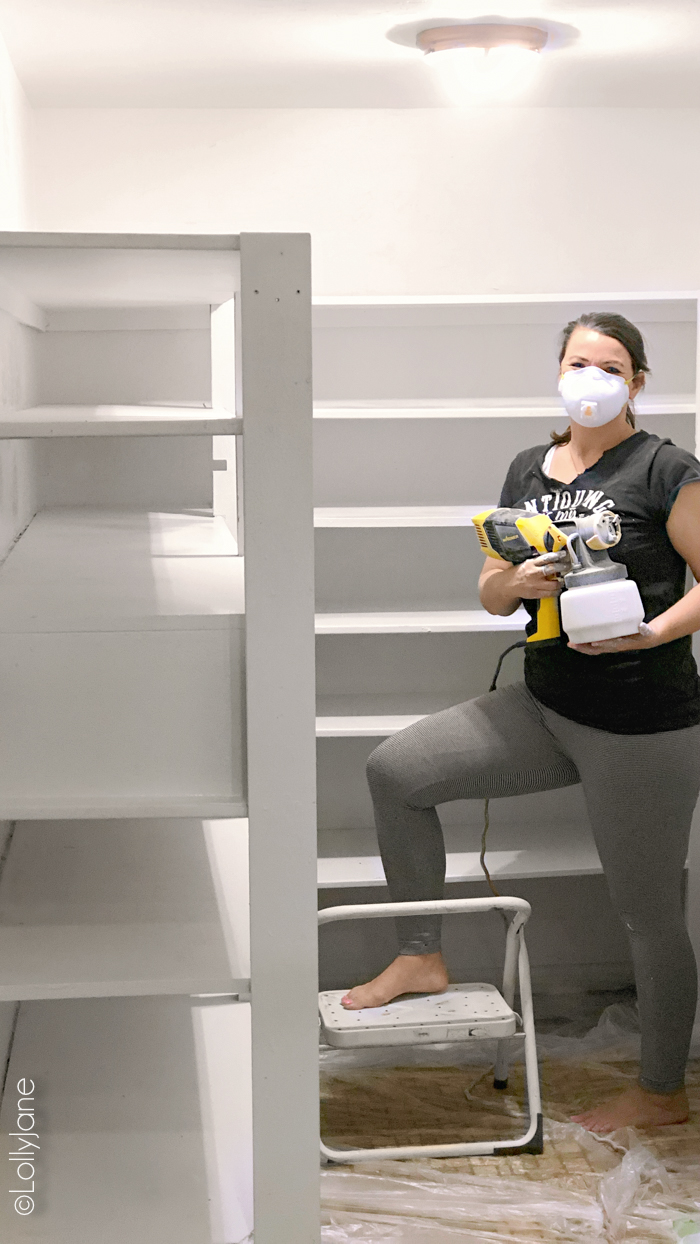
Now for the fun part, PAINT! Before we get to the floor tutorial, we couldn’t leave my original 40-year old wood shelves unpainted while the floors got a makeover so we used Painter’s Touch in flat white those a quick refresh.
Look at this before, guys.
YIKES, right?
We love Rust-Oleum’s ENTIRE paint line! Remember our darling plastic playhouse makeover that was transformed with spray paint alone?
Best paint ever.
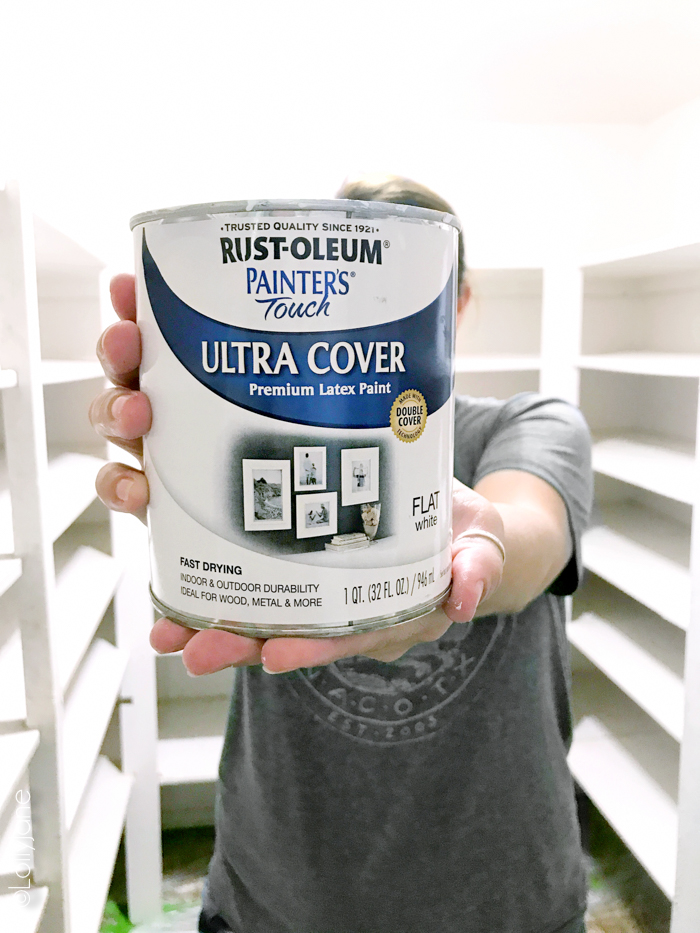
We used a paint sprayer for ease on these shelves but do not advise spraying for painting floors- use your recommended nap roller for that surface.
And now…drumroll, please… ?… the moment you’ve all been waiting for: Every single detail you want to know on how to paint your floors!
Rust-Oleum has basically done all of the work for you minus painting your actual floors for you.
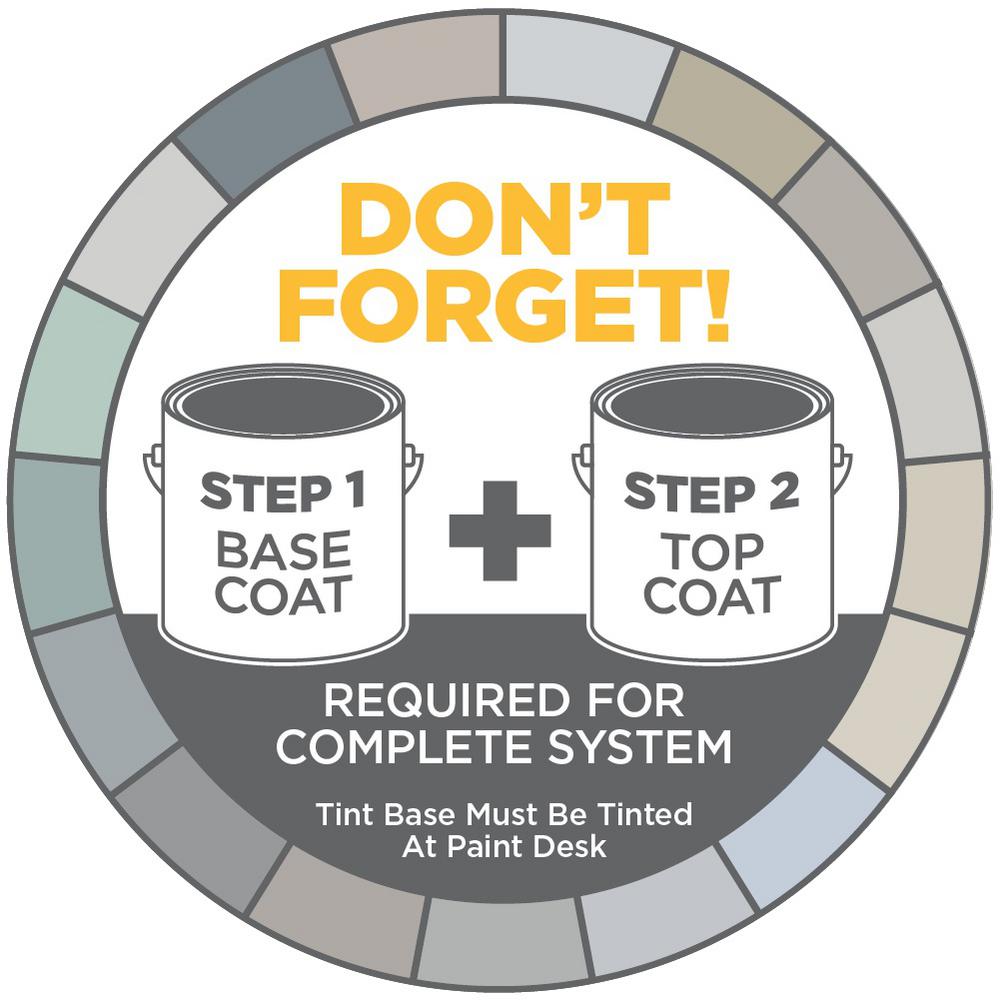
The HOME Floor Coating line is a 3-part process:
- Preparation
- Base Coat
- Top Coat
We’ll go over each step more thoroughly but your very first step for the base coat is to choose a color, or if you’re planning to stencil your floors, 2 colors. You can purchase HOME Floor Coating at your local Home Depot (coming to Amazon in May 2020) and the paint counter can tint it for you.
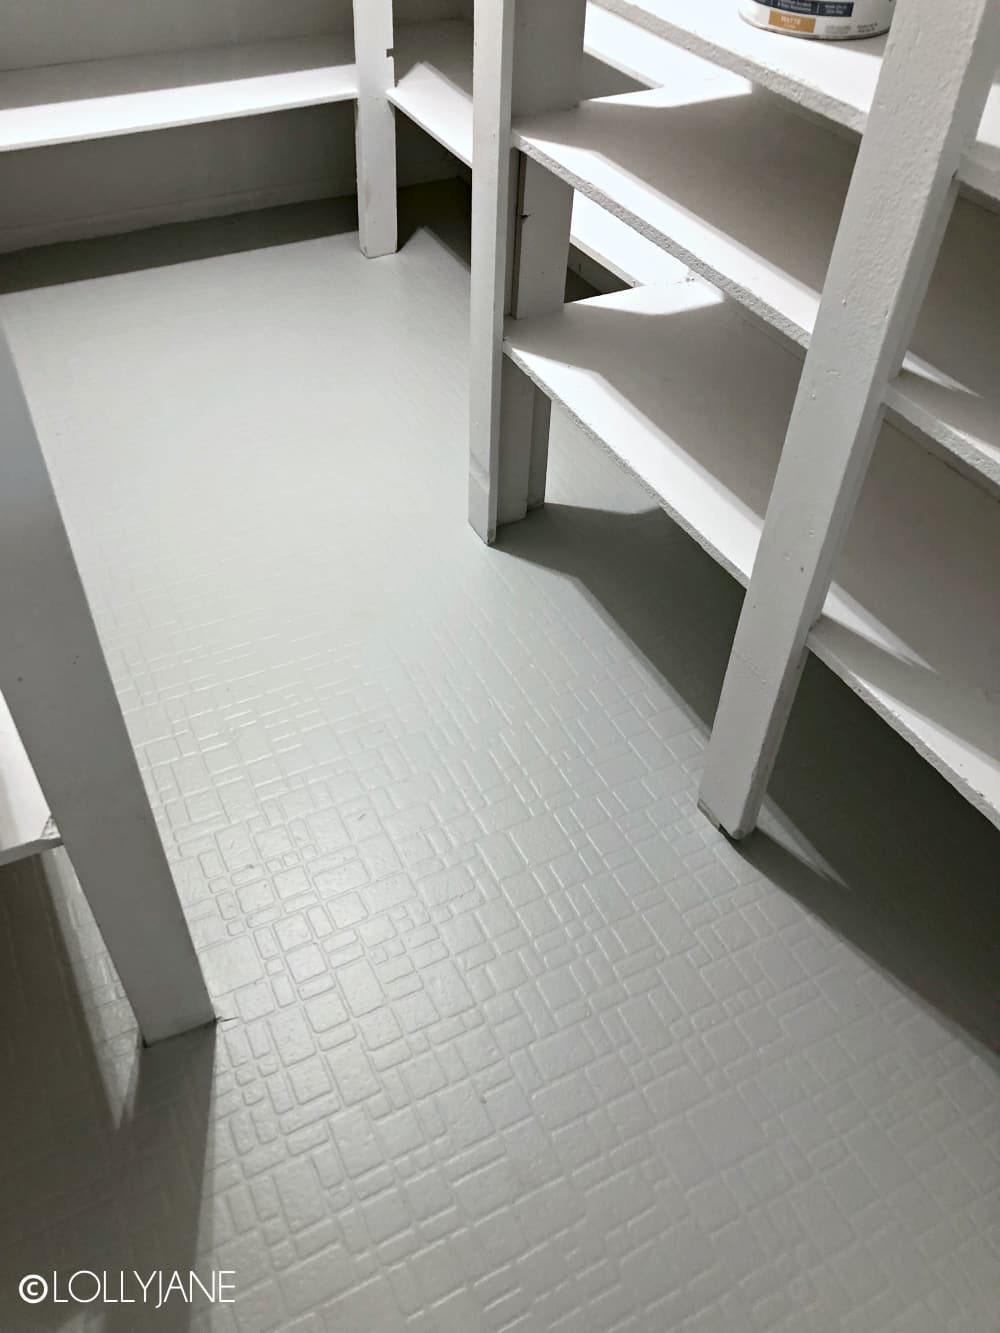
For our first base coat we chose one of our favorite hues of the 32 color options, Icy Gray.
The second base coat was White, which didn’t need to be tinted.
They’re a perfect combination, if I do say so myself!
I was worried Icy Gray wouldn’t be contrasting enough between the 2 hues when I opened up my can but boy oh boy was I happy to be so wrong… it’s truly stunning!
Here’s a peek:
STEP 1 OF PAINTING YOUR BASE COAT:
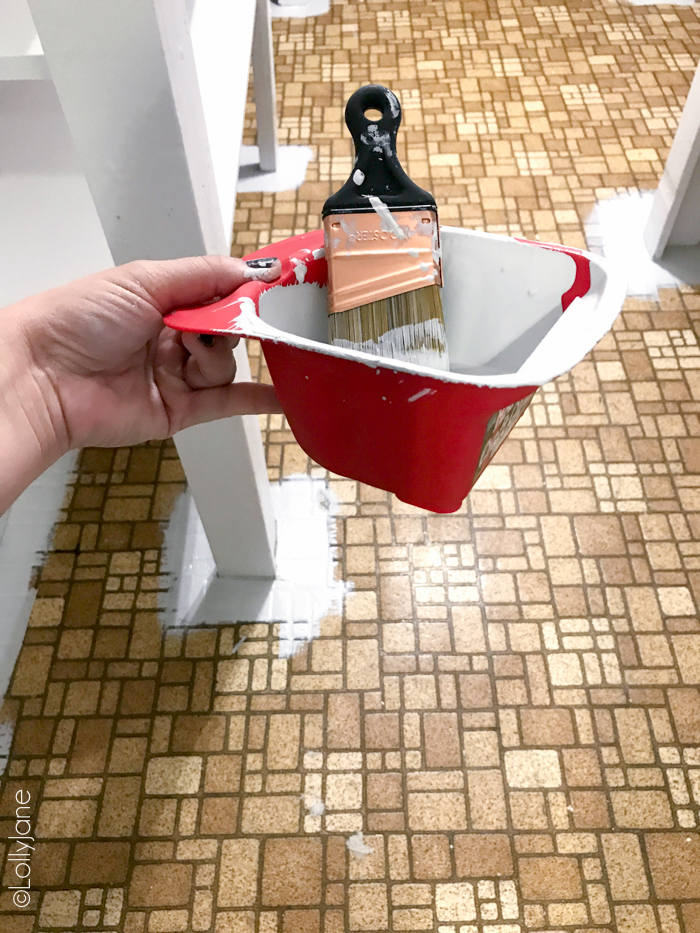
Edge the sides of your space and around base boards/legs of shelves/fixtures, (like a toilet if this was in a bathroom, for example,) and etc. We simply used a 2″ paintbrush and went around the base boards of the walls and legs of the shelving unit.
Note: We have an experienced steady hand with a paint brush but if you don’t, we advise using painters tape to tape off your baseboards and other areas to avoid massive touch ups later.
Also, shout out to this little paint cup that makes edging so easy… no need to lug the heavy painters tray around with you!
STEP 2 OF PAINTING YOUR BASE COAT:
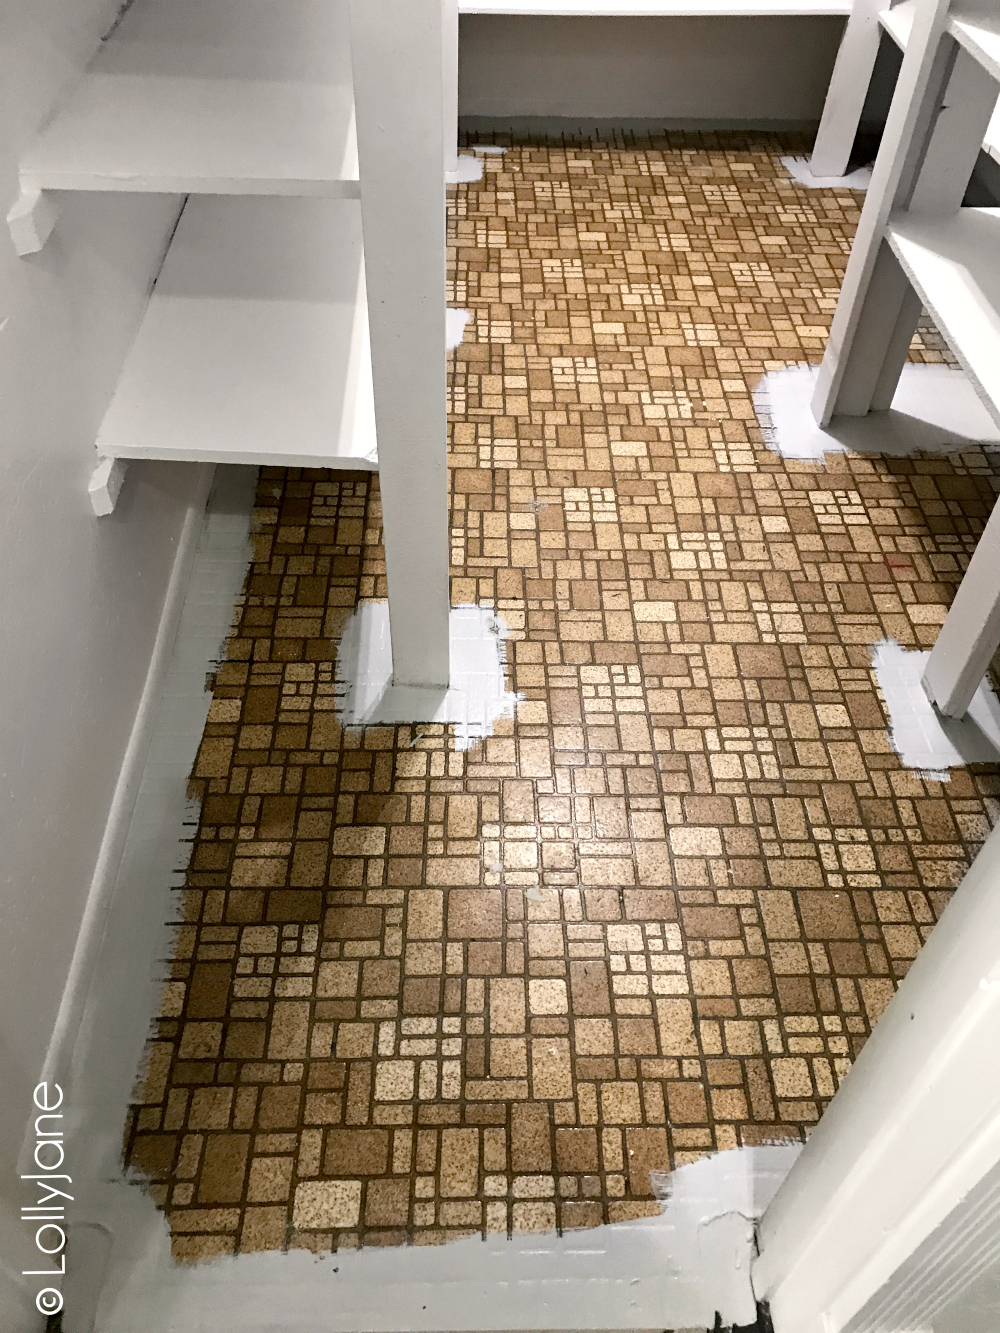
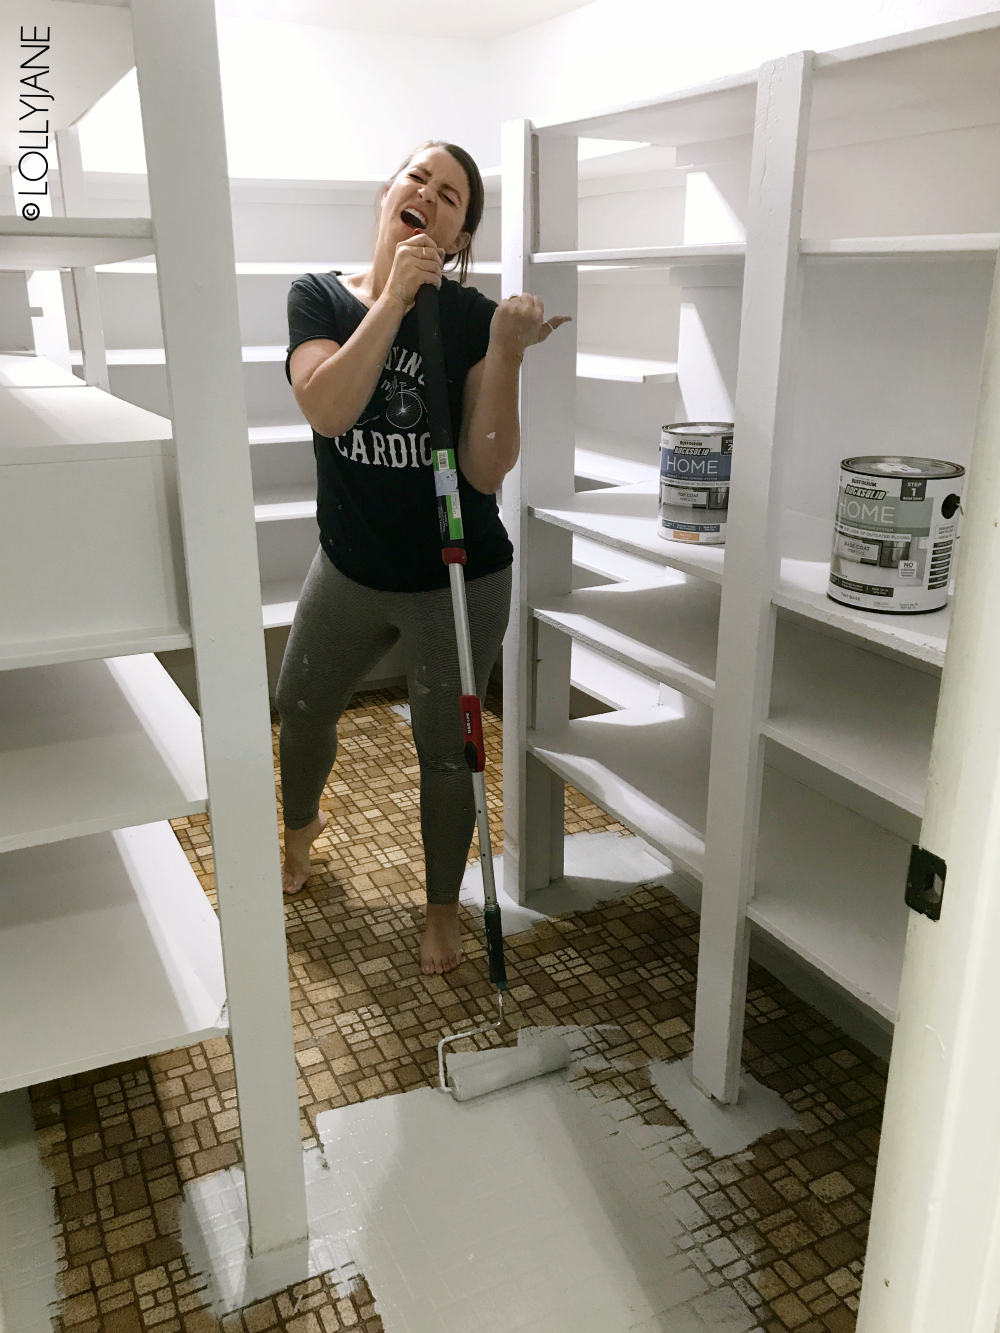
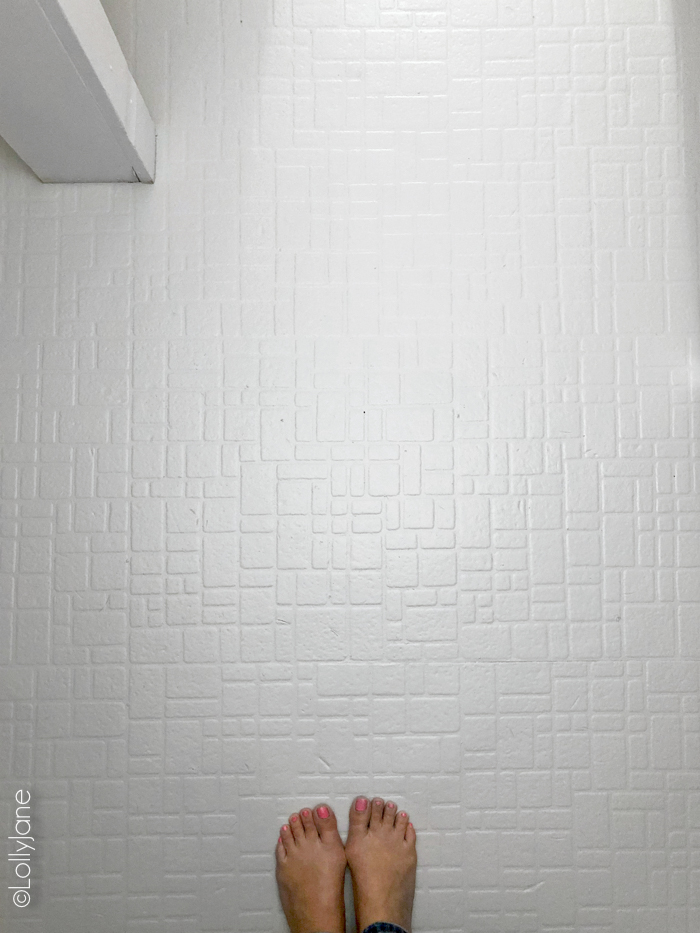
Time to ROLL. After all of your edging is done, use the recommended 3/8 in. nap roller cover and start rolling. We worked a few feet at a time and only needed one coat for full coverage, awesome!
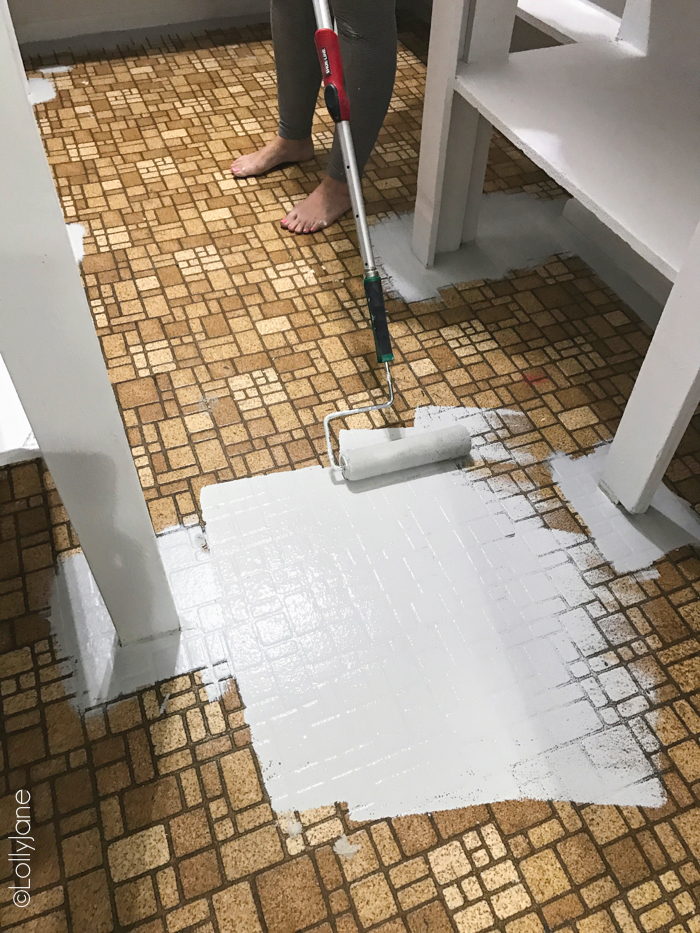
We love painting so this was so fun for us to see the INSTANT transformation of covering up ugly, outdated 40 year old linoleum.
Look how excited I was to paint over these floors, LOL!
Isn’t it amazing to see that quick before/after already?!
We kept saying WOW over and over again and repeatedly commented to each other how the white base coat instantly brightened up the pantry AND also went from outdated to updated.
Amazing.
HOME Floor Coating paint can also cover ceramic tile, porcelain tile, laminate, concrete, vinyl, hardwood floors, and more!
It’s kind of like magic ?
If you’re not stenciling, then you’re done with the base coat and it’s time to seal this puppy>>>jump down to Step 3 below to finish!
If you are stenciling, read on.
how to paint stencil floors
(OPTIONAL) STEP 3 OF PAINTING YOUR BASE COAT:
If you’re using a stencil, now is the time to use it!
We scoured our local hobby store for a 12″ stencil (similar one here) and simply laid it down against the wall, used a small 4″ foam roller and painted White over Icy Gray.
Read our full blog post on how to stencil tile floors here but don’t use Rust-Oleum’s chalk paint (even though it’s rad, save it for furniture!) be sure to use the HOME Floor Coating line as it’s specially formulated for floors after so many bloggers used chalk paint for floors, it’s amazing.
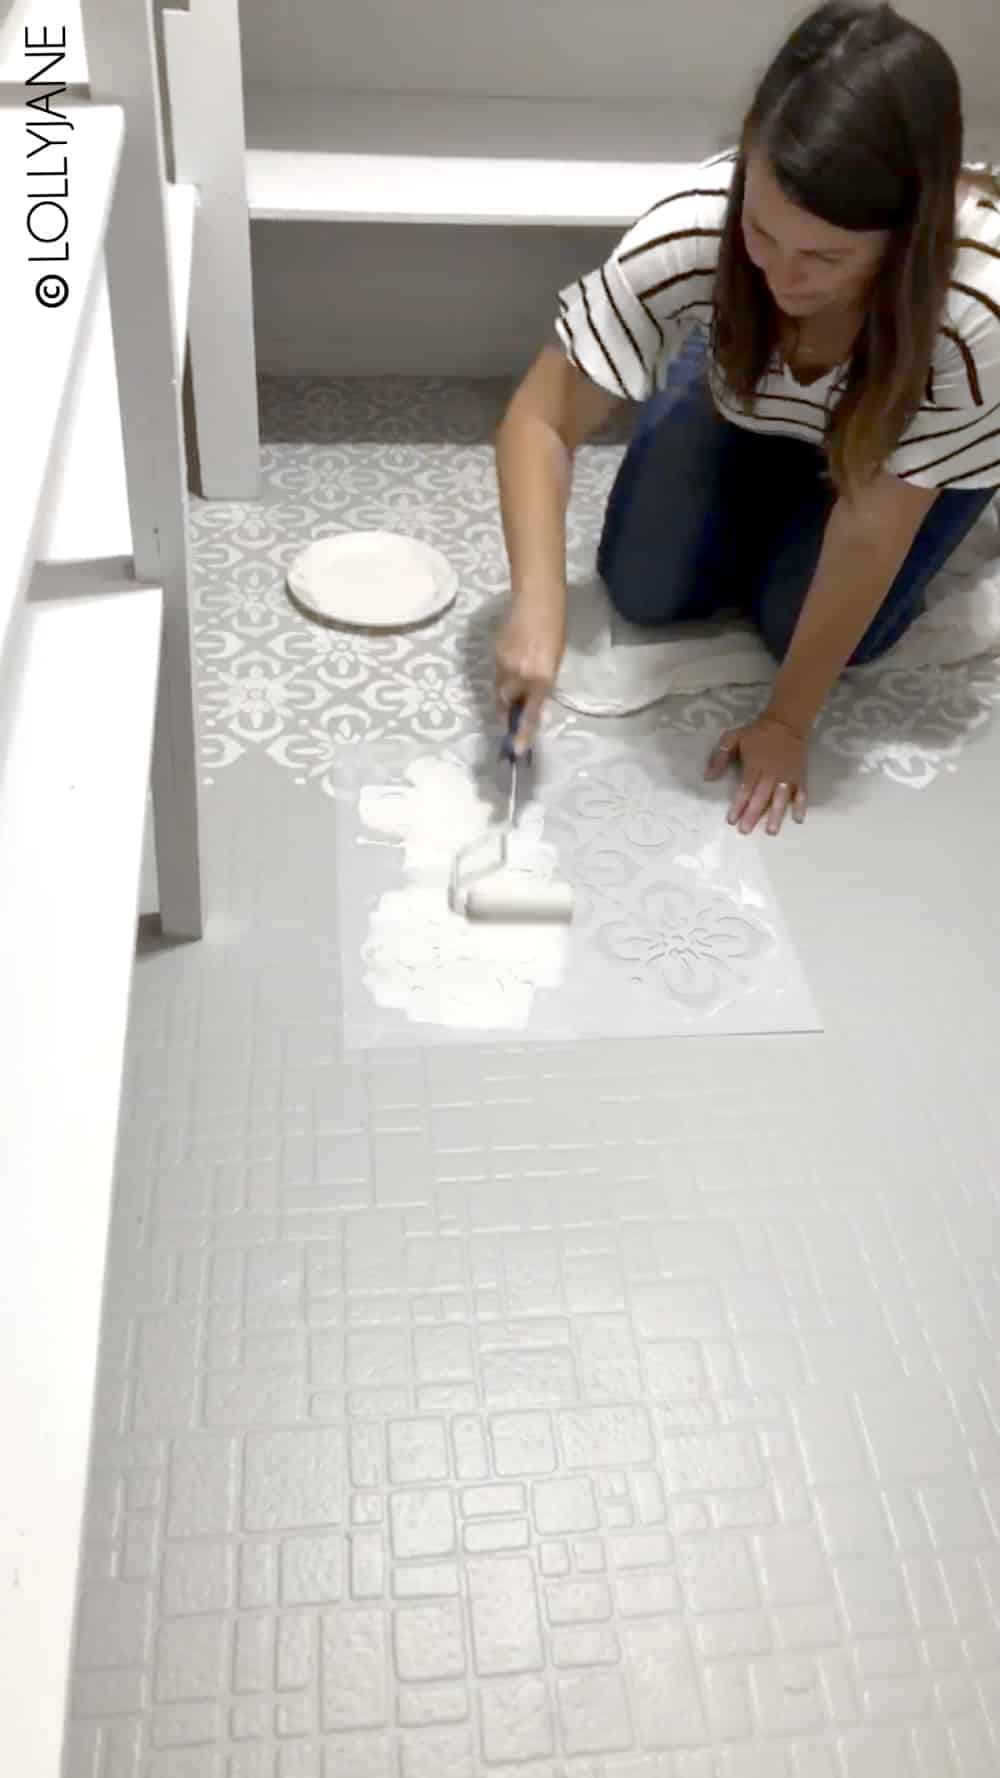
We were able to roll over our stencil with 3 sections before wiping it down as the paint starts to dry and it gets gummy; just keep some baby wipes or paper towels handy and be sure your paint hasn’t leaked under the stencil before laying it down each time as that is what causes bleeding.
A quick glance after each roll and wiping spillage on the underside of your stencil can prevent touch ups later, trust us.
Note: Wait 6 hours at least before applying your top coat.
Back to
STEP 2: TOP COAT/SEALER
The top coat is what seals your new floors, it goes hand in hand with your base coat– like PB&J!
Think of it like your top coat when doing your nails: it protects all your hard work!
Step 2 is non-negotiable… don’t shortcut this process if you want it to be fail proof:
how to seal PAINTED floors
I cannot emphasize enough how important it is to seal your floors! We applied Rust-Oleum’s HOME Floor Coating in a clear matte finish using a 1/4″ nap roller; simply edge like before then roll it over the base coat color(s) then let dry for a full 24 hours before walking on it.
That’s really it!
You can have new floors within a day… just like that. ✨
Come back next week for the FULL PANTRY REVEAL (eek!) and to see the full before/after of the shelves PLUS see how we dressed these shelves up for every day living as a family of 6!
Sneak peek here:
A huge thank you to Rust-Oleum for letting us try their new amazing HOME Floor Coating line, all opinions are our very own but YOU WILL LOVE IT, guaranteed!!!
Check out our Pantry Makeover (with storage ideas!)
Our follow up post is live with the full pantry makeover! It is sooo good, check it out here!
Also visit our pantry a year later to see how the painted floors have held up plus how we added cursive pantry labels to more organization!

EDITED April 2020: Rust-Oleum renamed and updated their label in April 2020; these photos of the previous design do not reflect the changes as this post was made in 2019 😉
Leave any and all questions in the comments!
xoxo

Hi Betsy! It did great in 95% of the room. There was slight wear (rubbing) in the heaviest traffic right when you walked in but not deep enough to rub back to the original floor. Definitely a great band-aid project! It held up so well until we were able to renovate.
I love this pantry floor!! been reading about this product and possibly going to use in my kids bathroom, to give it a facelift for a few more years. We might do some bigger renovations in 3-5 years. So I am curious how the floor paint held up in your pantry for you? Thanks in advance!!
We had the paint over the tile for several years before our remodel and loved it!! You won’t regret it!
Our vacation home has the very same flooring! We try to upgrade something each year but new flooring is soooo expensive it has been put on the back burner for years. I may try the painting method to tide me over. Thanks for the information.
Hi Ruth! I use a regular mop, I think the steam mop would be okay but for sure do a test area. The final sealant hardens the paint onto the surface but I’m not sure if the heat over time would break it down. I would use a regular mop to be safe. 😉 Other than scuffs and a few minor chips from dropped items it looks almost-new after a soapy wipe down (I use regular floor cleaner!) It holds up SO GOOD, 2 years and it was going strong! (We just tore out the entire kitchen but it was great to tide me over until I could install permanent tile.)
Will this hold up if I use a steam mop on my floors? 🙂
What all have you used to clean your floors, and how are they doing now!
Way to go Izzy!!! You got a workout AND a whole new look to your floors- woot woot! 😉 My floors are 40+ years old and I had LOTS of scrubbing too, so much build-up but worth it once I saw the paint adhere so well. I’m sure yours looks amazing, you can share on social media if you have it and tag us @lollyjaneblog so we can see! Thank you for taking the time to follow our tutorial + comment! ❤️
Hi there, I loved thee idea of stenciling the floors. So I sought out my retirement/multi purpose room. I went with the colors you choose. I must say this was way harder then your pictures. I mean just scrubbing the concrete with the Krust Kutter was back breaking. I did it twice, to be sure it was cleaned well, after I had removed thee old tiles. Then the 1st step, applying the base coat, was not to difficult. 2nd step, the stenciling, had to find a technique on lining up the stencil without getting paint everywhere. I probably should have chosen a smaller stencil. And getting up & down from the concrete floor was the real pain. But I did it! I finished it & I love it. Would I do it again,,hhmm not anytime soon. Thank you for the tips. It came out beautiful. If only I could could post pictures.
I loved your stencil floor. So I decided to conquer my retirement multipurpose room. I followed all your steps & used the same colors as you did. Wow, what a project. My whole body is sore from 1st scrubbing my concrete floor & 2nd sitting on the concrete floor to stencil it. 3rd I did little touch ups with a paint brush using white & icy grey where needed. I really didn’t think I was going to finish but I did. It took me about 3 days. I still need to put the final top coat on tomorrow. I’m hoping the top coat doesn’t leave a sticky feel like the base coat did.
I would post a picture if I could.
Hi Anne, apologies for the late reply but yes it will work on the walls for sure. I bet it will look great, and last much longer than mine even! 🙂
We just bought a 1910 house. There is linoleum/ vinyl on the kitchen walls. Do you think this process would work on the walls? We plan to use this house as a rental property so not really wanting to take it down.
Thanks!
Hi! We only did 1 coat 🙂
Did you have to do two coats of the white?
So exciting! We’d love to see your after, congrats, Chrissy!! xo
Thank you so much for this blog! It inspired me to paint my kitchen floors in my new home!
Any yellowing?
Thanks Ann! They are doing awesome, just a few small scuffs after a good soapy wash! No peeling or chipping, it’s all about the product 🙂
Great tutorial! How have your floors held up over time?
Thanks, Jackie! It’s called Rust-Oleum Home, Floor Coating 🙂
Hey Lauren! We usually used a Swiffer weekly then steam once a month. It’s very durable 🙂
What types of cleaning methods/chemicals can be used on the floor after painting? Normally, I use a steamer. Is this recommended with painted floors?
Do you know the new name? Thanks for the great tutorial!
Hi Michele, we can’t guarantee it’ll have the same durability. I can *guess* it will be fine but would hate for you to do the work and have it peel up. The new line is specifically designed and formulated for floors and major wear and tear and can handle the use. Hope that helps 🙂
Can’t match*
Can I use a color to stencil on top of base coat that rustoleum can match and then apply matte top coat? Or will it not seal correctly?
I got the two step process you recommend but the color I want to use after painting floors white is the color I used on kitchen cabinet then was gonna seal with the Matte sealer u recommend .. is using a different paint gonna affect the wear ?
Thanks for catching that: Ice Gray is on bottom with White as the stencil top color 🙂
The pictures look ilke Ice Gray is the base coat and white is the second base coat that you stenciled with but the post is written opposite of that.