rustic window pane turned Halloween decor
Hi all! My name is Jennifer Rodriguez from All Things Belle. I’m excited to share my rustic window pane turned Halloween decor with you today!

I competed against the magical duo that is Lolly Jane last year, and completely fell in love with their blog! I’m thrilled to be guest posting here today. I’m a quilt, sewing, and crochet designer in fabulous Utah (though once upon a time, I was fellow Arizonan too!) Today I am going to show you how to make a fun and easy Halloween decoration!

I have been wanting a rustic window pane for like forever! A couple months ago a generous, crafty friend scored a gold mine of them and sold me one. Isn’t it yummy?! As soon I as got it into my hot little hands I knew exactly what I wanted to create. Want to make one too? I know you do, so here’s how!
What do you need?
*A window pane
*A window pane
*12″x24″ vinyl sheet
*large piece of burlap
What do you do?
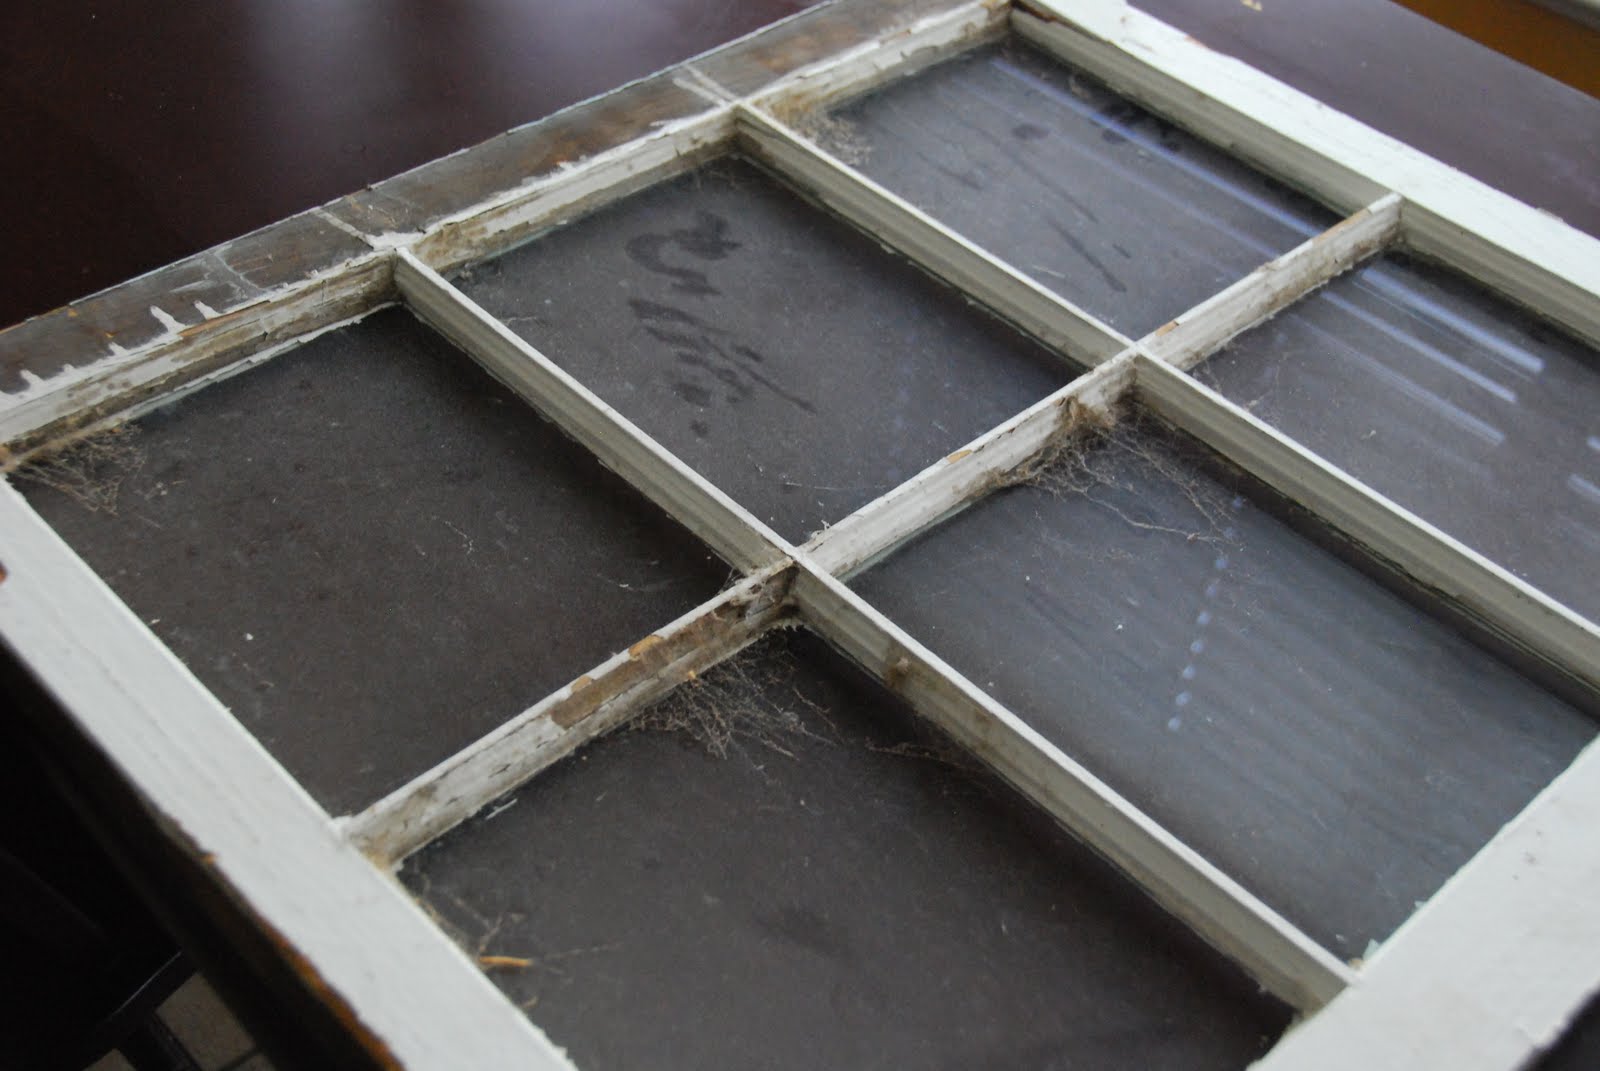
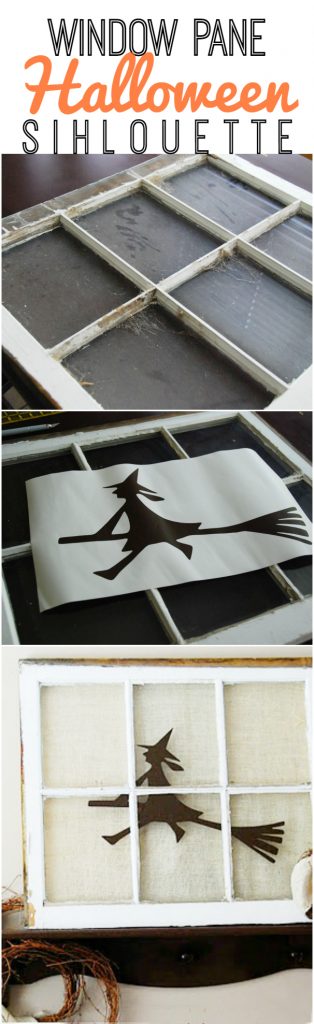
Clean that window! I want to add some spooky to my decor, but that’s a little much. You also want to be sure you have a clean surface for your vinyl and fabric.
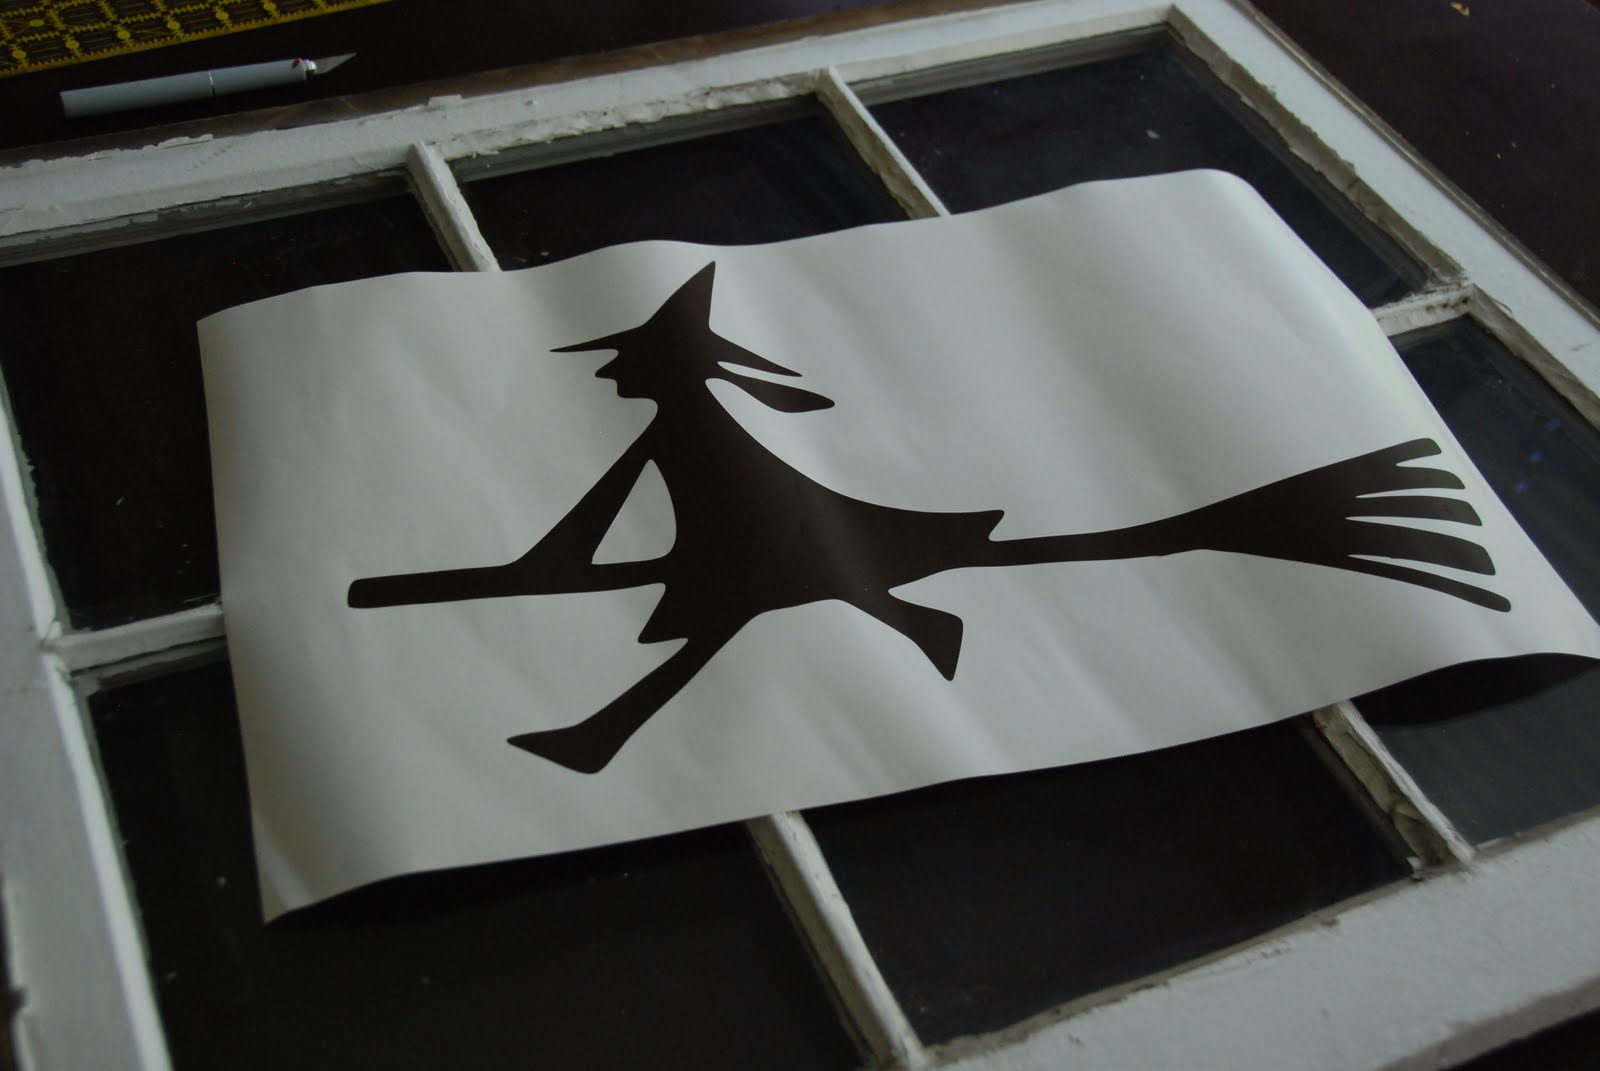
Next cut out a vinyl decal that you would like to display.
This witch is from Silhouette and only cost .99 for the file!

Next, place the vinyl on the pane and decided on placement.
Then cut the vinyl decal apart.
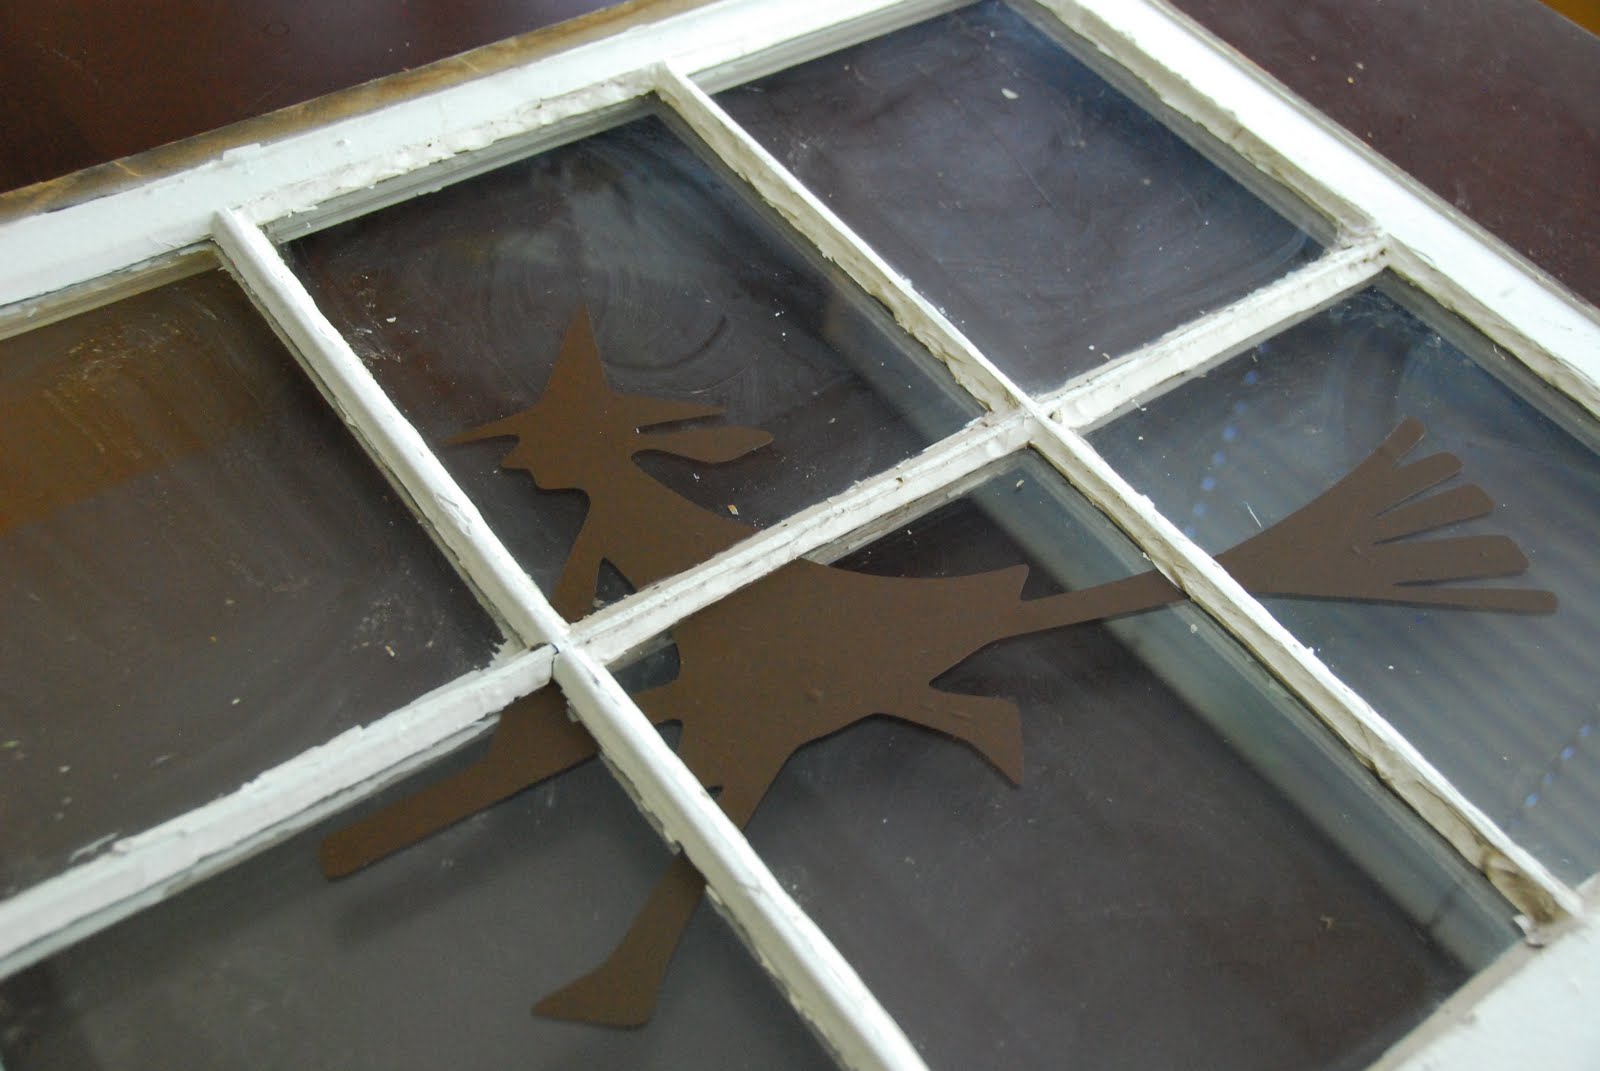
Carefully place the decal on to the window pane.
Easy, peasy right??
Now’s it’s time for the fun part..
Auditioning the
fabrics to go behind it!
fabrics to go behind it!
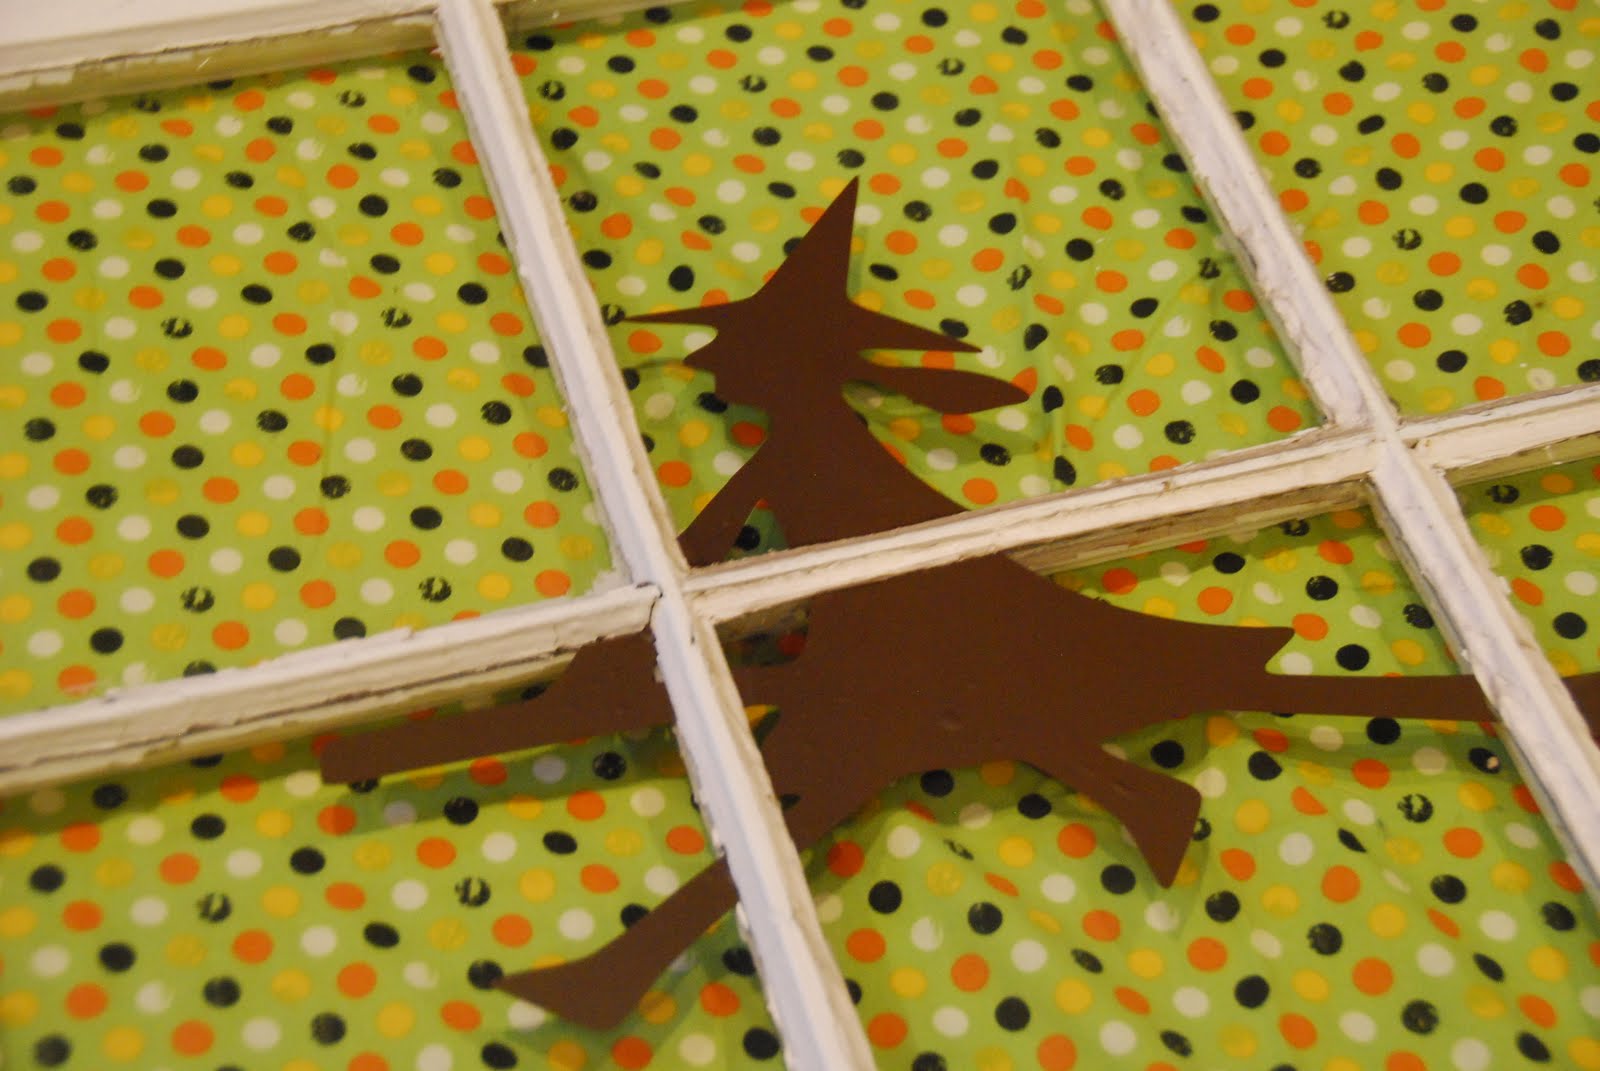
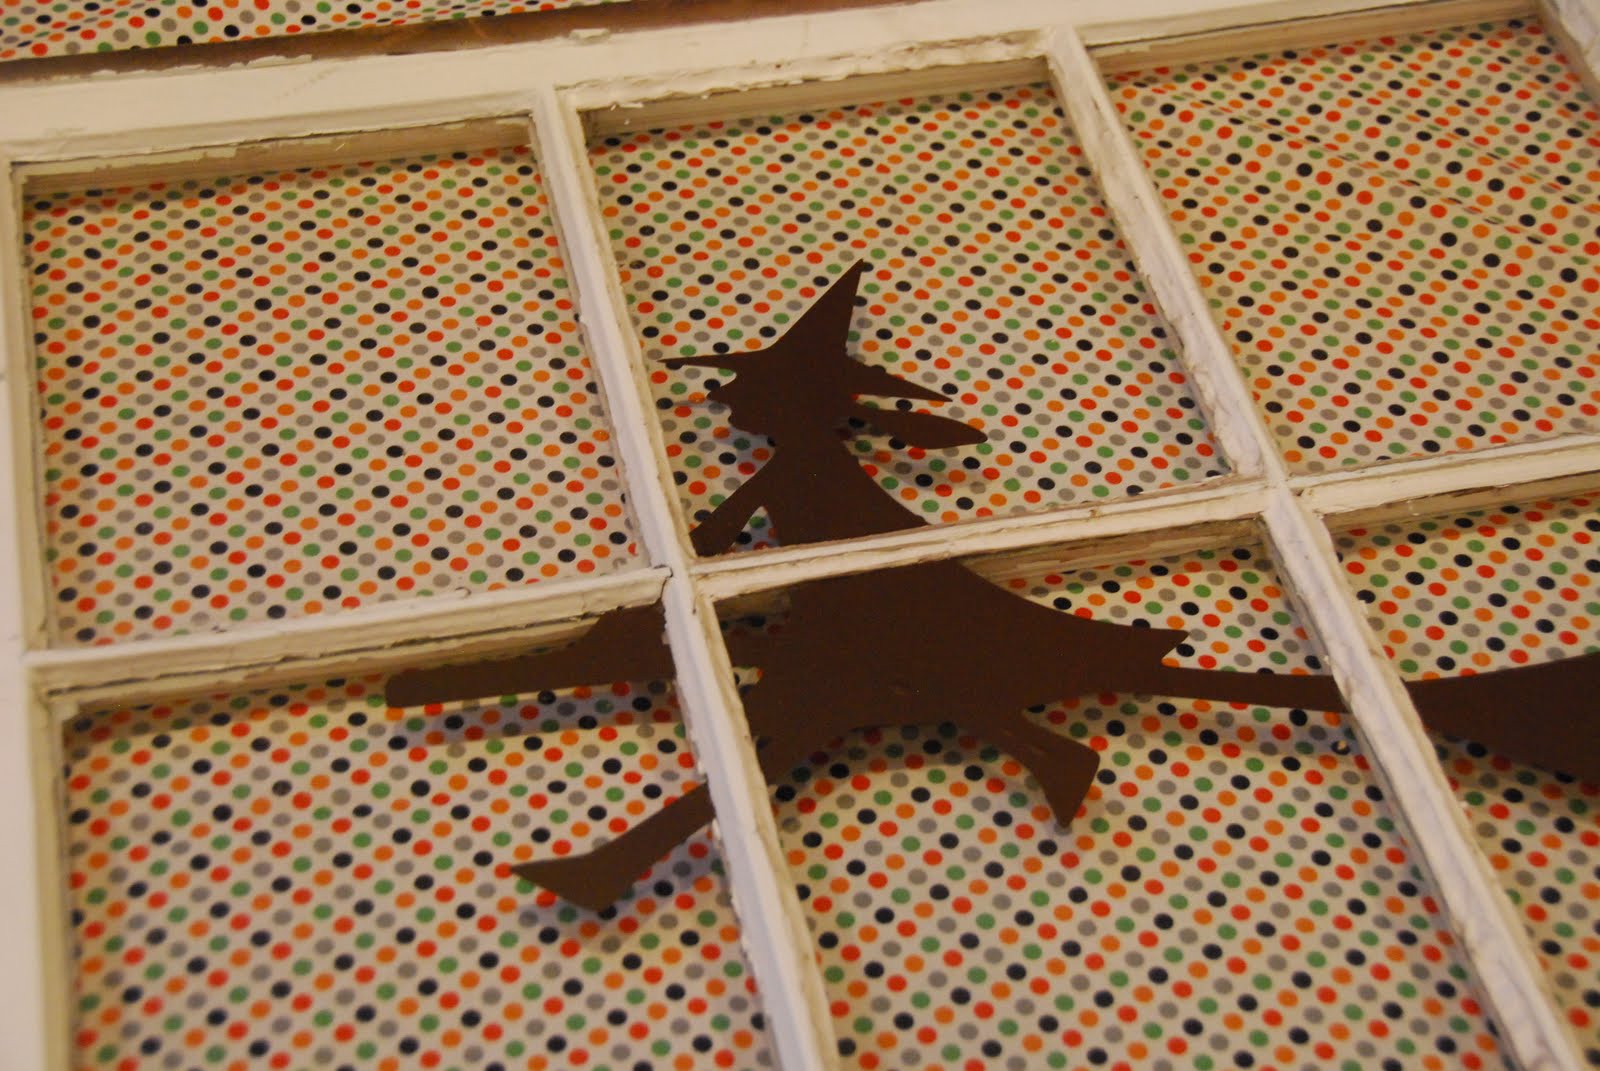
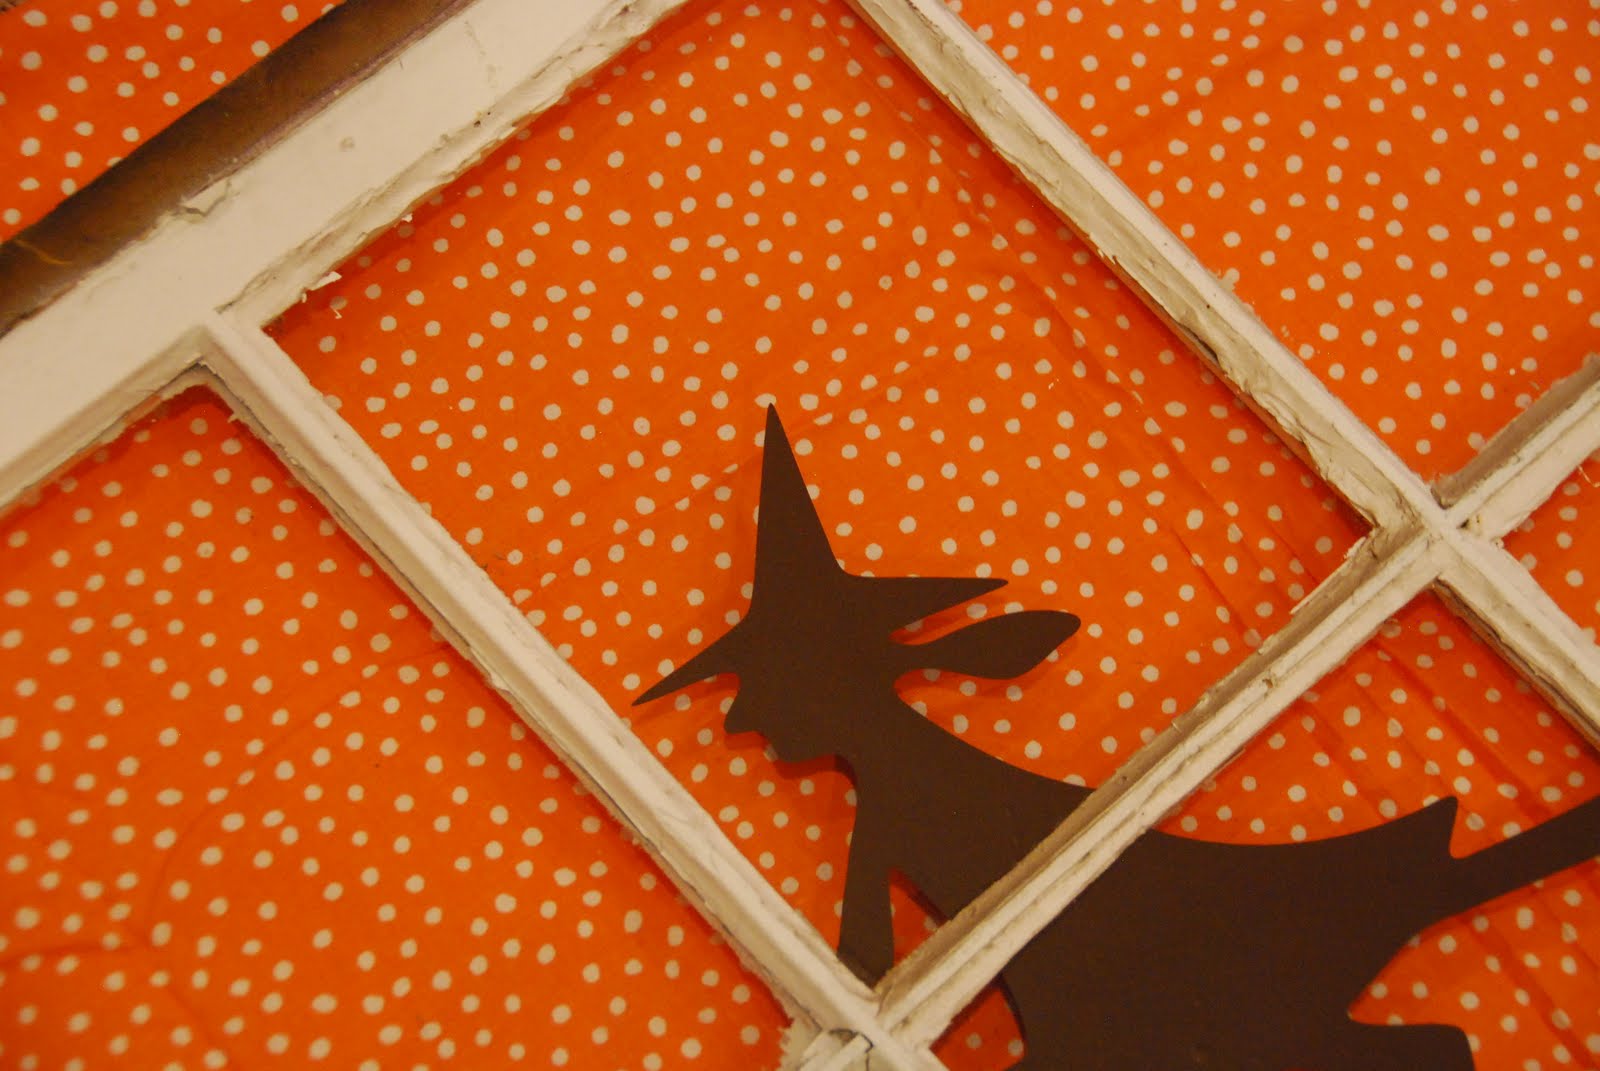
Ok, Ok I know.. I like polka dots!
And then it dawned on me. I hate burlap. I’m sorry. It’s awful to sew with and I really just don’t enjoy it.
But…
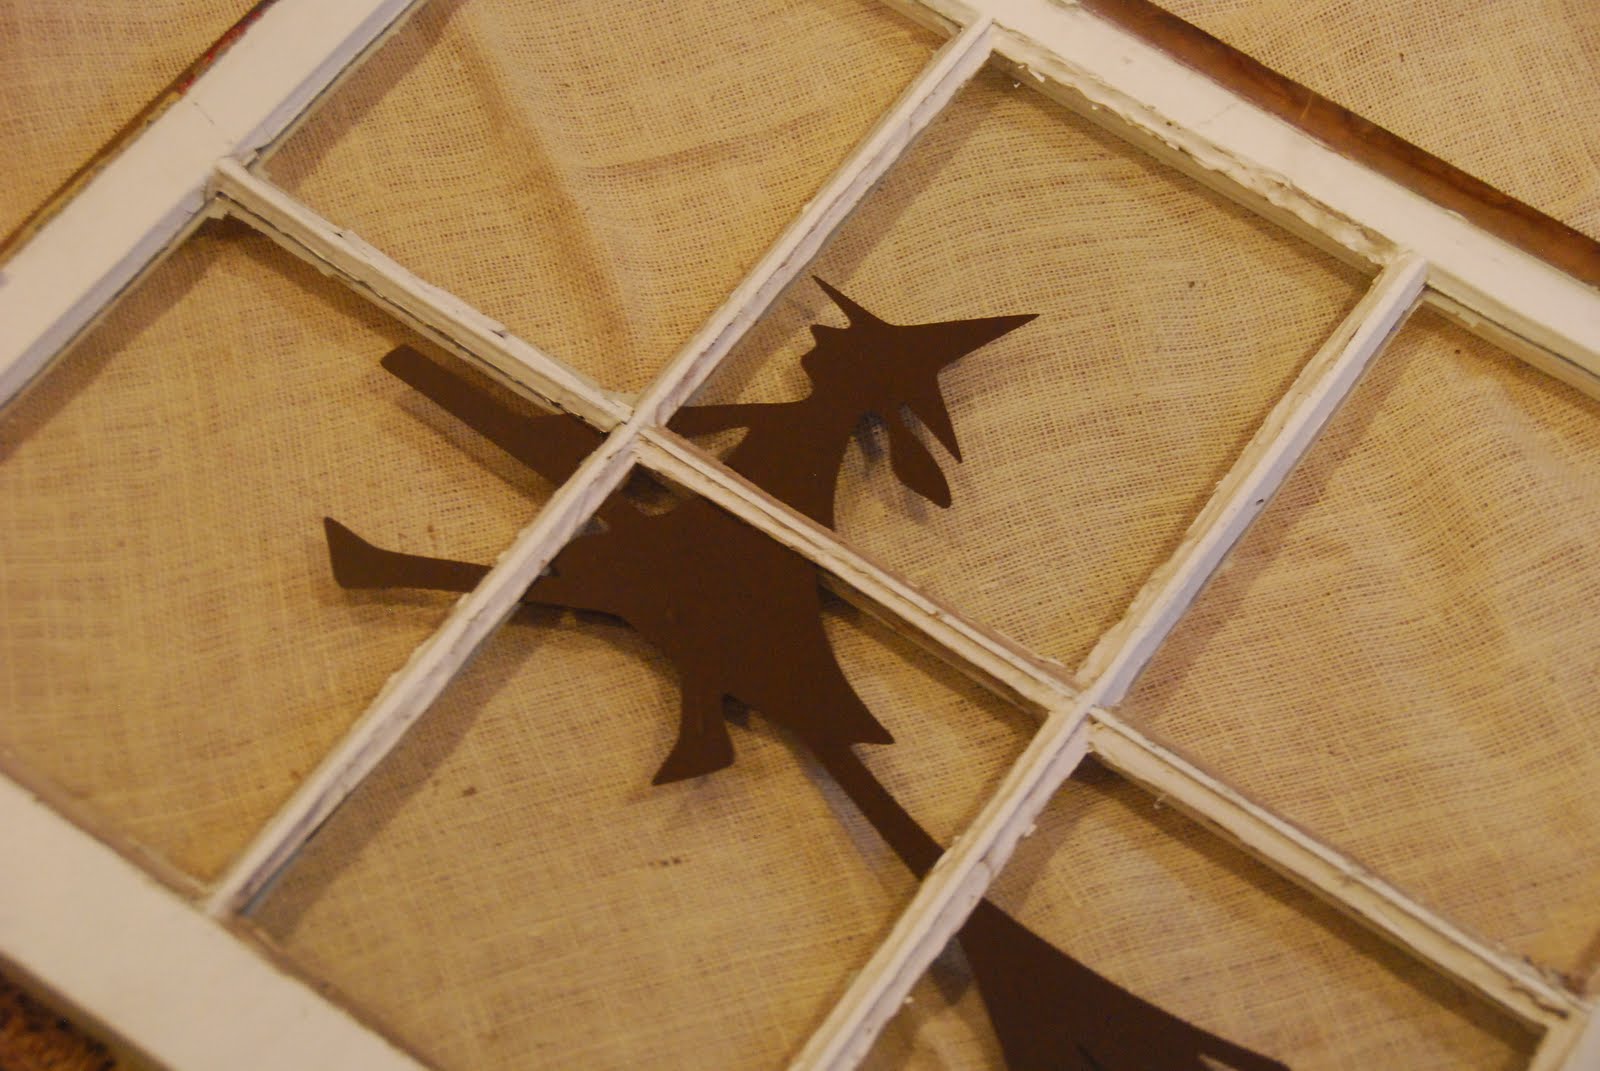
It looked amazing here! I love the texture, the natural color.. and it didn’t require sewing!
Fab-u-lous!
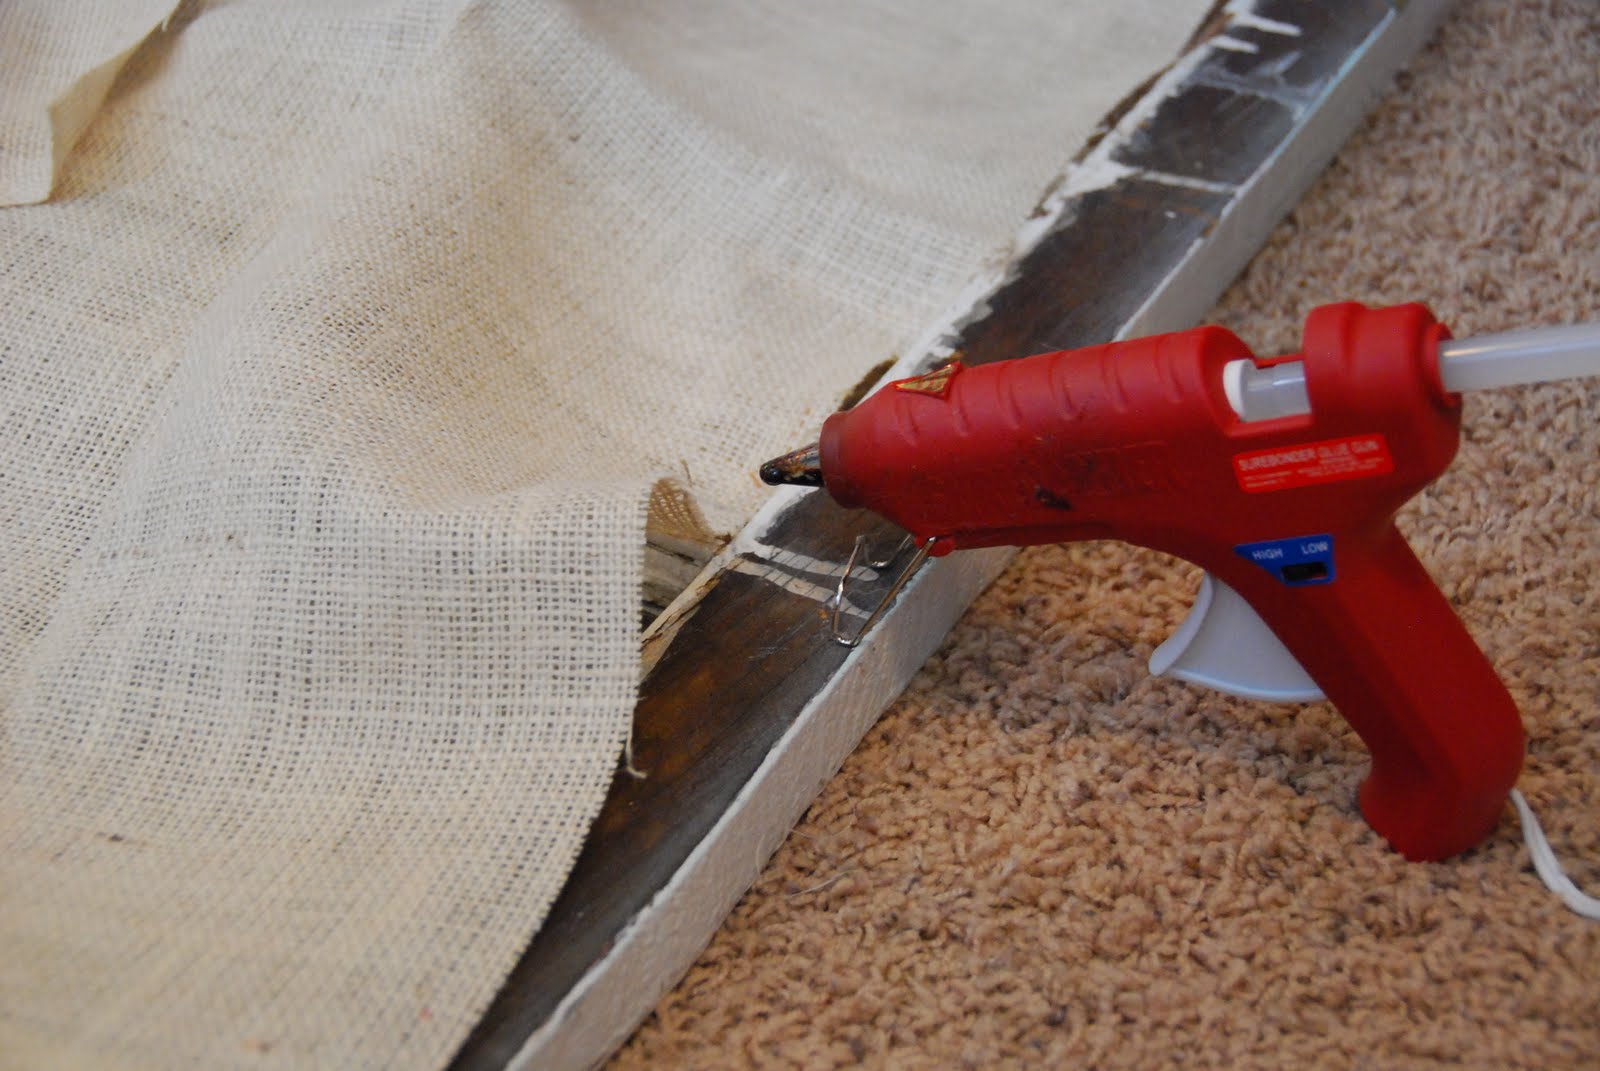
Just flip over the window, stretch the burlap and hot glue it on.
Easy….

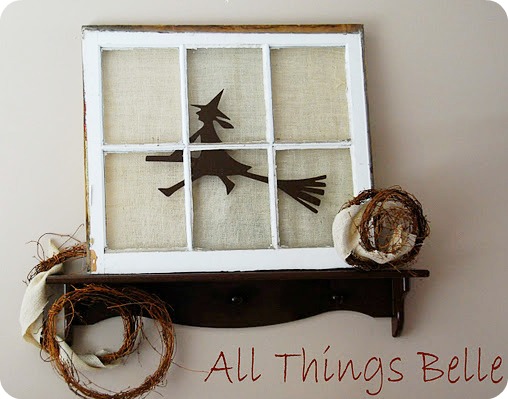
…and oh so pretty and classic. This may become my new favorite alterable holiday craft! I can just imagine some fun Thanksgiving & Christmas silhouettes.
Love it, but want to change it up a bit? Here are some variations:
*Don’t have access to a window pane, you can use a large fame and just remove the back.
*Use some super fun scrapbook paper instead of fabric!
* Cut out a favorite spooky line from a book or song instead of a visual decal.
*Don’t have a vinyl cutter, buy a ready made decal.
I hope you enjoyed this craft! I would love it if you hopped on over to my blog, All Things Belle where I blog about quilting, crochet, and more. You can also purchase patterns & gifts at my store on Etsy and tweet, facebook + pin with me.
Happy Halloween!


Love the idea, love the window pane. I think I would like to make the Halloween decor removable and do a different project for each season/holiday. Now I just need to score a window pane!
Hi Rolf-
A baby theme would be easy, simply switch out the witch for an initial or a symbol reflecting her room decor.
Good luck (:
Who would have thought that this is an old window pane? My wife will surely love this project. Do you have a version of this for a baby room?
Aw thanks everyone! I would love to see your window panes if you make one!!
So cute! I've got 2 window panes in my garage just waiting for a project. This is it.
I Love It! I got some window panes on my cross country trip, and now I have another idea of what to make with them! Great job, Jennifer!
LOve this idea! Awesome job Jennifer!
This is such a fun idea! I love how cute that little witch looks! There are just way too many fabulous Halloween crafts this year, I can't keep up. 🙂