diy stick horse tutorial
Stick Horses are a crowd pleaser when it comes to playtime but the real fun begins at MAKING it, this EASY stick horse tutorial is a cinch to put together with supplies you likely already have around the house!

easy stick horse tutorial
The great thing about these easy stick horses is that they can be made with items you already have at your house and they will be a GUARANTEE hit with the kiddos. The best part is they can be customized to meet your kids individual personalities!

how to make a stick horse
Making a stick horse is super easy, fast and cheap! Kids will love helping make this project and you can get it done in about 30 minutes, mom win!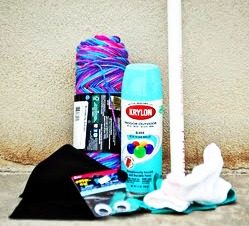
- PVC pipe (mine were 3 feet long)
- Spray Paint (optional)
- Yarn
- Googly eyes
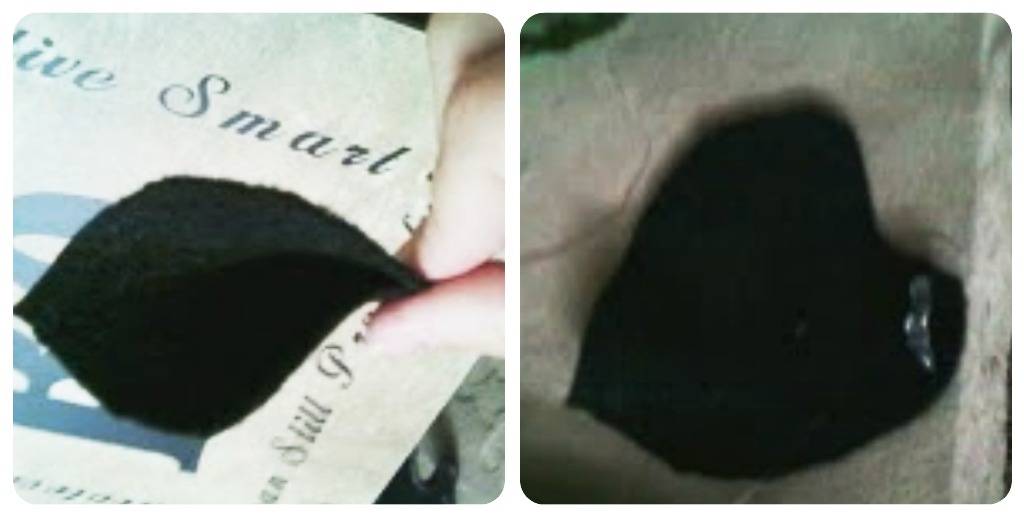
- Felt
- Hot glue gun and sticks
- Large needle
- Sock with colored tip
- Batting to stuff sock
Cost to make a stick horse
- $1.79 for 10 feet of PVC pipe which I had cut into (3) 3 feet sections so thats $.60 cents for 1.
- $3.49 for yarn (I used hardly any of it. I could probably make 15 more horses with my leftover yarn so lets estimate $1 for yarn even though that’s estimating high)
- $.39 for googly eyes
- $.39 for felt
- $1 for a pair of color tipped socks (really we should put $.50 since you only need one)
- $0 for spray paint that I already had
- $0 for stuffing… I just ripped up an old pillow and used that for my stuffing
how to make a stick horsE
Here are the steps to making your own stick (or PVC) horse.
- First is to get your PVC pipe cut. I made mine 3 feet long but by all means do any size you want. I just bought my PVC pipe at a local hardware store and it came in a 10 foot piece. They cut the pipe into (3) 3 feet lengths. The next step is optional. I didn’t want my stick horse to have a white stick so I opted to spray paint mine. I just happened to have some Blue Ocean Breeze spray paint laying around so I gave a few coats of paint to give it that cute color.]
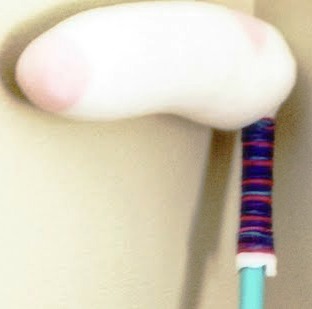
- After getting your PVC ready you will next take your sock and start stuffing it. Stuff away, ladies. Like I mentioned earlier I couldn’t find batting so I just ripped open an old pillow and dug to my hearts content. I will admit that I think I stuffed it too much. I wish I had given it a little more give but we live and learn.
- After stuffing the sock you will next take the sock and place it over the PVC pipe. Make sure to push it so the head doesn’t bob around too much.
- Next I fold the sock up a little and put hot glue up near the top of the PVC pipe and then fold the sock over it. Make sure to gather the sock up towards the back of the PVC pipe
- Next you will take your yarn and start wrapping it around the base of where the sock and PVC pipe meet up. [I like to put a little hot glue and glue a little section and then start twisting it around. Make sure you wrap it tight and that each strand is right next to the other. When you get to the end I just tucked the strand into the row below and then took a little tacky glue and place a dab on top of it to better secure it.]

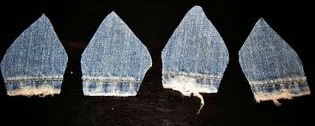
For another twist, spray paint an old broom stick and cut up old jeans for the ears then superglue them together so the front and back look the same.
Then I just glued it on to the sock. I also added a reign to mine with a scrap piece of leather. It wasn’t long enough to make it all fancy so I just tied a knot around the nose and another at the end. I then started to tie the yarn in for the man; I opted for the thicker yarn so I wouldn’t have to do as much work. I love how it turned out and was so fun to make. The best part is how easy and creative you can be with it!


even more easy kid-friendly DIY’s:
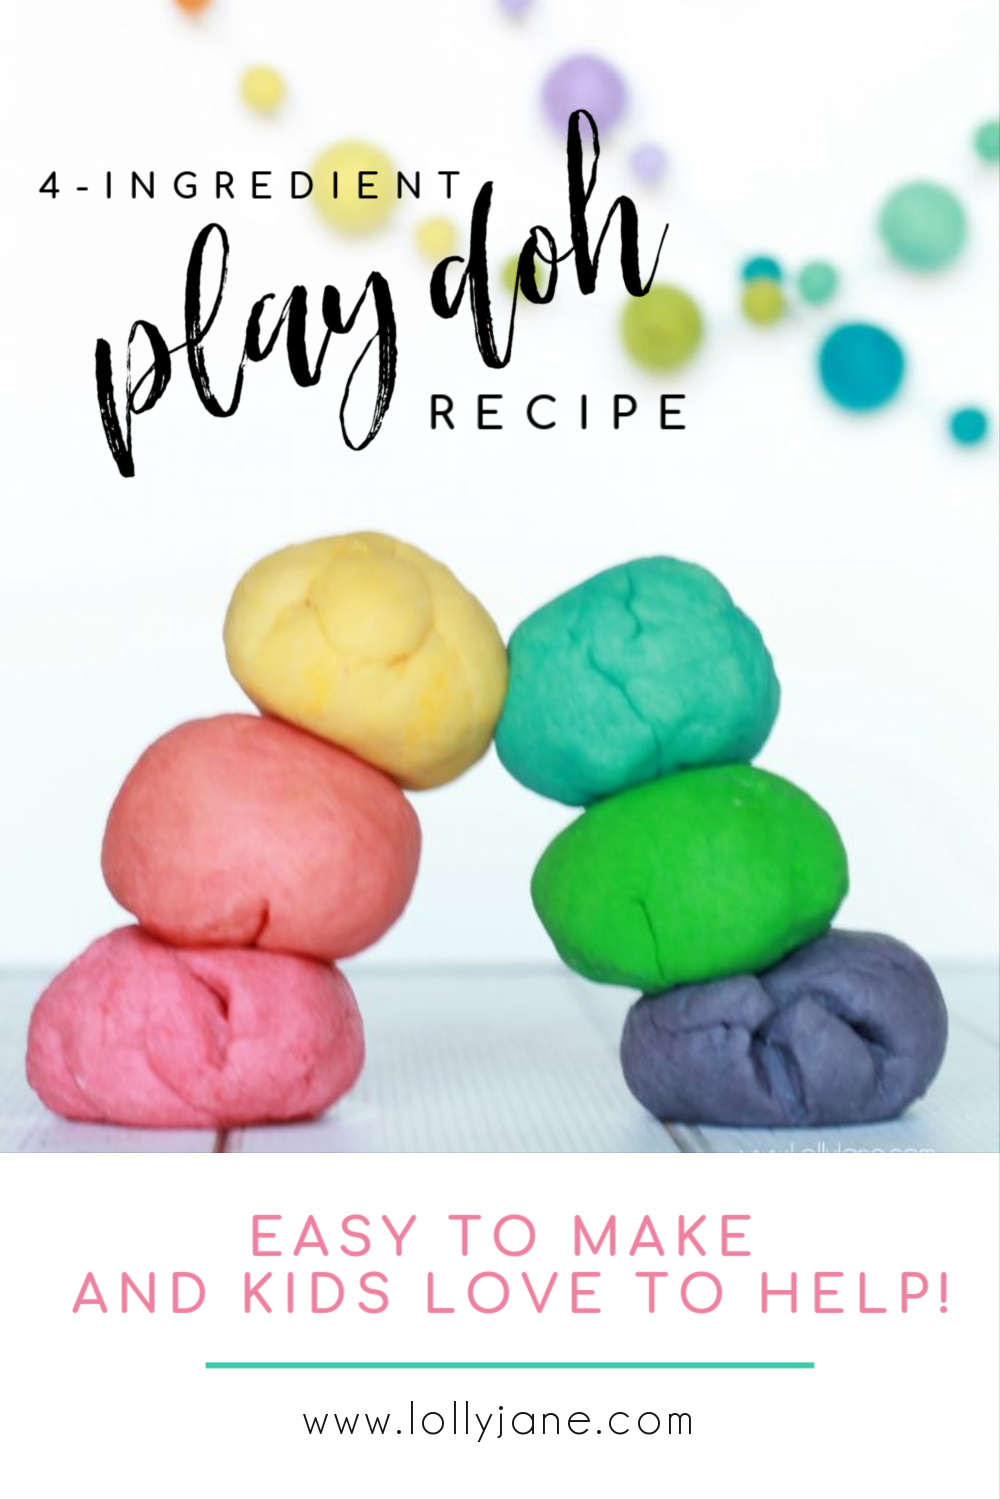
See all of our kid activities like our rainbow play doh,
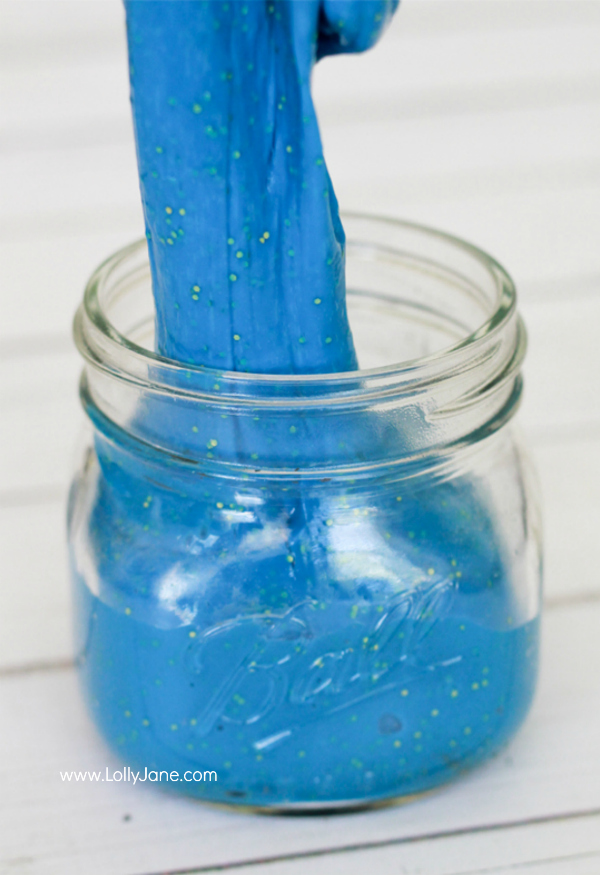
fun glitter slime recipe,
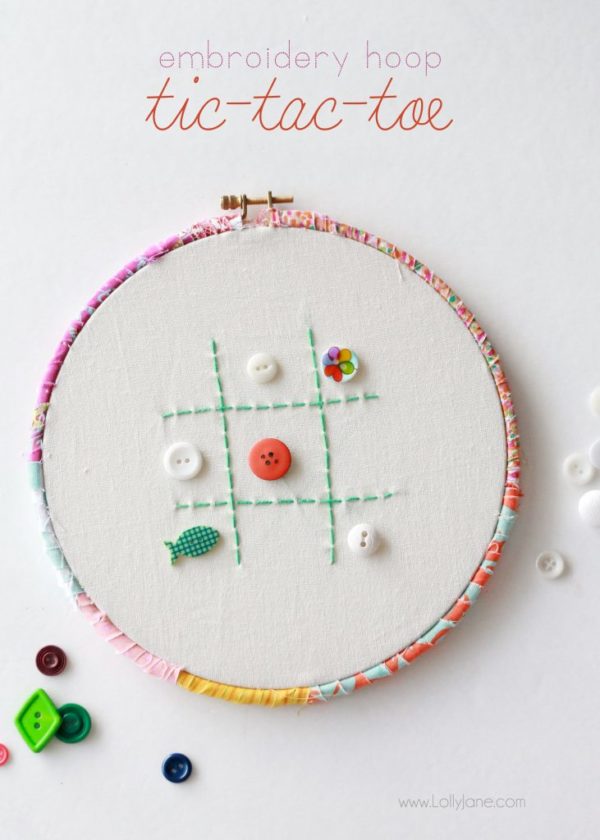
easy embroidery hoop tic-tac-toe game,
or these cute Sock Snakes your kids will LOVE making!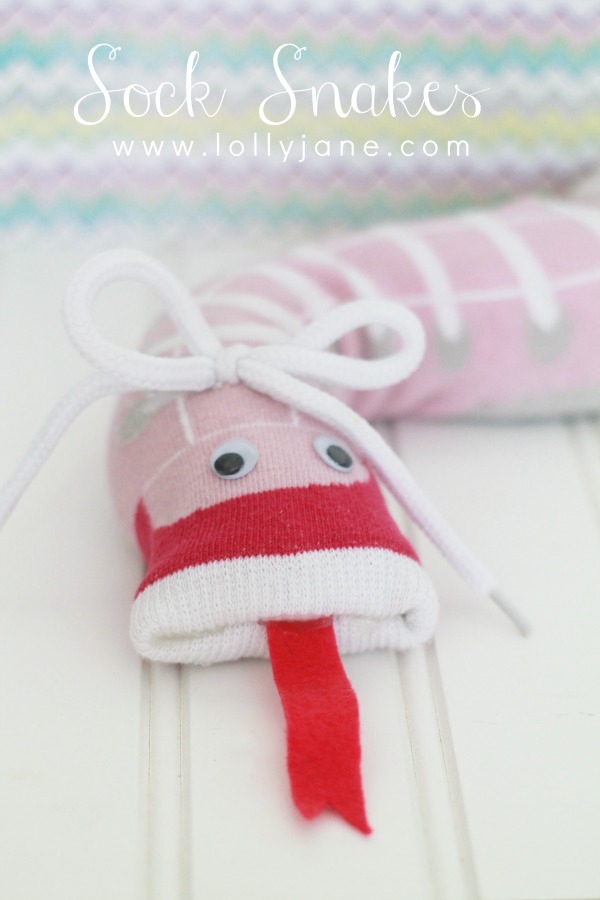

Perfect for a kids craft! Love the different versions- thanks for sharing!
:-)Monicka
Great project! You girls always have such creative guest bloggers!
That is such a sweet idea!
That is such a sweet idea!
Stinkin cute. Looks easy enough for me to make =)