Guest blogger: Maybe Matilda
Oh my goodness, have you SEEN Rachel from Maybe Matilda?
She is the.cutest.thing.EVER!!!!
Not sure if we love her designs more or her hair 😉
We are so thrilled she is here today to show off her tute on a DARLING tee…. take it away, miss creative!
____________________________
Hi Lolly Jane readers!
I’m Rachel from Maybe Matilda
She is the.cutest.thing.EVER!!!!
Not sure if we love her designs more or her hair 😉
We are so thrilled she is here today to show off her tute on a DARLING tee…. take it away, miss creative!
____________________________
Hi Lolly Jane readers!
I’m Rachel from Maybe Matilda
my little spot where I share my sewing, crochet, adorable baby, attempts at learning photography, and (my favorite!) clothing refashions.
I love to wear adorable, unique clothes, but I hate spending money, so almost every project on my blog is created using items I already own or bought for super cheap. I love to get creative and make the things I want myself . . . and I hardly ever spend more than a few dollars (one of the perks of being on a student budget: you learn to be very creative!). Here’s a little sampling of the sort of things you’ll find at Maybe Matilda:

I think we’re all a little smitten by doilies at the moment, and as a hardcore crocheter, I couldn’t be happier about it. I love the delicate, ladylike look of a doily and wanted to work it into something wearable that wouldn’t feel too prim and p
roper . . . because, really, I don’t throw garden parties with tea and crumpets very often, do you? So I picked up a package of little paper doilies and created this:
roper . . . because, really, I don’t throw garden parties with tea and crumpets very often, do you? So I picked up a package of little paper doilies and created this:
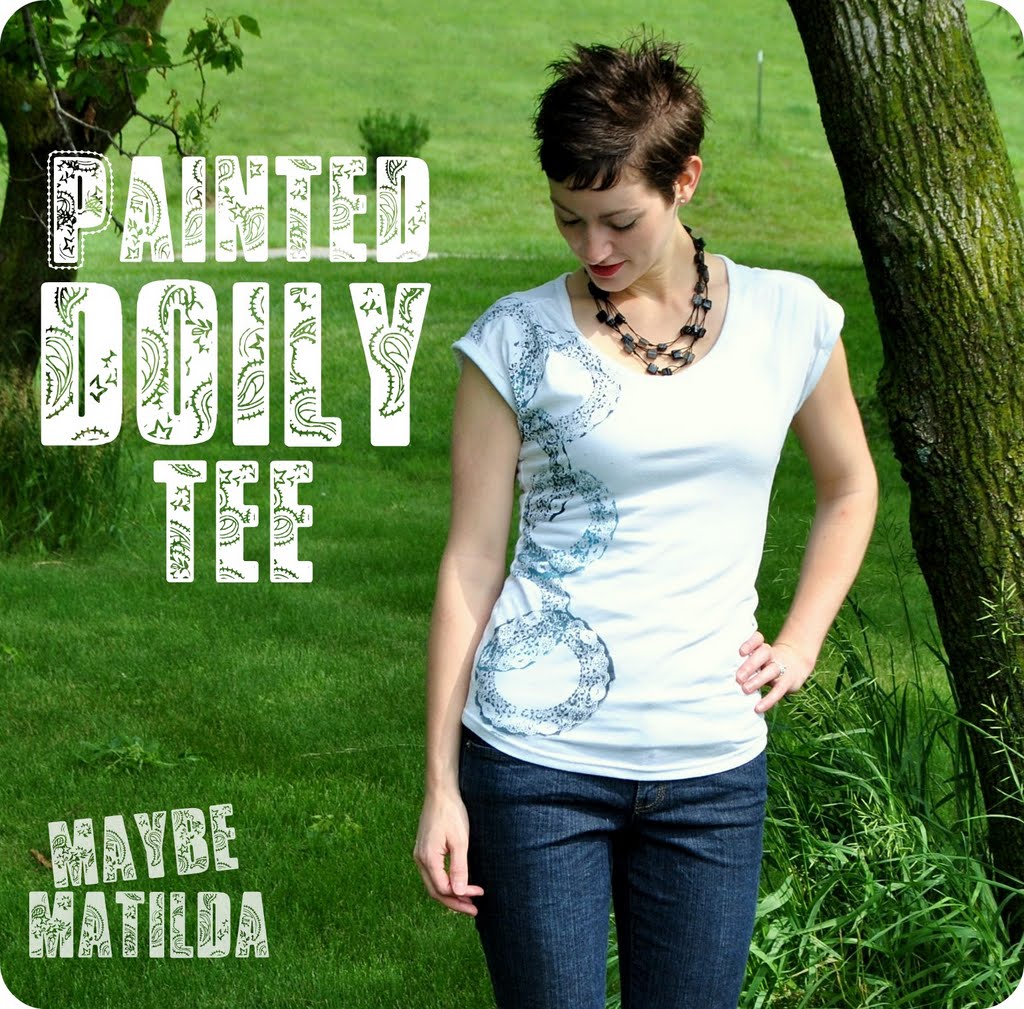
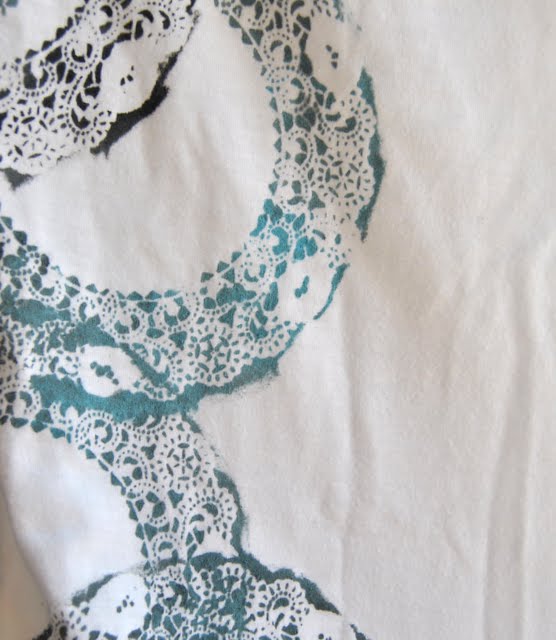
I used blue and black paint mixed with fabric paint medium to create a row of doilies working their way up the side of a $2 Walmart tee. I love that it works sweet feminine doilies into a unique design with fresh, modern colors. And $2 for a cute summer top? Yes, please!


You’ll need:
– a tank or tee
– a package of paper doilies (you could use multiple sizes if you’d like; I just used one size)
– one or more acrylic paints
– fabric painting medium (I bought mine at Joann, and it has lasted forever!)
– foam brush or sponge
– a piece of cardboard to place inside the top to prevent the paint from bleeding through
Place your cardboard inside your top so the paint doesn’t soak through to the back. Mix your paint and fabric medium according to the directions on the bottle (mine says to use a 2 to 1 mix of paint to medium). I wanted my top to include a range of colors and each d
oily stencil to have a bit of a color mix, so I swirled the blue and black together without mixing them completely; that way, when I wanted a lighter doily, I dipped my brush in a lighter section on my paint plate, and when I wanted a darker one, I picked a darker paint section, so none of my doilies came out exactly the same. I like a little variety, and the imperfections are what make it fun!
oily stencil to have a bit of a color mix, so I swirled the blue and black together without mixing them completely; that way, when I wanted a lighter doily, I dipped my brush in a lighter section on my paint plate, and when I wanted a darker one, I picked a darker paint section, so none of my doilies came out exactly the same. I like a little variety, and the imperfections are what make it fun!

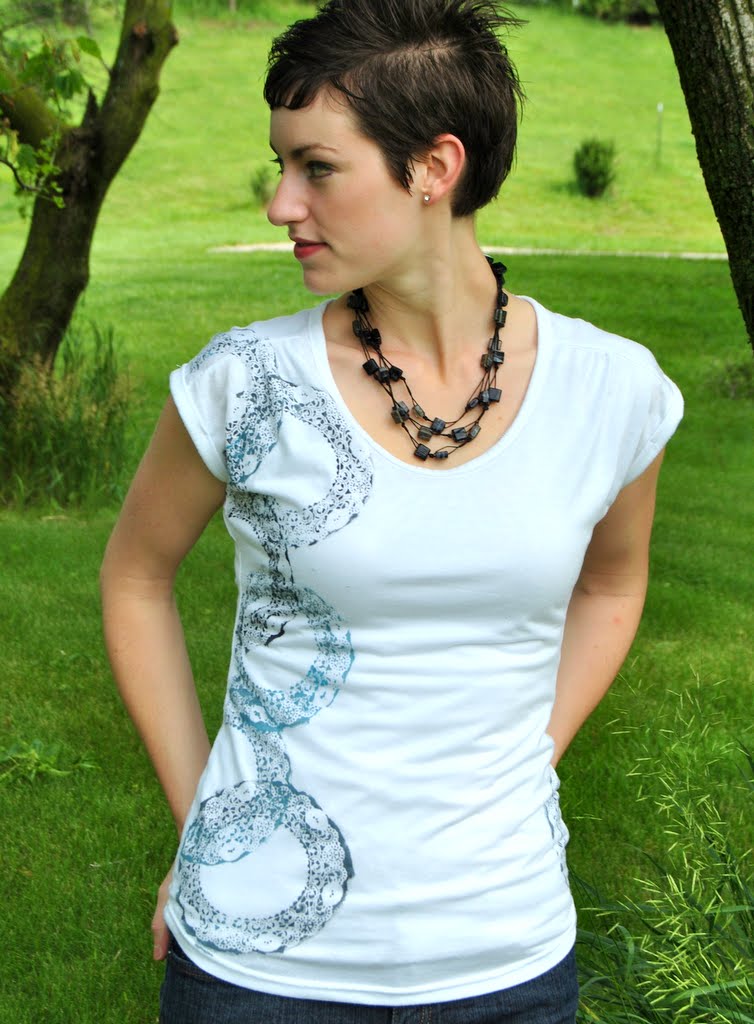
You can arrange your doilies however you want on your top–I wanted mine to wind up one side of the tee, and I worked from the bottom to the top, so I placed my first doily down near the hem of the shirt and lightly sponged my paint over it.
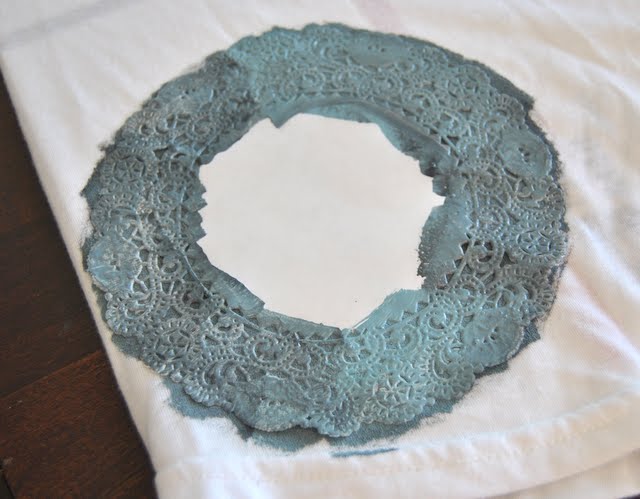
You don’t need to get too aggressive with your paint–a little goes a long way!
Just lightly sponge it around the patterned part of the doily. I thought it looked best to paint a little past the outer edge of the doily as well, but you don’t need to go very far. Just let your brush go a tad over the outside edge. What you see along the bottom of the doily in the picture above is a bit too much!
Just lightly sponge it around the patterned part of the doily. I thought it looked best to paint a little past the outer edge of the doily as well, but you don’t need to go very far. Just let your brush go a tad over the outside edge. What you see along the bottom of the doily in the picture above is a bit too much!
Peel up the paper and admire that lovely paint job . . . oooh, isn’t it pretty?
Now just keep arranging the doilies and painting over them. I liked to vary between lighter and darker shades on each doily and overlap the edges.


Work your way up the side of the top (or however you want your pattern!) and admire your colorful stencil work!

I worked all the way up one side of the top and placed one doily on the opposite side of the shirt as well, for a little variety (although you can’t even see it in any of my pictures . . . it’s there, I promise!).
e=”text-align: center;”>
Make sure to read the directions on your fabric medium–you’ll probably have to to let your shirt air dry for 24 hours or more and iron it to set the paint. Don’t you hate waiting to wear your new creations? I just about went crazy waiting an entire day. But I think this top is worth the wait!


Thanks for inviting me over, ladies!
I hope you’ll all swing by and say hi at Maybe Matilda!
I hope you’ll all swing by and say hi at Maybe Matilda!


Love this idea. It could also be used to cover a multitude of stains. I have lots to work with!
Agree! Thanks for popping by Cathie! 🙂
God bless you both… I am going to do this… I never find things I can do… not crafty..ty..ty ..ty
LOL…good thing Pinterest is around huh 🙂
Love this. I bought some fabric paint awhile back but have not used it yet. I didn’t know anything about having to mix it with this medium you are talking about. What exactly is this? I thought you just used it like paint.
Hi Renata! They do have good fabric paint now, this is an older tutorial 🙂
this is adorable Rachel! you have such great taste and style, i love to see what you come up with! adorable, and the price is right too 🙂
This is GENIUS. I love this and am already trying to figure out if I have a shirt to use. If not, I'm heading to Wal-Mart. 🙂
OK, seriously…I love Rachel…her projects are always AWESOME! Love this & I'm gonna do it…I have just the perfect tee…;)
super cute use of a doily! how CREATIVE!
jenn
craftyjoy.blogspot.com
So creative! Love!
PS: Her hair IS awesome!!
who knew you could be so creative with a DOILY?!
thanks for being our guest, Rach! XOXO
Okay this is REALLY creative. I adore it! xo
ohmyWORD that is AdOrAbLe!!! love love love!!
Thanks for inviting me over! 🙂