vintage dresser to bathroom vanity
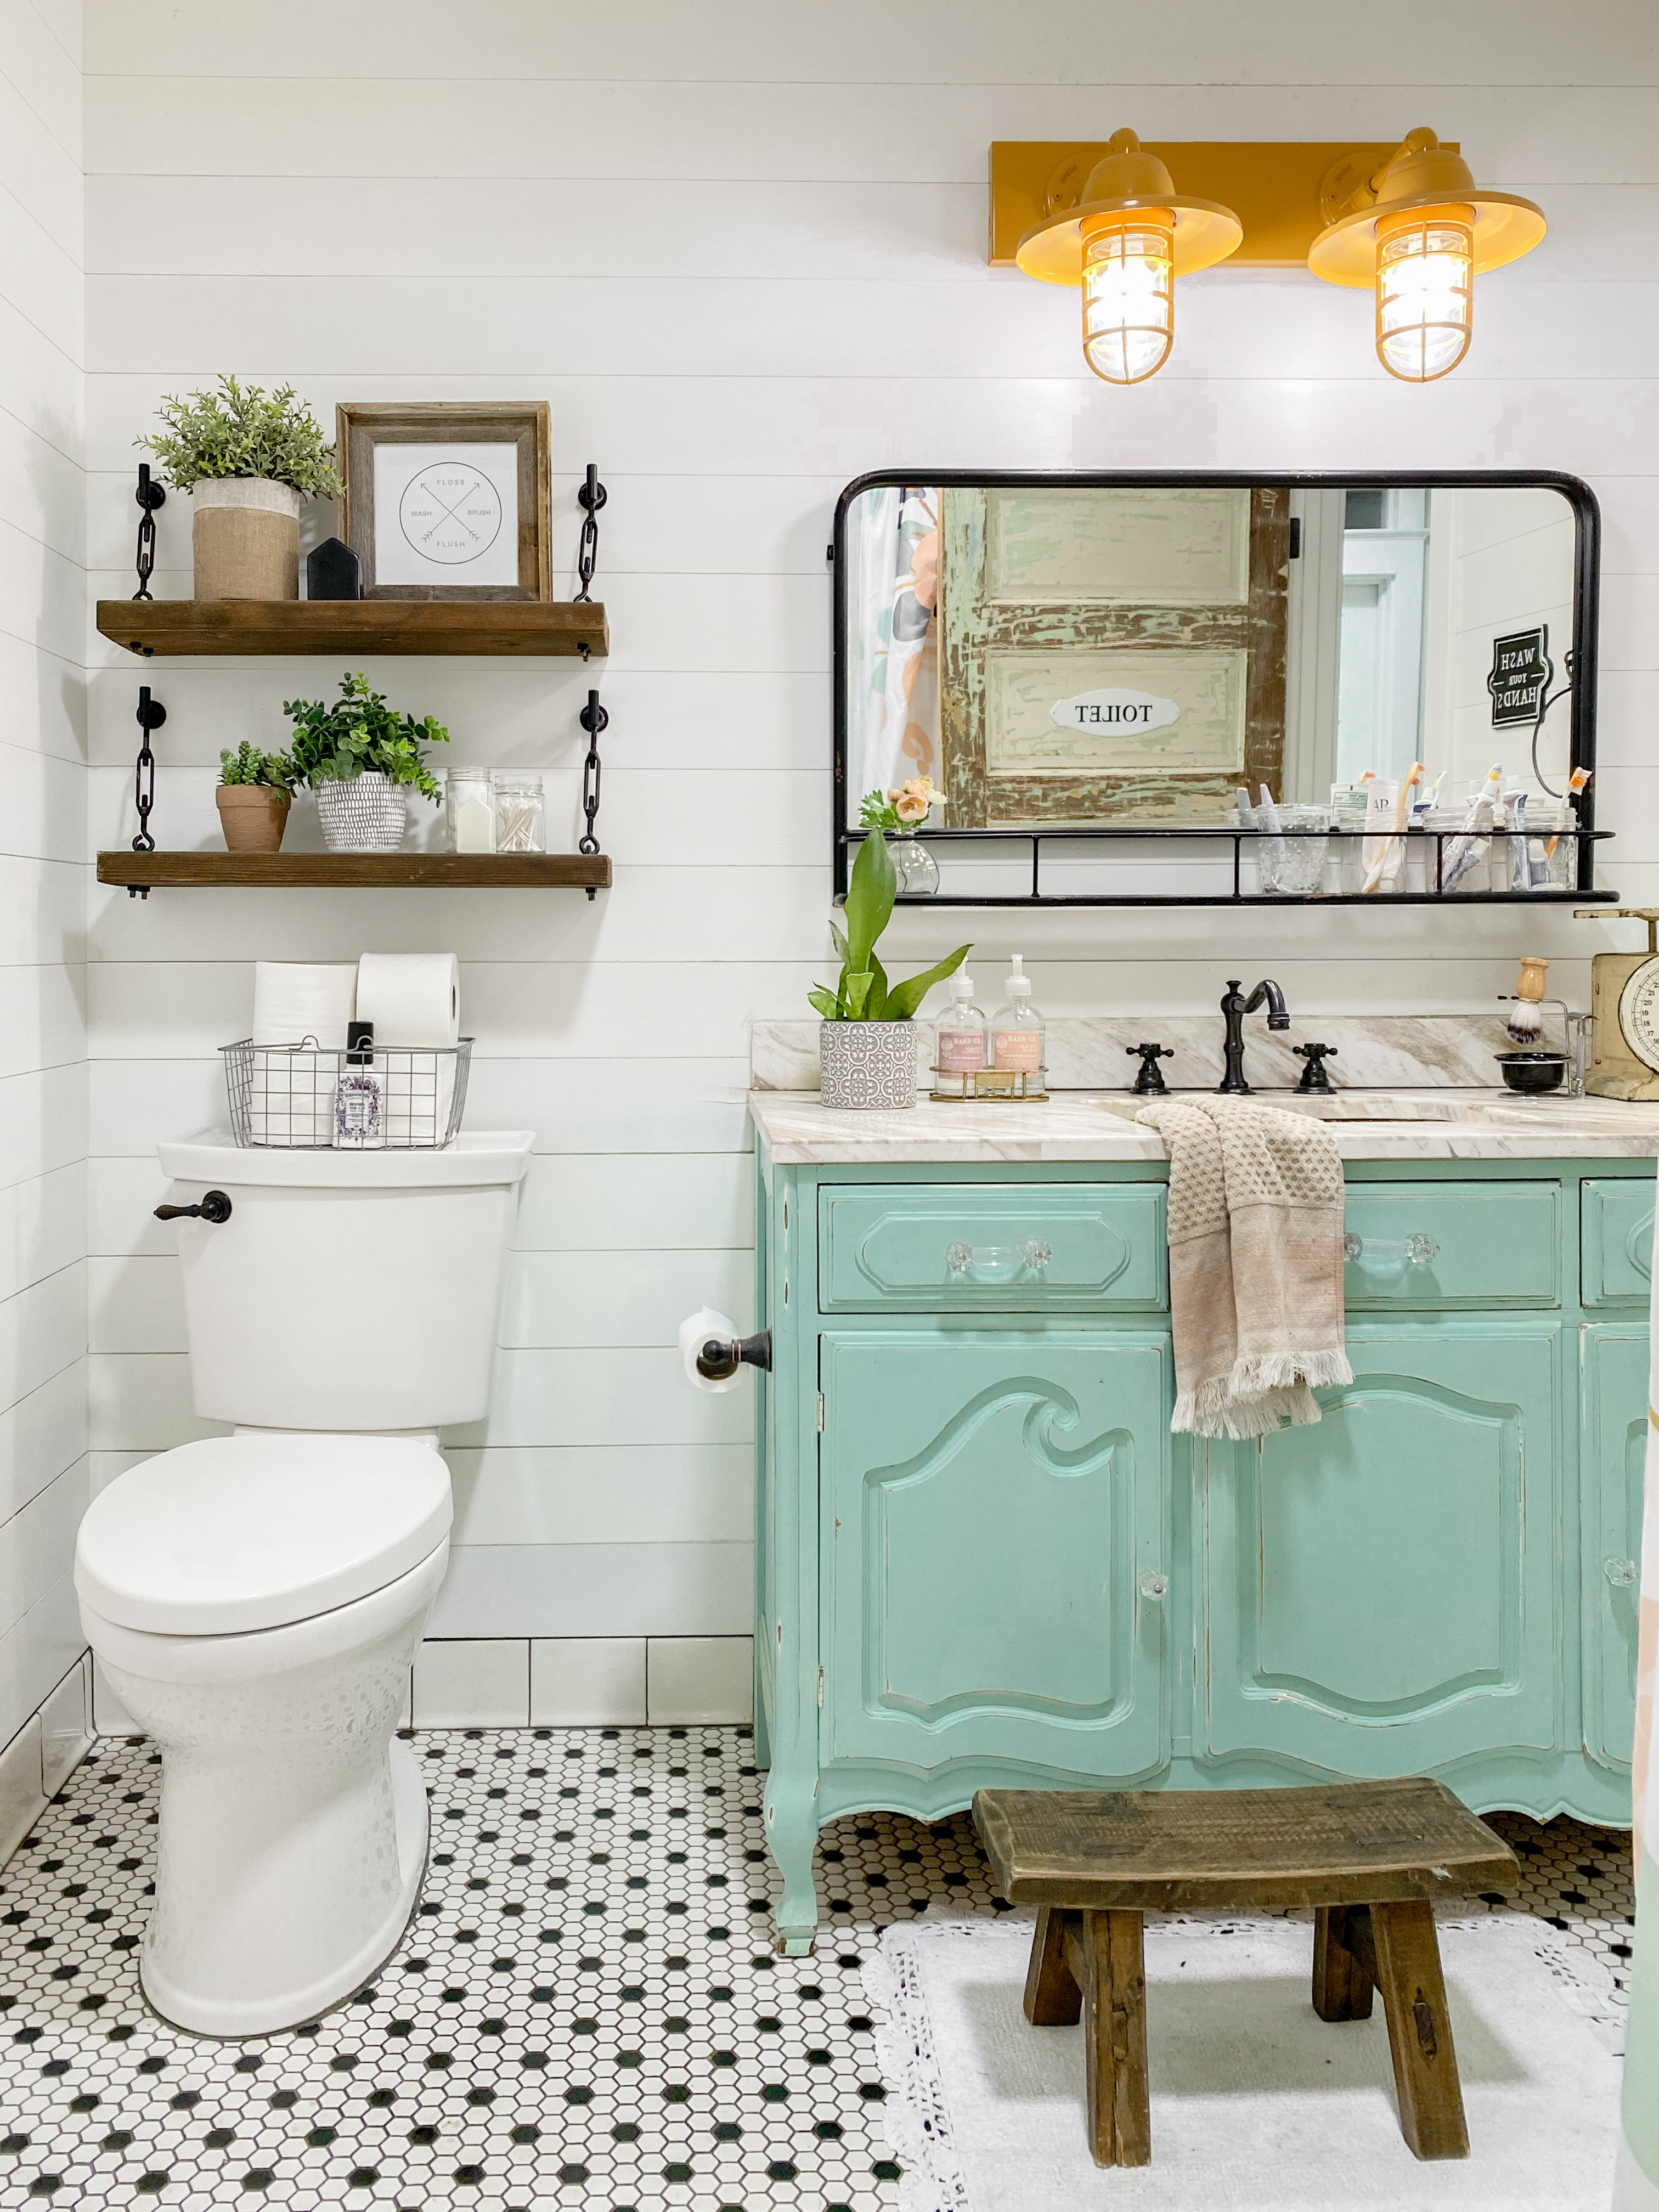
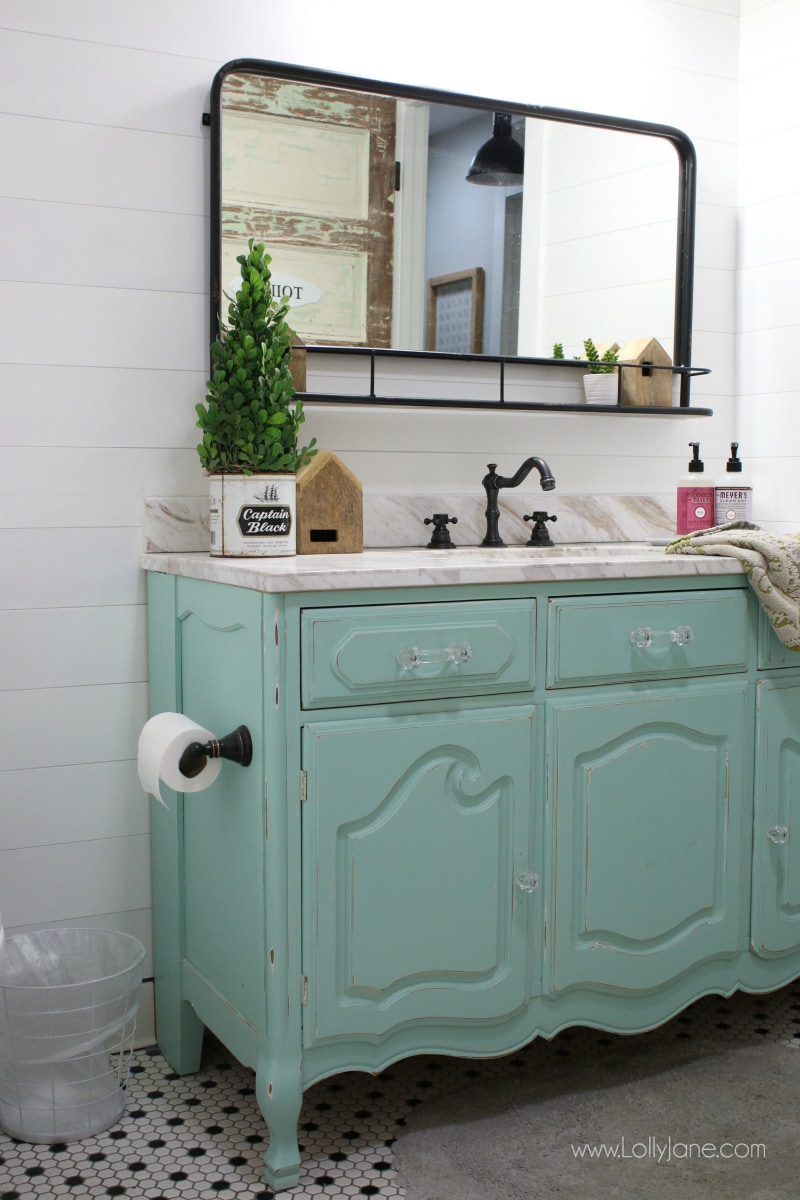
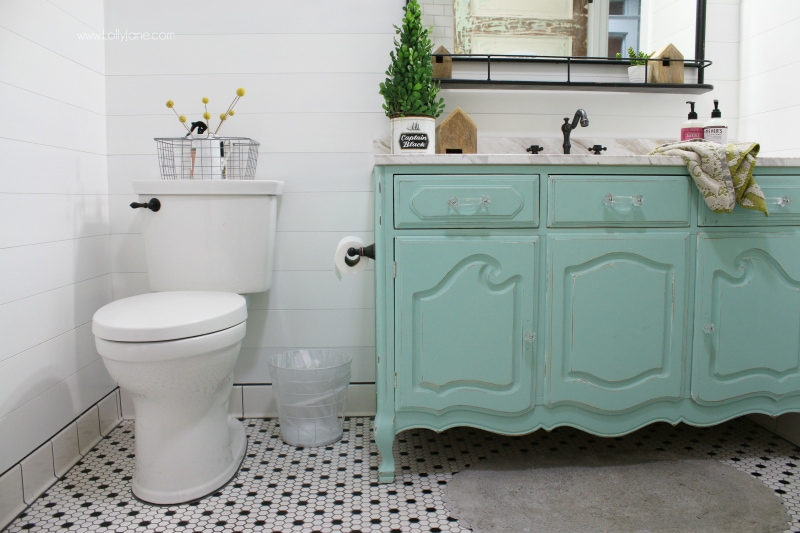
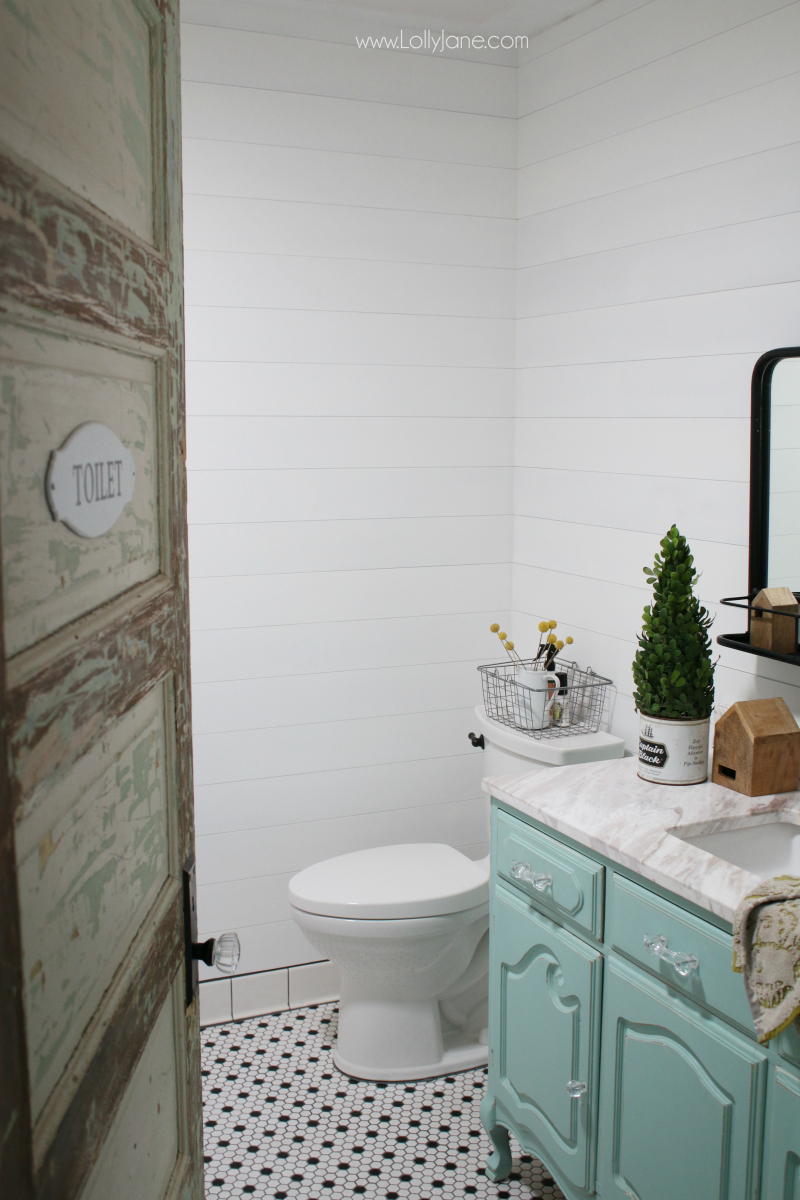
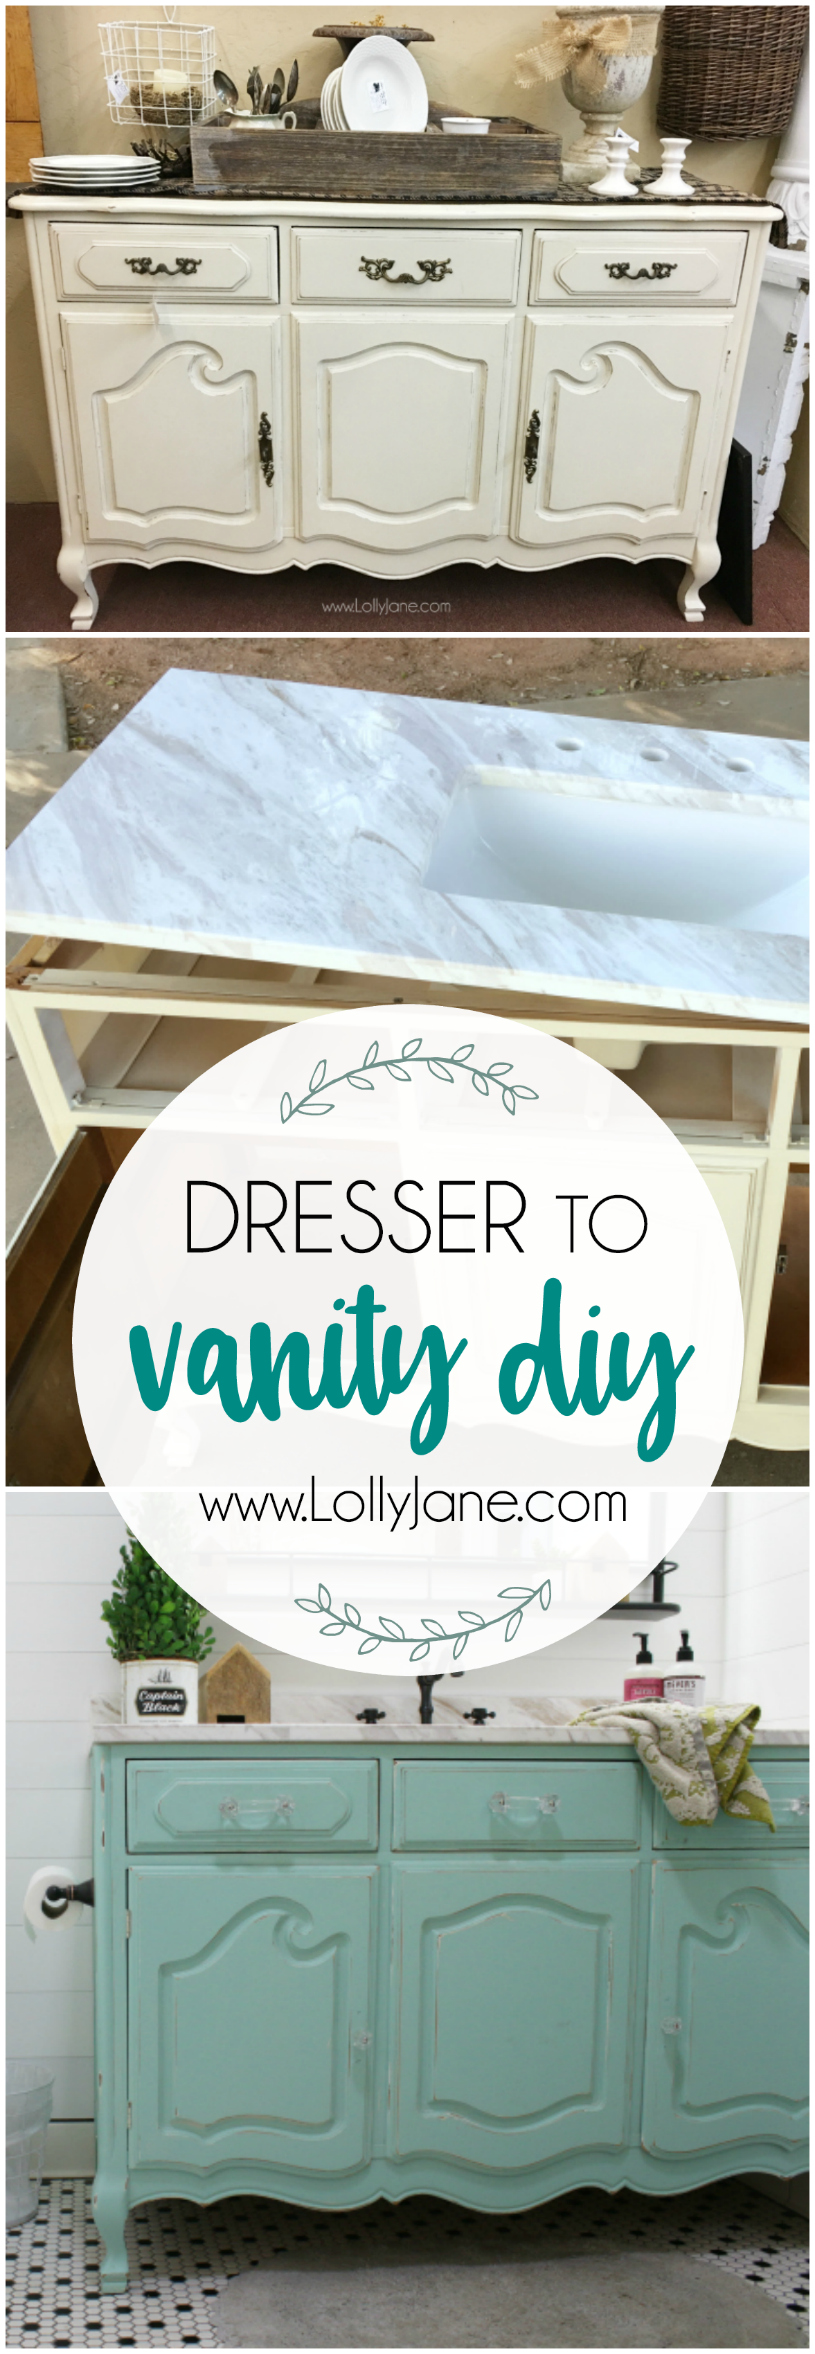
Check out how we turned a vintage dresser to bathroom vanity and topped it with a standard sink to make it the perfect statement piece in our newly renovated farmhouse style bathroom!
vintage dresser to bathroom vanity
Here’s what I learned about bathroom vanities: they are ridiculously overpriced. I spent weeks researching vanities and couldn’t justify $800-2000 for vanities that weren’t made out of 100% wood. Most are made from MDF or pressed wood without dove tail joints. I needed a stable vanity having four kids in one bathroom and a solid dresser fit the bill. We’ve done the whole upcycle a dresser into a bathroom vanity routine in our master bathroom and love the look. What I don’t love is how warped the top of the dresser becomes. In my opinion, you cannot prevent water damage to the top of a dresser vanity. It’s wood. Eventually, it’ll warp. That’s why we decided to add a marble top to our dresser turned bathroom vanity.
HOW TO MAKE A vintage dresser INto bathroom vanity
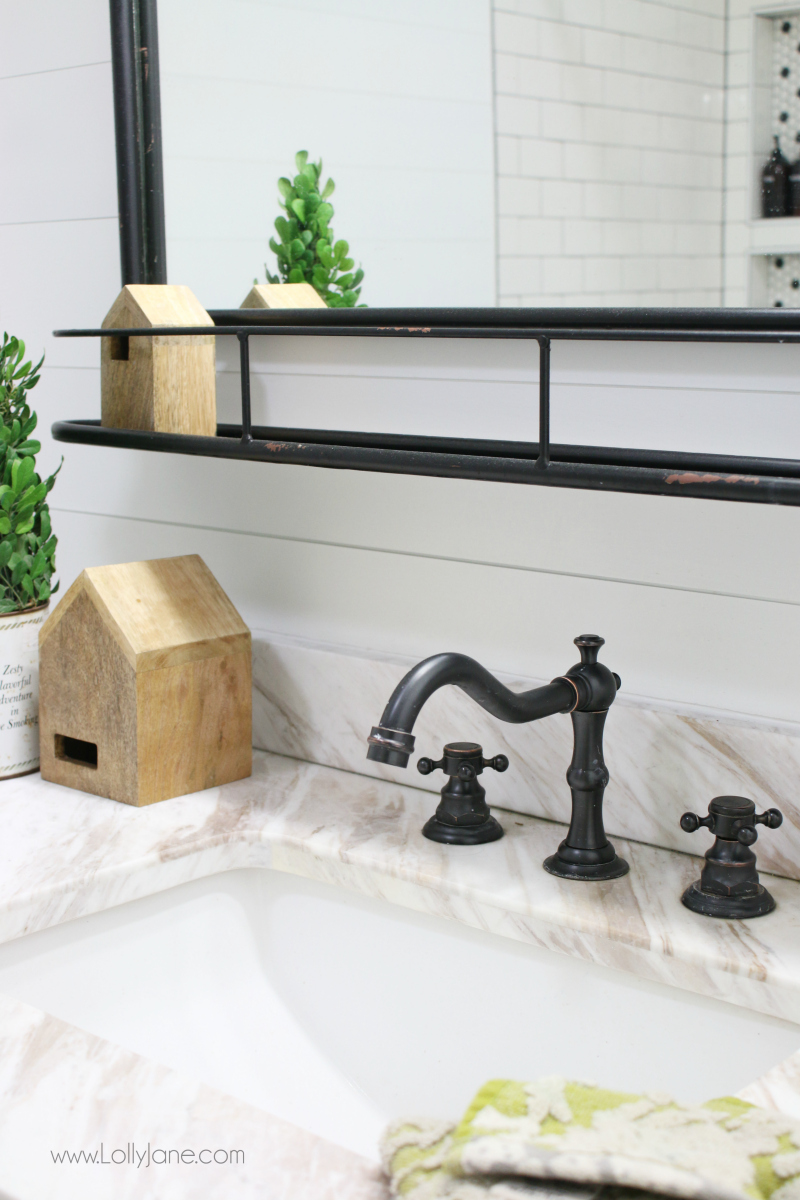
After a LOT of trips between Home Depot to Lowe’s, we decided on this white marble top from Lowe’s. It was super affordable and fit the dresser width exactly. The only problem was the depth from the front of the dresser to the back wall: the marble top was too long but we couldn’t shorten it because we needed the space for the sink. Our solution was to add 2 pieces of wood behind it that butts up to the back wall, wood putty it then paint it. You can’t even tell it was added onto. There is a gap behind the sink to the wall but it’s hidden and doesn’t affect the use of the dresser, it provides great storage! Here’s how we turned a vintage dresser to bathroom vanity, it turned out perfectly!
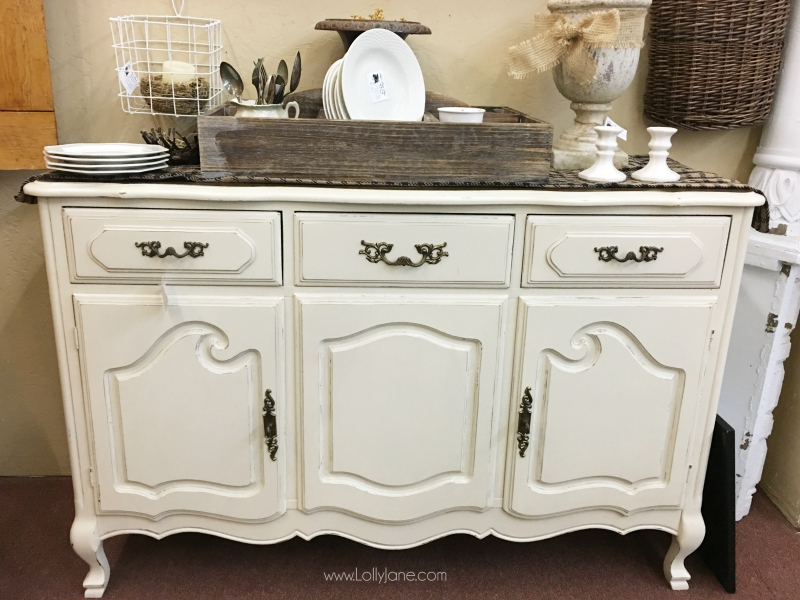
Here’s the beautiful dresser I found at Merchant Square, it was in Julie’s Home Decor and More booth. It was around $200 and worth every penny! I love the legs because I can show off my pretty honeycomb tile.
transform a dresser into a bathroom vanity
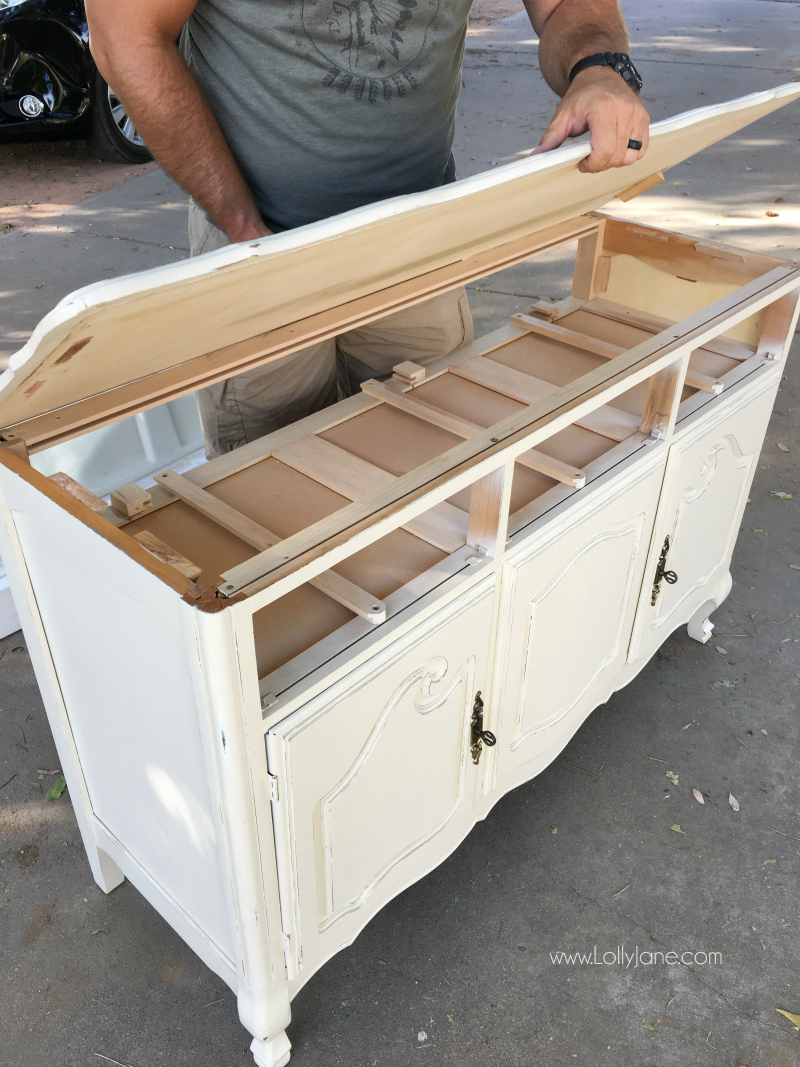
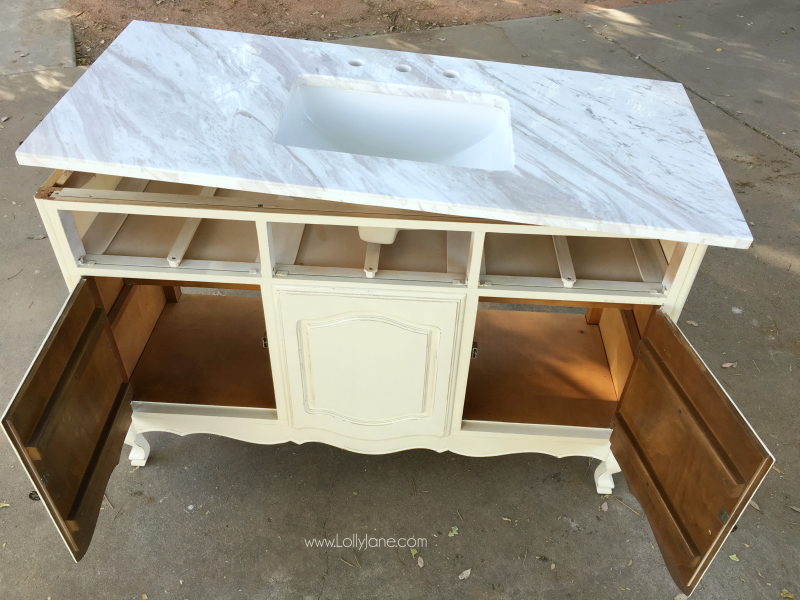
Here’s what we did to transform this old dresser into a bathroom vanity, we love this fun farmhouse look! First of all, we took the backing off the dresser then removed the top to see the bones up close.
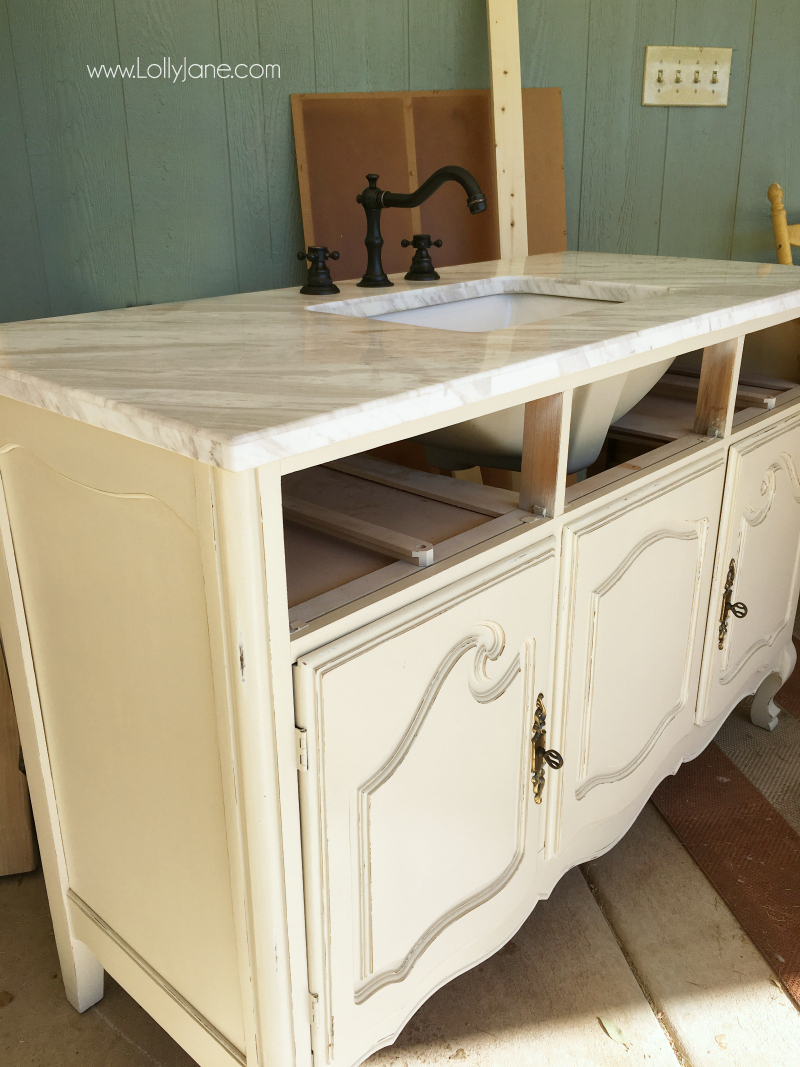
We placed the marble top into place to see where we needed to cut into the drawers to fit the sink in. We lucked out and were able to cut out the middle section top (directly under the sink) without having to cut the inside sides apart so it would keep the strength. Every dresser turned vanity will always be a little different cut-wise since no two dressers are the same.
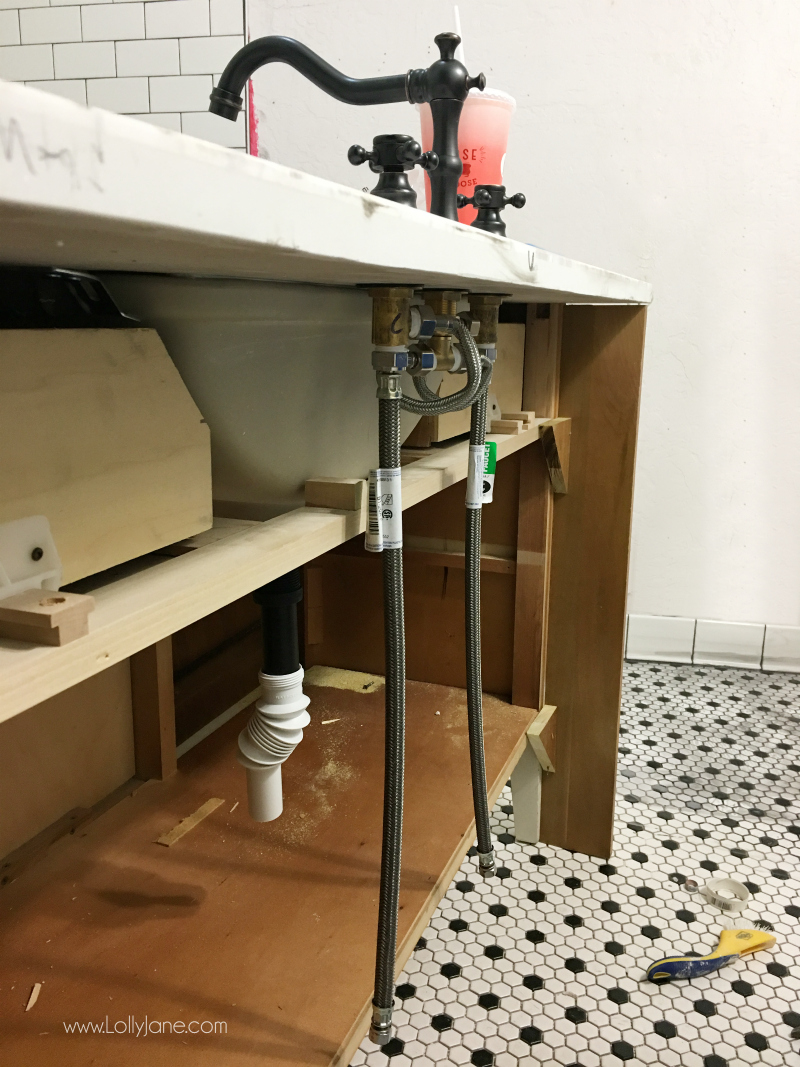
We installed the faucet so we could access the backside before we put it in the bathroom.
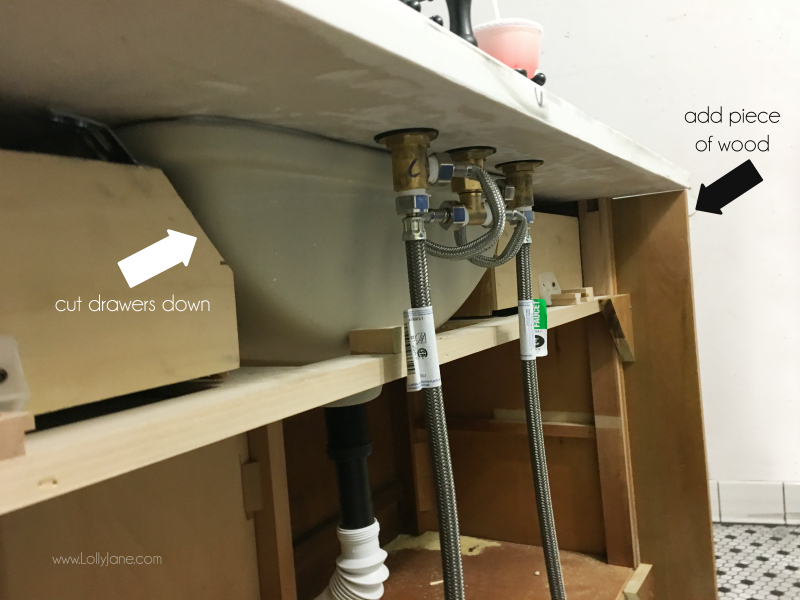
We lucked out again that we didn’t have to rebuild drawers like we did in our master bathroom transformation. This one we just had to shave off one side into a diagonal shape so we didn’t lose any drawer space.
The bottom middle front of the dresser is decorative anyway so we store toilet paper behind it and just have to reach around to grab it. You can see we added a 1″x6″ piece of wood to the sides to make up for the gap. The dresser was 18″ deep and the marble top that we added was 24″ deep so we added 6″ piece of wood to make up for the difference. After caulking the seam then painting it, you can’t tell we added the extra piece.
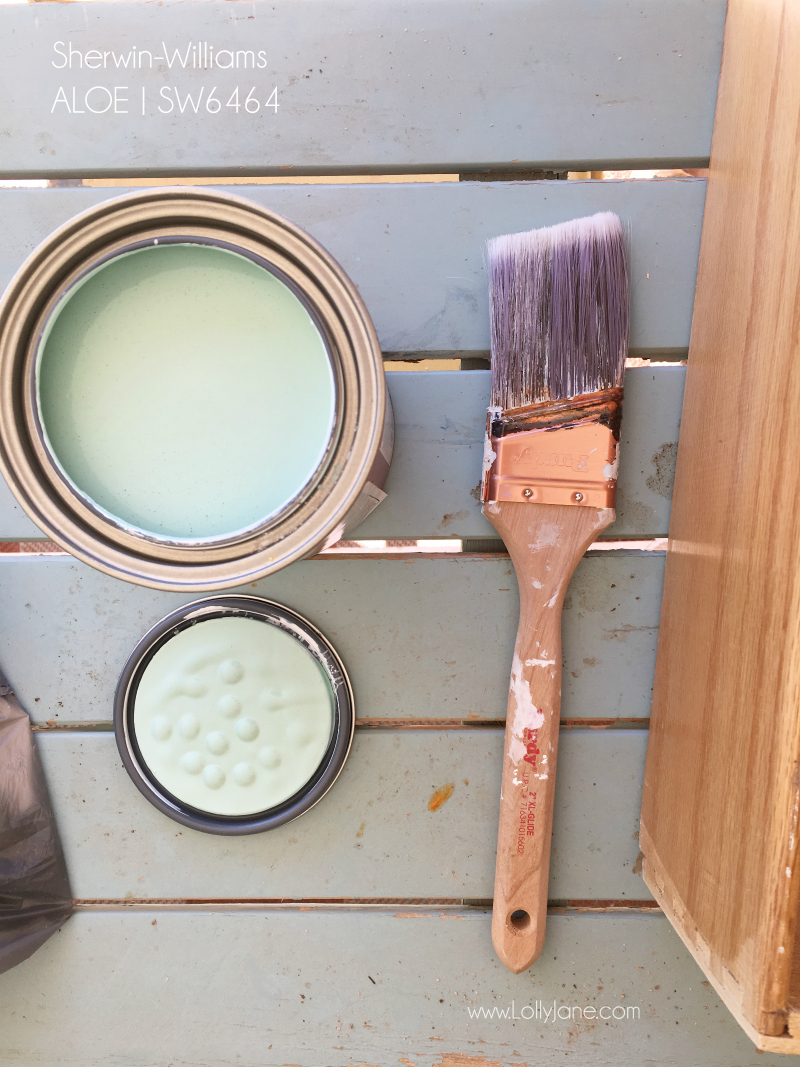
I painted the vanity Sherwin William’s “Aloe” before the install so I could get to all the nooks and crannies.
I already replaced the knobs with clear glass knobs. Here’s a tip: do that before you install it in the bathroom!! HA!-I had to borrow our installer’s screwdriver for tight spaces which I learned was called a ratchet offset screwdriver. So there you have it, it’s a little tricky but definitely doable so keep your eyes peeled for old but sturdy dressers!
Visit all the sources for our farmhouse bathroom remodel! Lots of before/after farmhouse bathroom renovation pictures!
PLEASE PIN so your friend’s can build this too!
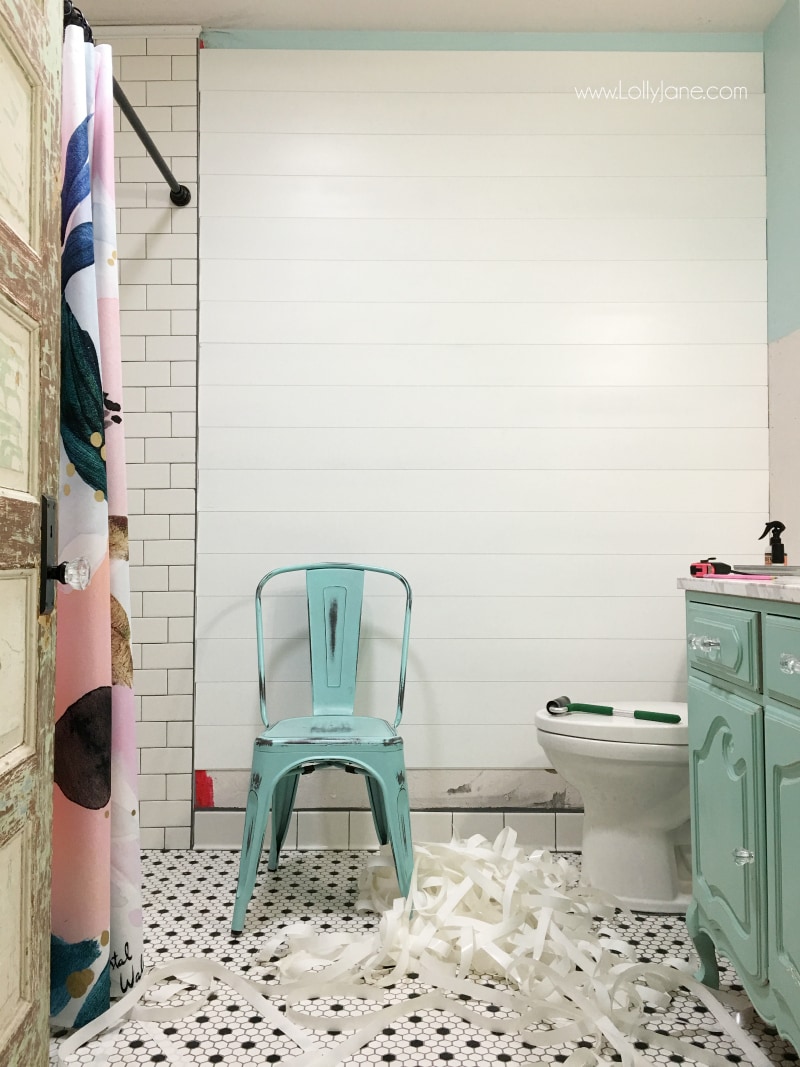
Check out how to install peel and stick shiplap on the wall, such an easy wall treatment option!
Here’s the FULL AFTER… so so good!
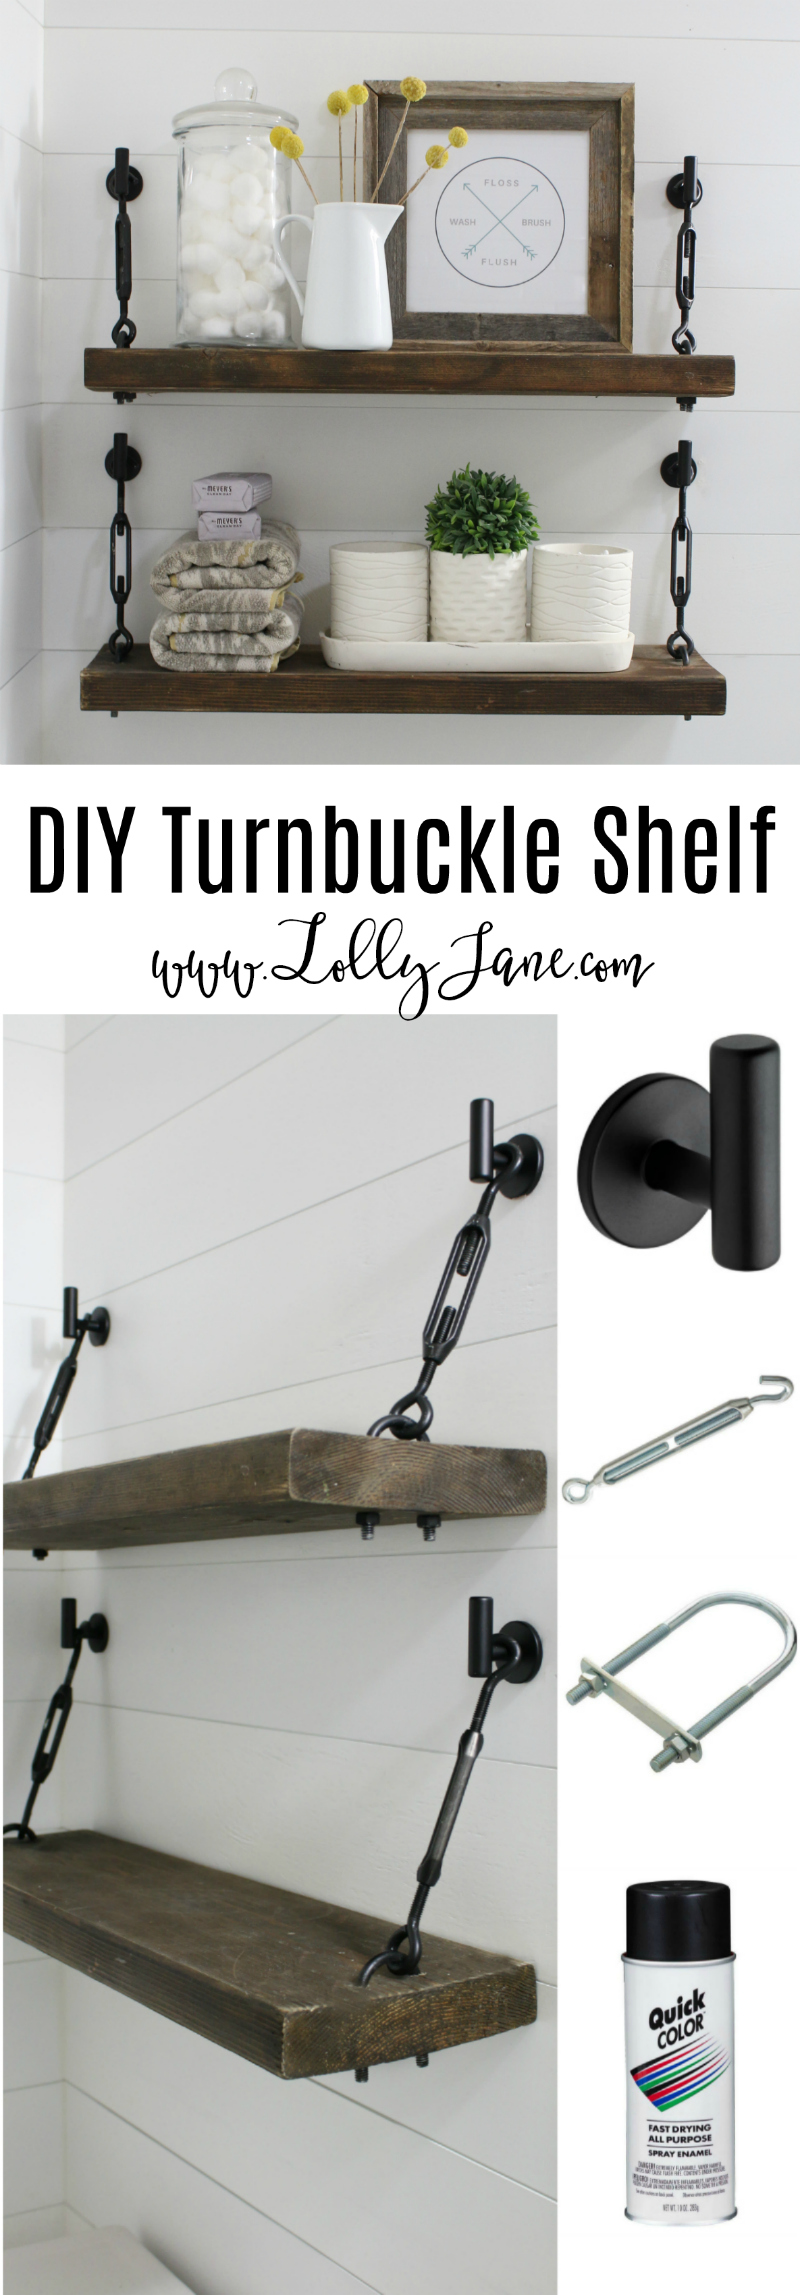
Snag the how-to on our easy Turnbuckle Shelves here!



This is beautiful and we are hoping to attempt something similar. Thank you so much for showing how you accomplished this and the materials you used! I also have to ask about that amazing mirror above the vanity. Where did you find that, it is perfect?!
Thank you so much! I found on Amazon, it’s so handy to store toothbrushes and beauty products! 🙂
Here’s the link for you: https://rstyle.me/+YQfiJxy4cbPL-B7l5Kzy5A
Thank you so much!! I’m going to look now lol!!
Hi! What did you use to secure the marble top to the vanity?
Hi Danielle!
We used a $5 adhesive from Home Depot: Loctite brand labeled Mirror, Marble and Granite Adhesive 🙂
What a great way to upcycle a dresser, and I love the color and the vintage vibe it brings to your bath! Wonderful tutorial as well, pinned!
So so pretty! New project added to our list <3 Xoxo, K&E
What a great repurpose of a dresser! I know, I love older furniture BECAUSE it is made of real wood!!! Thanks for a fun post ~ I shared on my FB page for you and pinned a couple of photos. <3 Coming over from Friday Features.
It is gorgeous! I love the color, I love all the details…
Aww thank you so much!
The right post at the right time. I’m looking for a dresser to use it as vanity and this post is so useful, I will definitely pin this so I can remember all the useful info. And btw the vanity turned out gorgeous, you can never find such a pretty ready vanity. Just got back to blogland and so glad I did. miss you all
You did a wonderful job. I love the transformation. I will be featuring this tomorrow night at my Winter Blues Wednesday party. Please stop by and pick up an I’ve Been Featured button. Thanks. http://diybydesign.blogspot.com
Wow! This turned out great. I love the vintage feel and color you used. Absolutely beautiful!
Thank you, Erin!
OMW, that looks so gorgeous. I love the color you used it looks so refreshing and the way the drawers have been cut to fit around the sink is genius. Beautiful makeover
I love this furniture upcycle. We need to change out a bathroom cabinet, makes me want to covert one for a vanity. I converted a vintage dresser to a kitchen island, with help. Love how awesome & unique it makes the furniture piece. Thanks for sharing at the Inspiration Spotlight party @DearCreatives pinned & sharing
I agree with the previous comment… you make it look so easy! Pinning for later. I followed you on Pinterest and Facebook and would love for you to follow me! Visiting from Inspire Me Monday.
Pinterest… https://www.pinterest.com/mintsandacherry/boards/
Facebook… https://www.facebook.com/mintsandacherry/
Blessings!
Thanks, Kristin! It’s a pretty easy project, just a few detailed steps to follow!
Can you tell me how’s you took the top off the dresser? You made it look so easy!
Hi! It was REALLY easy, actually! It just unscrews underneath 🙂 Thanks!!
This is amazing! I have wanted to do this for quite sometime. You make it look so easy! Maybe I will get this started after all…I already have the piece I want to use! Thanks for sharing!
It’s beautiful!
Thank you so much, Elena!
I have always wanted to do this! It looks amazing, thanks for the tips!
Thank you!! Good luck, Colleen! xo
Love everything about this! Great job?
Thanks so much, Beth!! xo
Youve chosen the same floor tile i want, it looks amazing. The floor is so bright and fresh, perfect compliment to your new vanity. What was the final cost after you added the marble top and faucets, id like to try to work this into my budget. Thank you❤
Hi there! Thank you so much! The marble was $379 (here’s a similar one on Amazon for $129: https://amzn.to/2HoDzzR) and the faucet was $60 (https://amzn.to/2Hm06xe) Hope that helps!
Wow! I love your site so much ! It’s beautiful! And this post is amazing! I am deff trying to redo my bathroom and I think I might take this and DIY. Thanks for posting this ! It really helped me!
Thanks, Alexa! Happy building!