Halloween witch wreath tutorial
This post is sponsored by Waverly Inspirations, all opinions are own own. You’ll love this easy craft!
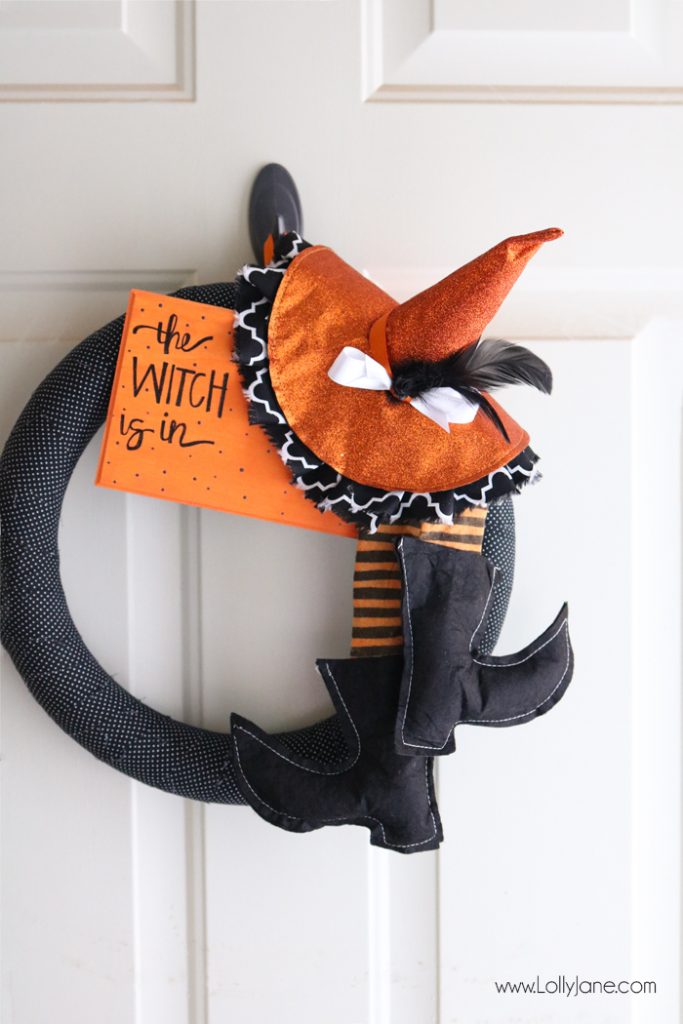
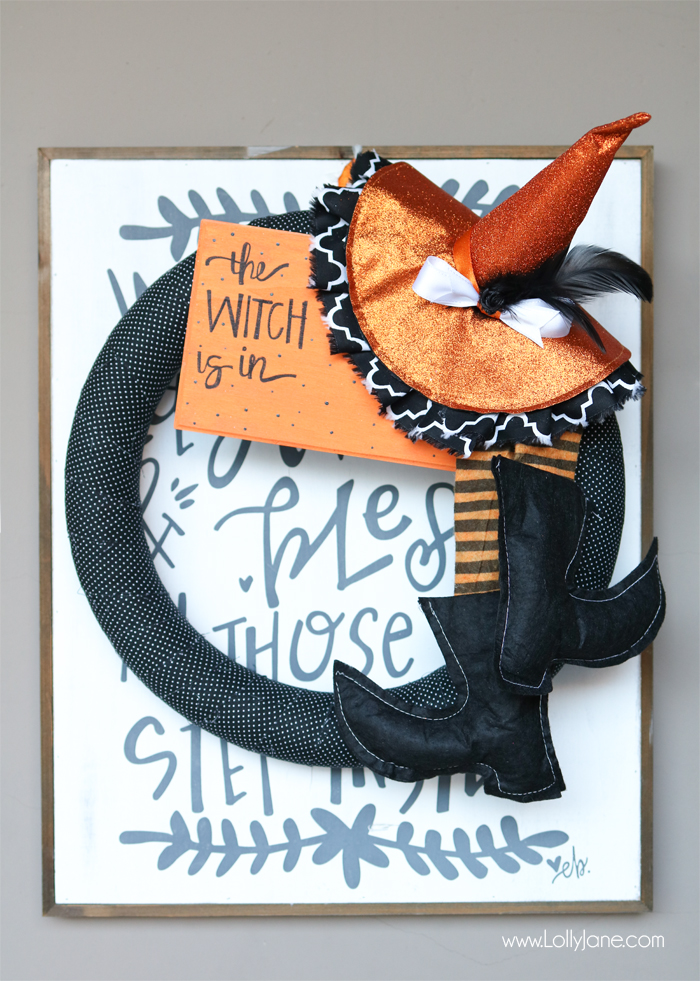
I’ve finally got this years Halloween wreath up on my front door so my littles are now officially aware the candy holiday is around the corner. You can bet every conversation is now centered around what costume they want to dress up in or when are we going to get our pumpkins to carve or when is the trunk-or-treat party, haha! I really love this time of year and displaying this easy Fabric Wrapped Witch Wreath is not only festive but easy (and affordable!) for you to make, too. Let’s be front door twin, you guys! 😉
I snagged everything at Walmart for 2 reasons: it’s a mile from my house (I’m there at least twice a week!) and I can breeze through the huge craft section with my cart and 3 kids and it’s no big deal. Mom win!
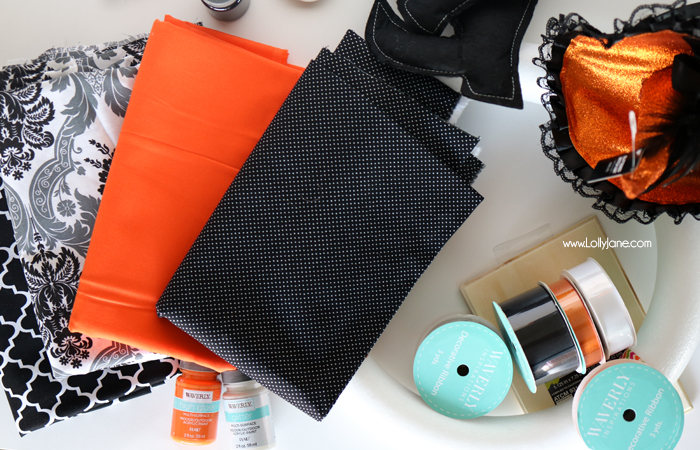
Here’s what I snagged to make this little pretty:
- Waverly fabric in Halloween hues (black, white and orange), about 1/2 yard
- Waverly acrylic paint in coordinating colors
- Waverly ribbon in the same hues (I sense a theme going on! lol)
- Witch headband from the Halloween section
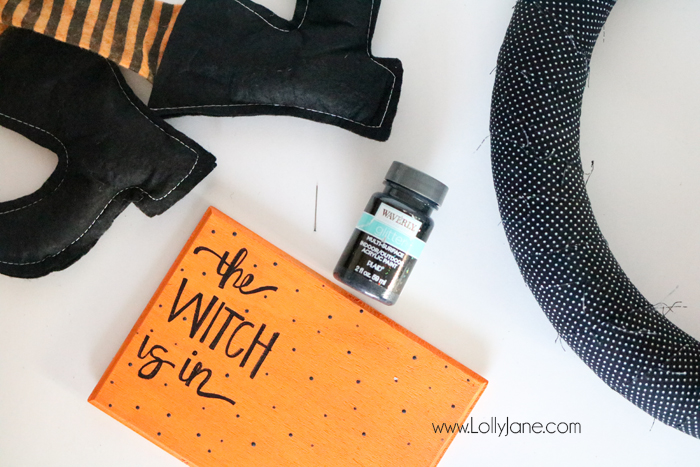
- Witch legs/boots cut off of a ghost from the Halloween section (hee hee!)
- Small unfinished wood sign
- Make It Fun wreath form
- Scissors, hot glue
I am all about the no-sew thang! Heaven knows I’m not about to stich witch legs/boots from scratch so I really did just cut them off of a plush ghost from the Halloween section of Walmart. lol!
Okie doke, direction time:
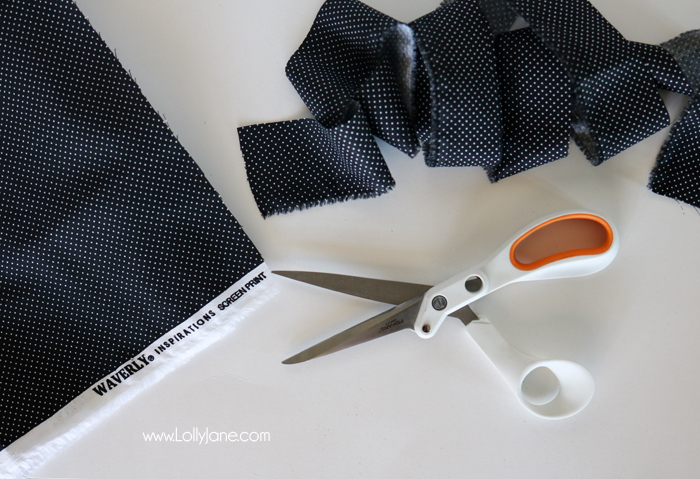
1. Cut 1.5″ fabric strips (about 1/2 yard worth) with Fiskars Amplify Mixed Media Shears, wrap around wreath form. I love the large sewing section next to the craft area in Walmart and this polka dot fabric from Waverly is so cute! Once it’s all wrapped, hot glue or pin into place.
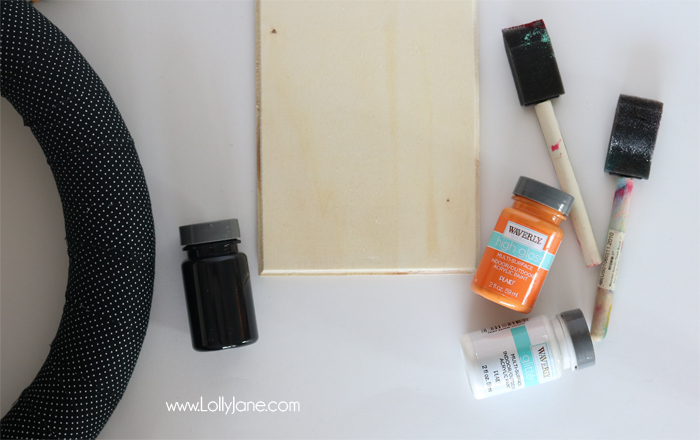
2. Paint unfinished plaque in Waverly high gloss paint. I used orange and it covered well, I only needed one light coat and have a ton leftover.

I am practicing my hand lettering and decided to use a permanent marker instead of paint on the sign so I hand wrote “The Witch Is In” on the dried plaque. I spruced it up with Waverly’s acrylic black paint that has glitter in it. I just poured a small amount in the lid of the jar and used the top of a sewing pin to make little polka dots to match the Waverly fabric. Love it!
While the little polka dot paint was drying (about 20 minutes) I was able to spruce up the little witch headband I nabbed from Walmart. I cut a 1″ strip of coordinating Waverly fabric and just hot glued it into little ruffles along the underside of the witch hat’s brim.
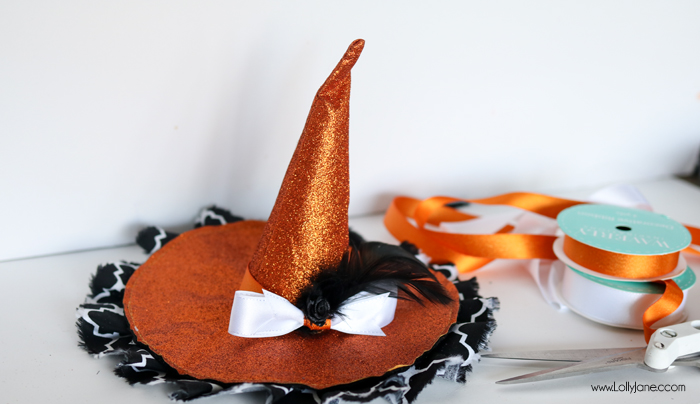
I used the pretty silky white Waverly ribbon to tie a bow and to coordinate some orange, tied a knot around the middle of the bow and around the top part of the hat as well. I finished the hat off with some black feathers to give it a smidgen of witchy bling!
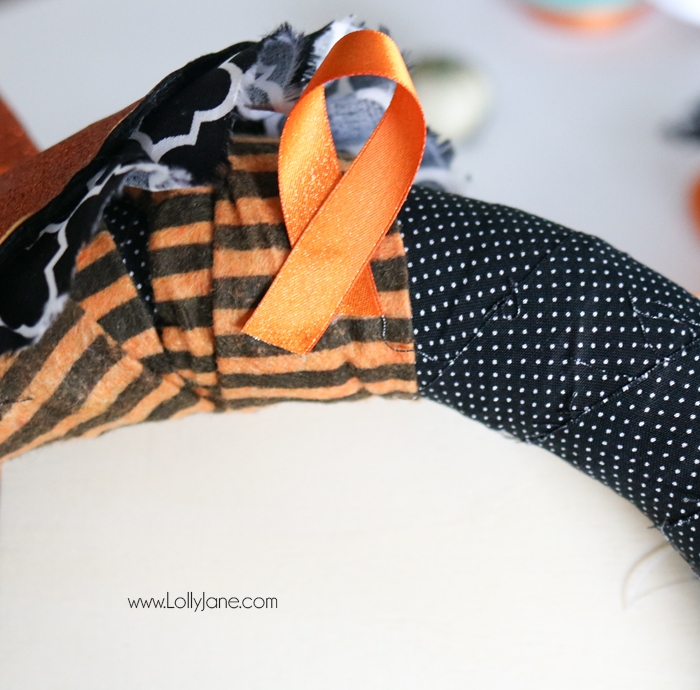
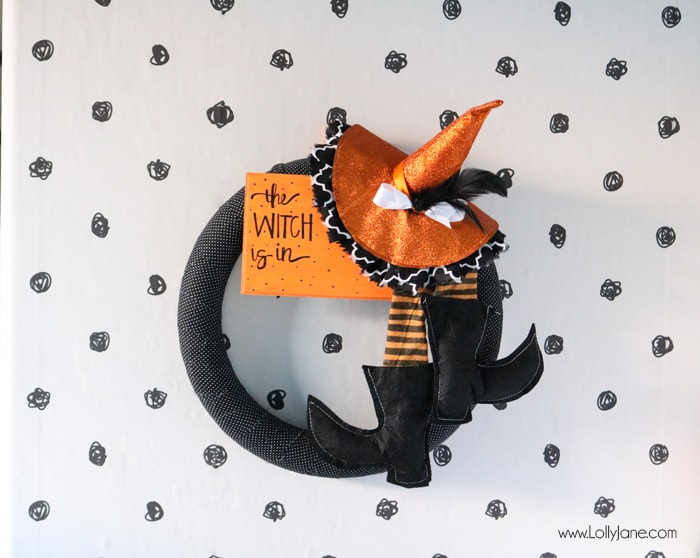
Lastly, I looped a small piece of the Waverly ribbon to make a hanger then hot glued it onto the back of the wreath then hung it!
SO easy and it spruced up my front porch instantly!
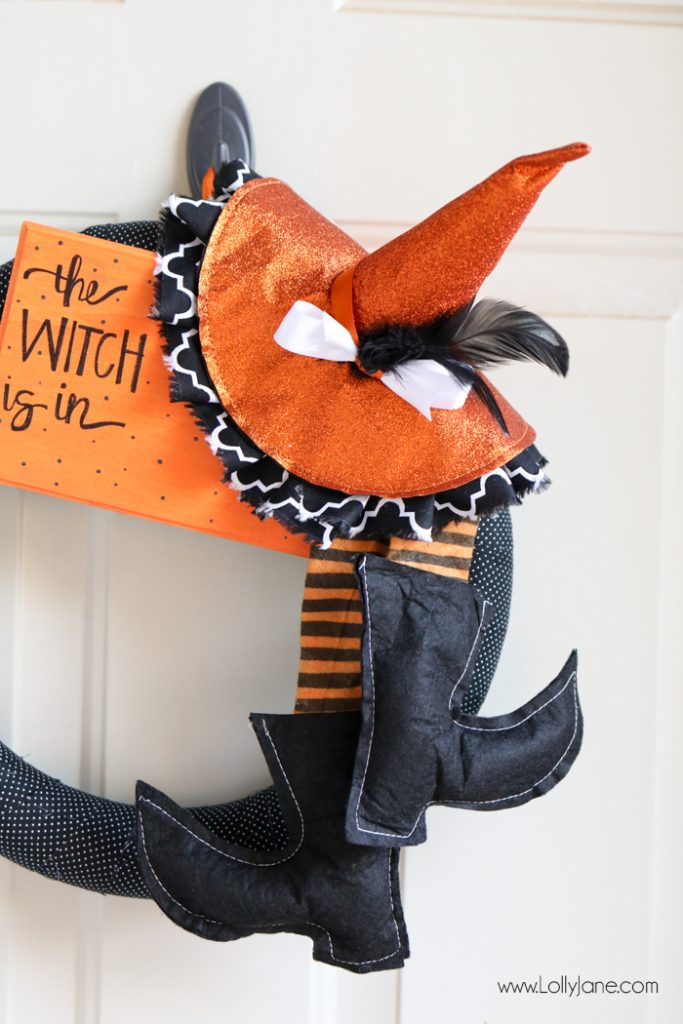
How cute is all this black, white, and orange together? I am really loving the coordinating fabric choices, super cute paired with the bright white ribbon. 🙂
The Waverly line is very expansive and there are tons of other fabric choices, paint colors, and ribbon hues and textures. We were compensated for this project by Waverly Inspirations in partnership with Walmart, but as always, opinions are our very own and we really do shop and use Waverly often! Thank you for supporting the brands that help keep our free tutorials… well, FREE! 😉
PS: Make sure you remind your kids that a real witch doesn’t live at your house; my poor 5 year old who is learning to read asked where she was after I hung this up today. LOL!

Hi Brittey!
I looped a small piece of the ribbon to make a hanger then hot glued it onto the back of the wreath then hung it from there. Super easy! We would love to see your finished product, be sure to tag us @lollyjaneblog or email us 🙂
Thanks!!
So I absolutely love this and I’m finishing making it now, but one question how did u put the sign on the wreath itself? I don’t want to jack it up ?
Thanks again for this idea I love it
Your Witch wreath is so cute I love it
Adorable. I like that this wreath is more cute than scary. Love it, pinned.
This is so adorable! Love the witch wreath. Thanks for sharing at the InspirationSpotlight party @DearCreatives. Shared.
This is really a great tutorial. I absolutely love the hanging stockings and boots. And take care that the little one doesn’t get confused. Haha! Pinning.
Aw, hope you do make one! Thanks, Danielle!
This is adorable, my kids would love it. We may have to make one now ;). Thanks for sharing with us at the homestead blog hop. Hope we see you again this week!
Thanks again for sharing, you are one of my features again this week at Creative Mondays
This wreath is so super fun and cute, love it!!! I wasn’t going to make a wreath for Halloween but now I want to!!!
Such a great idea, love this 🙂 Thanks for sharing at Creative Mondays,,
HA ! This is SO cute!
I would love for you to share this with my Facebook Group for recipes, crafts, tips, and tricks: https://www.facebook.com/groups/pluckyrecipescraftstips/
Thanks for joining Cooking and Crafting with J & J!
Awww thank you so much, Steph! We’re glad you came out of “comment hiding” for this HAHA 😀
Thanks so much, Shawnna!! XO
I don’t ordinarily comment but I gotta admit thank you for the
post on this amazing one :D.
hey girls- love the wreath! So creative!