scrapbook paper us map tutorial
Hello everyone!
I am CRAZY excited to be here today at Lolly Jane!
But first, I must remember my manners & thank Kelli and Kristi for inviting me. It’s truly an honor to be here with all of your fabulous readers 🙂
But first, I must remember my manners & thank Kelli and Kristi for inviting me. It’s truly an honor to be here with all of your fabulous readers 🙂

I’m Laura Beth from A Step in the Journey, but my friends call me LB. It’s great to meet you! Today I’m sharing a project I entitled
Oh the Places We’ll Go
(Sound vaguely familiar?)
As many of you know, the 1st anniversary gift is suppose to be paper…

I thought through several ideas, from magazines to tickets to a coupon book… even thought about making a monopoly board featuring all the placed we’d been (a friend did this & it turned out great!).
In the end, however, I kept coming back to a map; III loves maps, so I knew it would be perfect.
With inspiration from My Life and Kids and Thirty Handmade Days,
I came up with this:

It’s a gift that will keep on giving, as we expand out vacationing destinations through the next 60+ years of marriage.
The buttons mark all of the places we have been together… I’d considered a world map but we’ve only been to Mexico as a twosome & so I thought most of the map would look pretty boring 🙂
Here is the breakdown!
After cutting apart a US map, I traced all of the individual states on different scraps of patterned paper.

Make sure & write the name of the state on the back of each piece (in a way that shows which side is the top) as this will make putting the puzzle back together a little bit easier! I also laid it out as I cut, to make sure the pieces were fitting.

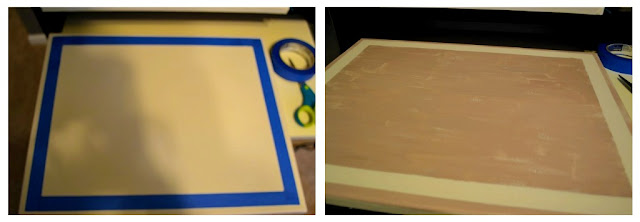
On a 16×20 canvas I outlined a border with painters tape & mixed some white & brown to give me a soft taupe. Then I whitewashed it a little. Paint. Remove tape.
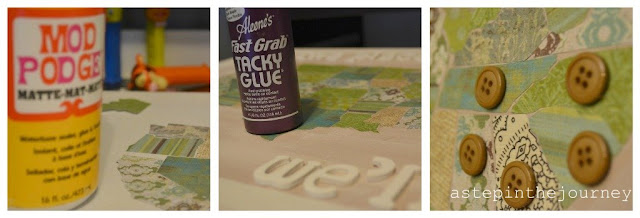
Using ModPodge I adhered the states to the canvas. I started with the middle states (Texas & up) to try & center the map on the canvas.

Finally, I covered the final map in another layer of ModPodge, painted the wooden letters & attached them with tacky glue. The same for the buttons…
And that is all she wrote!
Frame or not to frame, that is the question…

Come on over to A Step in the Journey and let me know what you think! White you are there, you should sign up for our photography challenge…. (maybe I’ll become a mast of one trade by the end of it.)
I’ll look forward to seeing you!
And thanks again to the girls of Lolly Jane for having me. It’s truly been a pleasure!

This is beautiful and such a cute idea! My husband and I will be celebrating our first year of marriage next week and I know what I'll be gifting! Thank you for the inspiration 🙂
amazing idea! love it! malia
Wow.. what a great idea, I love it!
Such a cute idea! My daughter has a puzzle of the states that would help in tracing the shapes!
This is just DARLING- great idea! Definitely going to copy copy copy… thanks for sharing 🙂 Stopping over to Laura Beth's blog now!
Great tute LB! Glad you could be our guestie today! XO
This is too cute! And just a great idea! Pinning it immediately. 🙂
This is so stinking cute! I'll bet my sister would love something like this for Christmas!
woah I LOVE THIS! too adorable…so guna copy. tfs! =)