We are excited to share our DIY curtain rod & clay finials with you today:
This was not a quick project but it turned out pretty well!
Let’s start from the beginning, though, shall we? 🙂
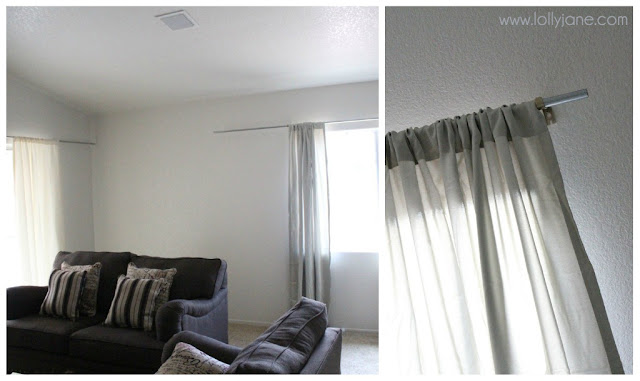
After removing shabby blinds from every.single.window in the home we recently moved into and now having zilch for window treatments, I decided to make my own curtain rods to save a buck or two. I found an awesome tutorial by House of Hepworths, {thanks Allison!} and got to work. Since I had purged most of my “clutter” from the move and didn’t have extra brackets, I picked some up at Home Depot for $5/set, {which was cheaper than Lowe’s, which were $5/bracket.} Score! After snagging some eclipse panels at Walmart for just $9/each, I was set:
{Note: The picture on the left was taken before my hubby sawed the ends of the rods to window size.}
Yes, they’re up but bare!
{And please ignore my plain boring walls –rental! boo!- and the solid curtains are actually a print now but I can’t reveal everything in one day, can I? *wink*}
Aaah! What am I missing?
Finials!
Kelli was making clay jewelry when I called her to ask where to get inexpensive finials and all I heard was “clay” so I headed right to Joann’s to pick up a box of clay. Random? Yes.
And you read that right: clay.
I figured this would be a major blogging hit or miss but what the heck? At 10# of modeling clay for $5, {I had a 50% coupon,} I had to try!
I don’t have much experience in working with clay but just shaped each piece as best I could:
I decided a ball was the easiest shape to create and played around with another few shapes.
1.I eventually decided on a simple design: circle, square and a ring-ish shape in between to join them. All sizes were completely random and I matched them by set as best I could, eyeballing and comparing along the way.
2. While the clay is wet, press your square shape into the end of the curtain rod. Important: Use a slight rocking motion to create an indentation*; the clay will shrink once dry and you won’t want the finial to fit too snugly onto the rod. Scoop out the middle of the clay using a utility or butter knife.
3. Use a shish-kabob stick to hold the clay pieces together when drying.
4. Once completely dry, glue pieces together. I used Loctite Epoxy… this stuff STINKS like a perm and is uber sticky but, it worked wonders.
5. Turn upside down to dry. Note: It says 20 minutes dry time but for clay-on-clay I discovered it was best to wait another full 6-12 hours. Also, a light coat goes a long way 😉
6. All done drying, stuck together nice ‘n snug, and ready for a makeover!
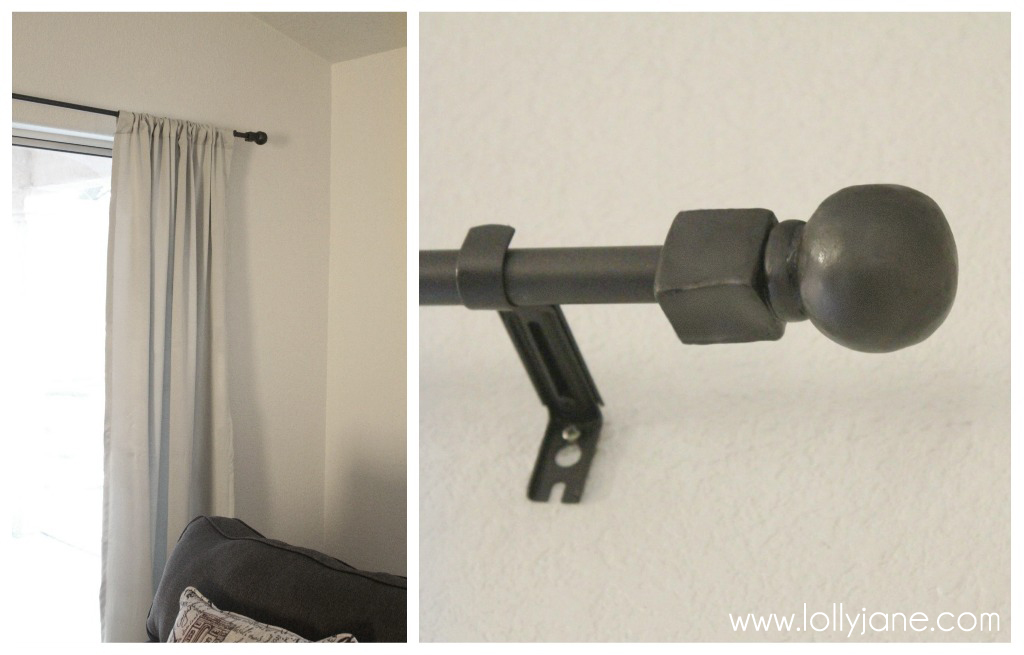
I then gave the whole set a fresh coat of bronze metallic spray paint:
Once it was completely dry, I reassembled the curtain rod, added the new finials*…
*I made my finials so they fit snugly onto the curtain rod by simply “screwing” it on. However, you can add a dab of hot glue to the inner edge of the finial to the rod for extra durability. I may do this since I have a busy little one that likes to play with the curtains 😉
….then hung my drapes:
I think I will add some curtain rings to finish it off but right now I am pretty happy with it as the finials really look like a professional bronzed metal- gotta ♥ that metallic spray paint!
Those are amazing. I can't believe you made them! Love this idea – my boys have air-dry clay sitting upstairs right now. I may have to do this…thanks for the inspiration!
Wow I can't believe you made those! Awesome! My sister and I blog together too (except we're not twins…). 🙂
Awesome Idea!!! I so am gonna do this!Very clever!!
You guys are so clever!! I love this idea! Your rod turned out so cute!
You're a freakin' genius. These are so cool. 🙂
Wow! I am doing a make over in my boy's room with a pirate theme. May use this idea to put some kind of pirate decor on the curtain rod (hook, hat, something….) I need to think this one through a little, but I may steal your idea to save a few bucks! THANKS for the tutorial!
Rene
This blog is great source of information about saint patrick’s day which is very useful for me. It very important information about saint patrick’s day Thank you very much for this useful information.
Seriously?! Who knew you could make finials out of clay? Definitely not me! Great tutorial girls! XOXO
You guys are so cool and creative! I love anything that has to do with saving cash on the dumb stuff like curtain rods! Great idea!!! Sooo did you hear that Maggie and I got to get together this past weekend?! I think it made us both realize how much we wish we could meet you girls too!!!! Yayyy! I heart blog friends! Jaime :o)
That's such a good idea, and so easy! I love the imperfect look of it! They look great!!
Wow, very cool! They look really great and I would have never known they were made from clay!
I made my own a few months ago- but used glass finials from Ikea. The clay was an interesting idea- I really like how they turned out. Becca
This is great! I've been wanting to make curtain rods for our master bedroom, but was not sure what to do for the finials. Thanks for the inspiration and ideas!
PS: Just pinned under my "to try" board! Thanks! 🙂
Holy cow you MADE those?! Wow! Pretty cool! 🙂
clever clever, girls! definitely inspired to make something with clay now- whodathunk it? 😉
No way! Brilliant! It's amazing the things you can build with imagination 😉 Thanks for the tut!
amazing! What a clever idea and it looks wonderful!!


 =”214″ src=”https://3.bp.blogspot.com/-sCpU4Hsh3f8/T0sWboR-NtI/AAAAAAAAE2U/uvE01TNiKug/s640/DIY+curtain+rod+clay+finials+by+Lolly+Jane.jpg” width=”640″ />


Those are amazing. I can't believe you made them! Love this idea – my boys have air-dry clay sitting upstairs right now. I may have to do this…thanks for the inspiration!
Wow I can't believe you made those! Awesome! My sister and I blog together too (except we're not twins…). 🙂
Awesome Idea!!! I so am gonna do this!Very clever!!
You guys are so clever!! I love this idea! Your rod turned out so cute!
You're a freakin' genius. These are so cool. 🙂
Wow! I am doing a make over in my boy's room with a pirate theme. May use this idea to put some kind of pirate decor on the curtain rod (hook, hat, something….) I need to think this one through a little, but I may steal your idea to save a few bucks! THANKS for the tutorial!
Rene
This blog is great source of information about saint patrick’s day which is very useful for me. It very important information about saint patrick’s day
Thank you very much for this useful information.
Best Saint Patrick’s Day Home Decoration Ideas.
Seriously?! Who knew you could make finials out of clay? Definitely not me! Great tutorial girls! XOXO
You guys are so cool and creative! I love anything that has to do with saving cash on the dumb stuff like curtain rods! Great idea!!! Sooo did you hear that Maggie and I got to get together this past weekend?! I think it made us both realize how much we wish we could meet you girls too!!!! Yayyy! I heart blog friends!
Jaime :o)
That's such a good idea, and so easy! I love the imperfect look of it! They look great!!
Wow, very cool! They look really great and I would have never known they were made from clay!
This is such a creative idea! I would love for you to Link up at my Linky party via: http://www.ourdelightfulhome.blogspot.com
Mrs. Delightful
http://www.ourdelightfulhome.blogspot.com
I made my own a few months ago- but used glass finials from Ikea. The clay was an interesting idea- I really like how they turned out.
Becca
This is great! I've been wanting to make curtain rods for our master bedroom, but was not sure what to do for the finials. Thanks for the inspiration and ideas!
PS: Just pinned under my "to try" board! Thanks! 🙂
Holy cow you MADE those?! Wow! Pretty cool! 🙂
clever clever, girls! definitely inspired to make something with clay now- whodathunk it? 😉
No way! Brilliant! It's amazing the things you can build with imagination 😉 Thanks for the tut!
amazing! What a clever idea and it looks wonderful!!