DIY colorful birdhousees
How we ♥ this blog & fun author behind it! Meet Ashley, so stinkin cute… I bet at least 10 of you are going to be making birdhouses this weekend while munching on nutter butter cookie balls! 😉 Thanks for guesting, Ash!
. . . . .
I am so excited to be guest posting today here at Lolly Jane! I’m Ashley, the face and voice behind Simply Designing.

My blog is a fun blog that covers everything from crafts to interior design, recipes to floral design, home decor to seasonal items. I host a weekly Friday link up party and my local Fox news station also has invited me to do a regular segment on their morning show: it is a lot of fun! In addition, I offer interior design services, both in-home and online. So I keep very busy around here, but most of all, I like to keep things SIMPLE!
Today I am excited to share with you two of my most popular posts!
The first is my Shabby Birdhouses:

I found these bird houses at Michael’s for $2 each, fully assembled and ready to be painted!
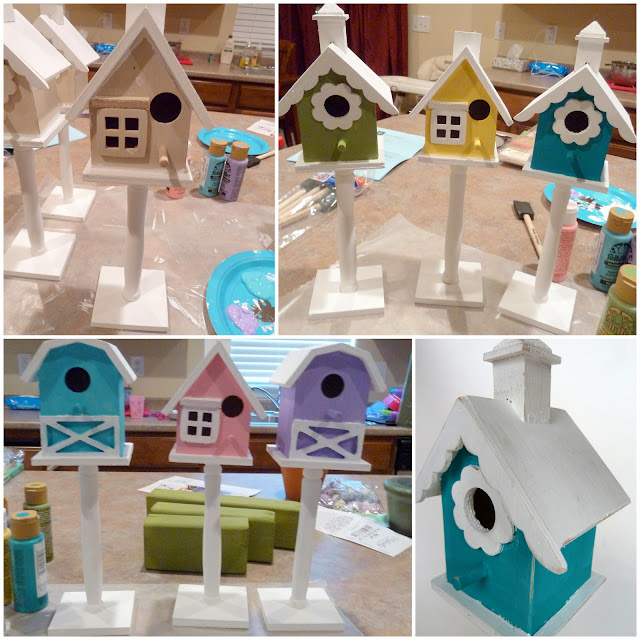
I started by painting them.
Then I took my sander and sanded the edges to make them look worn.

Next I took brown craft paint and mixed it with water. I used that to paint a “glaze” all over the bird houses and then I wiped it down with a paper towel.
Aren’t they so cute?!?! I love how they add a bit of spring to my decor!
And I can’t resi
st sharing one more thing with you. A super yummy super simple recipe!! (yum yum)
st sharing one more thing with you. A super yummy super simple recipe!! (yum yum)
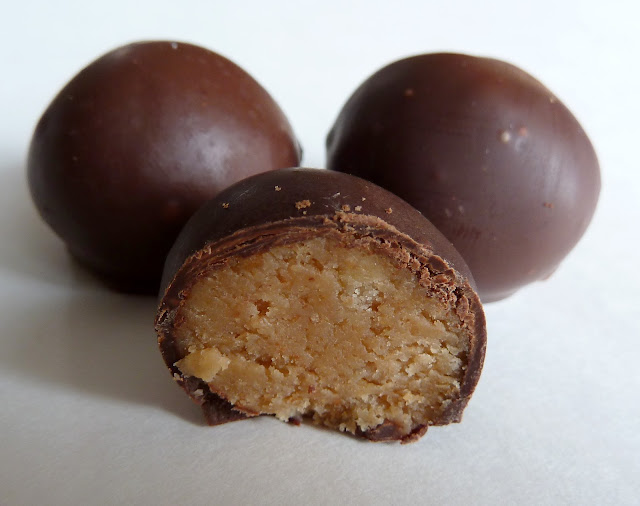
Nutter Butter Cookie Balls
If you like nutter butters and chocolate and making very simple recipes, then you will like these.
Ingredients:
-
1 package Nutter Butter cookies
-
1 8oz block of cream cheese
-
1 bag of semi-sweet chocolate chips

Instructions:
-
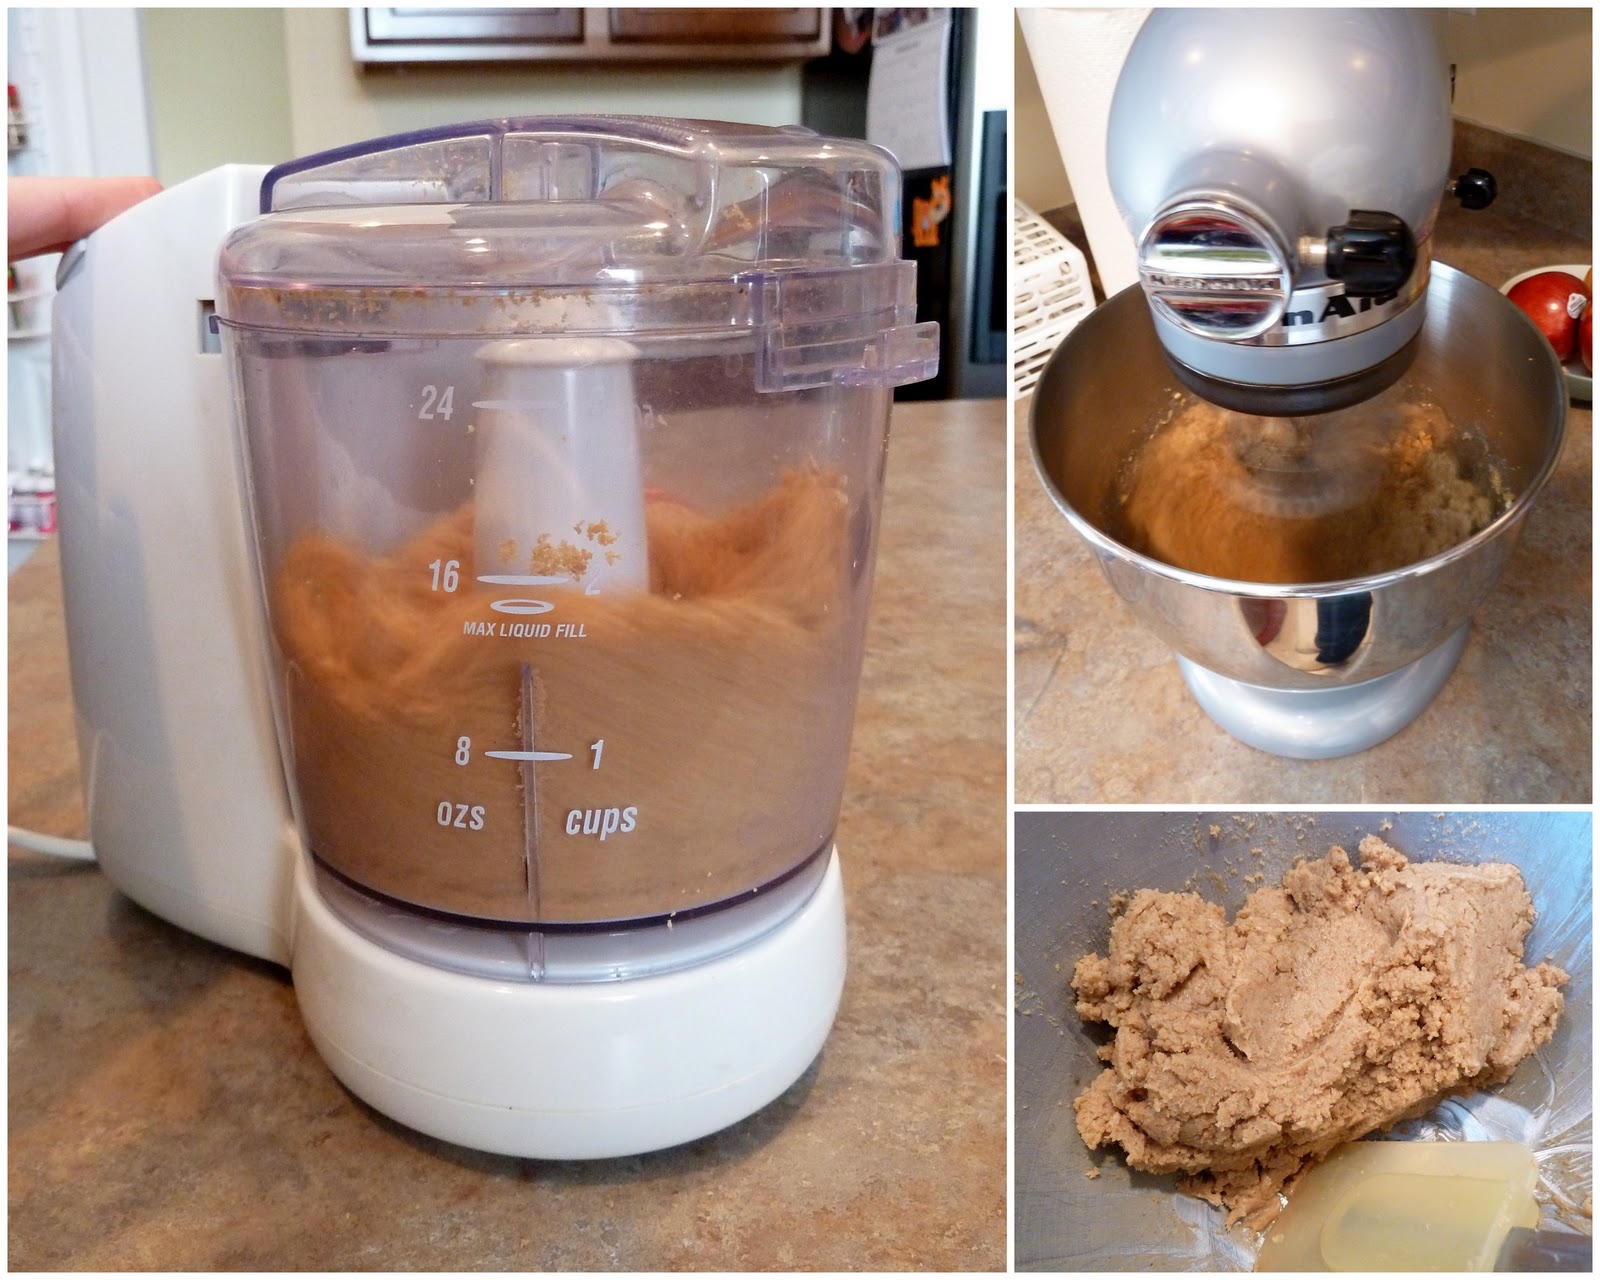
Using a food processor or a blender, crush up the cookies until finely ground
-
Place the cookie crumbs and the cream cheese in a stand mixer (I am sure you can use a hand mixer or even mix it together with your hands, but it will take a bit more time and effort on your part.)
-
Mix for several minutes until well-blended.
-
Form mixture into small balls and place on waxed paper. Put in the fridge or freezer for about 20 minutes.
-
Melt your chocolate (see how to melt chocolate here) and dip the cookie balls into the chocolate, tapping off the excess.
-
Let sit on waxed paper or foil until set.
Enjoy!
Thanks so much for letting me guest post today! I truly enjoyed it!
If you would like to see more of my creations, you can find me at my blog Simply Designing, through my RSS feed, on Facebook, on Twitter @SimplyDesigning and via Email Subscription.
Happy Designing!


Thanks for letting me guest post!
Ashley
http://www.simplydesigning.blogspot.com
I love those bird houses.
the nutterballs look SOOOOOOO yummy!
mindi @ crafting gals
craftinggals.blogspot.com
I love those birdhouses! Thanks for the recipe! 🙂
Oh, mercy! Sooo, fun and delicious.