Summer blocks
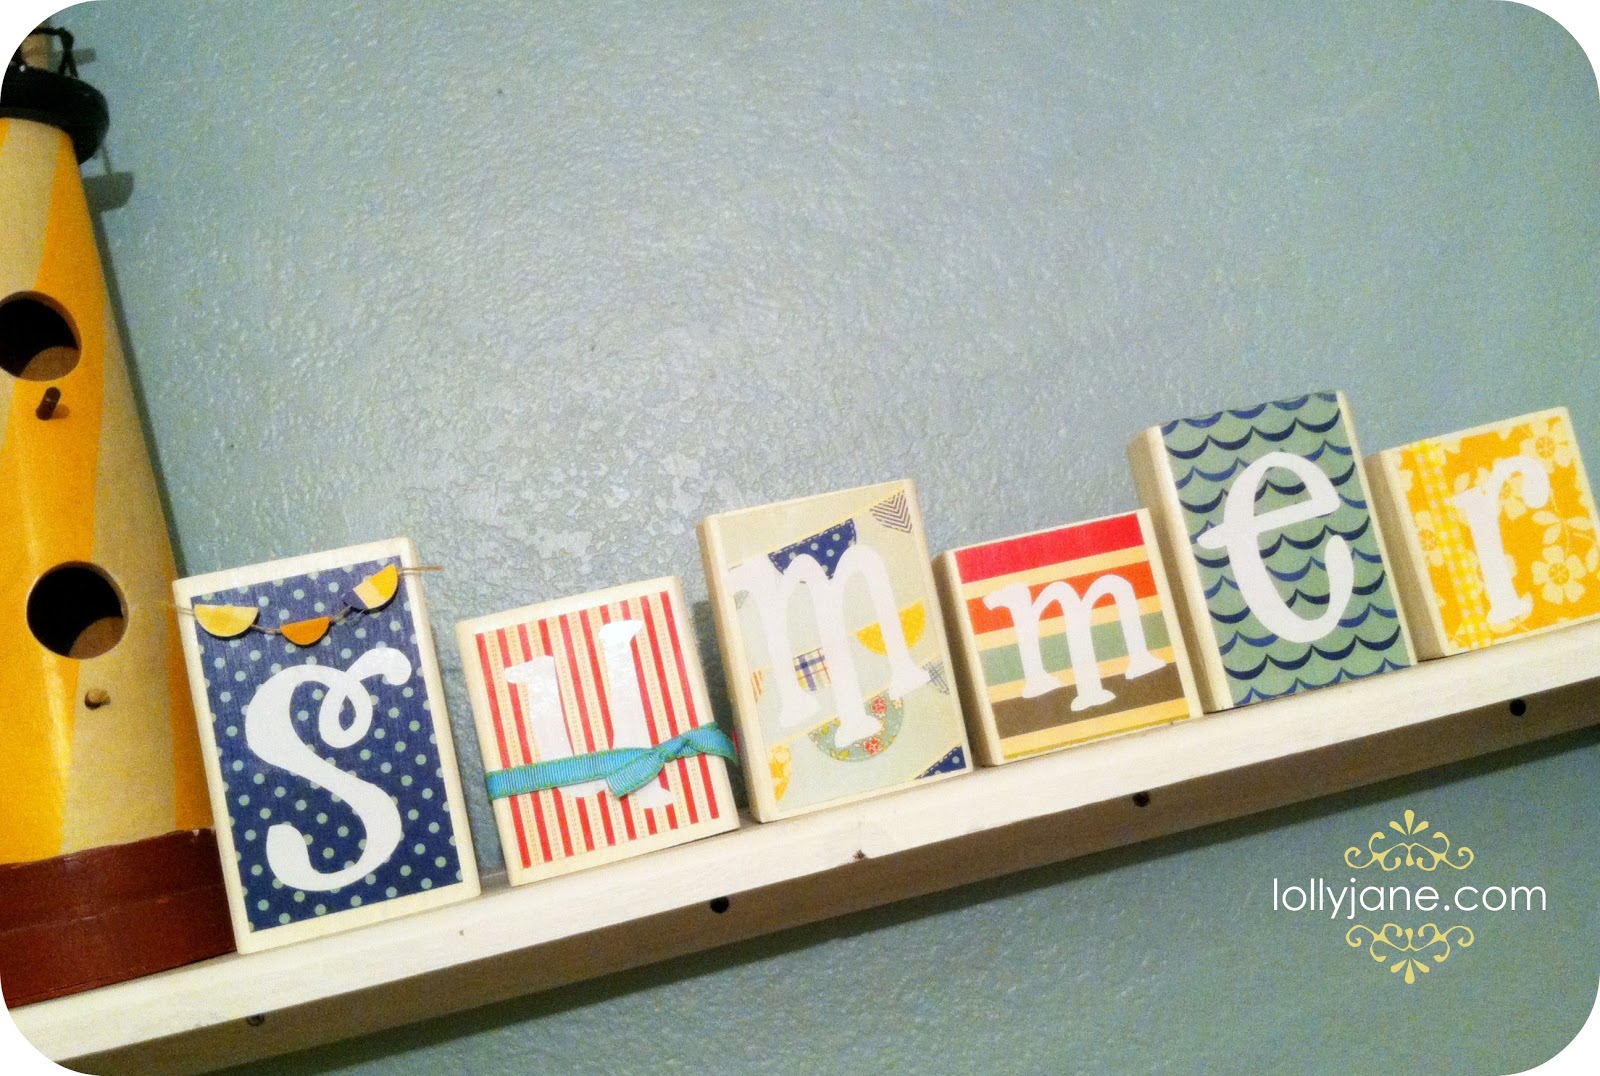
D-I-Y Summer blocks:
*2×4 piece of wood
*scrapbook paper
*ribbon & twine
*Mod Podge
*vinyl letters
*sticky dots + foam sticky dots
Directions:
1: Cut 2×4 into 6 blocks, our dimensions are:
S=5 1/2 ” (tall) x 3 1/4″ (wide), U=4×3 1/4, M=5×3 1/4, M=3 1/2 x3 1/4, E=4 3/4×3 1/4, R=3 1/2x 3 1/4
2: Sand blocks til smooth.
3: Paint the edges/sides *optional!
4: Cut scrapbook paper to size of block, ModPodge onto wood
5: After dry, apply vinyl letters {available in our shop}
6: For “S” banner: cut 3 small circles from scrapbook paper, fold them in half. Put foam sticky dots on the top edge of wood & push the half circle in place. Then put sticky dot inside half circle so it stays closed.
7: Finish embellishing with ribbon.

Viola!~easy seasonal decor for under $10!
{Melanie from Reasons to Skip the Housework is also sharing this tute with her readers this week in honor of her 500 followers gala, be sure to stop by as she’s having giveaways every day, wee!}
. . .
Please stop by {HERE} to see the plethora of absolutely FAB giveaways in honor of this sweet couple hoping to adopt 🙂

I LOVE these letters – what kind of paper is that?? It's awesome!
Lexi-
Great minds think alike, huh? (:
My friend's inspiration was this site:
http://www.inspiringcreationsblog.com/2010/02/spring-blocks-with-tutorial.html
We actually featured the girl's cuteness back in March too. Fun stuff! (:
Wow. These look JUST like the ones I make. Right down to the font.
these are so adorable.. but that lemonade stand might possibly be the cutest thing EVER!
I am lovin these!! Esp the pattern on the E! Darling!!
the colors are perfect for summer- so nautical. great job!
mindi @ crafty joy
craftyjoy.blogspot.com
I love the "S" the most!!! Soooo cute!!
🙂 Jennifer
Those are FUN!
these are just FUN. love!
Loving these!!