How To Make a Wood Sign
Today’s guest blogger is the creative Lindsay from Diary of a Crafty Lady… you’ll probably recognize this craft queen’s latest projects:

We’re thrilled she’s popping in to show you all
how to make this cute sign!
I’m Lindsay, and my blog Diary of a Crafty Lady is my chance to document all the crazy crafts I do. I craft constantly and I love to look back on things I have done and improve my techniques and remember how things did and didn’t work. I am sure many of you can relate! This is my first guest blogging post – and I hope that you can learn something, and have the confidence to create your own one-of-a-kind sign!
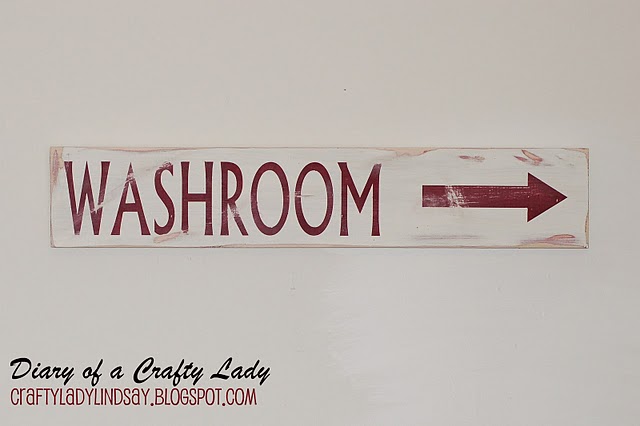
I love handmade, personalized painted signs. I love how distressing them makes each one unique. I have been starting to decorate a big blank wall in my kitchen, and this is one of the signs that I decided to make for it! It is very simple, but looks like something you would buy in a boutique or online for buko bucks!
Instructions:
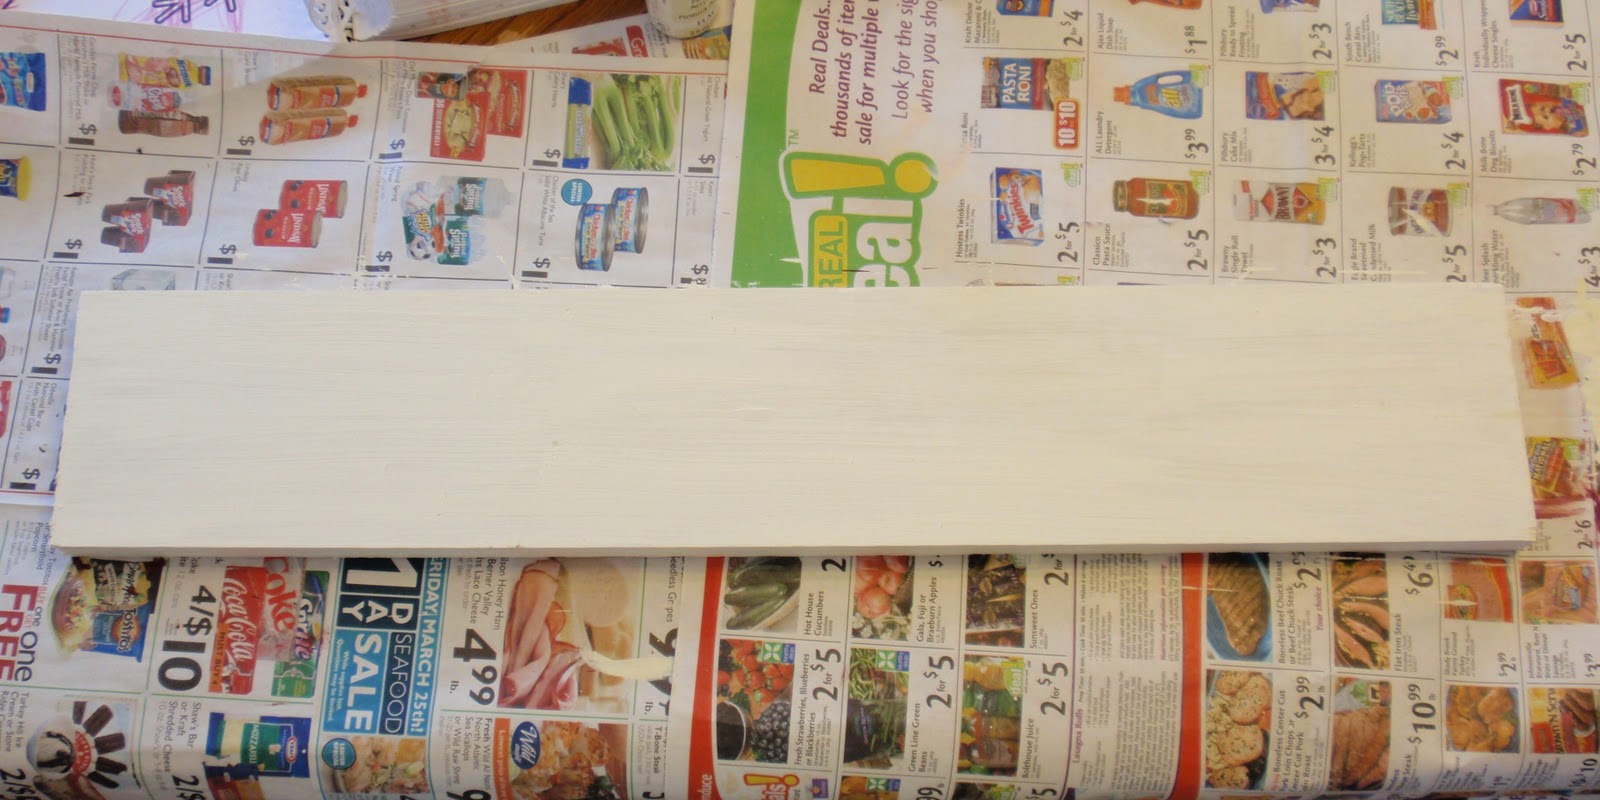
I grabbed a piece of scrap wood that I had around. You can pick up a piece of pine board like this at the hardware store, and have them cut it for you.
This one measures about 4.5″ tall and 22″ long.
This one measures about 4.5″ tall and 22″ long.

I knew that I wanted my sign to be “antique white”, and the words to be “tapestry wine”. I have many brands of acrylic paint in my stash – because I usually buy whatever is on sale at the craft store:)
Start by painting your board the color that you are going to want the words. In my case, the red color. This way, when it is distressed, this color peeks through, coordinating with color of the words.

Now is when you have to make some choices.
There are 3 ways to put words on this sign:
Option 1) After this first coat of paint is dry, put down vinyl letters, stickers, or contact paper that you have traced and cut. This will act as a barrier to your next coat of paint, keeping the words the red color. Ultimately you will peel them off. (I did not choose this option, because I wanted to distress the words and have the white coat of paint show through.)

Whether or not you choose Option 1, next comes a few coats of white paint (or whatever color you want your finished plaque to be).
Option 2) After painting the plaque the final top color, use vinyl that you cut with a machine, or contact paper that you cut by hand, and create a stencil. (This is the option that I chose.)

Paint inside the stencil, the color that you want the words to be.

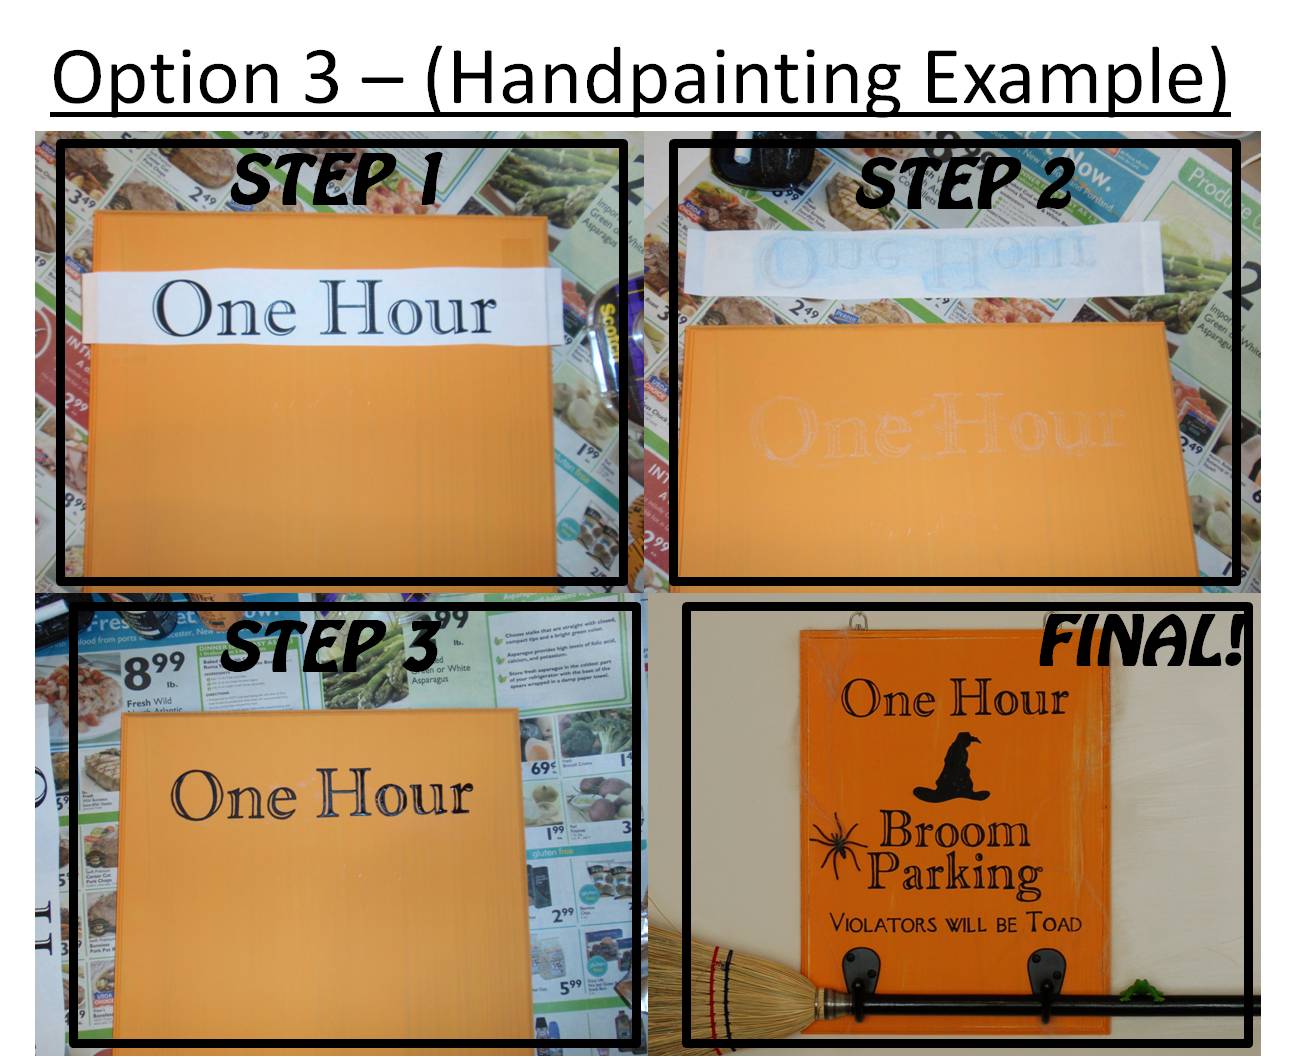
Option 3) If you do not have a vinyl cutting machine, or the patience to cut a stencil, you can paint the words over the top by hand. I have done this many times before!
I have a quick example of this below: Print the words in the size and font you want, trace them onto the wood using chalk or pencil rubbings on the back of the paper, and paint inside your traced lines.
Whether you use option 1, 2 or 3, you will end up with something nice and crisp, like this! With option 2 and 3 you will have peeled off any vinyl or stickers, etc. that you used.
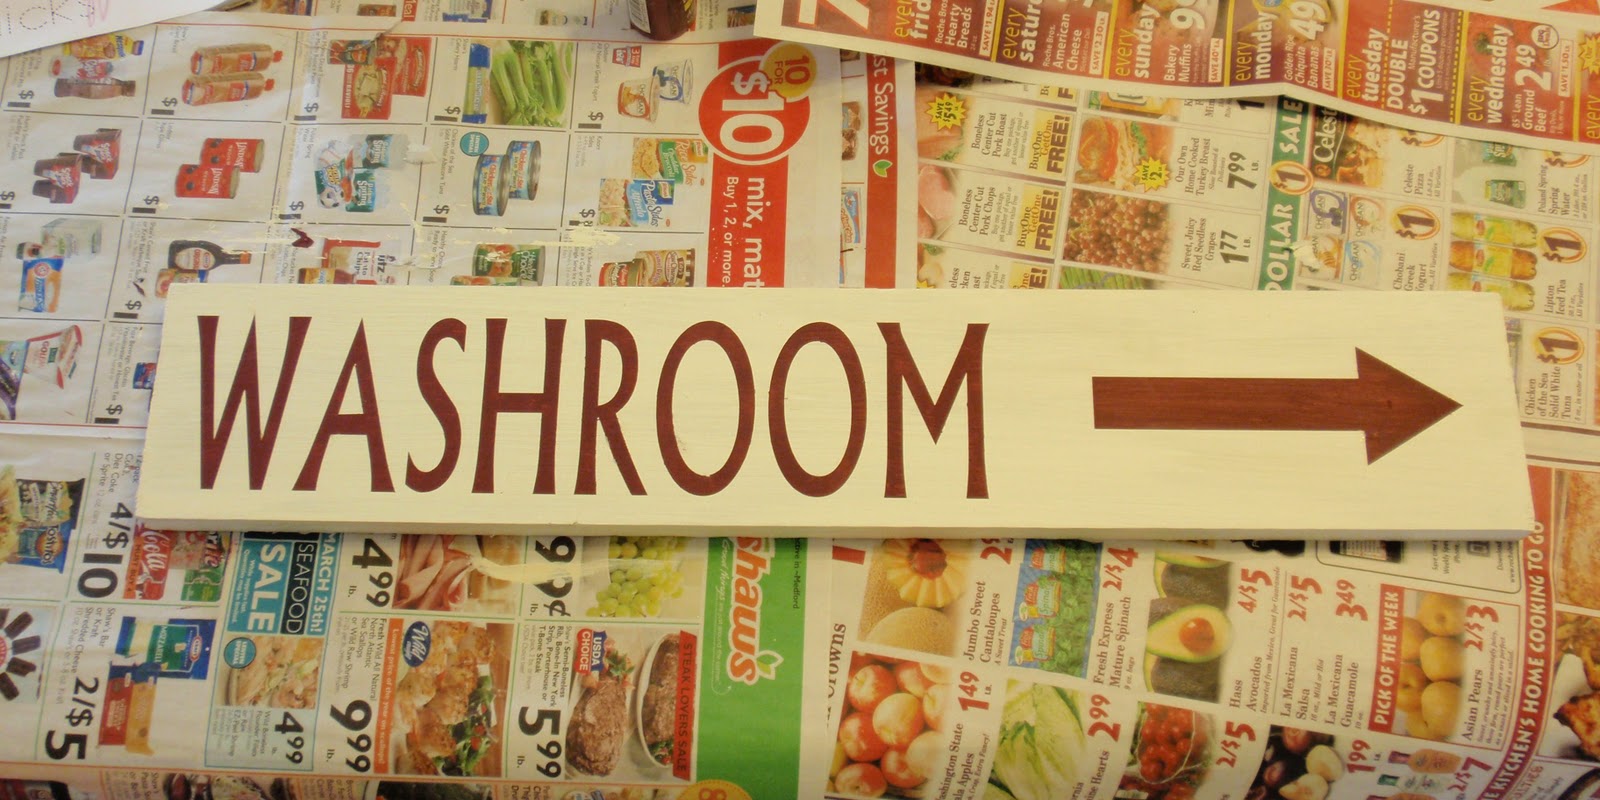
Now comes the fun part! Distressing it 🙂
I used an electric sander for the edges, and hand sanded the top. If you used Option 2 or 3, then white paint will show through when you sand down the words. As you can see, by painting the red underneath, as the very first coat of paint, red shows through when you sand the edges – and really ties the whole sign together! Finish it by spraying it with a matte sealer.
I used an electric sander for the edges, and hand sanded the top. If you used Option 2 or 3, then white paint will show through when you sand down the words. As you can see, by painting the red underneath, as the very first coat of paint, red shows through when you sand the edges – and really ties the whole sign together! Finish it by spraying it with a matte sealer.

I used this same technique to make a more complex sign for my daughter. It hangs on the same wall as this Washroom sign, and they look awesome together!

Come check out my blog anytime for lots more crafty tutorials! I love to sew, paint, build, mod podge – you name it, and I will try it! Hope you see you all soon – and THANKS for having me!! 🙂

Cute Cute Cute 🙂
I love it, the sign is so pretty and rustic looking.
I am stopping by and following from the I ♥ Blogging hop, thank you for joining our hop! http://www.mooseandtater.com
I found you on the Wednesday Social Bzzz, I am your newest GFC follower. If you could check out my blog and follow me back I would appreciate it. Thanks Amber
http://dragonflysweetnest.blogspot.com/
New follower from Wandering Wednesday Blog Hop! Hope you cans stop by and return the follow 🙂
Cristi
http://thekingscourt4.blogspot.com/
WOW that other sign must have taken FORever to make! LOL Like it a lot! Thanks for the tutorial- I must create my own! =)
loving this. good job!!
Cute! I LOVE the diner sign 🙂
Holy smokes what a way to kick off a Wednesday morn! Good pick on the crafter, Kris. Lindsay, GOOD WORK!! (:
Suuuper cute! That jossy sign is incredible..looks like SO much work! I don't think I could do that, wow! Love them both!