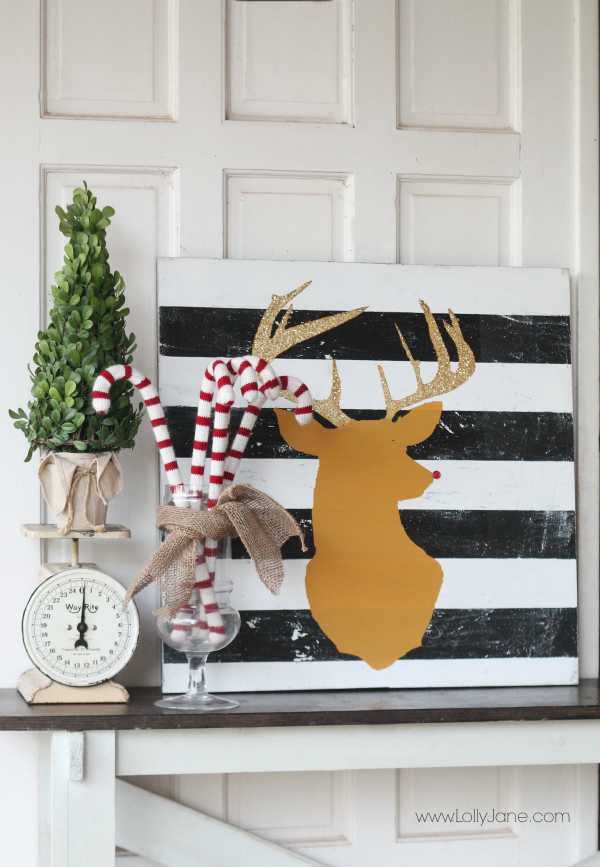
glitter antler reindeer head art
Today we’re showing you some glittery goodness Christmas decor… because we think glitter solves all of life’s problems! (; We are seriously loving the deer trend right now. My craft room sports a 3D deer head and my kids playroom is the new home to deer head pallet art. This one is a little different as it’s got a cute red rhinestone nose, (and we all know who the popular reindeer is that has a rosy sniffer!) Read on to make your own glitter antler reindeer head art aaaand the best part is you can simply remove the rhinestone and display this dear decor year round, too. Gotta love a two-for-one-craft!
Supplies:
- Wood, MDF, plaque, etc.
- measuring tape
- saw
- primer/white paint
- painters tape
- black acrylic paint
- sander/sandpaper
- yellow acrylic paint
- gold glitter
- decoupage
- spray adhesive
- free deer stencil or freehand a deer head. Note: poor resolution won’t matter in this case.
- sticker rhinestone
Directions:
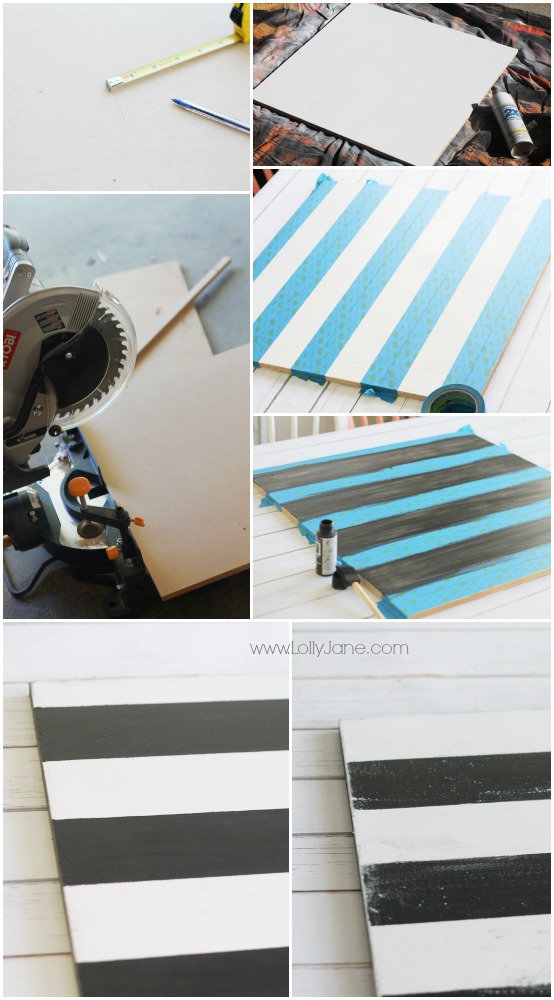
- Cut your wood to size. (I used scrap MDF so I cut it down on my saw. You could use any size, mine is 24″ x 24″.)
- Paint the whole piece white. If you use MDF, be aware it sucks up paint…I primed it first.
- I used 3″ painters tape and taped off starting from the bottom.
- Paint the exposed lines black after taping off.
- Using a power sander, sand until desired “scratchiness”. This is optional, I prefer the distressed look.
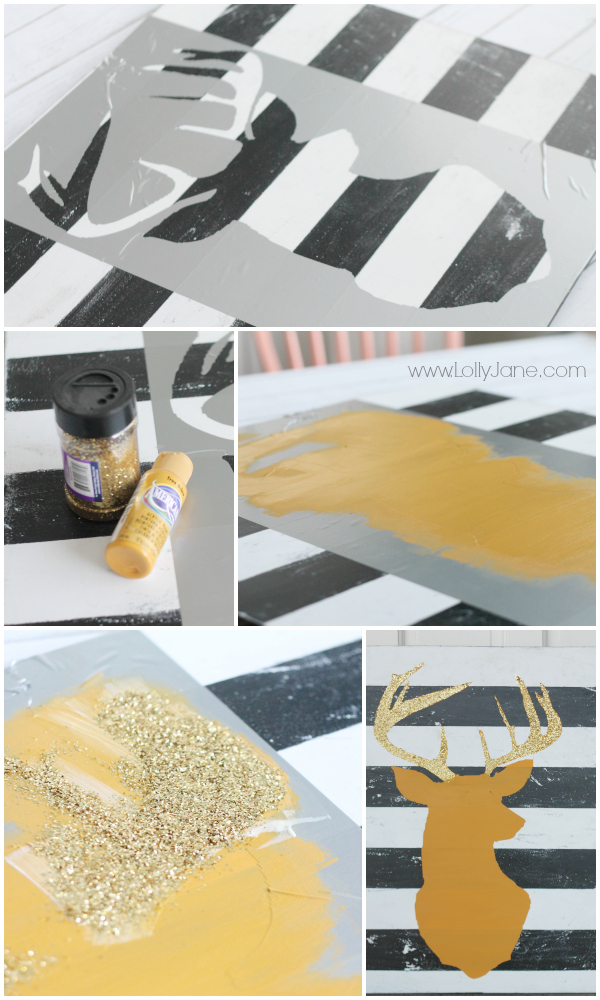
- Cut the free deer stencil with your vinyl machine and apply it to your wood.
- Paint the inside of the deer stencil yellow.
- As soon as the paint is dry, coat the antlers in decoupage & immediately pour glitter on top of the wet decoupage.
- When the glitter is dry, remove the stencil.
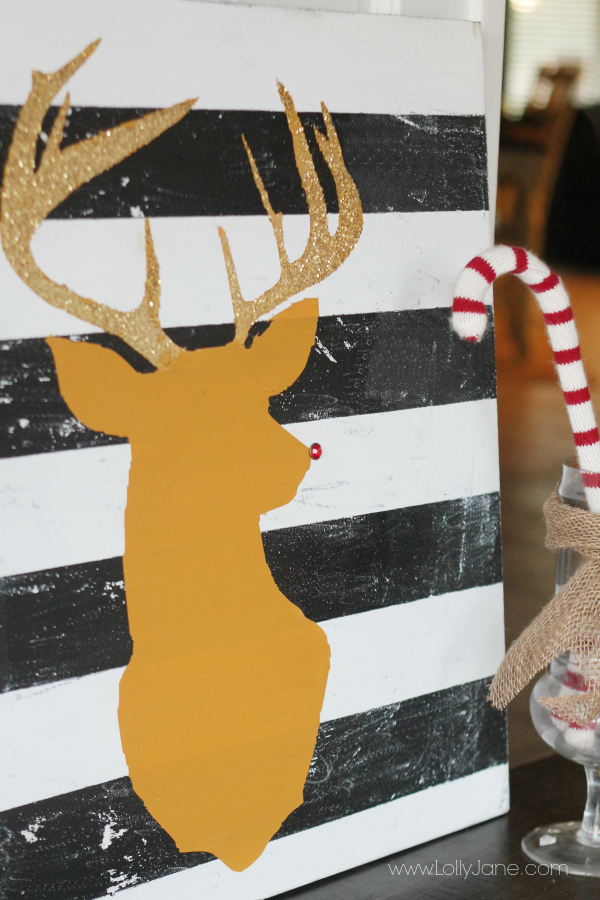
That’s all there is to it! Don’t forget to add that sticker rhinestone to his nose make him look like Rudolph so you’re ready for Christmas!.

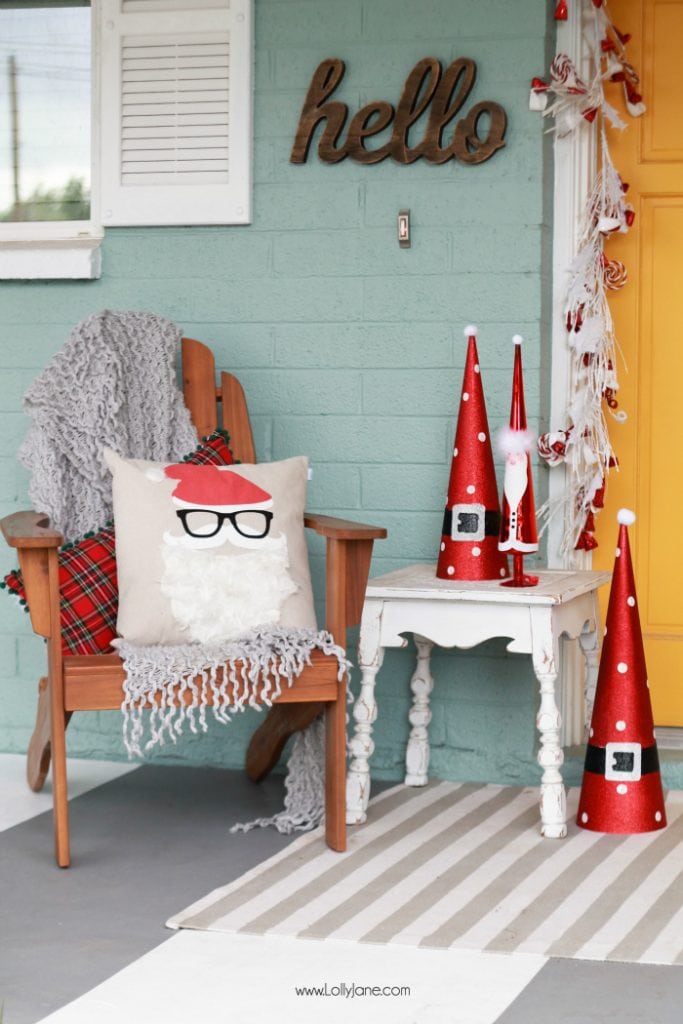
We are often asked what vinyl cutter we have to cut the stencils for the signs and decor we create. We have been using our 24″ industrial cutter for years, which is pricey (like, over $1000 pricey) and instead of replacing it we snagged a Silhouette Cameo. Be sure to pop by tomorrow for a sweet discount using our promo code to score major savings on your very own. (; In the meantime, visit our other Christmas decor like 6 Snow Day Activities for Kids, Christmas Porch Decorating ideas,
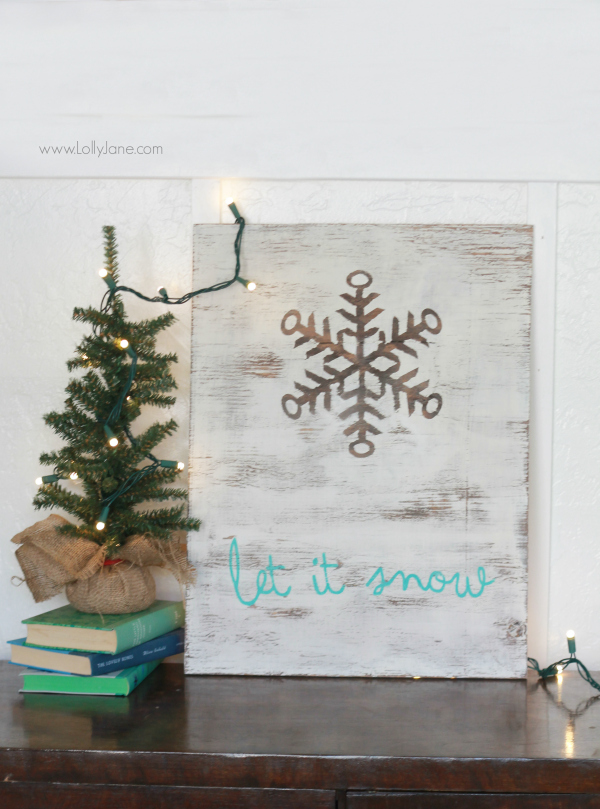
plus another fun winter project, our Let It Snow sign.
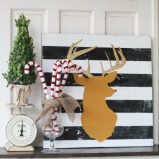
Glitter Antler Reindeer Head Art
Materials
- Wood, MDF, plaque, etc.
- Measuring Tape
- Saw
- Primer/White Pain
- Painters Tape
- Gold Glitter
- Sander/ Sandpaper
- Black Acrylic Paint
- Yellow Acrylic Paint
- Decoupage
- Spray Adhesive
- free deer stencil or freehand a deer head
- Sticker Rhinestone
Instructions
- Cut your wood to size. (I used scrap MDF so I cut it down on my saw. You could use any size, mine is 24″ x 24″.)
- Paint the whole piece white. If you use MDF, be aware it sucks up paint…I primed it first.
- I used 3″ painters tape and taped off starting from the bottom.
- Paint the exposed lines black after taping off.
- Using a power sander, sand until desired “scratchiness”. This is optional, I prefer the distressed look.
- Cut the free deer stencil with your vinyl machine and apply it to your wood.
- Paint the inside of the deer stencil yellow.
- As soon as the paint is dry, coat the antlers in decoupage & immediately pour glitter on top of the wet decoupage.
- When the glitter is dry, remove the stencil.
- Don’t forget to add that sticker rhinestone to his nose make him look like Rudolph so you’re ready for Christmas!.


Thanks Kim! Snagged these cute canes from Rod Works. (:
Love this! And I love those candy canes, where did you get those?
Dang girl! I admire your determination… your hubby deserves a gold sticker for his participation! (; Awesome! Thanks for sharing- love your method!! xo
I loved this so much I saw it on Pinterest and made it 2 weeks ago. Although I have no stencil cutting machine, I had my husband hold up my iphone flashlight and hold a small cutout of a deer silhouette in front of the light and it projected on the wall. I had a piece of paper already taped on the wall and traced the projection image. Then used that as my stencil;) FYI for those SUPER cheapies.
It’s cool ,I like it ………..Thank you for great idea