DIY Concrete Pumpkin Planter
Learn how to make this EASY DIY Concrete Pumpkin Planter in no time, goes perfectly with your modern or neutral fall or Halloween decorations… just stick florals or treats inside for the ultimate centerpiece!
DIY Concrete Pumpkin Planter
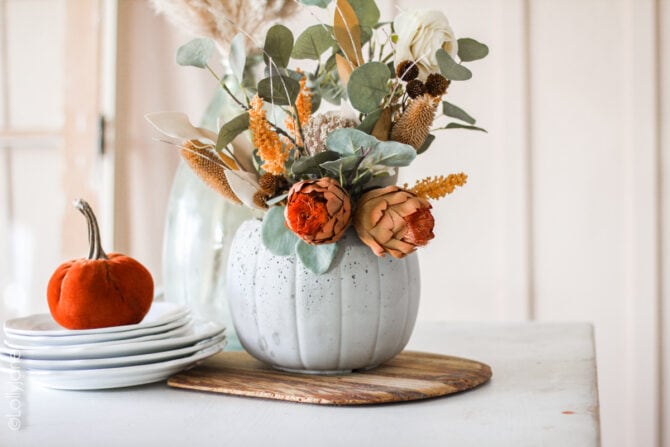
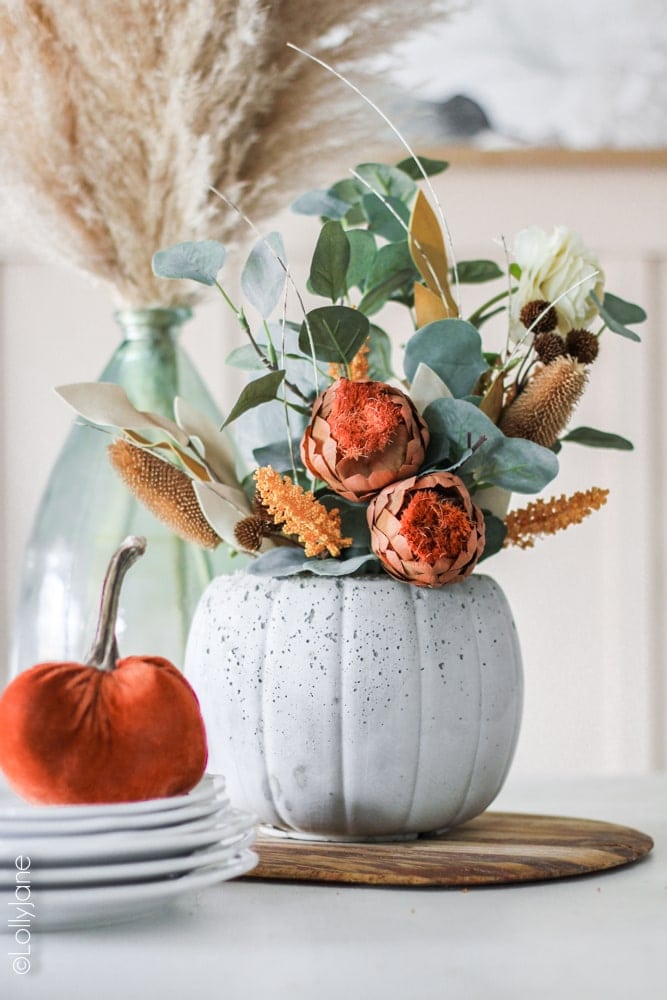
Making a DIY concrete pumpkin planter is easier than you think and is the perfect neutral decor that’s so on trend right now. Brighten it up with fall florals to use as a centerpiece, so pretty! ??
Do these florals look familiar? They should because I borrowed them from my freshly DIY’d fall wreath. Check out the wreath and these other trending fall favorite decorations:
- Fall Split Wood Bead Wreath
- Free Farmhouse Style Fall Prints
- DIY Fall Wood Bead Garland
- Easy Fall Table Decorating Ideas
Supplies to make a DIY CONCRETE PUMPKIN PLANTER
To make a concrete pumpkin planter you’ll need to gather just a few supplies. I made a Walmart run for the pumpkin pails + cooking spray and the hardware store for everything else.
- Quikrete Countertop Mix (1 bag of 80# Quickcrete = 4 planters)
- Water
- Plastic pumpkin pails
- Foam or plastic cup
- Gloves (unless you don’t mind dry hands)
- Drop cloth
- Mask (there will be lots of rogue powder!)
DIY CONCRETE PUMPKIN PLANTER
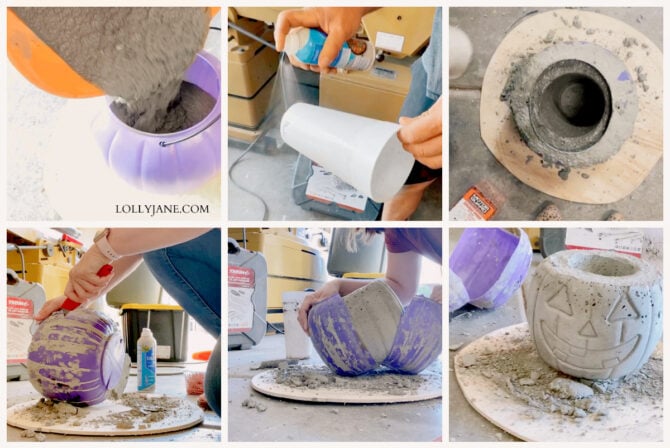
I would call this a one-hour craft but, due to dry time, it takes a full day from start to finish. However, you can have the most labor-intensive part of this cute project prepped, mixed, and poured in less than 30 minutes! I followed Instructables tutorial and modified it a bit on my own as I made a “fall batch” with coloring but Karen’s post is excellent and very detailed. ??
HOW TO MAKE A CONCRETE PUMPKIN PLANTER
- Remove the handle of the pumpkin pail.
- Spray the inside of the pail + the outside of your cup with cooking spray for easy release
- Mix the concrete according to the package directions; you want the consistency to be like brownie batter. (Note: You can also add colors in at this step: Bob Vila has a great tutorial for this, concrete coloring found here.)
- Pour the wet mix into the pail about 1/2″ before it overflows.
- Use a concrete vibrator tool, sander or simply tap the pail to get rid of air bubbles. As you can see, I didn’t tap/vibrate the top so well but still cute.
- Now to planter-ify this cutie! Simply shove your cup of choice in the center of your wet mix and push it down into the pail. As you can see, some of the wet concrete will spill over the top. No biggie.
- To keep the cup in place while it dries (overnight) place something heavy on top to steady it.
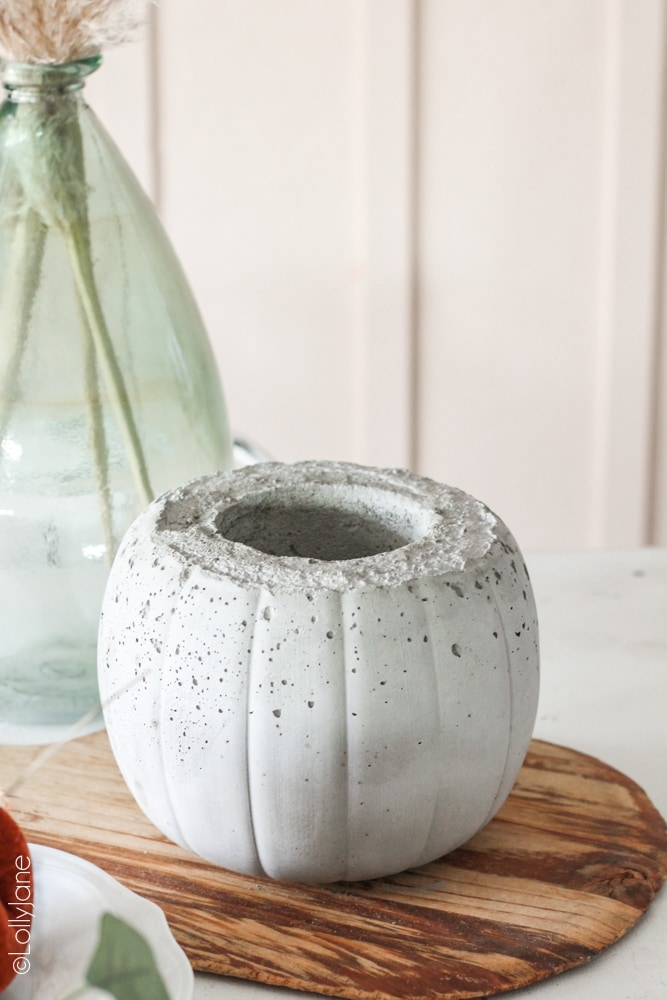
- Once dry, remove the cup from the middle first (you may need pliers to wiggle it out of place if it’s being stubborn.) Score the sides of the pumpkin pail with a razor blade then peel back layers until you deliver your new concrete pumpkin baby! Aww. So presh.
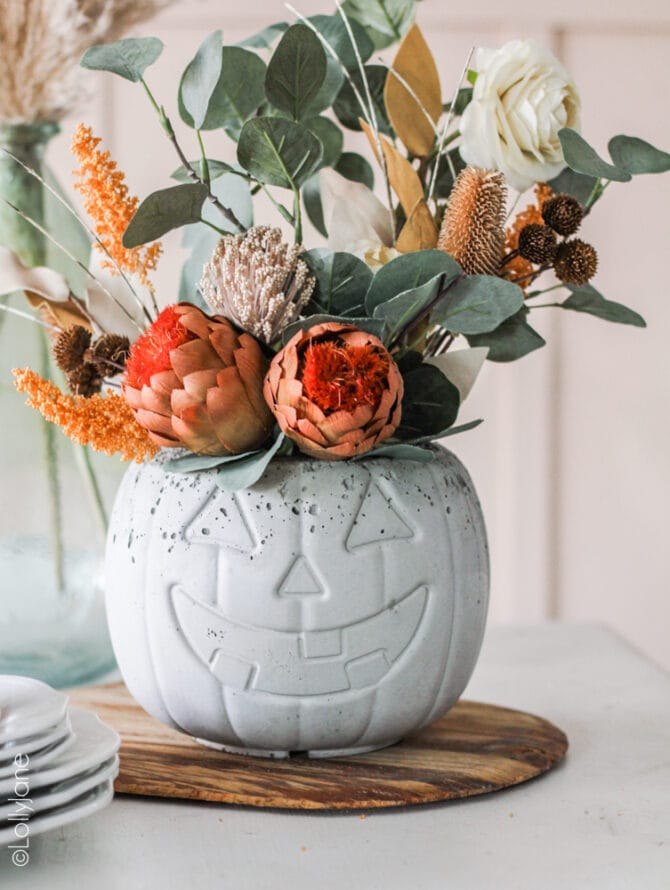
- Fill with florals and enjoy!
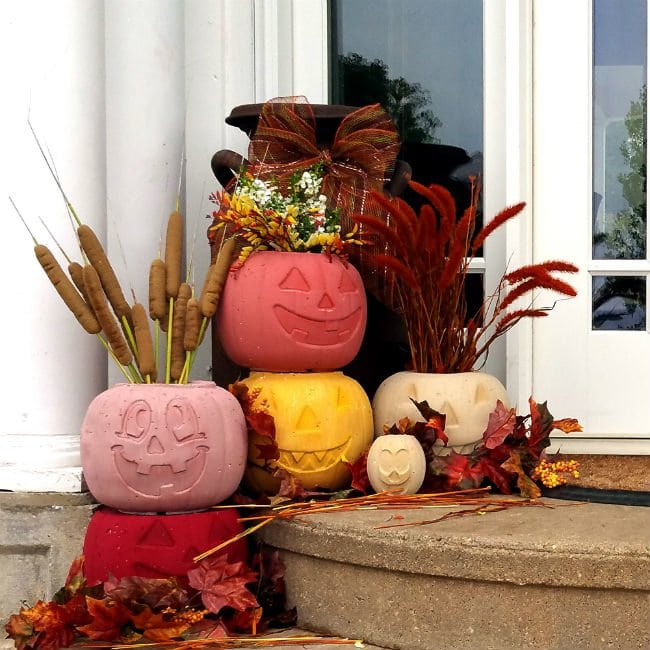
Eek! That little jack-o-lantern face… I die of cuteness overload! ?✨

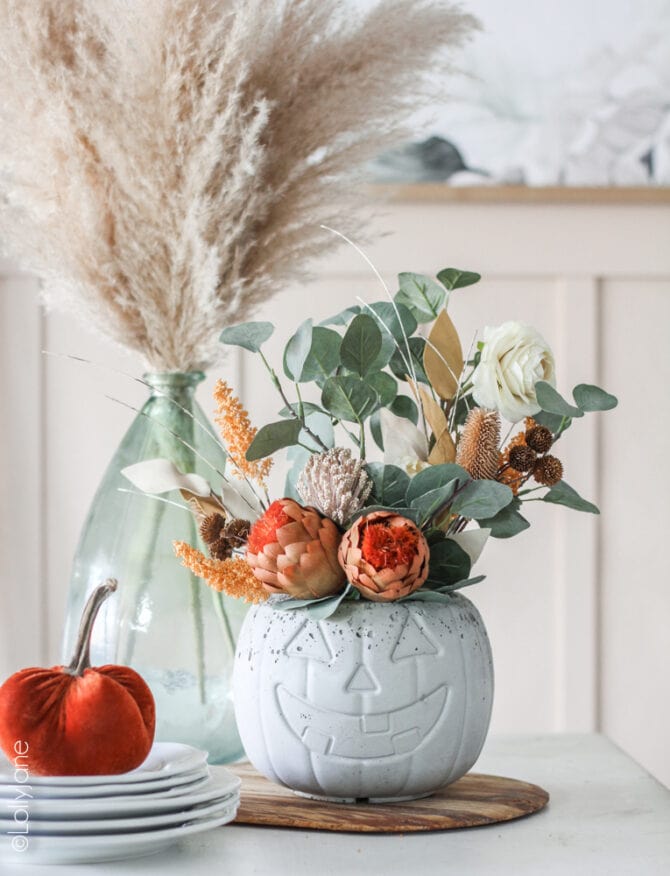
Simply turn it around for fall to look like a pumpkin vs. a silly Halloween face. Here’s what you start with fresh out of the form:
Fall Pumpkin Planter as a Centerpiece or Floral Arrangement
To create a fall floral arrangement with your DIY concrete pumpkin planter, simply add fall florals, pampas grass, branches from your yard, reeds or anything else that screams FALL to you inside the hole. (PS: My fall florals are all faux and from JoAnn store.)
Funny story: I had my centerpiece turned around for straight fall and my husband walked by and turned the jack-o-lantern face back then said to me, “No one puts baby in the corner.” Haha! (Name that movie for 5 points, LOL)
I admit I do like it best with the little spooky face showing so for now it’s fall-oween around here!
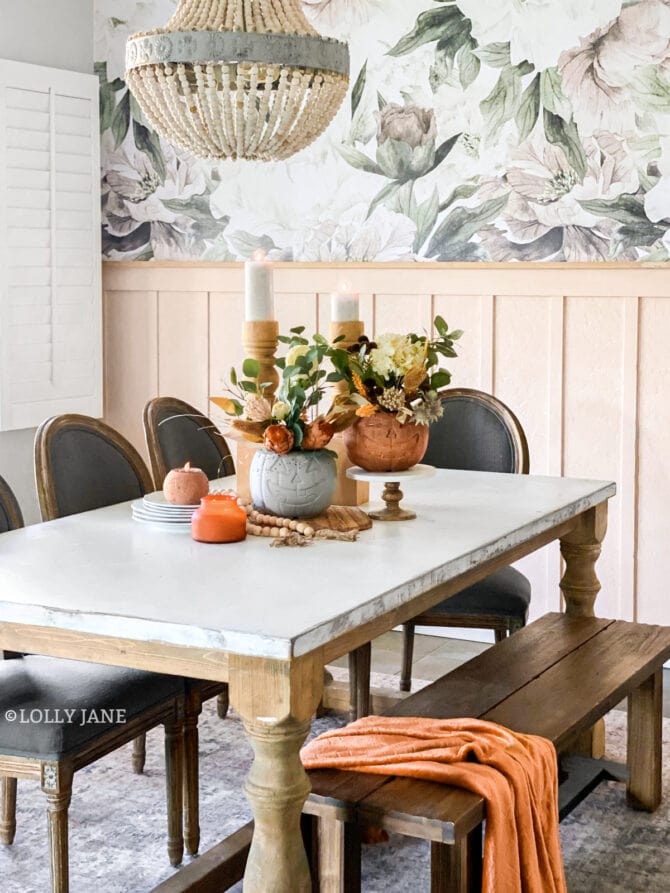
We can’t wait for you to make your very own DIY concrete pumpkin planter! If you liked this post, check out more fall goodness here!
We’d LOVE to have you follow along with our DIY successes & fails! Plus, our live fave home decor finds along the way:
Pinterest | Instagram | Tik Tok | Facebook | AMAZON
*disclosure: some affiliate links used.

DIY Concrete Pumpkin Planter
Materials
- Quikrete Countertop Mix 1 bag of 80# Quickcrete = 4 planters
- Water
- Plastic pumpkin pails
- Foam or plastic cup
- Gloves unless you don’t mind dry hands
- Drop cloth
- Mask there will be lots of rogue powder!
Instructions
- 1. Remove the handle of the pumpkin pail.
- 2. Spray the inside of the pail + the outside of your cup with cooking spray for easy release
- 3. Mix the concrete according to the package directions; you want the consistency to be like brownie batter. (Note: You can also add colors in at this step: Bob Vila has a great tutorial for this, it's linked above in our post.)
- 4. Pour the wet mix into the pail about 1/2" before it overflows.
- 5. Use a concrete vibrator tool, sander or simply tap the pail to get rid of air bubbles. As you can see, I didn't tap/vibrate the top so well but still cute.
- 6. Now to planter-ify this cutie! Simply shove your cup of choice in the center of your wet mix and push it down into the pail. As you can see, some of the wet concrete will spill over the top. No biggie.
- 7. To keep the cup in place while it dries (overnight) place something heavy on top to steady it.
- 8. Once dry, remove the cup from the middle first (you may need pliers to wiggle it out of place if it's being stubborn.) Score the sides of the pumpkin pail with a razor blade then peel back layers until you deliver your new concrete pumpkin baby! Aww. So presh.
- 9. Fill with florals and enjoy!


That planter is so fabulous! And looks perfect with your beautiful fall arrangement!
I absolutely love this! I want to give it a try!!
Kelli and Kristi,
OH my goodness this is super amazing! I love how your pumpkin vase turned out! Does the concrete change color when it gets wet with the water? Anywhoooo, I love your project!