How to Make a Wooden Bead Wreath, Easy Front Door Decor!
Spruce up your front door with this DIY Wooden Bead Wreath Tutorial. make this pretty wreath with embroidery hoops, wood beads and twine!
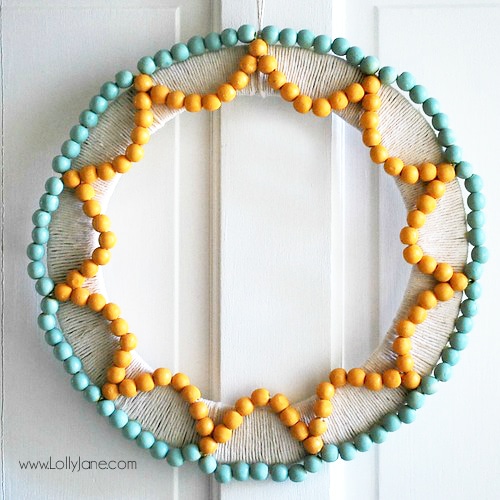
We are so ready for summer! We wanted something cheerful with pretty colors to welcome our guests and with wood bead wreaths trending, this sunburst wreath pattern screams cheer and sunshine! Go away, cold weather ?
Read on for the how-to on making this aqua and yellow beaded wreath!

see more easy wreath tutorials:
- DIY Modern Floral Wreath
- DIY Floral Wheel Wreath
- DIY Floral Heart Wreath
- Hula Hoop Photo Wreath
- DIY Wagon Wheel Wreath
Supplies to make a wood bead wreath
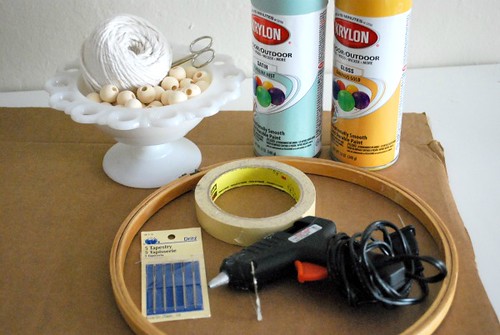

- 16mm wood beads
- kitchen twine
- tapestry needle
- scissors
- spray paint, yellow + blue
- painters tape
- cardboard/round template *the size of your wreath
- glue gun + glue
how to make a wood bead wreath
First we’ll string the beads to make the weaved pattern.
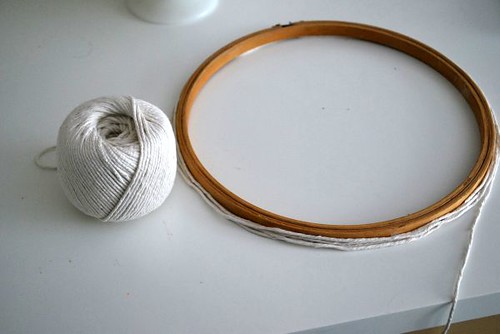
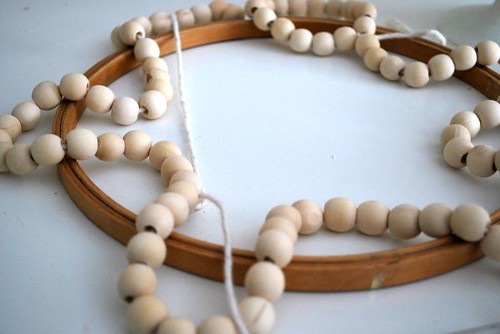
Determine the size of your wreath. We’re using a 9 inch embroidery hoop as our guide. We wrapped the twine around 3 times to make sure we have enough twine by the time we get the beads on them.
String beads using your needle and twine. Form a loop as you go. We used 15 beads per loop.
Tie a knot to secure the loop. Remove the needle. *DO NOT CUT THE TWINE.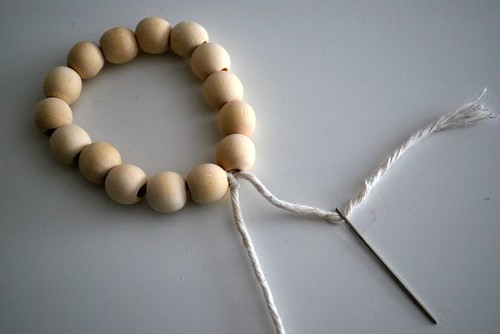
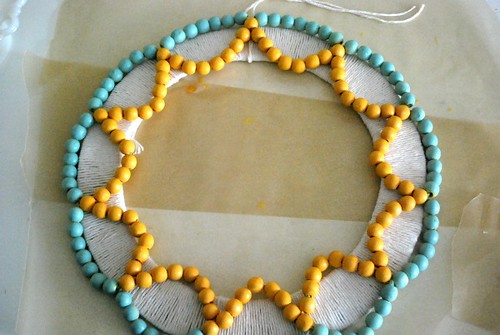
If you look at the final project, you’ll notice there are 7 beads in each blue section and 8 beads in each yellow section (15 per loop).
First, string a bunch of beads on the other end end of the string. It will be a multiple of 8. As you string, lay it out in a weave pattern to determine when to stop stringing. Each weave has 8 beads.
When you’ve met the other side, stop stringing. We used 11 weaves total, 88 beads.
Now we’ll join the two ends (the end of your long strand of beads to the original loop you made). Thread the long strand through the 8th bead in the original loop and pull until the beads meet.
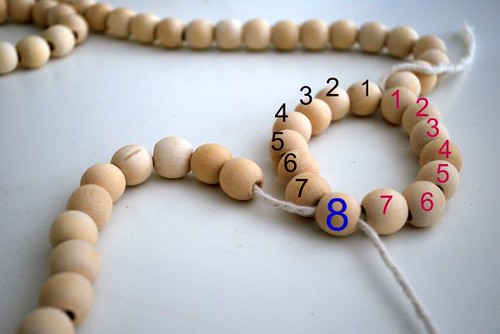
Let’s start the weaving pattern.
String 7 beads (the pink numbered beads in the picture below) then count 8 beads on the other strand (the black numbered beads). You’ll thread the twine through the 8th bead. Repeat the serpentine pattern till you get to the end.
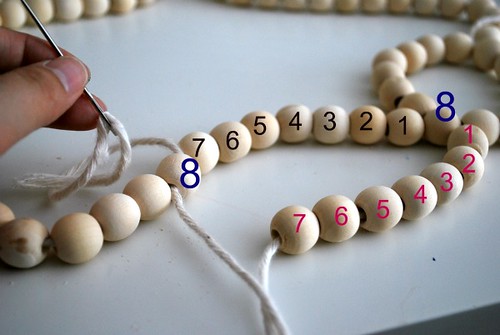
To finish, thread your needle through the 8th bead of the original loop then tie a knot.
For us, the final knot was in the same spot as the very first knot we tied to to make the original loop.
You can add a dab of glue to all the knots for extra security but it should be strong enough without it.
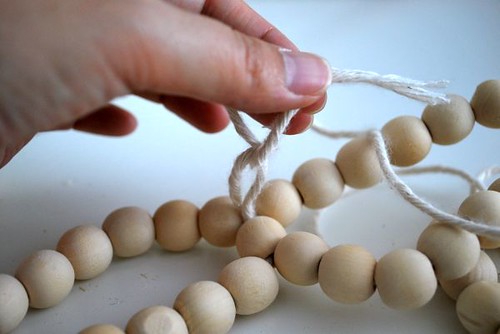
TIP: Be sure to pull the string taught but so much that the loops warp. Pull them equally taught or some might be bigger or floppier than other.
Before painting the beads, start creating the wreath form.
You can always purchase a wreath form and base the size of the wreath on that, but cardboard works, too.
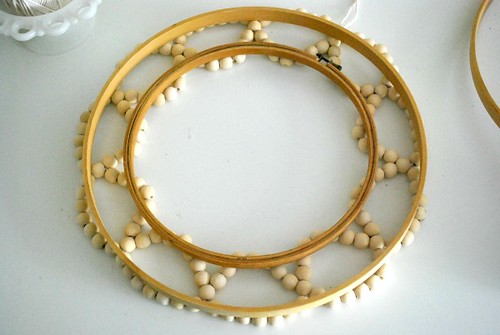
We took the 9 inch hoop and laid that on top of the beads. We then took a bigger hoop and laid that on top, as well. As long as the beads overlap, the hoops will be fine.
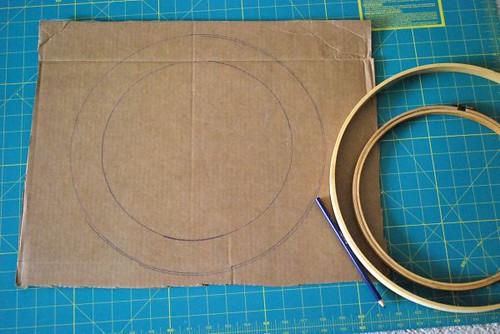
Then lay the two hoops onto the cardboard and trace them.
Set aside for now, you can finish while the paint is drying.
Time to paint!
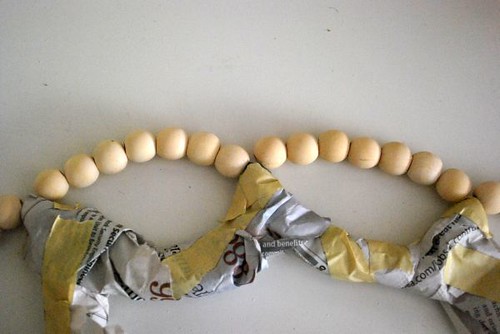
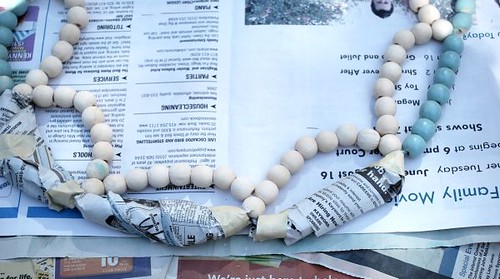
First, we painted the blue section. We used the newspaper to wrap the other beads to prevent paint from getting on them then taped them down.
The 8th bead through which you weaved the twine to make the pattern will be yellow, to be the “point” of the sun rays. Make sure you cover that one well to avoid color mixing.
Note: You can definitely paint the beds first. Since this was our first time making this wreath, we didn’t know how many we’d use nor the colors.
If you follow this tutorial exactly and want to paint it the same color (or even leave it unpainted), you can definitely paint the beads ahead of time so you can eliminate covering sections and overlapping paint.
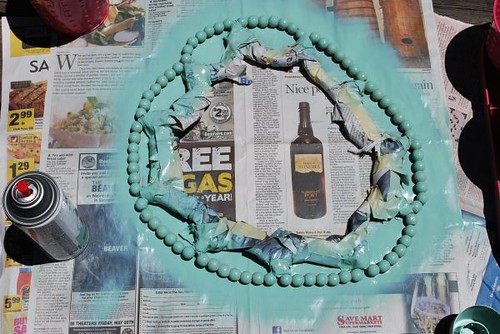
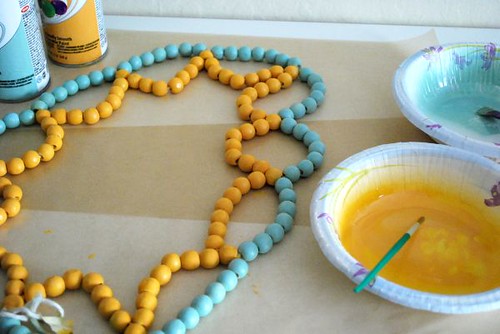
We sprayed 2-3 coats, per side.
Repeat the process with the yellow paint. Cover the blue beads, paint 2-3 coats then flip over to paint the other side.
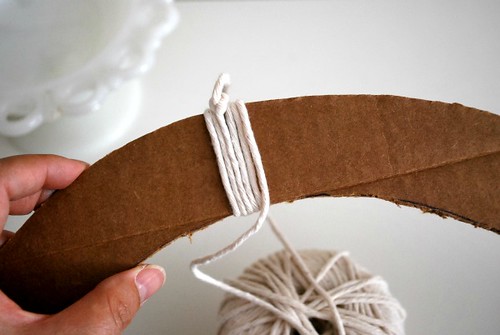
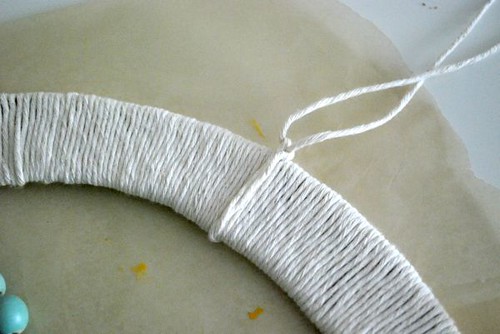
While the paint is drying, you can work on the wreath form that you traced out. Use scissors or and x-acto knife to cut the cardboard form. Wrap it in twine. Wrap, wrap, wrap then wrap some more. Tie a knot behind to finish it off.
When you’re done wrapping, tie a quick length of twine at the top so you can hang it later.
We’re ALMOST there!
Lay the beads on top of the wreath form. The blue beads drape over the outside edge of the wreath form and the yellow beads will stick out twoward the inside edge.
Make one of the 8th beads and center it on the twine you just tied to make the wreath hanger.
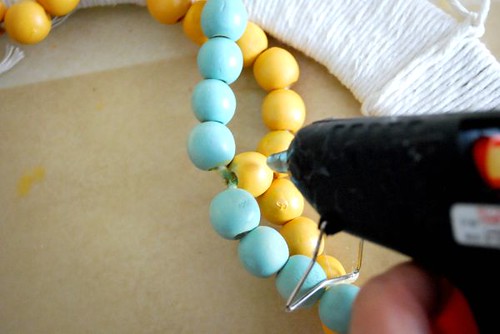
Apply hot glue on that bead and press down. Be sure the beads are evenly spread out and positioned well.
Glue the 8th bead toward the bottom, then on the sides until all the 8th beads are glued down.
Then glue down the blue beads to the side edge of the wreath form (just the 2-3 middle beads should be fine).
*If any of the loops sag, or if you notice beads that still didn’t get quite covered up with paint, you can glue those down, too.
All done!
PLEASE pin so your friends can make a wooden bead wreath, too!

Thanks to the retired Silly Pearl blog for this fun how-to!

So fun!
That's a fun idear!
oooh I love steph's site! so cute-love that wreath!!!
super cute wreath- what a cool way to use beads!
Great post! Thanks for being our guest, Steph 🙂 xo