diy lamp makeover
Hello all you wonderful Lolly Jane readers here to share a diy lamp makeover!
I am beyond excited to be sharing here today! First off, my name is Jen, and I’m the gal behind I Can’t Stop Crafting, my little blog about all things crafty and fun, you can also find me on Facebook.
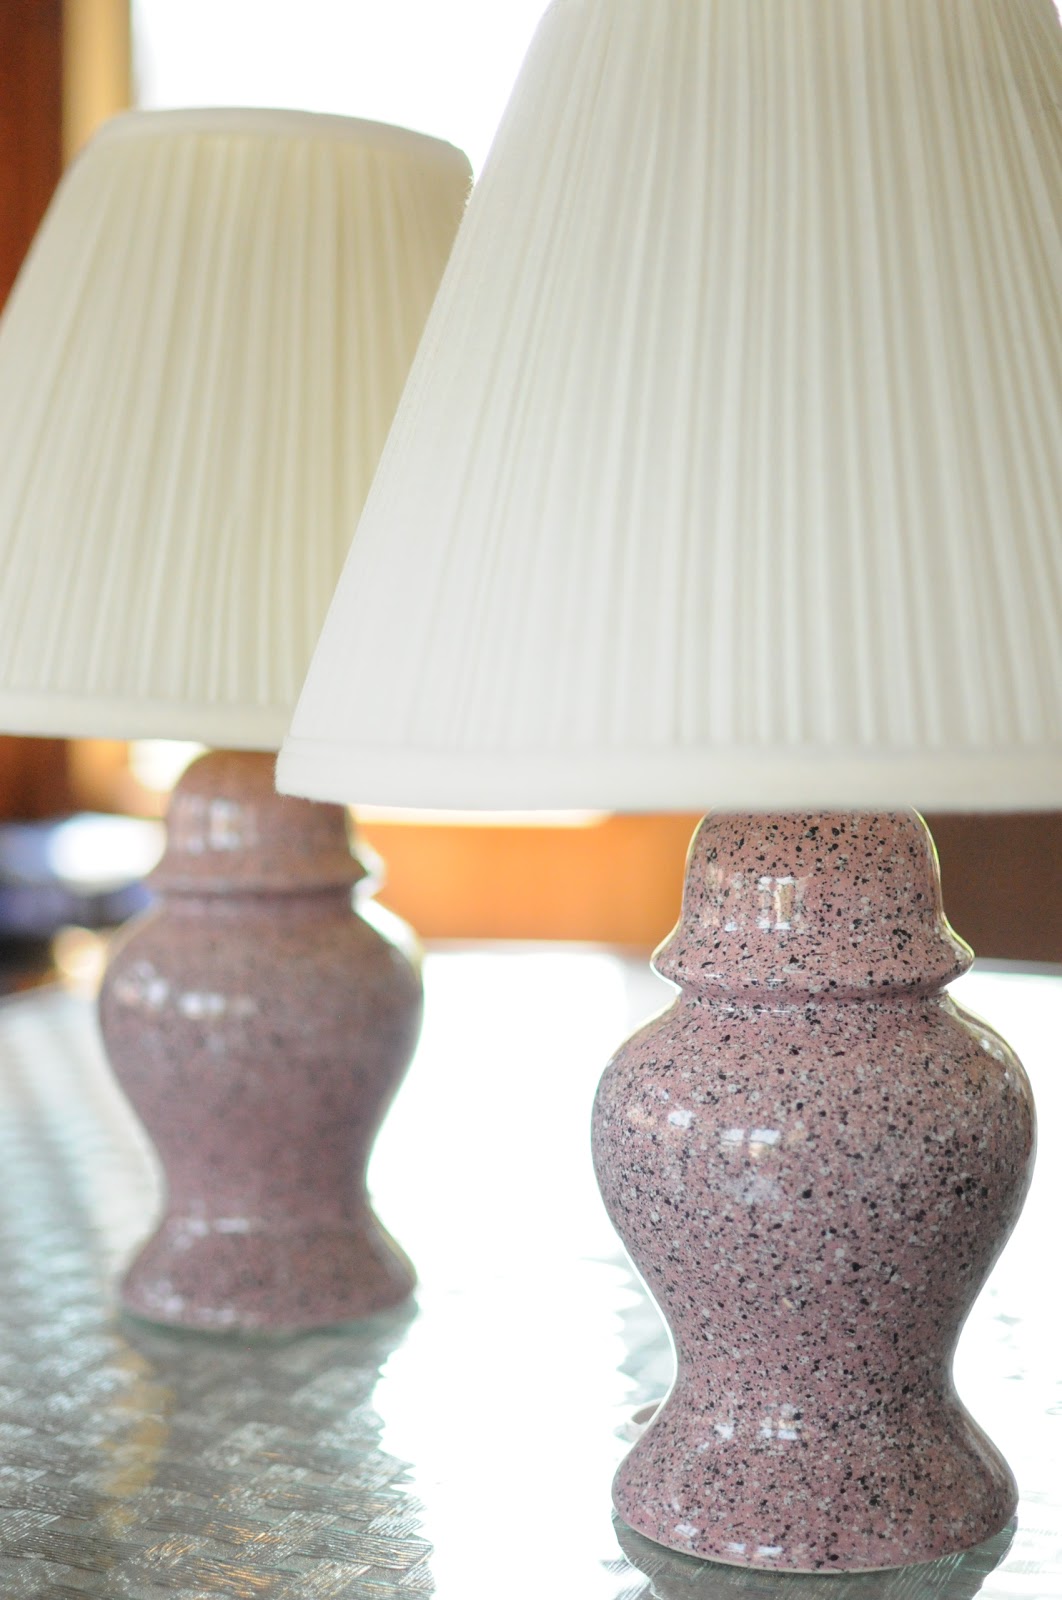
I’m sharing a quick makeover project that I did on a couple of thrift store lamps I snagged.

I really love scouring thrift stores looking for great deals and unique treasures, and these lamps fit the bill. While my newly purchase lamps were in pristine condition, the pink speckled bases paired with the crinkle fabric covered shades equaled one big hot mess. Thankfully, these lamps provided the perfect canvas for a makeover!
So, in an attempt to undo the wrong that was done when these lamps were made, I taped off the lamp hardware, whipped out a can of spray primer and went to town.

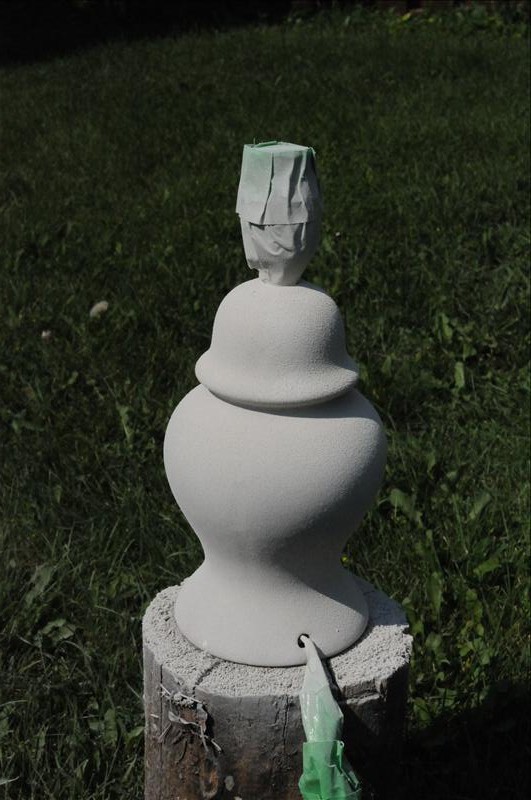
Here’s a quick note about spray primer: It’s worth it to spend a couple extra dollars to get good quality primer. If you want to cheap out on paint, go for it, but the primer coat is going to make or break your lamp makeover.
While I did go that extra mile and purchased a decent primer, apparently I didn’t shake my can as vigorously as I should. The first coat I sprayed on was not properly mixed…which I think is to blame for the end result of my lamp bases. You see, after I primed, and painted my lamps, the paint crackled. Bummer? Kinda. The worst thing ever? Nope, ’cause I happen to like the slightly crackled look that resulted.
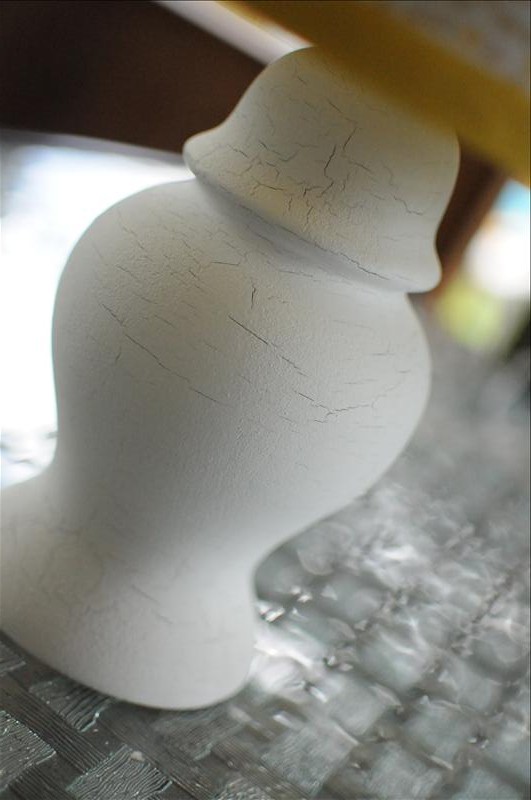
I kept it simple and fresh by painting the lamp bases just a plain, flat white.
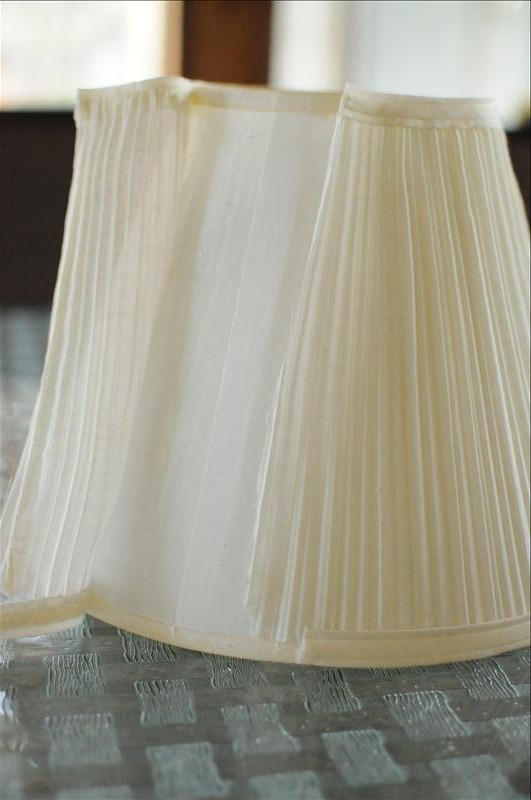
Now for the lamp shades! I started by removing the crinkle fabric covers. I just cut the trim at the top and bottom of the shade, then gently ripped the fabric off. The shades were still in great shape and ready for a new life with a new cover.
To make a new cover, I first made a pattern by tracing the lamp shade on a piece of craft paper. Just lay the lamp shade on its side, and as you slowly roll it along the paper, run a pencil along either side marking the shape of the shade.
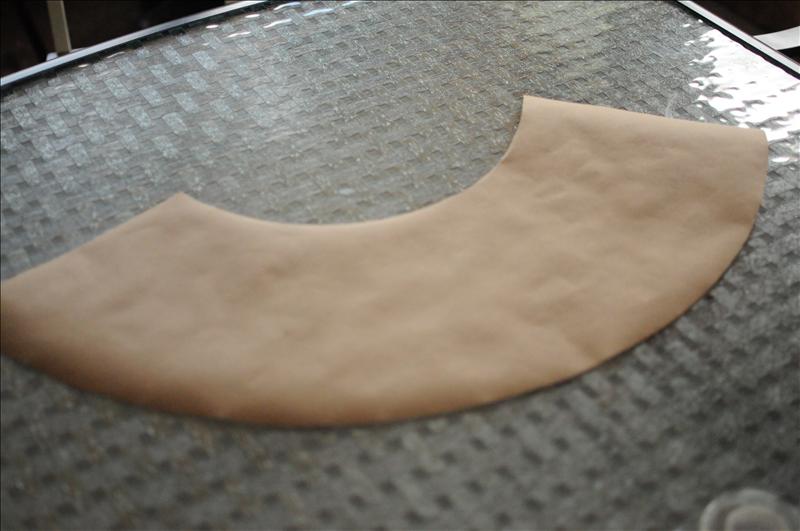
Cut out the pattern and test it out on the lamp shade to make sure it fits properly.
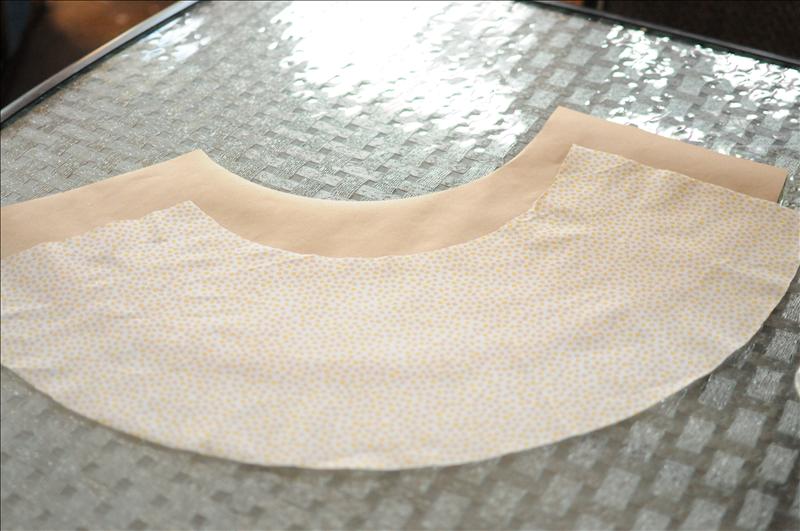
Next I used my pattern to cut fabric for the shade. I added an extra 1/2 inch in length so I had a little extra fabric to overlap when I recovered the shades. The fabric I used was just a 100% cotton flat sheet I bought on major sale.
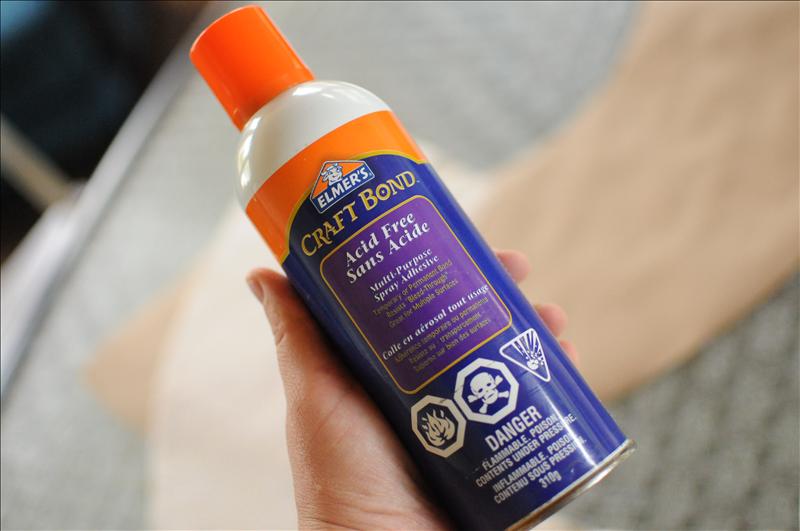
Using spray adhesive, I sprayed the first few inches of the shade and laid my fabric over it, smoothing the fabric down. Then I sprayed a little more and smoothed the fabric over again, continuing until the shade was completely covered. Oh, and please, use the spray adhesive outside…not that I learned that the hard way.
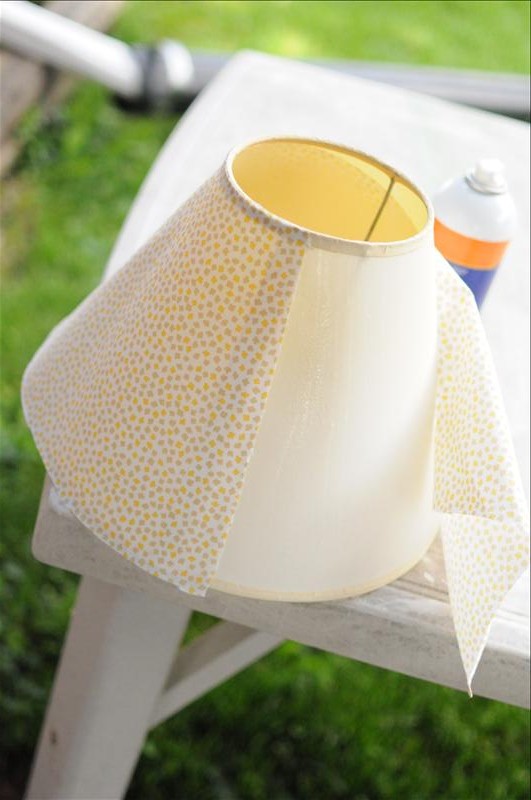
It took a couple of tries for me to get the fabric laid straight onto the shade. If it wasn’t laying nicely or was going on a little crooked, I just peeled it off and tried again, no big deal.
Once my shade was covered, I simply tucked the last 1/2 inch of fabric under and glued it down, creating a nice finished edge.
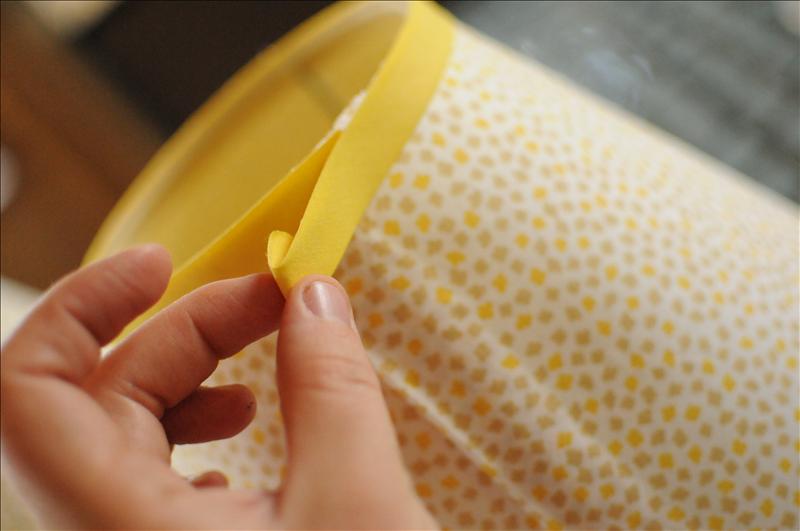
Lastly, I grabbed a package of coordinating bias tape and glued it around the top and bottom of the lampshades using my handy hot glue gun. I tucked the end of the bias tape under and glued it in place once I’d made my way around the rim of the lampshade.
And, easy as pie, I’ve got some fresh new lamps!
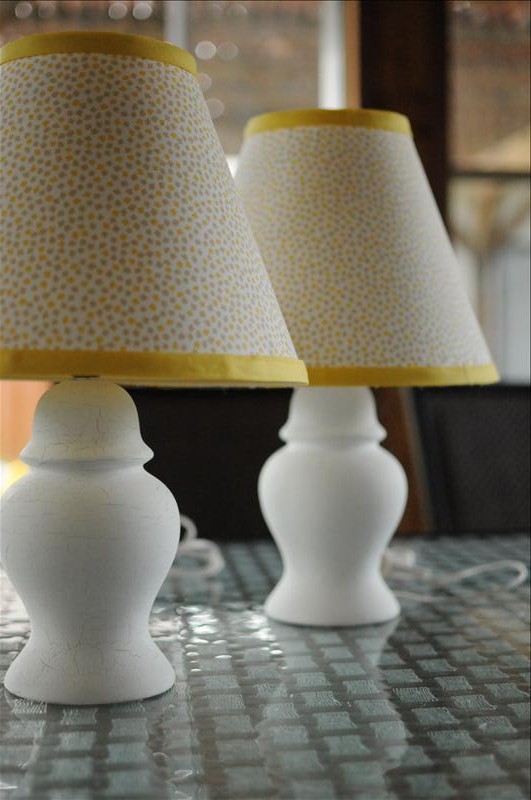
What do you think, improved? Recovering the shades was such a breeze, if I ever get tired of the fabric I put on these, I’ll redo it again in the future!
Thank you so much Kelli &Kristi for having me over today, it’s been such a treat!
Be blessed,

Its like you read my mind! You seem to know so much about this, like you wrote the book in it or something.
I think that you can do with some pics to drive the message home a bit, but instead of that,
this is excellent blog. A great read. I will definitely be back.
Cute!
super cool after- diggin that cheetah print! 🙂
Jennifer
craftinggals.blogspot.com
What a transformation! Looks much-o better!
Looks Fantastic!
Good Job!
xo
NIIIIICCEEE! Awesome job Jen!
Jennie {CInnaberry Suite}
Looks way better! =) Kayci
this looks easy enough even for me, lol!! TFS!